Overview
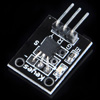
DS18B20 is a 1-wire temperature sensor,Since the Raspberry Pi has no ADC (Analog to Digital Converter), it cannot directly use an analog temperature sensor like the TMP36, making the DS18B20 a good choice for temperature sensing. In this tutorial, you will learn how to use a DS18B20 with the Raspberry Pi to take temperature readings.
Parts
The parts list for program as followed:
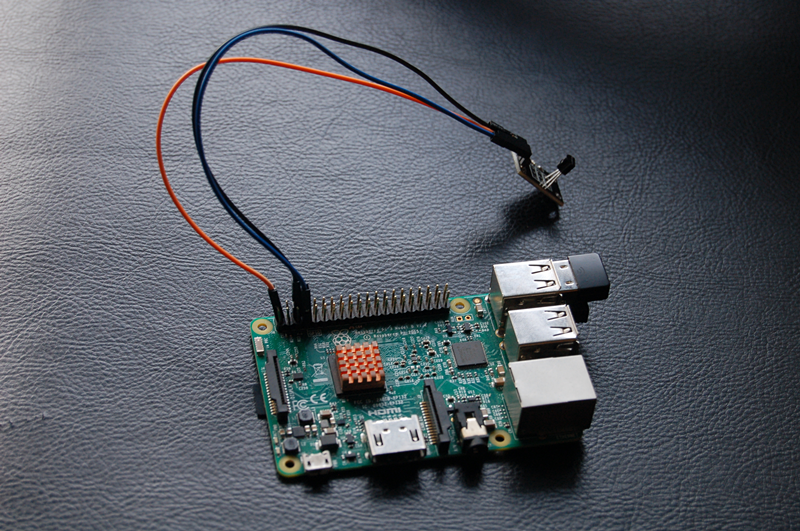
Connecting the DS18B20 sensor
Make sure the connecting as followed, if you put it wrong way around, it will got hot and break.
| DS18B20 |
Raspberry Pi |
| Right leg(S) |
GPIO4 |
| Left leg(-) |
GND |
| Middle leg(VCC) |
5V |

Add OneWire support
Raspbian support single-bus protocal, so it can connect with 1-wire device such as DS18B20. Open terminal and input following command to add onewire suppot:
sudo nano /boot/config.txt
Then scrolling to the bottom and typing the followed command:
dtoverlay=w1-gpio
Press Ctrl + X key, then press Y to save file. Then reboot with sudo reboot. when the Pi is back up and you are logged in again, type the command: lsmod to check if the temperature sensor is valid to read. if there are two line as shown below, it means the there is a valid temperature to read.
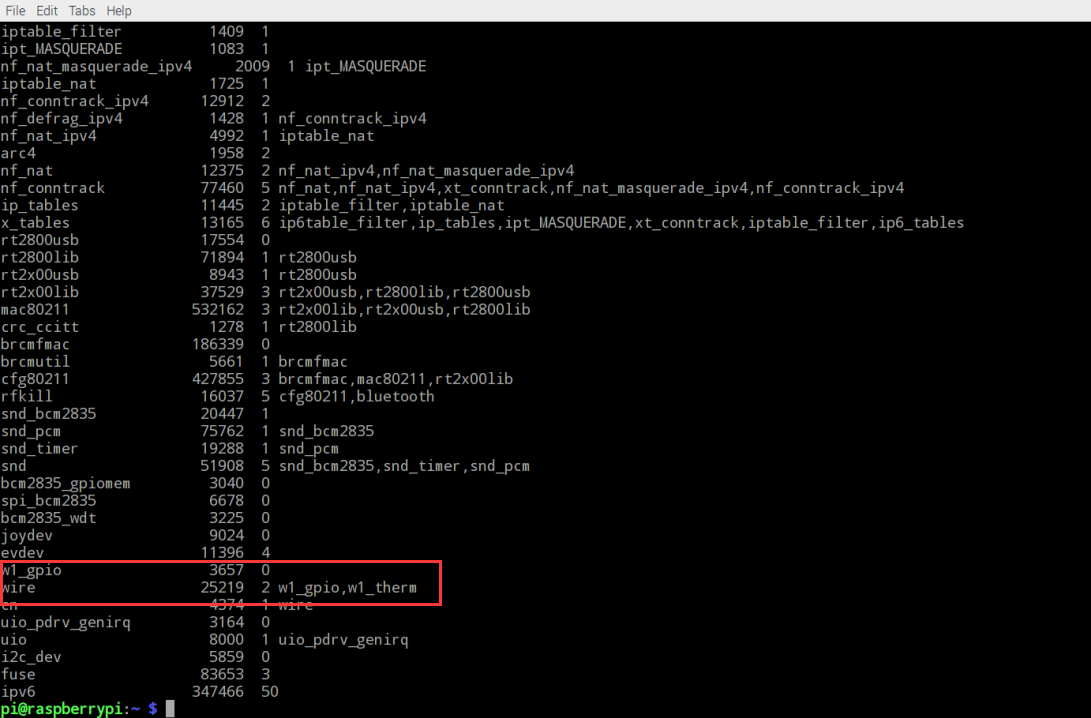
Otherwise you need to type the commands as followed:
sudo modprobe w1-gpio
sudo modprobe w1-therm
If the temperature sensor is connected to Raspberry pi, the sensor will appear with an address in the format: 28-XXXX in the dirctory /sys/bus/w1/devices. Each DS18B20 temperature sensor has a unique hard-coded address so that you can connect up multiple temperature sensors when required and still read them individually. using “cd”to go to the directory and view the temperature reading by typing following commands:
cd /sys/bus/w1/devices
cd /28-xxxxxx
cat w1_slave
Software
Eenter below command to creat a file named tem.py
sudo nano temp.py
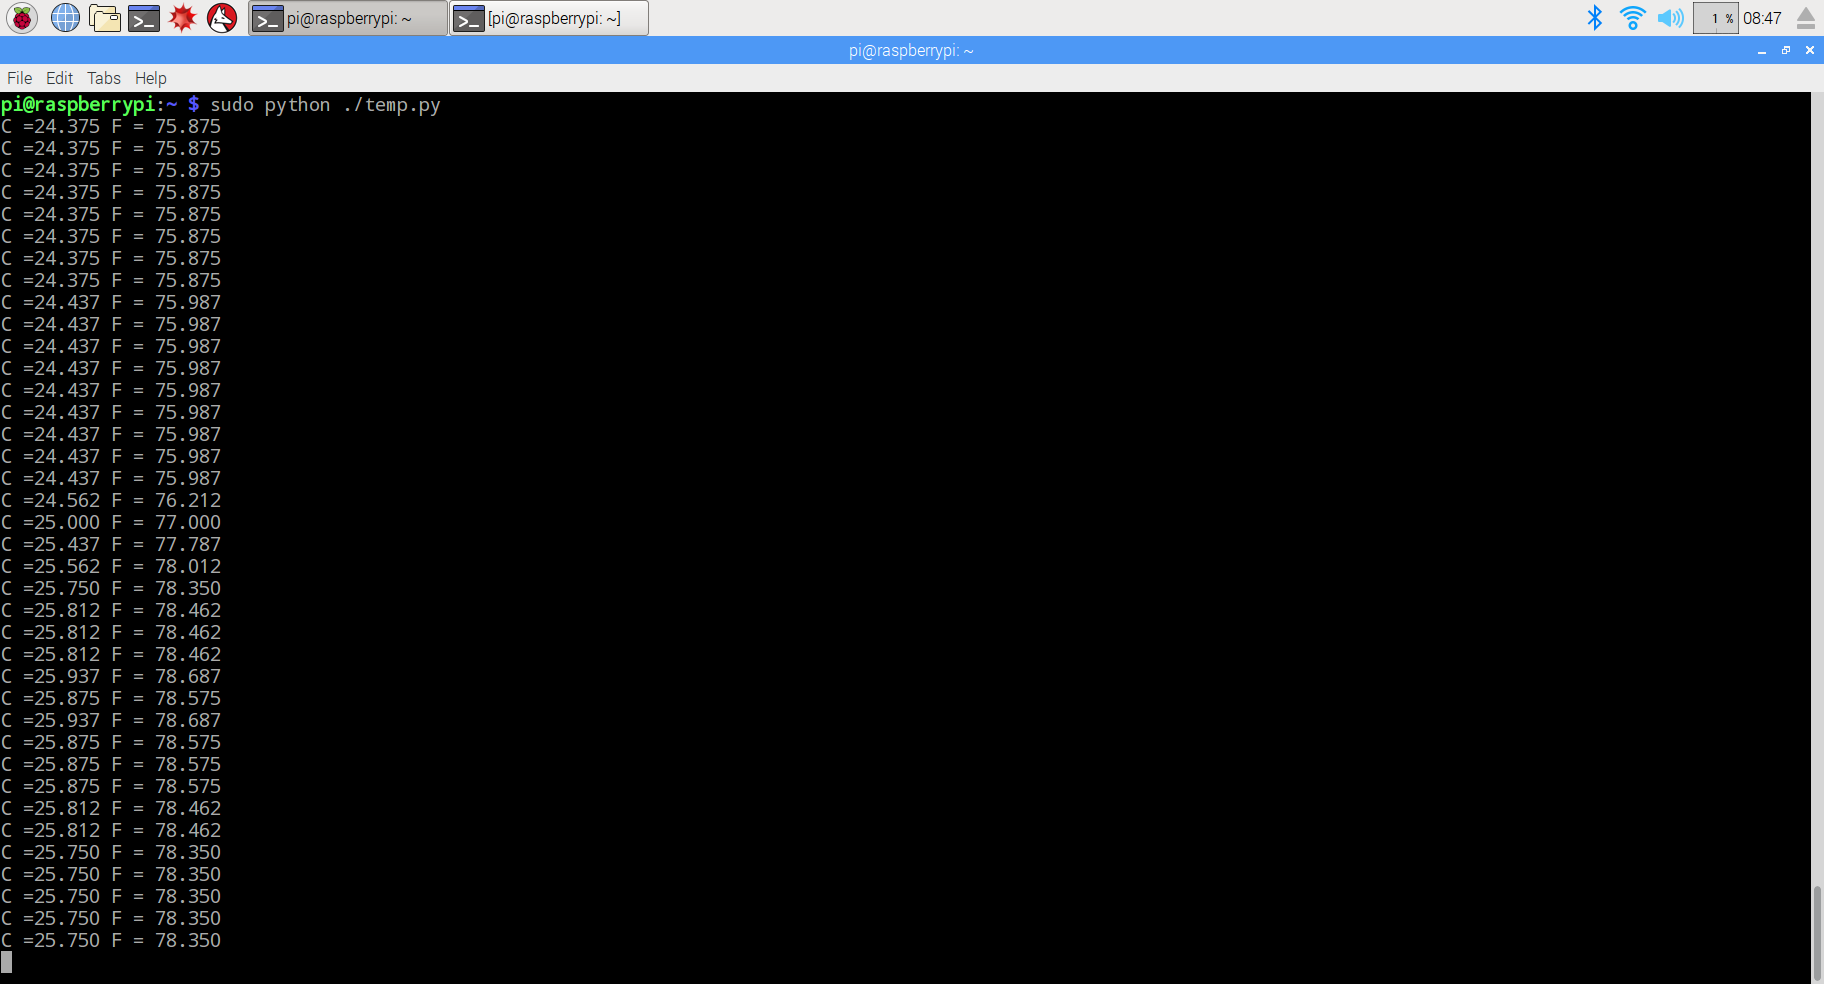
The Python program deals with any failed messages and reports the temperature in degrees C and F every second. here is a example code in Python:
import os
import glob
import time

os.system('modprobe w1-gpio')
os.system('modprobe w1-therm')

base_dir = '/sys/bus/w1/devices/'
device_folder = glob.glob(base_dir + '28*')[0]
device_file = device_folder + '/w1_slave'

def read_temp_raw():
    f = open(device_file, 'r')
    lines = f.readlines()
    f.close()
    return lines

def read_temp():
    lines = read_temp_raw()
    while lines[0].strip()[-3:] != 'YES':
        time.sleep(0.2)
        lines = read_temp_raw()
    equals_pos = lines[1].find('t=')
    if equals_pos != -1:
        temp_string = lines[1][equals_pos+2:]
        temp_c = float(temp_string) / 1000.0
        temp_f = temp_c * 9.0 / 5.0 + 32.0
        return temp_c, temp_f

while True:
  print('C =%3.3f F = %3.3f'% read_temp())
  time.sleep(1)
Comments
1)os.system(‘modprobe w1-gpio’) and os.system(‘modprobe w1-therm’)
–include modprobe w1-gpio and modprobe w1-therm library
2)base_dir = ‘/sys/bus/w1/devices/’ and device_folder = glob.glob(base_dir + ’28*’)[0]
— define base(root) directory to location 28-xxxxx device file
3)device_file = device_folder + ‘/w1_slave’
–define device data file location(temperature sensor data stream is read like a file stream)
4)while lines[0].strip()[–3:] != ‘YES’:
— Keep reading the temperature sensor data(from device_file) until last 3 characters are ‘YES’
5)equals_pos = lines[1].find(‘t=’)
–read the data line ,find the string ‘t=’ which is the sign of temperature data