Note: ALL OSOYOO Products for Arduino are Third Party Board which is fully compatitable with Arduino
Overview
In this lesson, we will show how to use the IR control and receiver to control a motor. We use the OSOYOO basic board as the MCU board here, and the Osoyoo Model X motor driver is based on the L298N chip, if you plan on working with robots or just building things that move you’ll eventually need to learn how to control a motor. The Osoyoo Model X motor driver module is a simple way to achieve that.
Part List
- OSOYOO basic board x 1
- OSOYOO Model X motor driver x 1
- DC Motor x 1
- Battery Box for 18650 battery x 1
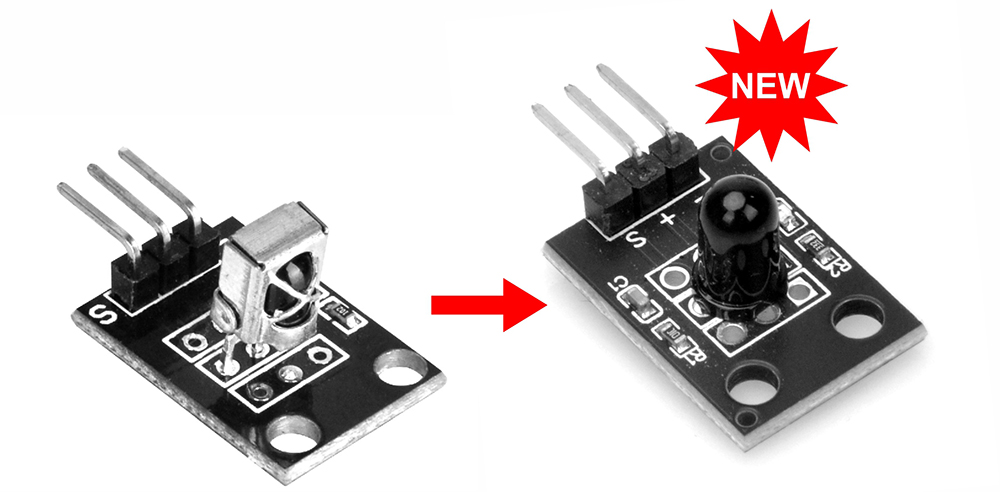
- IR Control x 1
- IR Receiver x 1
- 18650 battery x 2
- Wheel x 1
- Jumpers
Software Preparation
IDE(version 1.6.8 or later)
Library: IRremote.h
Connection
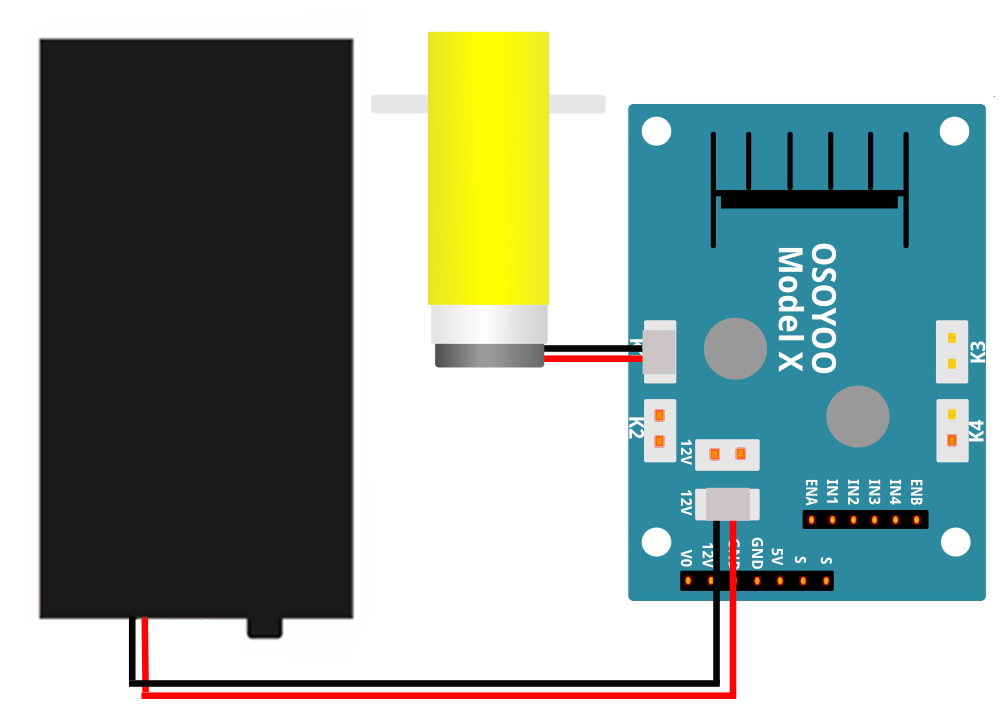
- Connect battery box, motor to OSOYOO MODEL X motor dirver module according below connection diagram:
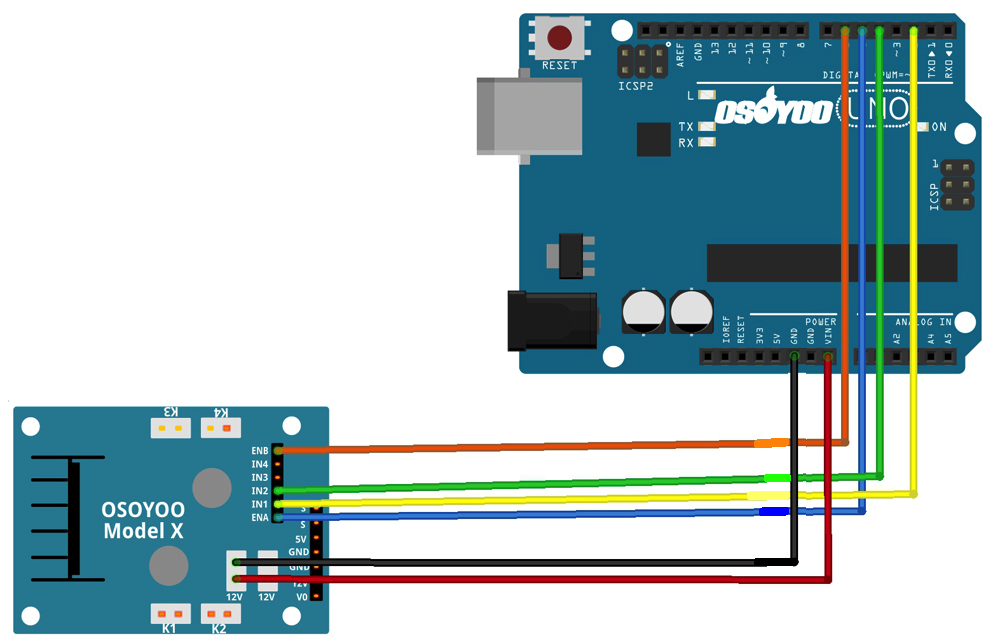
2. Connect the OSOYOO basic board and OSOYOO MODEL X motor driver module as below:
| OSOYOO Basic Board |
OSOYOO MODEL X motor driver module |
| D2 |
IN1 |
| D4 |
IN2 |
| D5 |
ENA |
| D6 |
ENB |
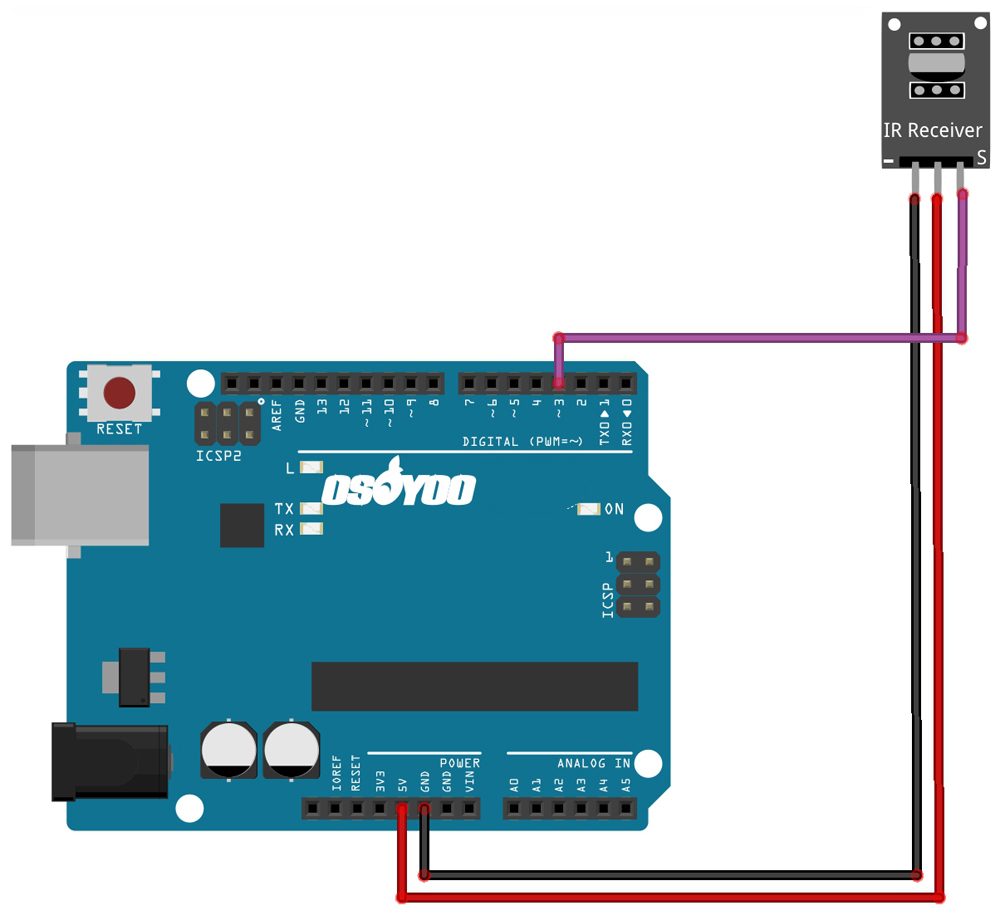
3. Connect the S pin in IR receiver to D3 pin in board, GND to GND, VCC to 5V, as the following photo :
Code Program
After above operations are completed, connect the board to your computer using the USB cable. The green power LED (labelled PWR) should go on.Open the IDE and choose corresponding board type and port type for you project. Then load up the following sketch onto your your board.
#include <IRremote.h>
#define IN1  2   //K1、K2 motor direction
#define IN2  4     //K1、K2 motor direction
#define ENA  5    // Needs to be a PWM pin to be able to control motor speed ENA
#define ENB  6    // Needs to be a PWM pin to be able to control motor speed ENA
#define IRPIN 3 //IR receiver Signal pin connect to Arduino pin 4

#define IR_ADVANCE       0x00FF18E7       //code from IR controller "▲" button
#define IR_BACK          0x00FF4AB5       //code from IR controller "▼" button
enum DN
{
  GO_ADVANCE, //go ahead
  GO_BACK,//go back
  DEF
}Drive_Num=DEF;
IRrecv IR(IRPIN);  //   IRrecv object  IR get code from IR remoter
decode_results IRresults;
bool stopFlag = true;//set stop flag
bool JogFlag = false;
uint16_t JogTimeCnt = 0;
uint32_t JogTime=0;
/*motor control*/
void go_back(int t)  //motor rotate clockwise -->robot go ahead
{
  digitalWrite(IN1, LOW);
  digitalWrite(IN2, HIGH);
  delay(t);
}
void go_ahead(int t) //motor rotate counterclockwise -->robot go back
{
  digitalWrite(IN1, HIGH);
  digitalWrite(IN2, LOW);
  delay(t);
}
void go_stop() //motor brake -->robot stop
{
  digitalWrite(IN1, LOW);
  digitalWrite(IN2, LOW);
}

/*set motor speed */
void set_motorspeed(int lspeed,int rspeed) //change motor speed
{
  analogWrite(ENA,lspeed);//lspeed:0-255
  analogWrite(ENB,rspeed);//rspeed:0-255
}
/**************detect IR code***************/
void do_IR_Tick()
{
  if(IR.decode(&IRresults))
  {
    if(IRresults.value==IR_ADVANCE)
    {
      Drive_Num=GO_ADVANCE;
    }
    else if(IRresults.value==IR_BACK)
    {
        Drive_Num=GO_BACK;
    }
    IRresults.value = 0;
    IR.resume();
  }
}
/**************car control**************/
void do_Drive_Tick()
{
    switch (Drive_Num)
    {
      case GO_ADVANCE:
            set_motorspeed(255,255);go_ahead(20);JogFlag = true;JogTimeCnt = 3;JogTime=millis();break;//if GO_ADVANCE code is detected, then go advance
           case GO_BACK:
            set_motorspeed(255,255);go_back(20);JogFlag = true;JogTimeCnt = 1;JogTime=millis();break;//if GO_BACK code is detected, then backward
      default:break;
    }
    Drive_Num=DEF;
   //keep current moving mode for  100 millis seconds
    if(millis()-JogTime>=100)
    {
      JogTime=millis();
      if(JogFlag == true)
      {
        stopFlag = false;
        if(JogTimeCnt <= 0)
        {
          JogFlag = false; stopFlag = true;
        }
        JogTimeCnt--;
      }
      if(stopFlag == true)
      {
        JogTimeCnt=0;
        go_stop();
      }
    }
}
void setup() {
  /******L298N******/
  pinMode(IN1, OUTPUT);
  pinMode(IN2, OUTPUT);
  pinMode(ENA, OUTPUT);
  pinMode(ENB, OUTPUT);

  pinMode(IRPIN, INPUT);
  digitalWrite(IRPIN, HIGH);
  IR.enableIRIn();
}

void loop() {
  do_IR_Tick();
  do_Drive_Tick();
}
Running Result
A few seconds after the upload finishes, pull out the USB cable, put the 18650 batteries into the battery box, install wheel on the motor, then turn on the battery case.
- Press the “▲” button of IR controller, the wheel will move forward;
- Press the “▼” button of IR controller, the wheel will move backwards.


