Analog Noise Sound Sensor Detection Module is a sensor module based on MIC sound sensing element. Sound Sensor is particularly sensitive to sound intensity, and it can be used to detect ambient sound level. Louder noise brings bigger output Sine wave amplitude.
Parts Needed You will need the following parts:
1x micro:bit
1x Micro B USB Cable
1x micro:bit Breakout (with Headers)
1x Breadboard
5x Jumper Wires
1x Sound Detection Sensor
About Sound Detection Sensor
OVERVIEW
The Sound Detection sensor module has a built-in capacitive electret microphone which is highly sensitive to sound. Sound waves cause the thin film of the electret to vibrate and then the capacitance changes, thus producing the corresponding changed voltage, so it can detect the sound intensity in ambient environment. Since the change is extremely weak, it needs to be amplified. We use a LM393 as the power amplifier here. You can adjust the sensitivity with by adjusting the Potentiometer. When the sound level exceeds the set point, an LED on the sensor module is illuminated and the output is sent low.
Note: This sound sensor is used to detect whether there’s sound surround or not, it cannot recognize the frequence or volum, please don’t use the module to collect sound signal.
ARDUINO SOUND DETECTION SENSOR PIN OUTS
The image and table below detail the controls, pin outs, and other key components.
When referring sensititivity, well. I mean:
When less sensitive, it takes more sound to trigger the device
When more sensitive, it takes less sound to trigger the device
Parameter
Value
+
5 V DC from your Arduino
G
GND from your Arduino
OUT
Connect to Arduino Input Pin
Power LED
Illuminates when power is applied
Sound Detect LED
Illuminates when sound is detected
Potentiometer
CW = More Sensitive
CCW = Less Sensitive
It has 3 pins that needs to be connected to your Arduino. The top one(if you look at the image above), is OUT Pin. This should be connected to the Arduino input pin. The one beside that is GND, which is connected to ground, the VCC is connected to +5V.
On the top of the sound sensor is a little flathead screw you can turn to adjust the sensitivity and analog output of the sound sensor. To calibrate the sound sensor you can make some noise and keep turning it until you start seeing the sensor-LED on the module starts blinking with the rhythm.
USES FOR THE Arduino SOUND DETECTOR
Given that this device measures whether or not sound has exceeded a threshold, you’re basically left with determining what it is you want to do. What I mean by this is that you can do something when it is quiet and/or you can do something when it is loud. For example:
You could detect whether or not a motor is running.
You could set a threshold on pump sound so that you know whether or not there is cavitation.
In the presence of no sound, you might want to create an ambiance by turning on music.
In the presence of no sound and no motion, you may go into an energy savings mode and turn off the lights.
Sound Detect Example
In this example, we are going to connect the Sound Detection sensor module with the micro bit, When any sound was detected by the sensor, micro:bit will display the decibel value on the screen.
Note: The sensitivity of the Sound Detection sensor is adjustable – you may adjust it by the potentiometer.
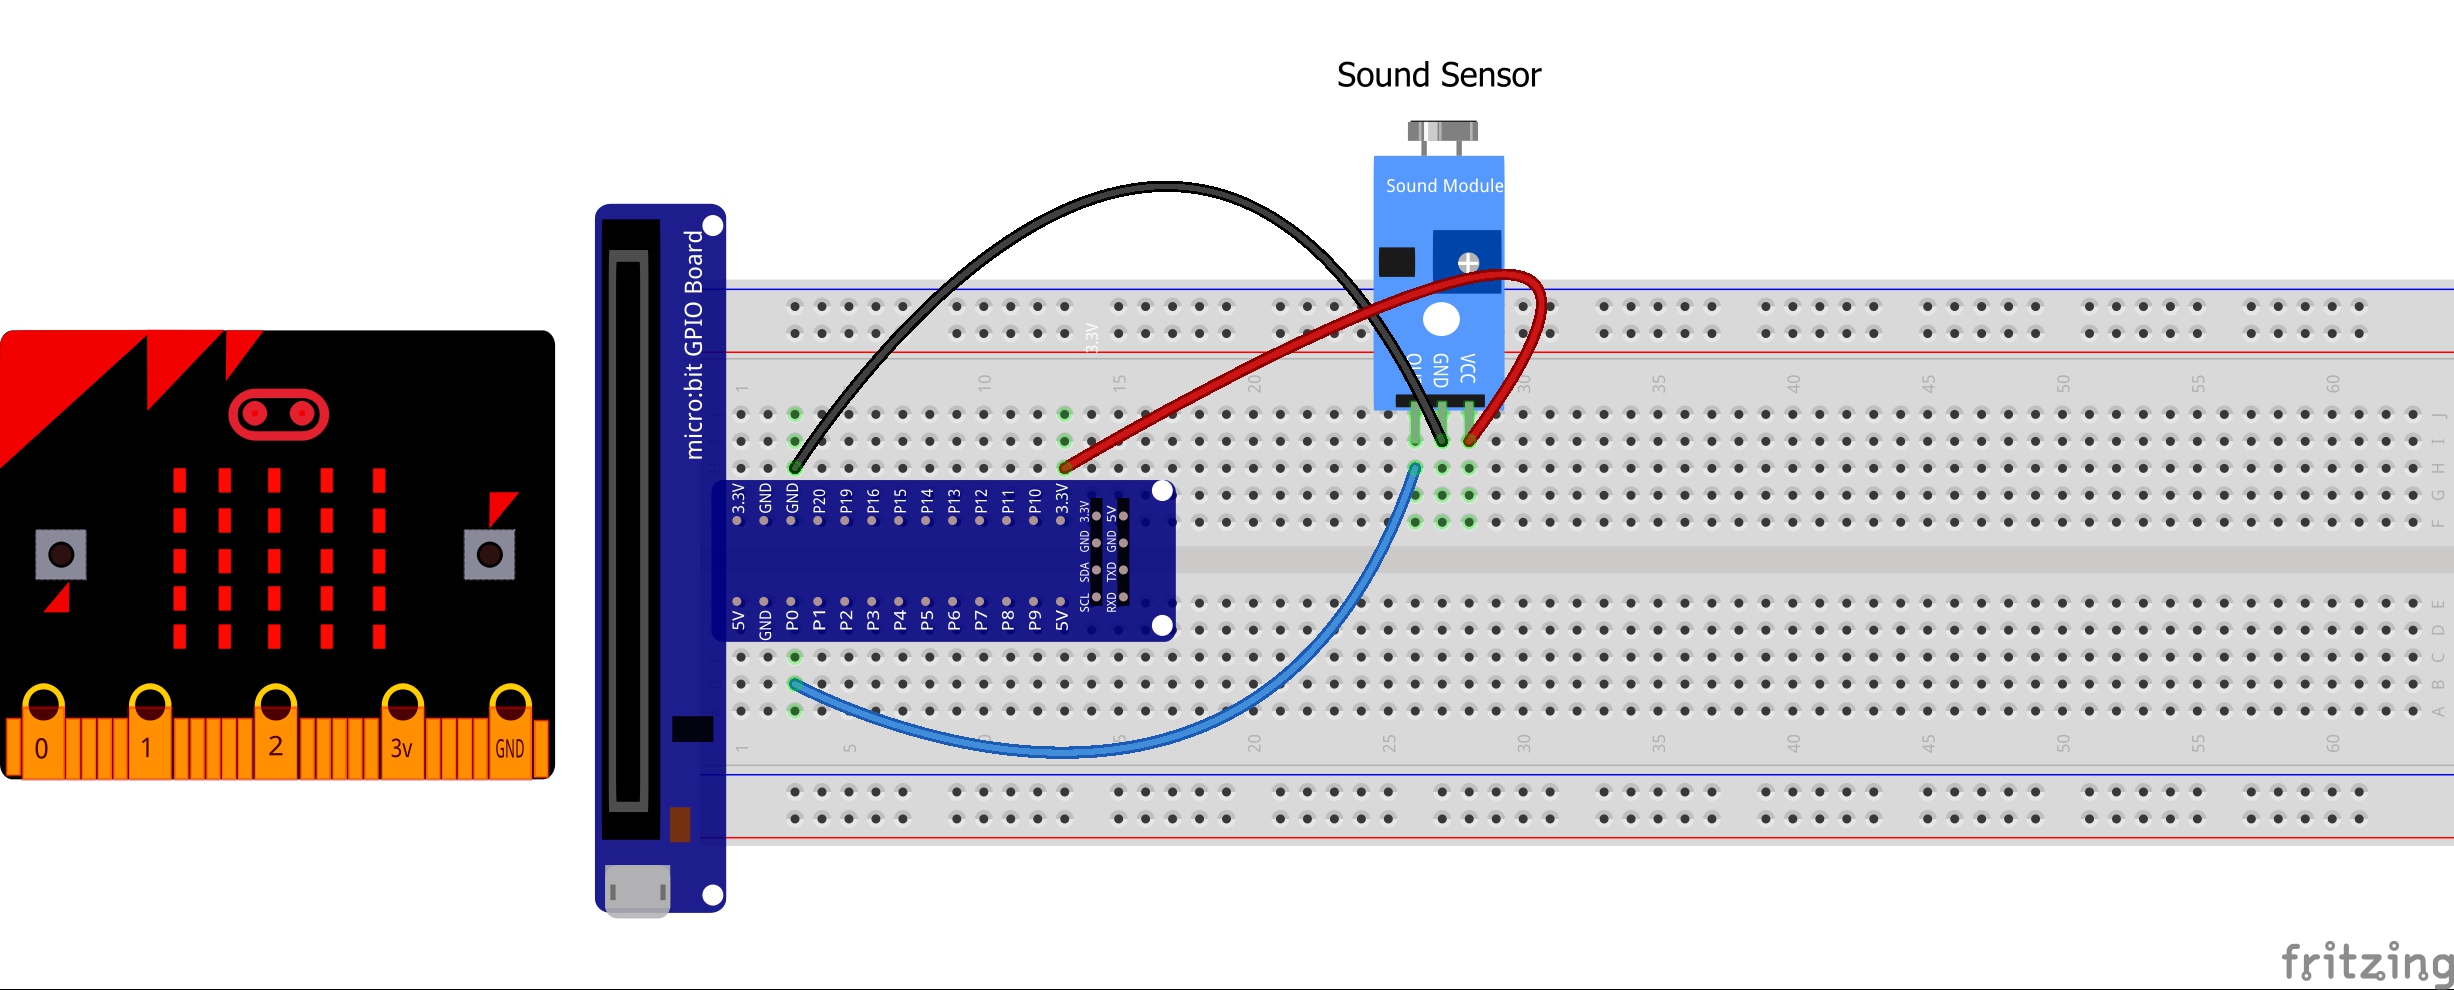
Wiring Diagram for the Experiment
Sound sensor
Micro bit
VCC
3.3V
GND
GND
OUT
P0
Run Your Script
Either copy and paste, or re-create the following code into your own MakeCode editor by clicking the open icon in the upper right-hand corner of the editor window. You can also just download this example by clicking the download button in the lower right-hand corner of the code window.
Note: You may need to disable your ad/pop-up blocker to interact with the MakeCode programming environment and simulated circuit!
Result
When any sound was detected by the sensor, micro:bit will display “voice in” on the screen.