Authorized Online Retailer

DESCRIPTION
The DHT22 sensor is used to measure the temperature and humidity. It is also known as AM2302. This sensor is cheap and also has better accuracy. So in this tutorial, you are going to learn about temperature and humidity sensor DHT22 Raspberry pi interfacing.
Specifications of DHT22
The specifications of the temperature and humidity sensor DHT22 are as follows.
• Temperature range is from -40 to 125 degree Centigrade with accuracy of ±0.5 ͦ C.
• Humidity range is from 0 to 100% with accuracy of ± 2-5%.
• Sampling rate is 0.5 Hz.
• Operating Voltage is 3-5V.
• Maximum Current while measuring is 2.5mA.
Pin out of DHT22
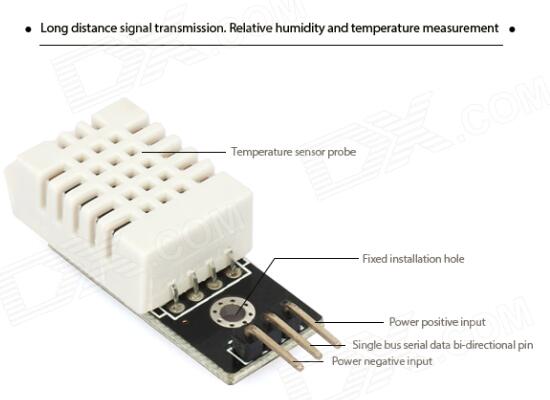
The Pin out of the temperature and humidity sensor DHT22 is as follows.
| 1 |
Vcc |
Power supply 3.5V to 5.5V |
| 2 |
Data |
Outputs both Temperature and Humidity through serial Data |
| 3 |
Ground |
Connected to the ground of the circuit |
Working of Temperature and Humidity Sensor DHT22
DHT22 sensor consists of two components for measuring; Humidity sensing component and the NTC temperature sensor (or a thermistor). There is an IC on the back side which makes the readings to be able to read by the Raspberry pi.
While measuring the humidity, the humidity sensor comes into play. The humidity sensor consists of two electrodes with moisture holding substrate between them. So when the humidity changes, the conductivity of substrate changes or you can say that the resistance between the electrodes changes. This change in resistance is then given to IC which makes it to read by the Raspberry pi.
While measuring the temperature, the NTC temperature sensor or thermistor comes into play. The resistance of the thermistor changes with change in the temperature. These are negative temperature coefficient (NTC) which means that their resistance decreases with the increase in temperature.
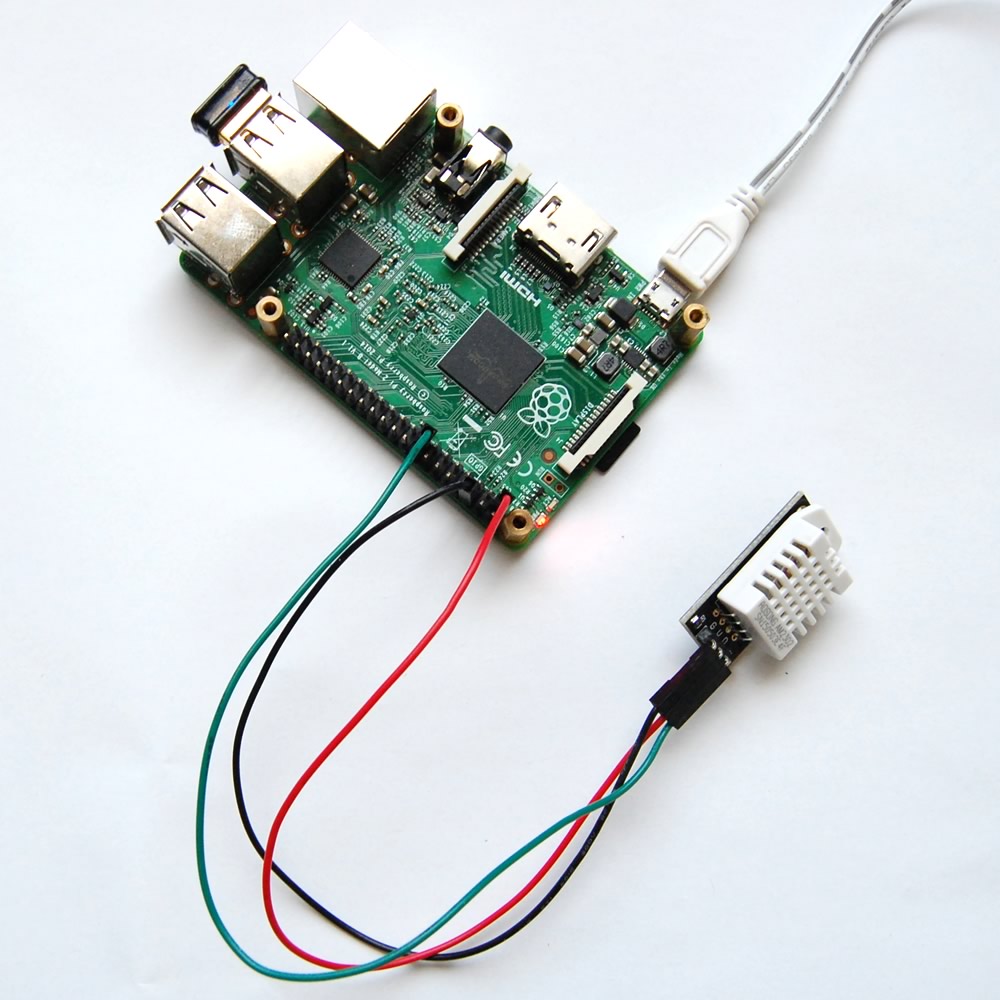
Circuit Diagram and Explanation
Make the connections of the DHT22 with the Raspberry pi as described below
| DHT22 |
Raspberry pi |
| VCC |
5v |
| Data pin |
Connect to GPIO 4 |
| GND |
GND |
Installing the Library
To install the library, Follow the below steps
- Enter the below command to download the library
git clone https://github.com/adafruit/Adafruit_Python_DHT.git
- Then enter in to the installed directory using the below command
cd Adafruit_Python_DHT
- Now download the required modules using the below command
sudo apt-get install build-essential python-dev
- Then install the library using the below command
sudo python setup.py install
Program
After installation, you can directly execute the sample program in Python library, and you can get the temperature and humidity by executing it.
#Test program
cd examples
#/home/pi/Adafruit_Python_DHT/examples

sudo ./AdafruitDHT.py 22 4
#The following are the results
Temp=29.7* Humidity=75.7%
The first parameter (22) indicates which sensor was used (11 for the DHT11) and the second, to which GPIO it is connected (not the pin number, but the GPIO number). This produces an output like the following:
$ sudo ./AdafruitDHT.py 22 4
Temp=29.7* Humidity=75.7%
Attention: The sensors are only ready every two seconds. Be careful not to start a query every second.
To integrate the Raspberry Pi humidity library into other (Python) projects, you only need the following:
|
|
import Adafruit_DHT
...
sensor = Adafruit_DHT.DHT22
pin = 4
humidity, temperature = Adafruit_DHT.read_retry(sensor, pin)
...
|


I have no idea what I’m doing wrong please help.
Failed to get reading. Try again!