| Buy from US |
Buy from UK |
Buy from DE |
Buy from IT |
Buy from FR |
Buy from ES |
ここでご購入を! |
 |
 |
 |
 |
 |
 |
 |


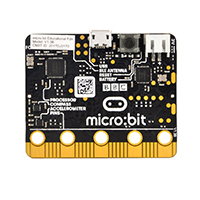
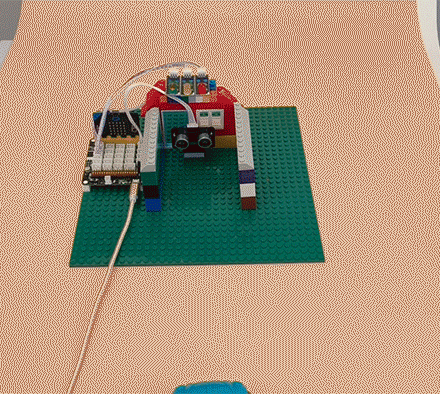
- BBC micro:bit board x 1
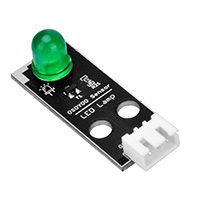
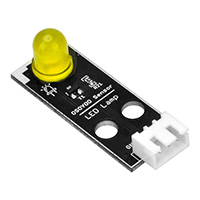
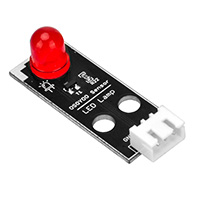
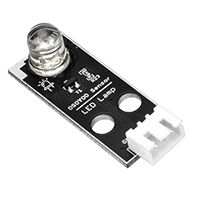
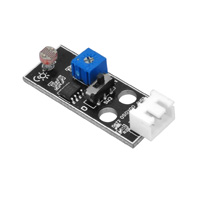
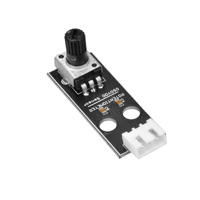
- OSOYOO LED module x3
- OSOYOO 3-pin PnP cable x 3
- OSOYOO 4-pin PnP cable x 1
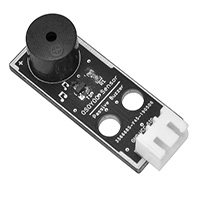
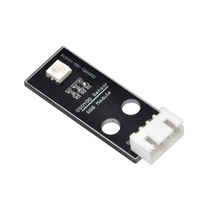
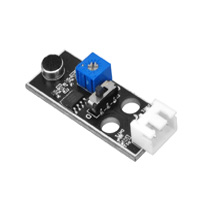
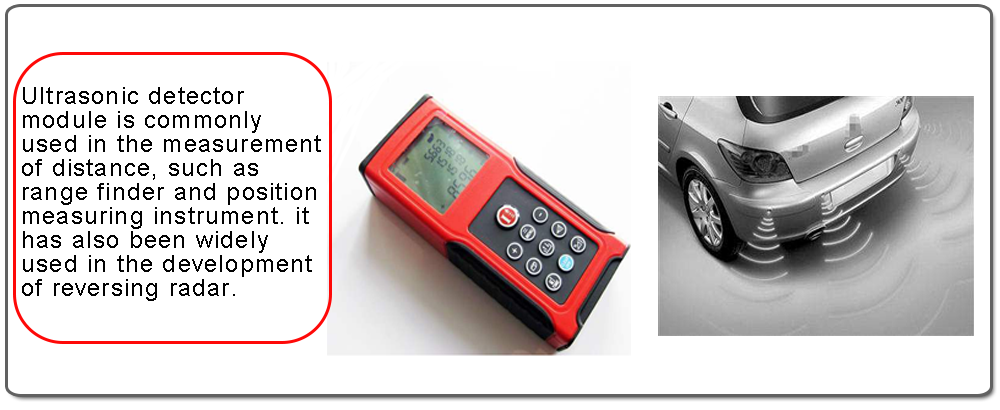
- OSOYOO Ultrasonic detector module x 1
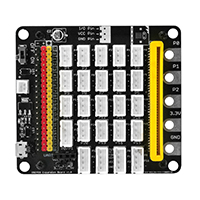
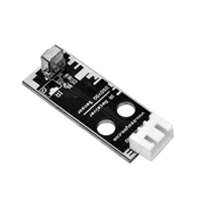
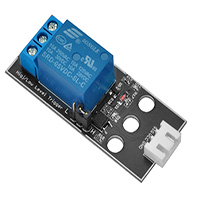
- OSOYOO Plug&Play( PnP ) board for micro:bit x 1

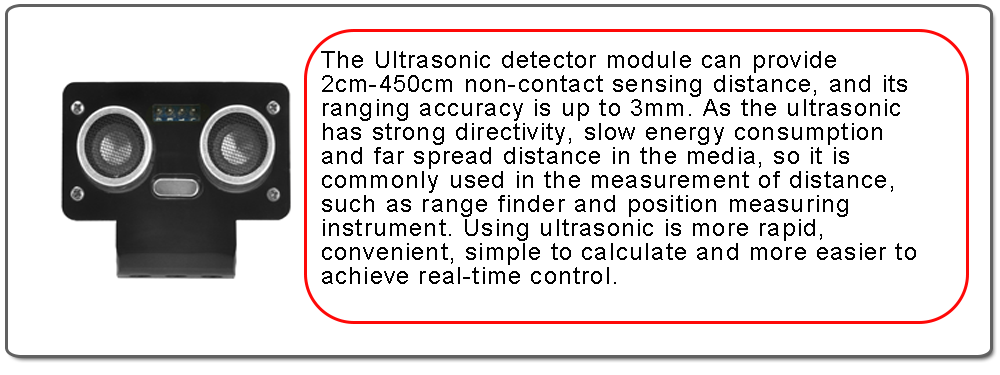

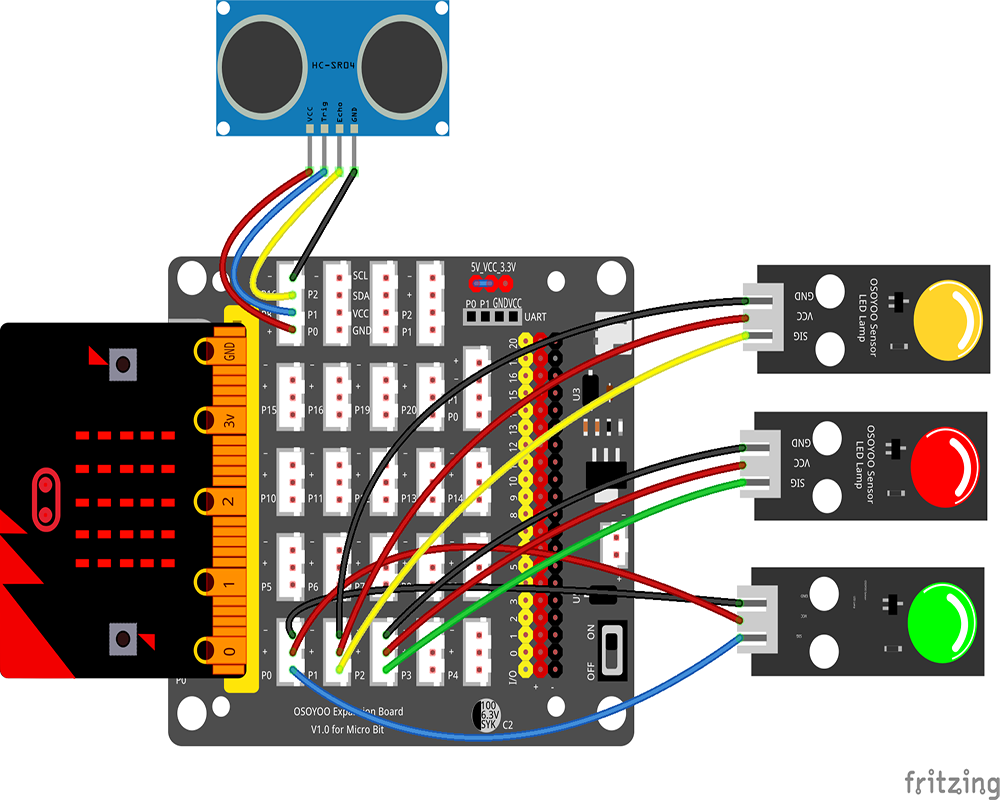
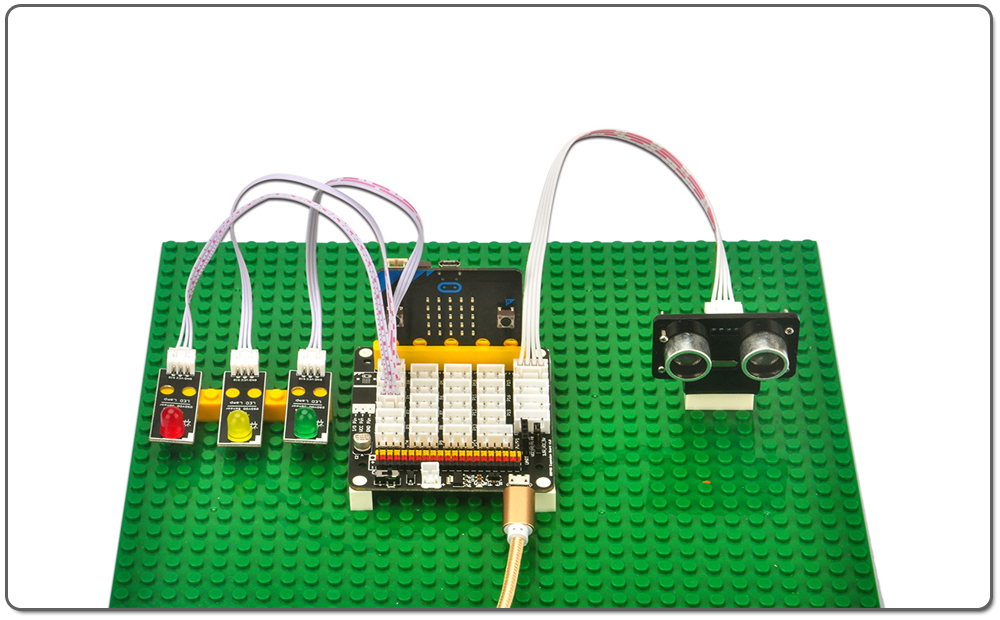
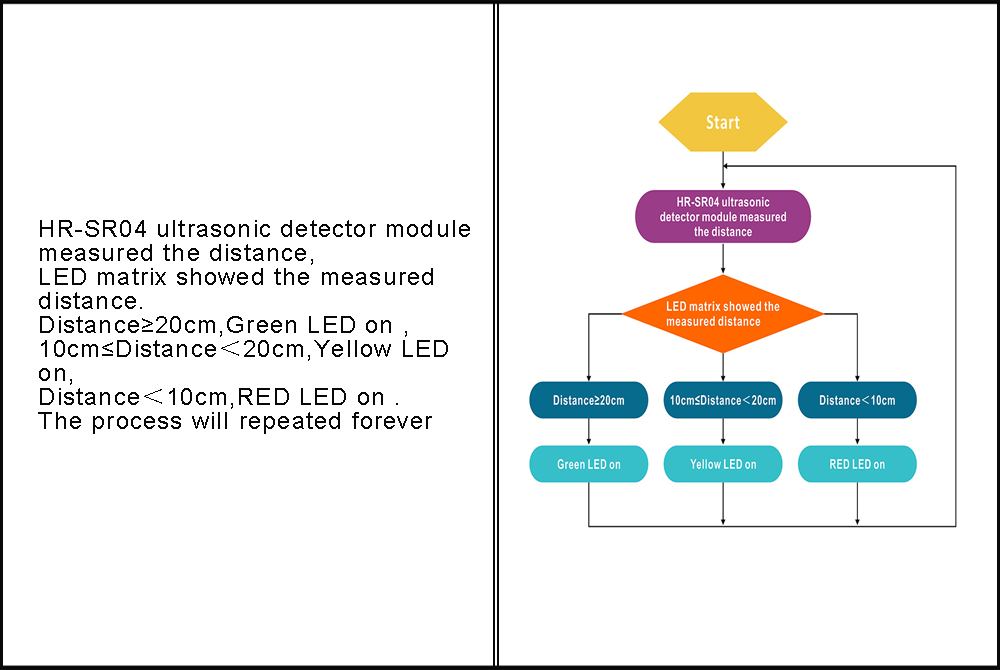
Connect Ultrasonic detector module to the 4-pin port “+,p8,p16,-” of PnP board with a 4-pin PnP cable ;
Connect green LED module to port P0 in OSOYOO PnP board with OSOYOO 3-pin PnP cable ;
Connect yellow LED module to PnP board port P1 with 3-pin PnP cable;
Connect red LED module to PnP board port P2 with 3-pin PnP cable as below;
.png) Step 0: Go to url: https://makecode.microbit.org, click New Project
Step 0: Go to url: https://makecode.microbit.org, click New Project
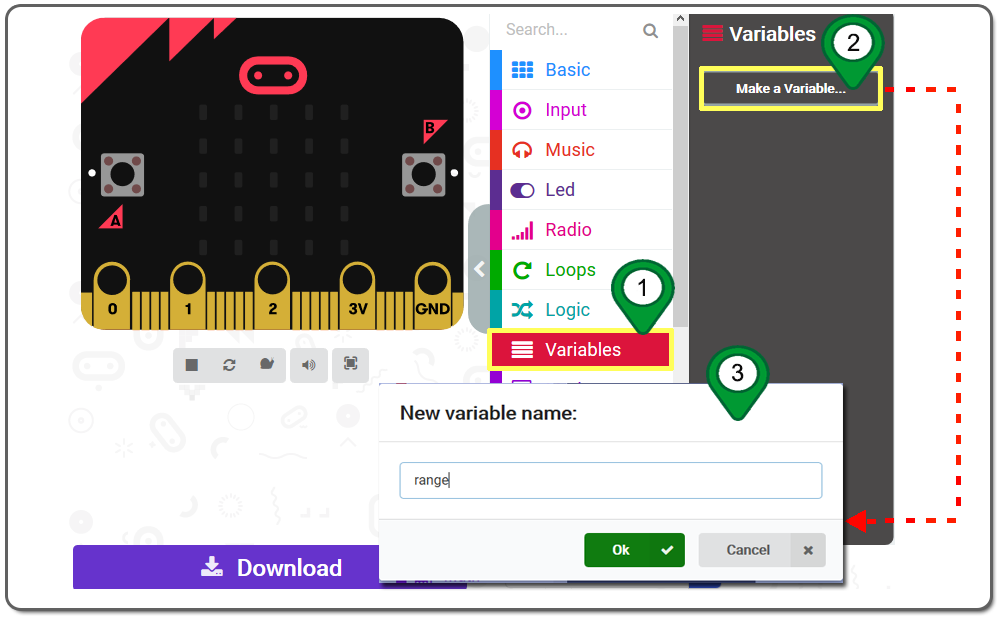
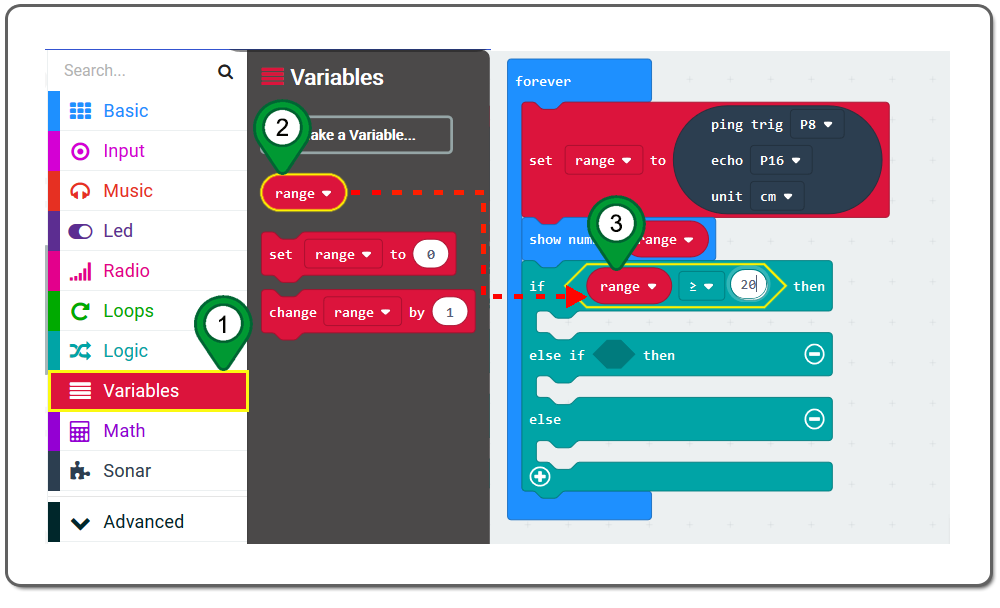
Step 1. In the Toolbox, click on the Variables category and then click the Make a Variable button, and then In the New Variable name window, type “range” as the variable name, then click on the Ok button as following figure。
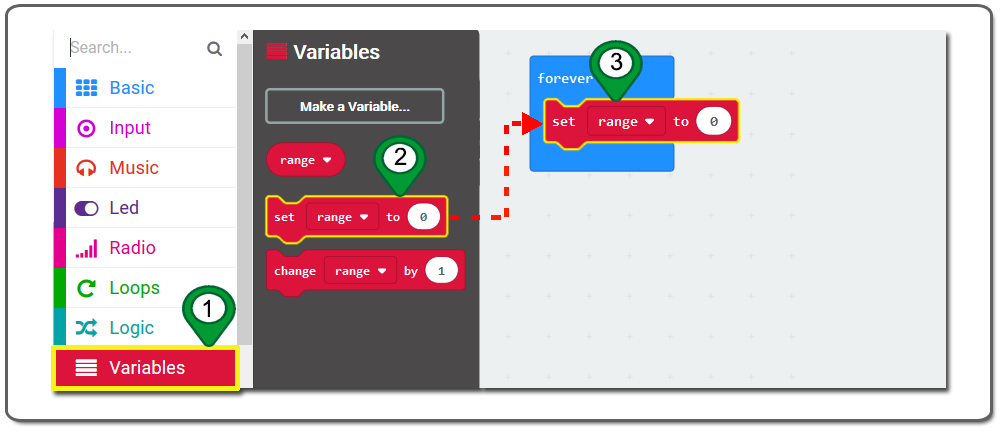
Step 2. Drag and drop a set range to 0 block inside the forever block.
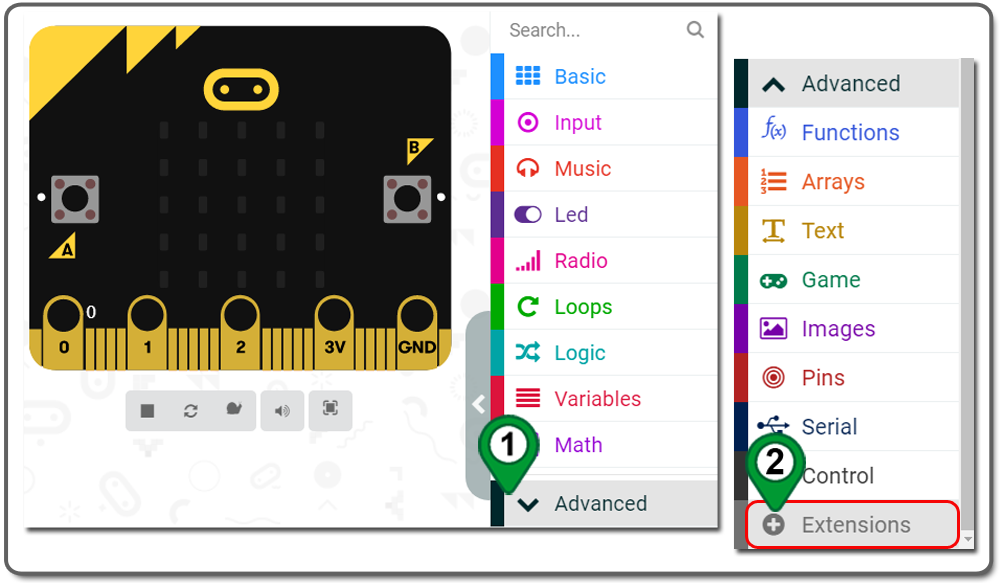
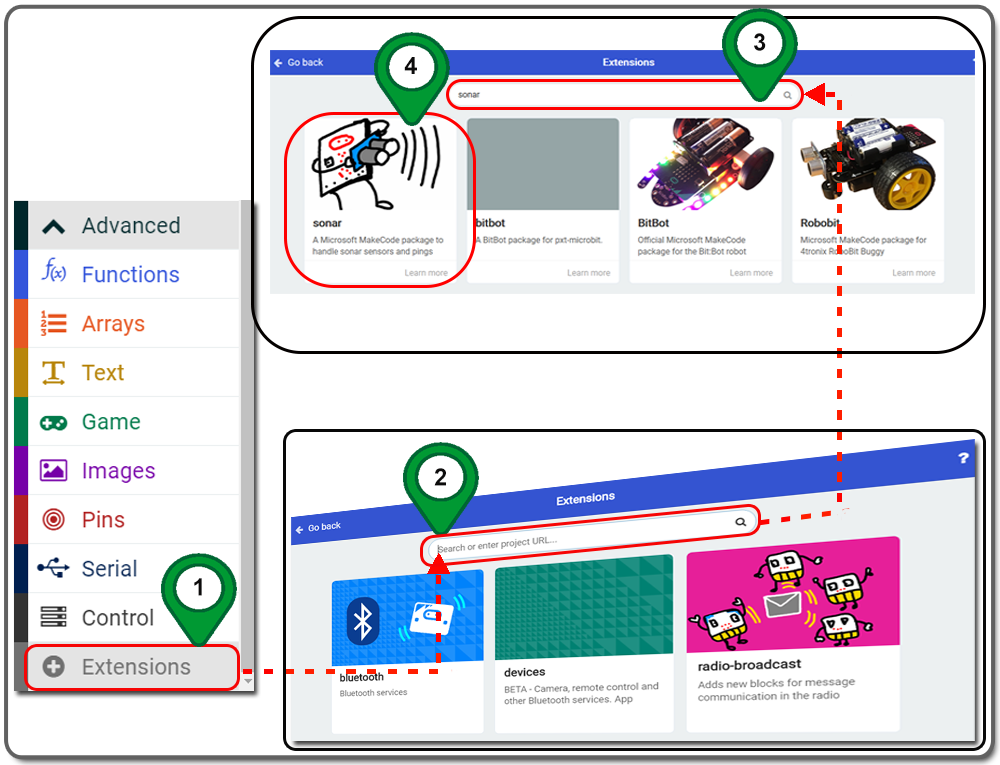
Step 3. In the Editor controls, click on the Advanced button and then Extensions as following figure.
Step 4.In the Extensions page , enter project “Sonar ” in the Search textbox and click on the Search button. The page will show you all the matching extensions based on your search string. Now, click on sonar to add it into your project as following figure.
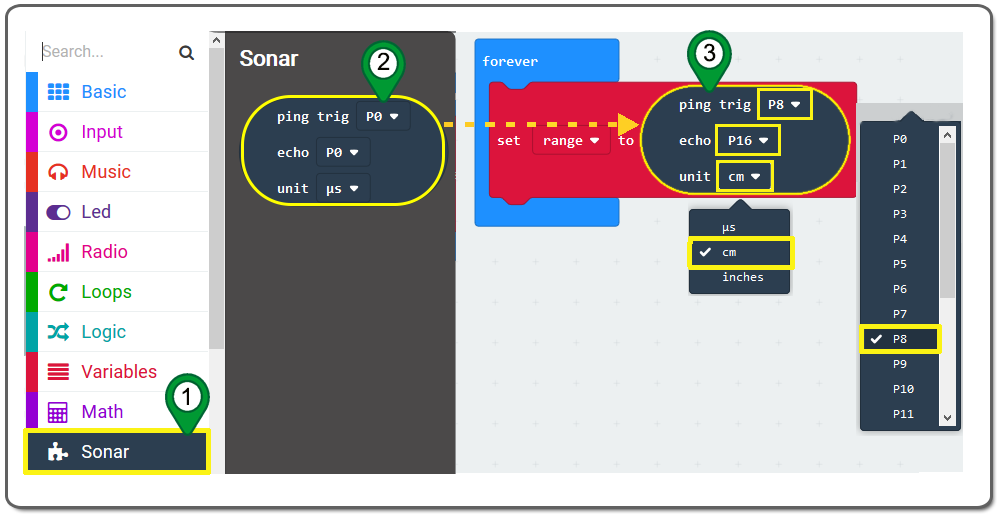
Step 5. In the Toolbox, click on the Sonar category . Drag the ping trig echo unit block and place it inside the placeholder of the set range to 0 block. Then choose P8 in ping trig ,choose p16 in echo pin ,choose cm in unit from the drop-down menu as following figure.
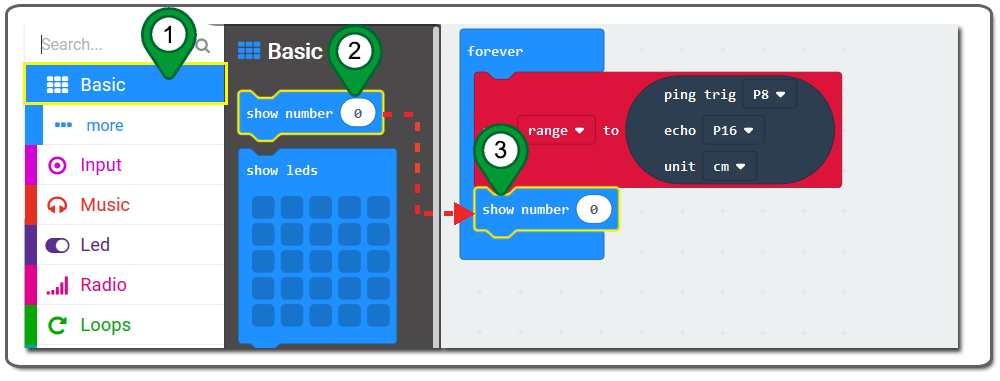
Step 6. Click on the Basic category and drag the show number block place it inside the placeholder of the forever block just below the set range to 0 block as following figure.
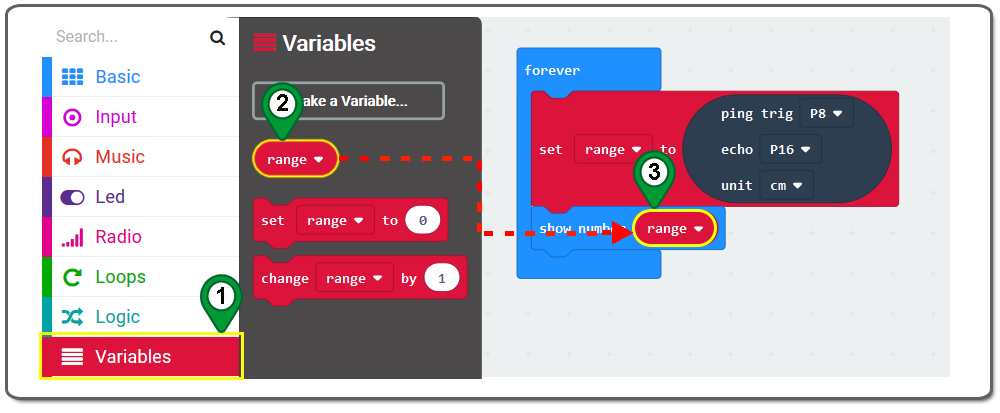
Step 7.In the Toolbox, click on the Variables category . Drag the range block and place it inside the placeholder of the show number block as following figure.
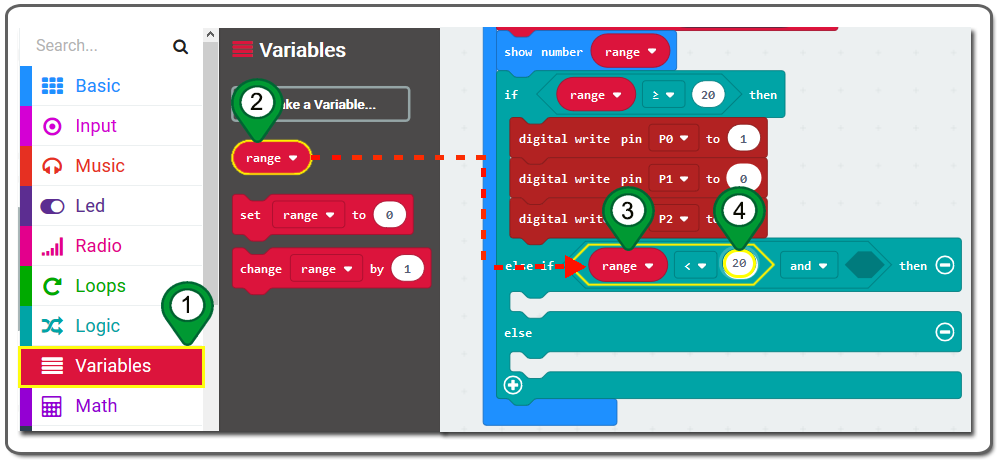
Step 8. In the Toolbox, click on the Logic category and drag the if-then-else block over .
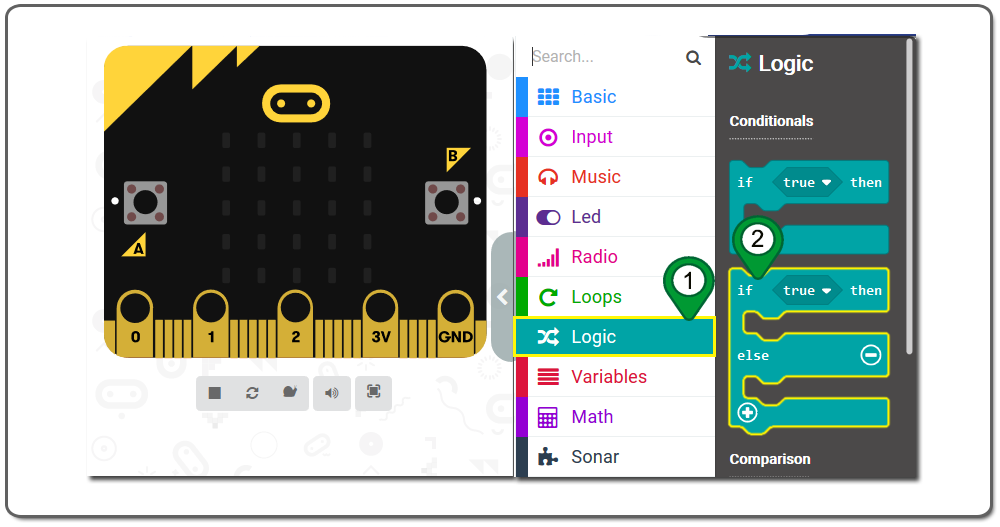
Step 9. Place the if-then-else block inside the placeholder of the forever block below the show number 0 block. Click on the plus icon to add another section to the if-then-else block as following figure.
Step 10. In the Toolbox, click on the Logic category again, click and drag the 0=0 block over and place it inside of the forever block below the show number block.then set “0≥0”from the drop-down menu as following figure.
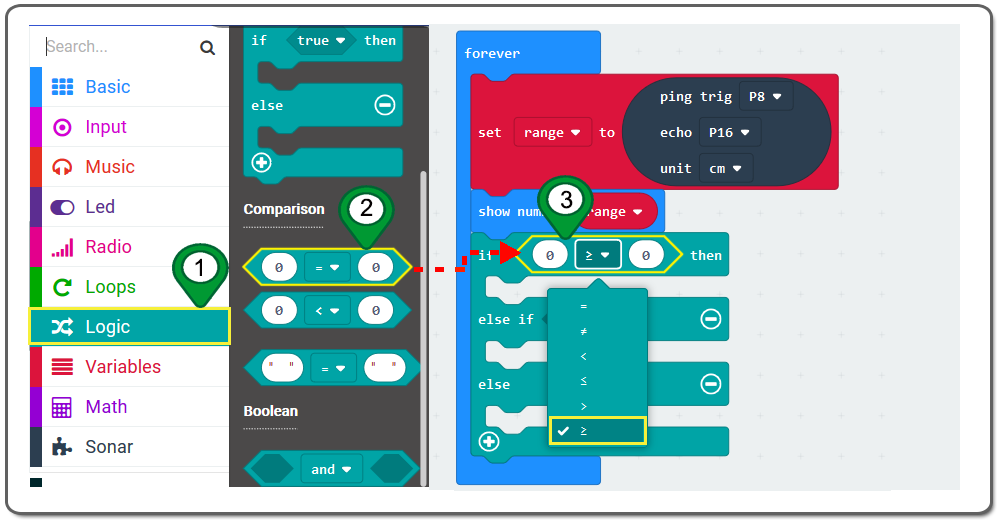
Step 11. Drag and drop a range block from variable category and place it inside the placeholder of the 0≥0 block .Then set range≥20 in it as following figure .
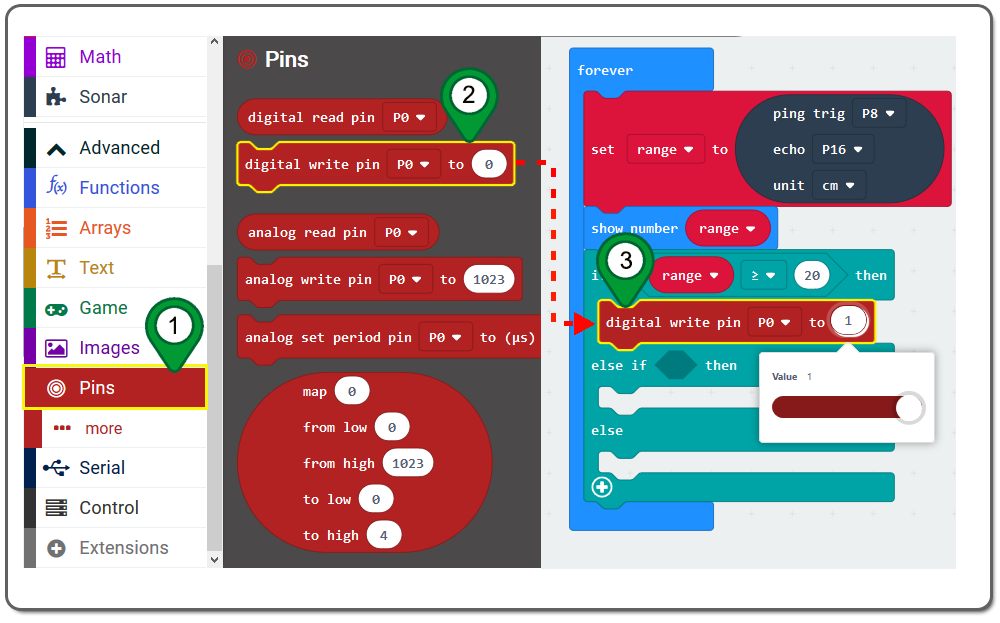
Step 12. In the Toolbox, click on the Pin category. Then drag a digital write pin to block and place it inside the forever block. Then set write pin value to “1” from the drop-down menu as following figure.
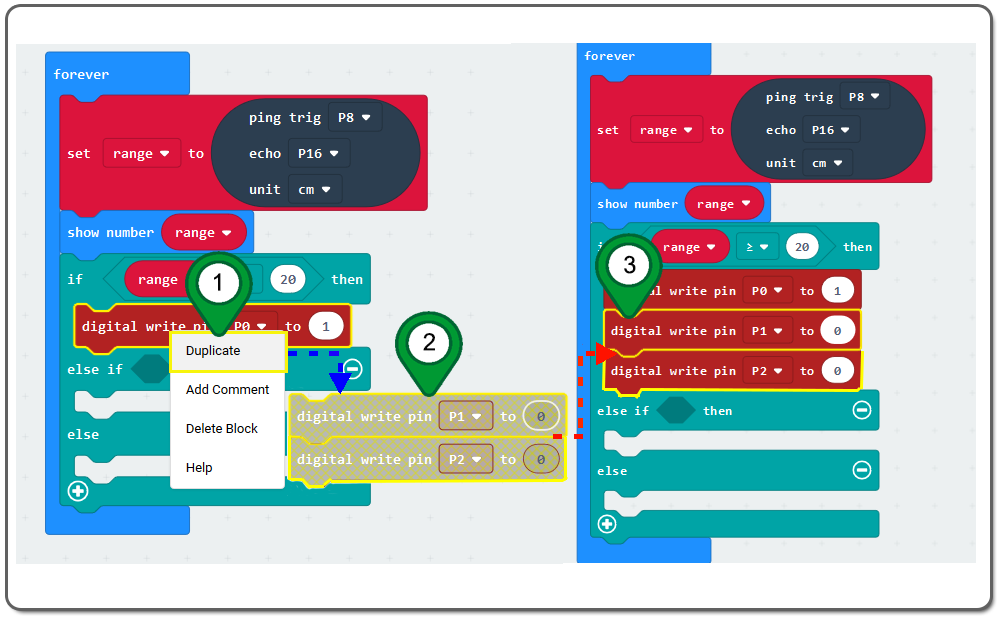
Step 13. Right click duplicate digital write pin to block select duplicate twice . You will get two duplicated digital write pin blocks ,and place them inside the on forever block just below the if range ≥20 then block .set write pin to P1 ,P2 as following figure.
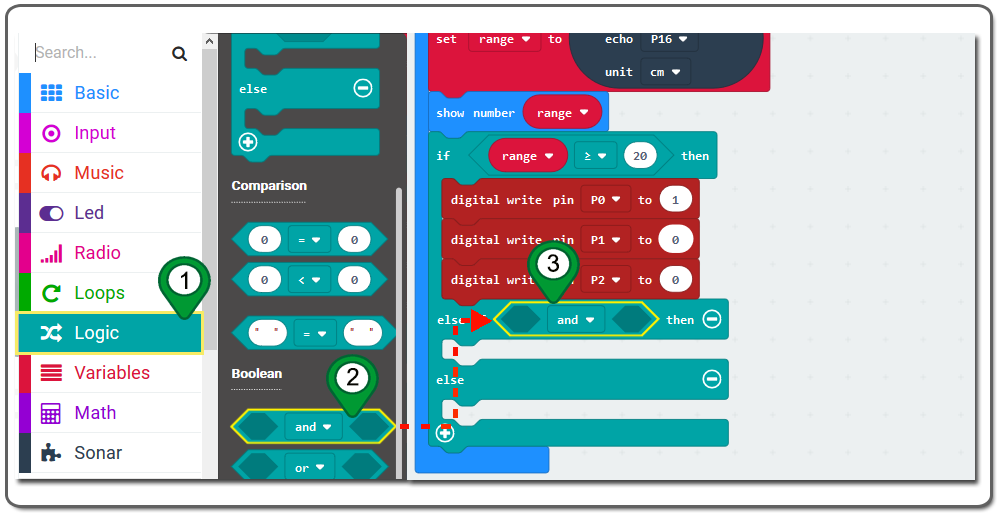
Step 14. Click on the Logic category. Then click and drag the and block over and place it inside the placeholder of else block.
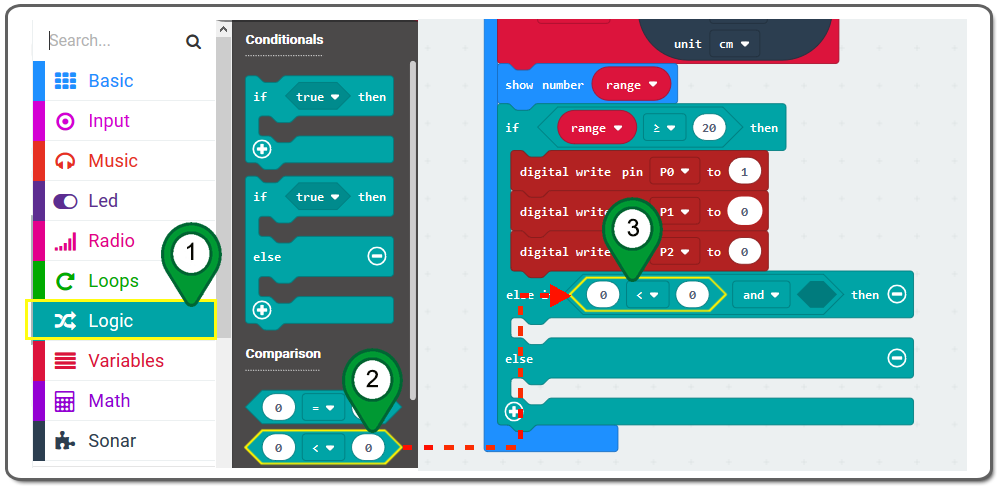
Step 15. Click on the Logic category again and drag the 0 <0 block and place it in front the “and” section of the else block.
Step 16. Drag and drop a range block from variable category and place it inside the placeholder of the 0<0 block.then set range < 20 in it as below figure.
Step 17. Click on the Logic category again , drag an 0 <0 block and place it behind the “and” section of the else block. then set 0 ≥10 in it as below figure.
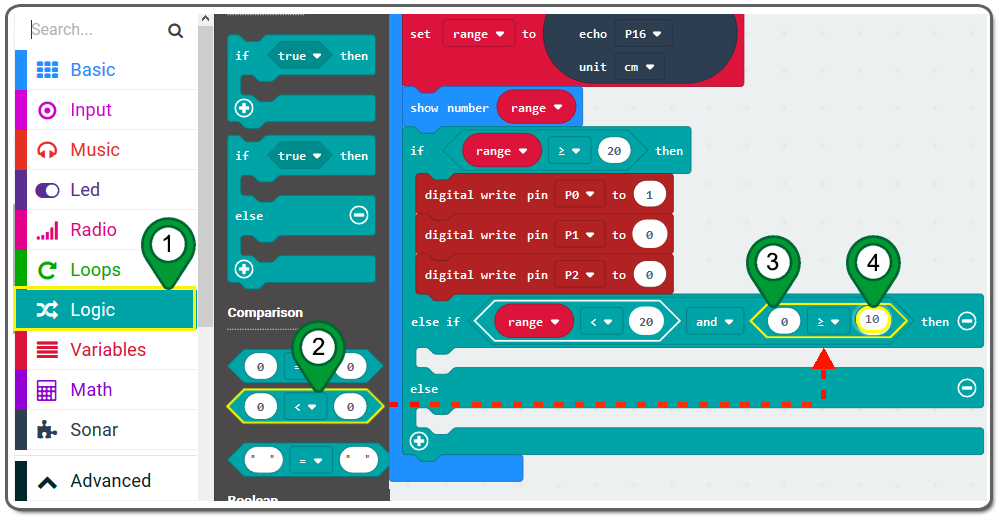
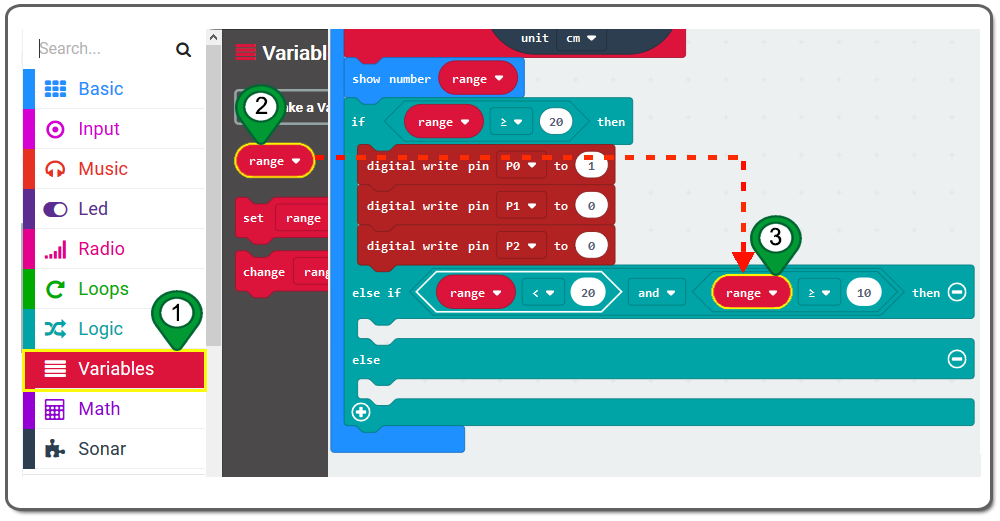
Step 18. Drag a range block from variable category again. and place it in front the placeholder of the 0≥10 block.
Step 19. use duplicate method to make another three digital write pin block , drop these new block below else if range <20 and range ≥10 then block . Then Set the pin# toP1,P2, the value o to 1 as following figure.
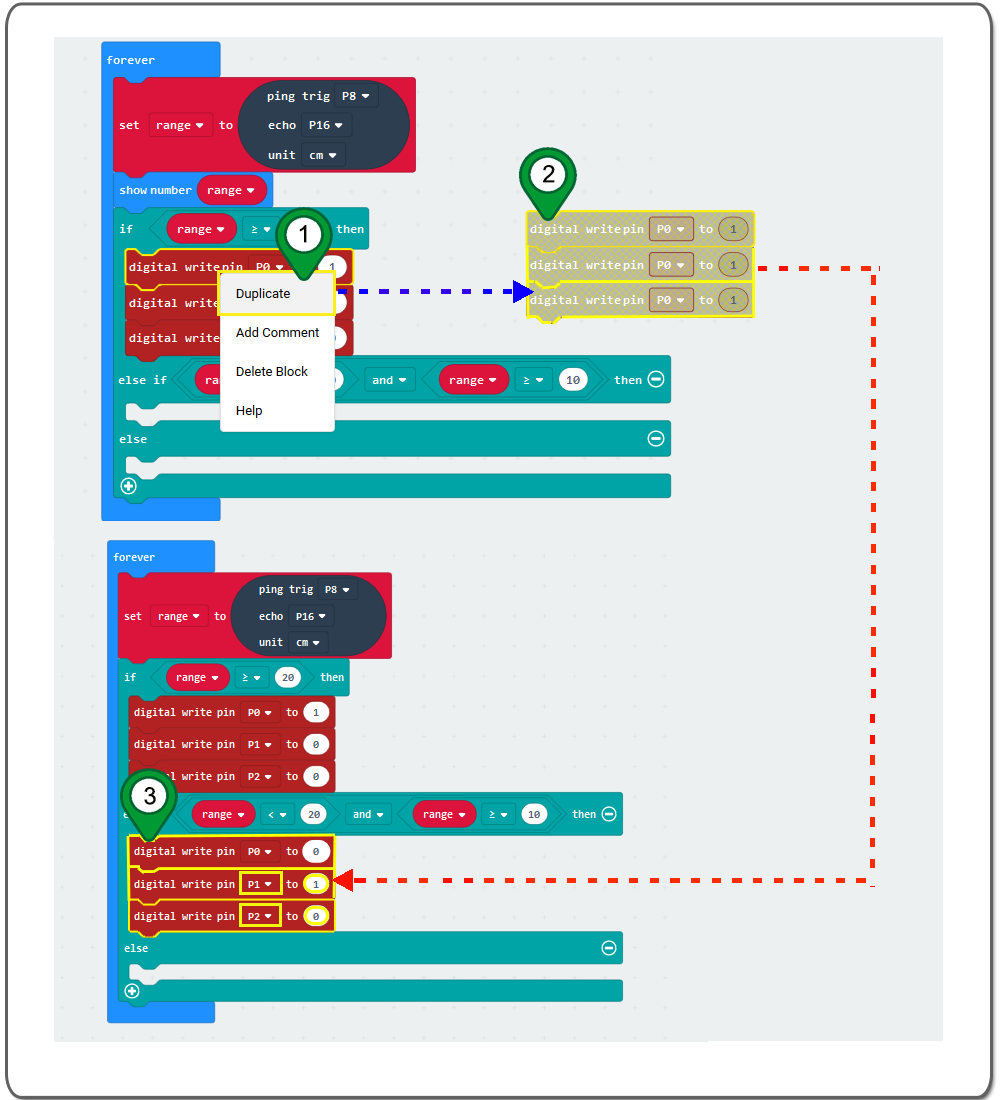
Step 20. Repeat duplicate method to make another three digital write pin blocks. drop these new blocks below else block . Set the pin# to P1,P2, the value o to 1 as following figure.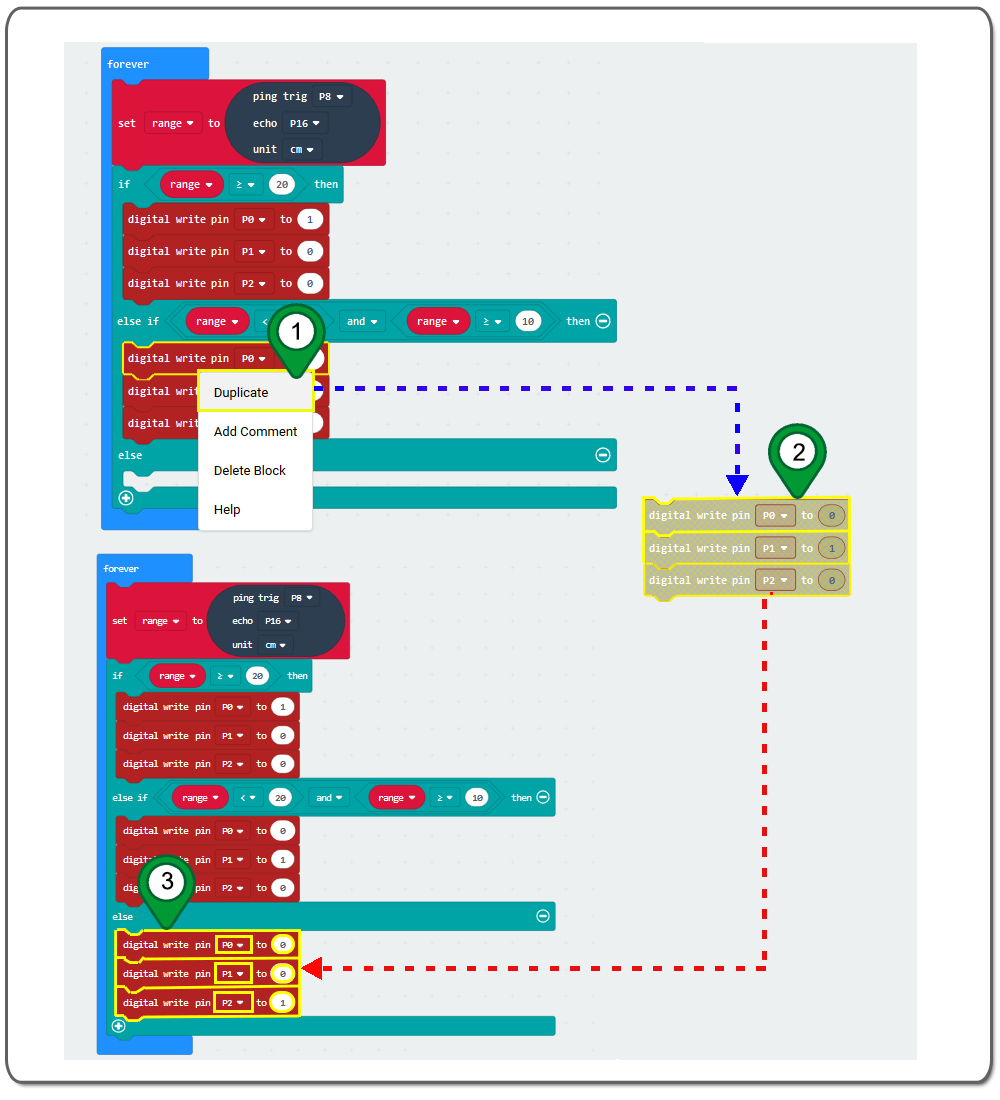
Step 21. In the Toolbox, click on the Basic category. Then drag the pause(ms) block and place it inside the else block below the three digital write pin to block .

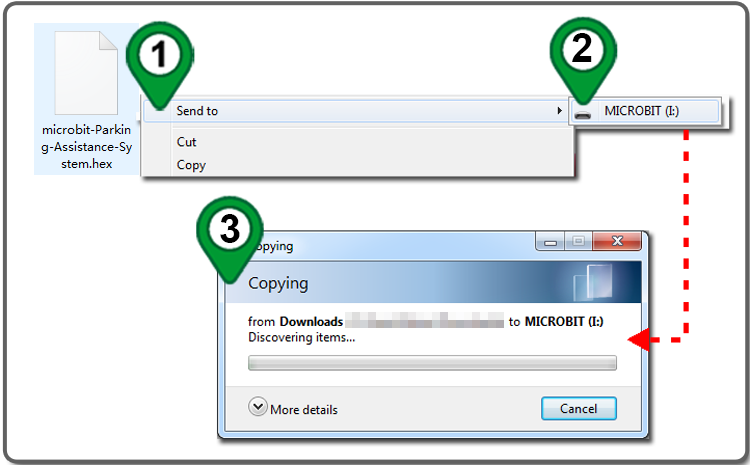
Step 22. Download this “.hex” file and save it to your MICROBIT disk Driver as following figure.
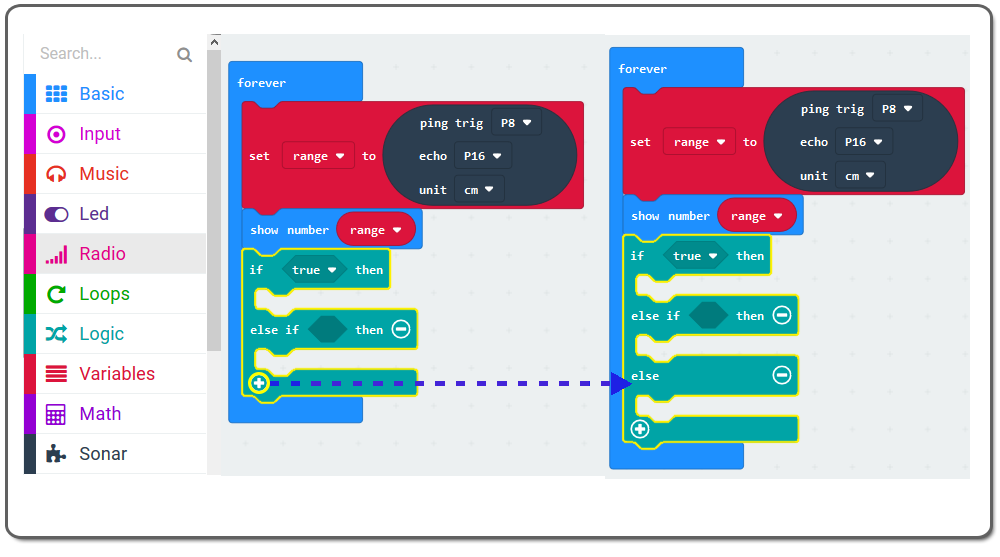
Below are the full Graphic programming code blocks we have done for you as reference:


Learn More about parts