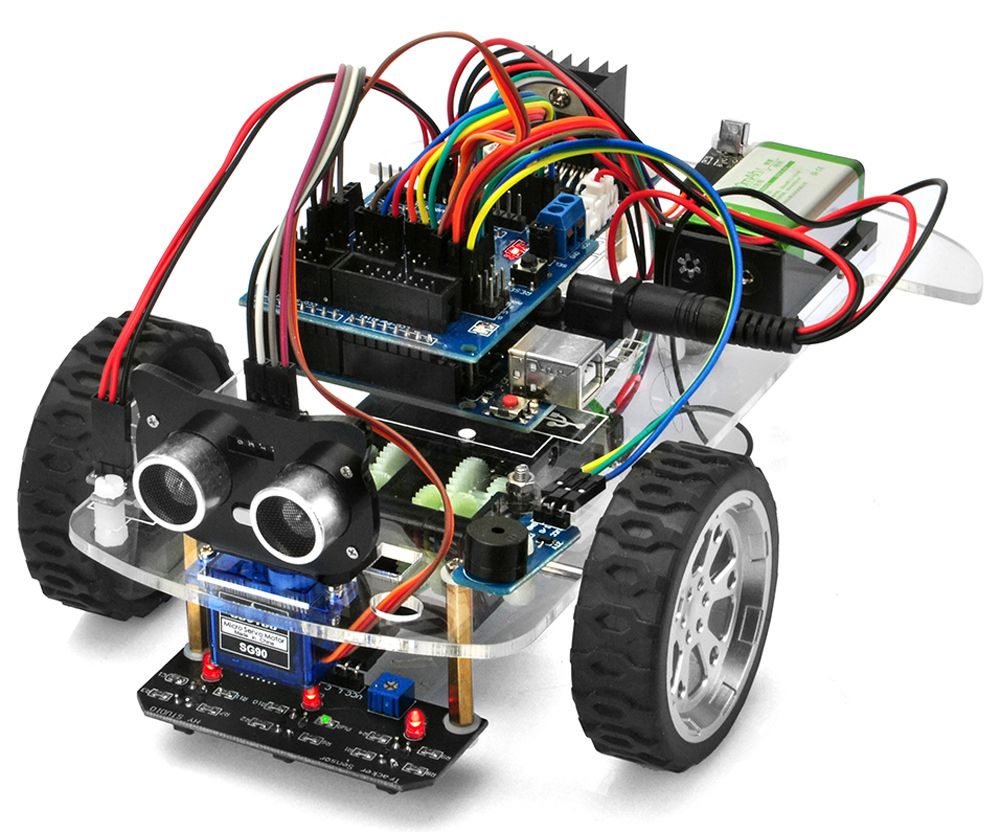
In this lesson, we will install an ultrasonic sensor on the robot car and program the car to keep some distance of object to move.
You must complete lesson 1 (assembling the car) before you continue on with this lesson.
Parts and Devices:
Hardware Installation
Step 1: Install the smart car basic frame work as per Lesson 1 . If you have already completed installation in Lesson 1 , just keep it as is.
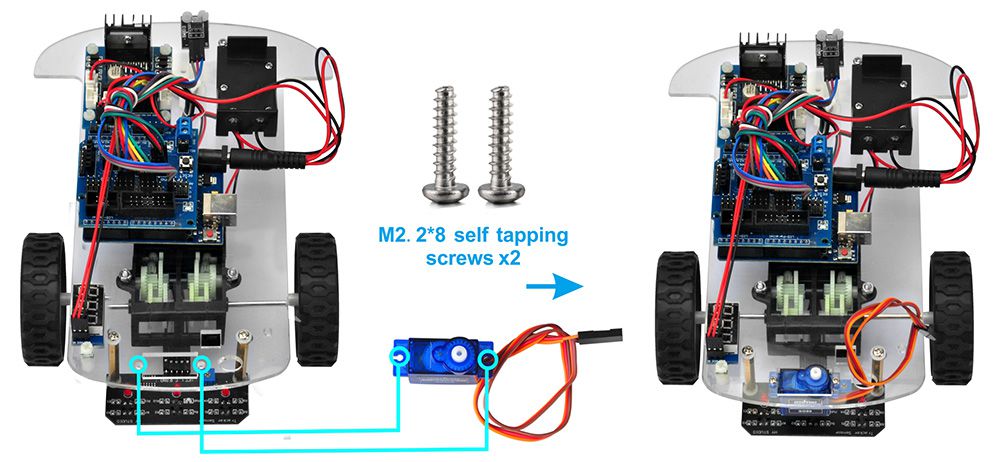
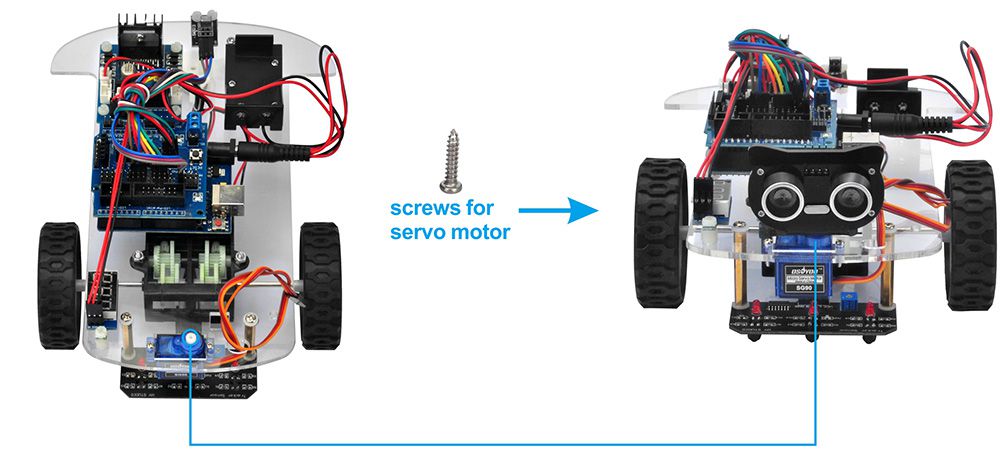
Step 2: Install servo motor at the front of car chassis with 2pcs M2.2*8 Self Tapping Screws as following:
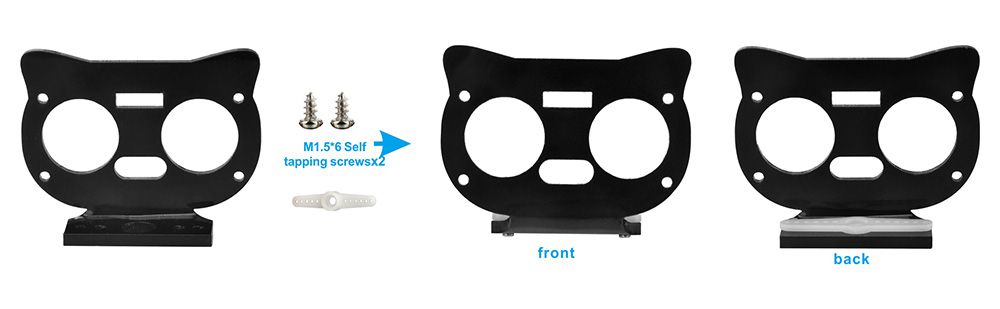
Step 3: Install bracket (from servo motor package) on mount holder for Ultrasonic Module with 2pcs M1.5*6 Self Tapping Screws
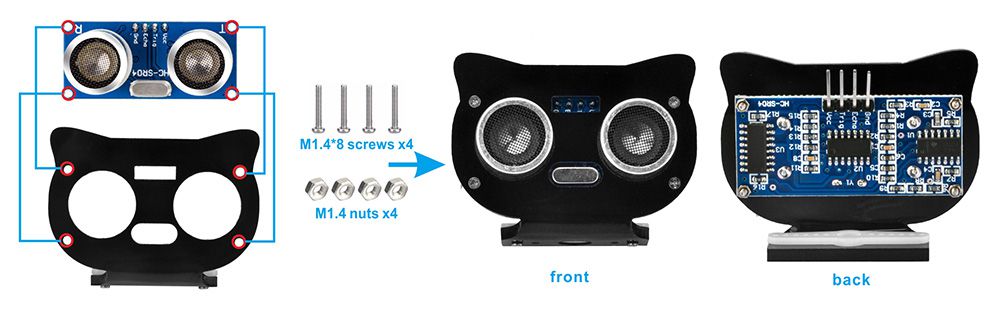
Step 4: Install ultrasonic module to mount holder with 4pcs M1.4*8 screw and M1.4 nuts
Step 5: Install mount holder for Ultrasonic Module on servo motor with M2*4 Self Tapping screw
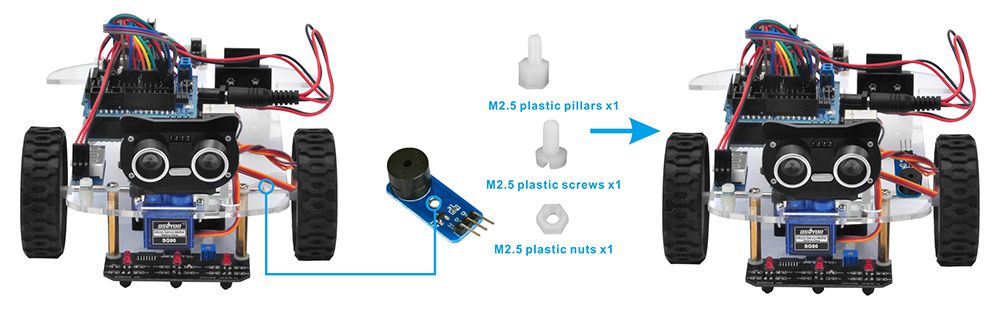
Step 6: Install buzzer module on car chassis with 1pc M3 plastic screw, M3 plastic pillar and M3 plastic nut
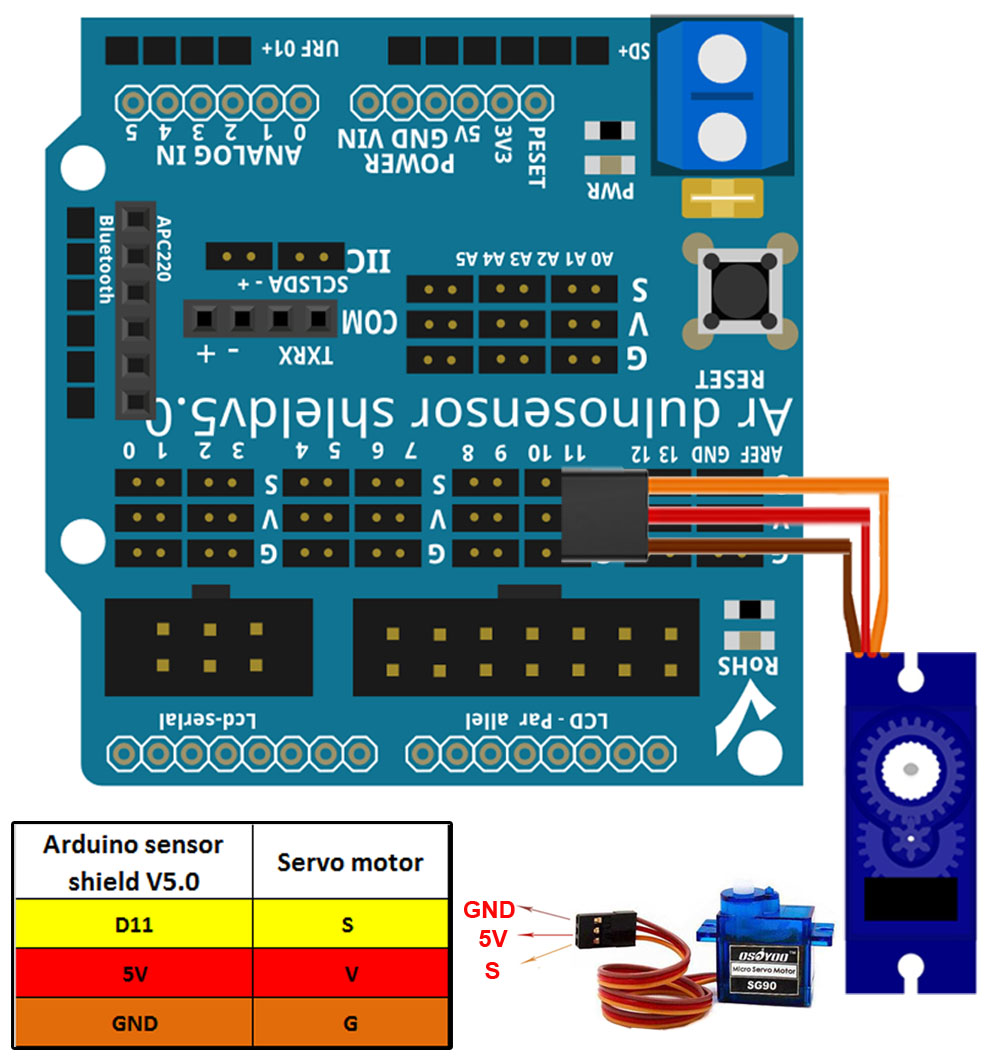
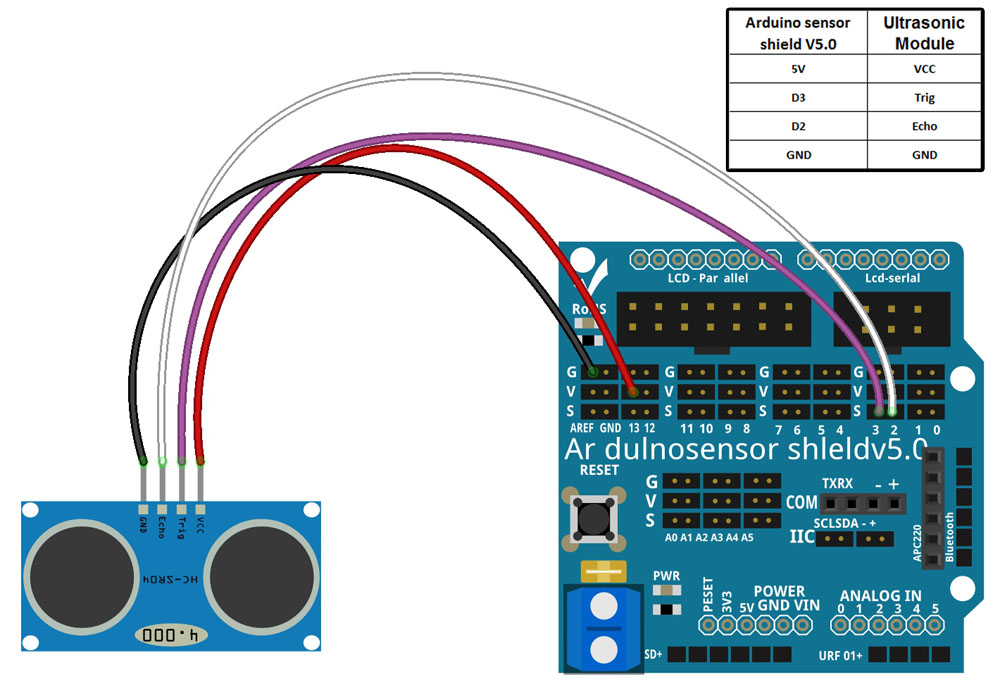
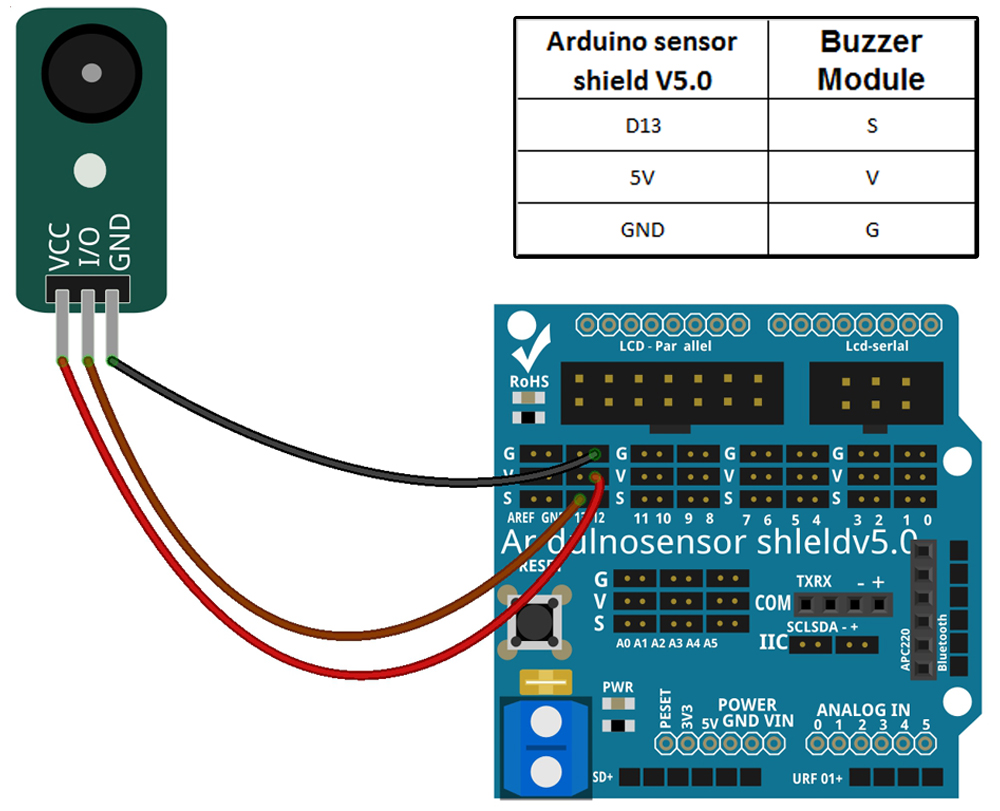
Step 7: Connect SG90 servo motor to sensor shield V5.0 as following graph (Remember : DO NOT remove any existing wires installed in Lesson 1 ) : Step 8: Connect ultrasonic module with sensor shield V5.0 as below connection diagram: Step 9: Connect buzzer module with sensor shield V5.0 as below connection diagram
Software Installation:
Notice: Shut off your battery or Unplug your power adapter when upload sketch code to Arduin.
Step 1: Install latest Arduino IDE (If you have Arduino IDE version after 1.1.16, please skip this step). Download Arduino IDe from https://www.arduino.cc/en/Main/Software?setlang=en , then install the software.
Step 2: Download sample code from Lesson 4 sample code , unzip the download zip file lesson4.zip, you will see a folder called lesson4.
Step 3: Connect OSOYOO Basic board to PC with USB cable, Open Arduino IDE -> click file -> click Open -> choose code “lesson4.ino” in lesson4 folder, load the code into arduin.
Step 4: Choose corresponding board/port for your project,upload the sketch to the board.
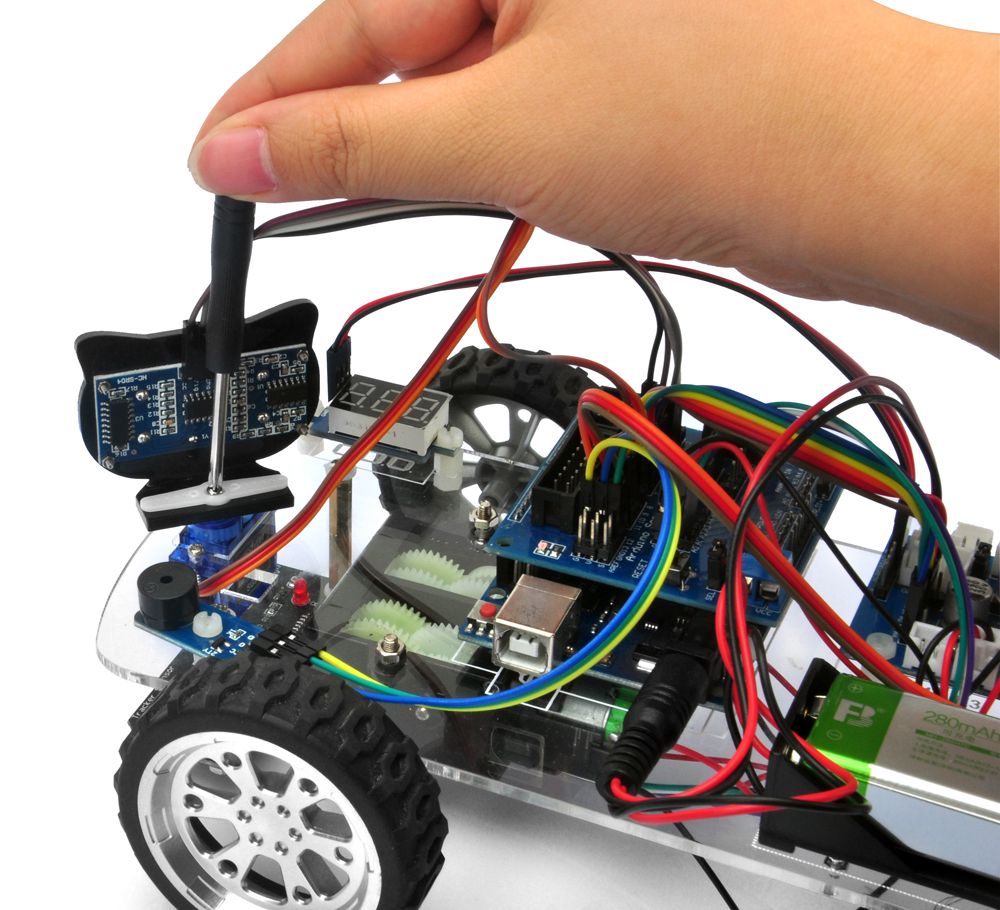
Step 5:Ultrasonic sensor servo initial direction alignment
After power on the car, you will hear a long beep sound, then the servo will make some movement and finally stops at a direction for 5 seconds.During this first 5 seconds, you must make sure the Ultrasonic sensor(two eyes) is facing straight forward.If it is not straight forward, you should turn off the car immediately and remove the sensor from servo, reinstall it and make it facing straight forward direction as following picture. Otherwise the obstacle avoidance program will not work properly.After adjusting sensor direction, power on the car again. After hearing the long beep, the sensor should face front same as following picture. If its direction is not straight forward, turn off the car and do direction alignment again.
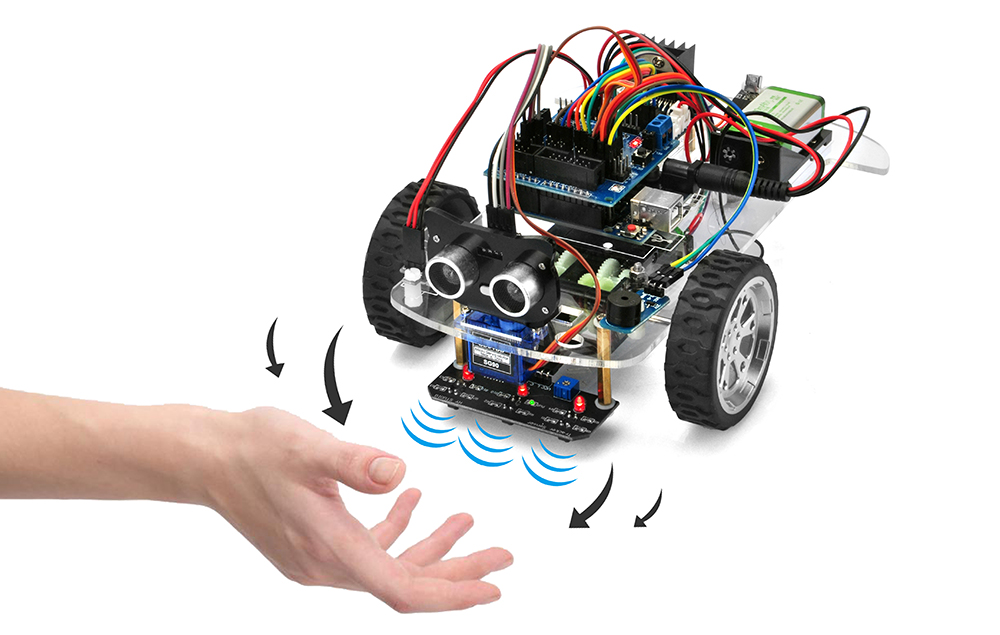
Final Testing :
Turn on the car, move object or your hand before ultrasonic module, and then the car will move in some distance of object or your hand. when you close the car, the car will move back, just as it says don’t touch me.
when object or your hand leave the ultrasonic module, the car will stop moving.