Introduction
In this lesson, we will show how to make an ultrasonic range finder and display the distance on the screen.
If you want to display the results from the HC-SR04 Ultrasonic Sensor on an I2C LCD you can use the following source.
Preparations
HARDWARE
- Osoyoo UNO Board (Fully compatible with Arduino UNO rev.3) x 1
- Ultrasonic Sensor HC-SR04 x 1
- I2C LCD1602 x 1
- Breadboard x 1
- Jumpers
- USB Cable x 1
- PC x 1
Connection
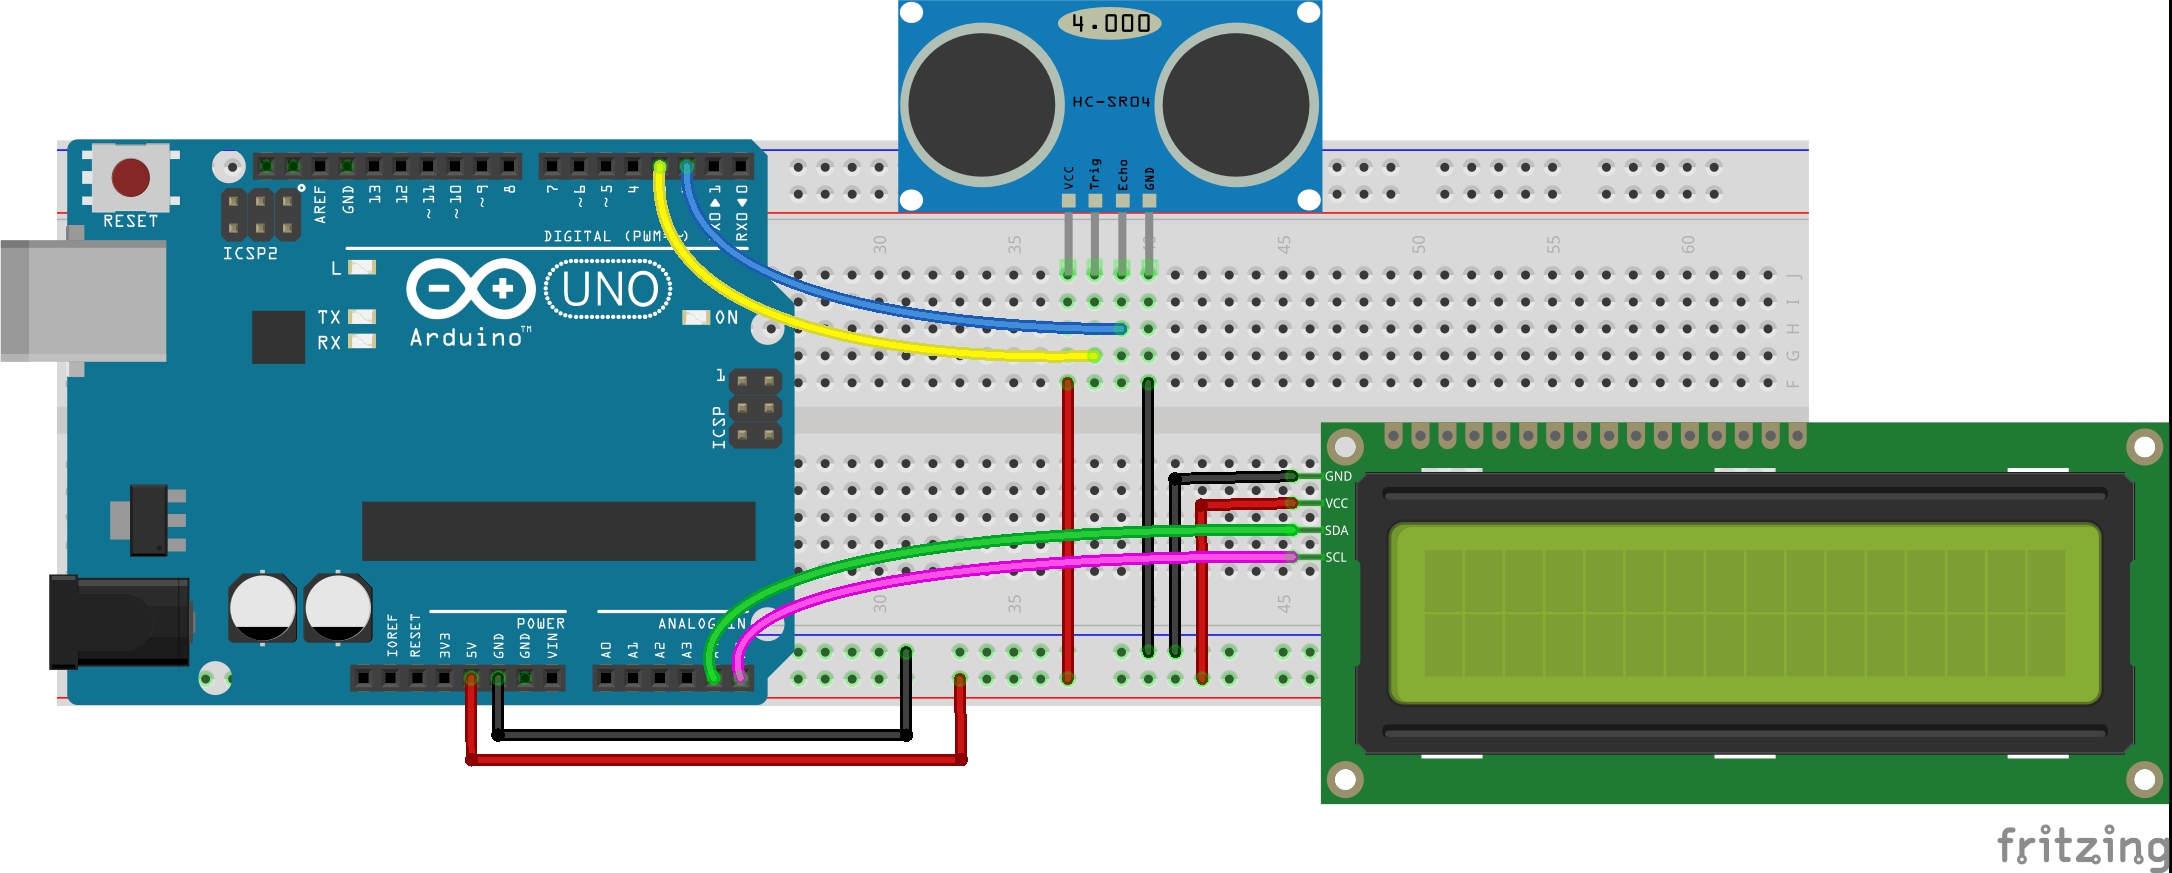
Before you write the code you have to build the circuit. To do this, connect the pins as follows:
| Osoyoo UNO |
I2C 1602 LCD |
| GND |
GND |
| 5V |
VCC |
| A4 |
SDA |
| A5 |
SCL |
Note:
- For Mega2560: the I2C connections are on SDA=20 and SCL=21. So go ahead and wire these up, along with the two power leads to the 5V and GND terminals.
- For Arduino Leonardo: connect SDA to digital pin 2 and SCL to digital pin 3 on your Arduino.
The HC-SR04 ultrasonic range finder has four pins: Vcc, Trig, Echo, and GND. The Vcc pin(Connect to +5V here) supplies the power to generate the ultrasonic pulses. The GND pin is connected to ground. The Trig pin(Connect to D3 here) is where the Arduino sends the signal to start the ultrasonic pulse. The Echo pin(Connect to D2 here) is where the ultrasonic range finder sends the information about the duration of the trip taken by the ultrasonic pulse to the Osoyoo Uno board.
Build the circuit as below digram:
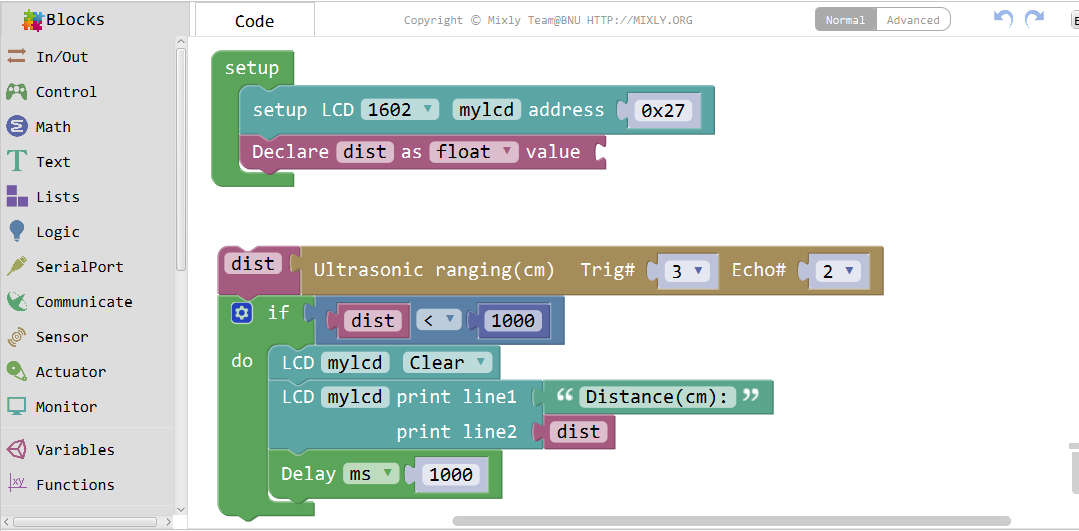
CODE PROGRAM
After above operations are completed, connect the Arduino board to your computer using the USB cable. The green power LED (labelled PWR) should go on.Open the Graphical Programming software Mixly and follow the next operations:

Click Save aftogramming is done. Select the board type and serial port before uploading. For instause a Uno board, just select Arduino/Genuino Uno: if you use a Mega2560, select Arduino/Genuino Mega or Mega2560. 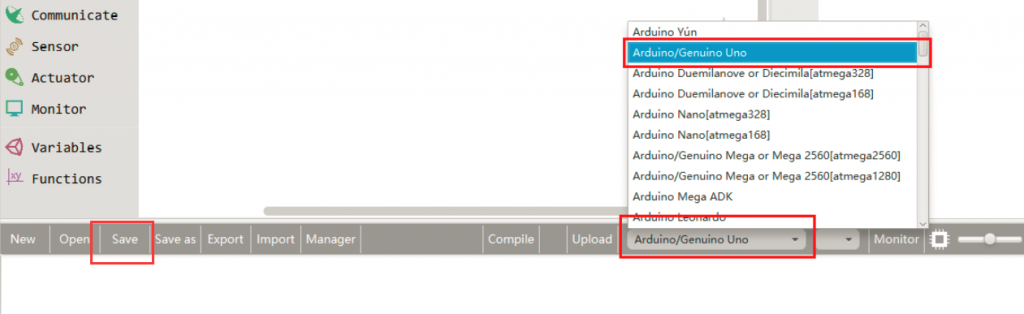
Select the serial device of the Arduino board from the COM menu. This is likely to be COM3 or higher (COM1 and COM2 are usually reserved for hardware serial ports). To find out, you can disconnect your Arduino board and re-open the menu; the entry that disappears should be the Arduino board. Reconnect the board and select that serial port.

Next,upload the code. If the uploading fails, check and correct the code according to the prompts


Finally, the staus will change to ‘Upload success!’.

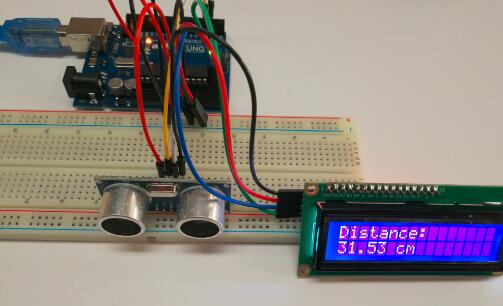
Running Result
A few seconds after the upload finishes, move a board close to the sensor or remove it farther. You can see the value displayed on the LCD changes accordingly; it indicates the distance between the board and the ultrasonic sensor.