Mecanum Omni direction wheel is a very interesting wheel which allows robot car make omni-directional movement( parallel shift to left and right).
In this project, we will show how to use Arduino to control an Osoyoo Brand Mecanum wheel robot car to make some basic movement including go forward, backward, left turn, right turn, parallel left shift, parallel right shift etc.
This lesson also shows you how to install the chassis of this car and connect Arduino control signal wires to two model-X (L298N) driver board. This installation will be the start point of our other lessons.
OSOYOO Mecanum wheels robotic car chassis x 1 (2xleft-wheels/2xright-wheels and Motor x 4)
OSOYOO Mega2560 board fully compatible with Arduino UNO/Mega2560 x 1
OSOYOO V1.0 WIFI shield x 1
OSOYOO Model X motor driver x 2
OSOYOO battery box x 1
OSOYOO 2 pin XH.25 female to femalex 1 18650 batteries(3.7V) x 2 +charger
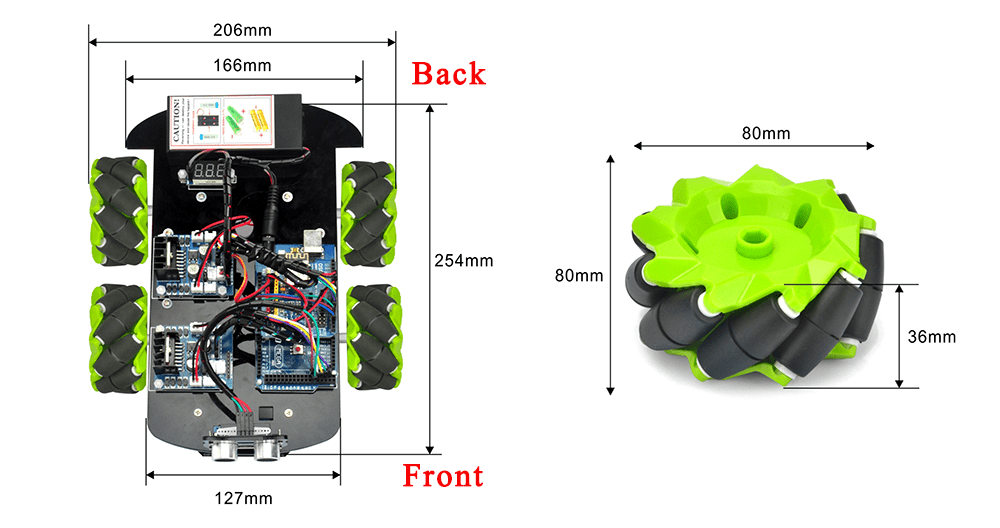
Picture 1: Size dimensions
Video made by our France Customer for Basic robot car assembly
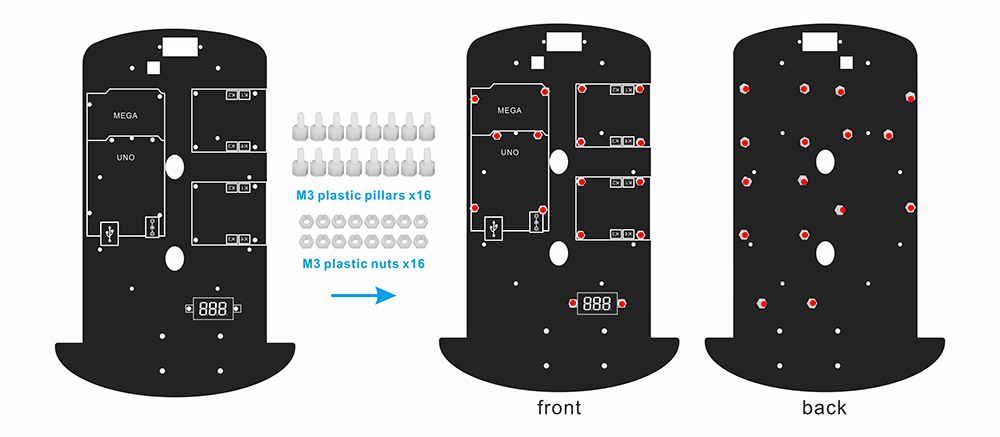
Step1: Install 16pcs M3 plastic screws and plastic pillars as per the chassis screw location map (view from top).
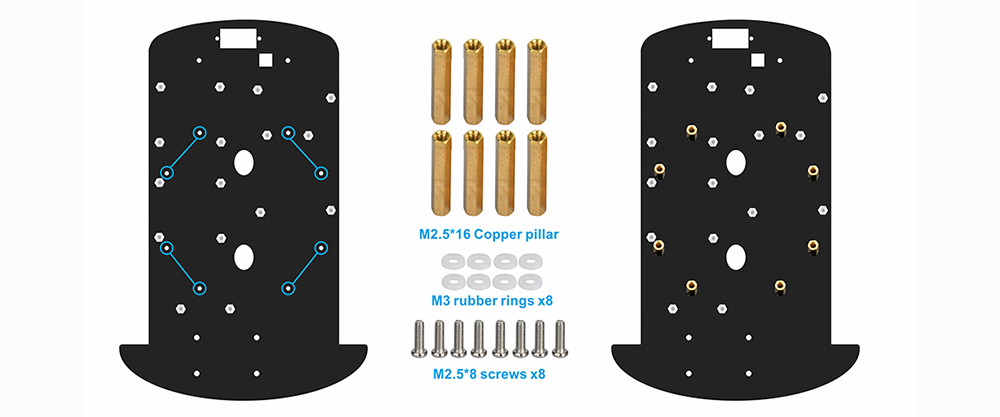
Step2: Install 4 copper standoff on the positions of the blue lines as per the picture.Motor fasten screws location map (view from bottom of the chassis)
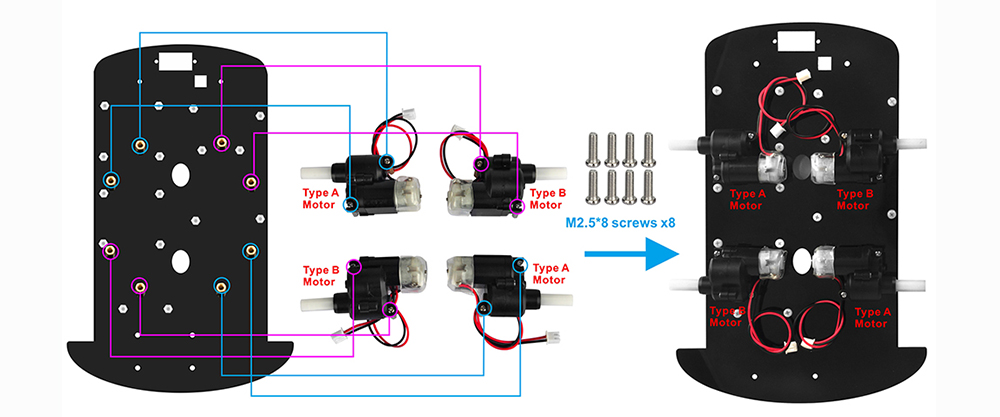
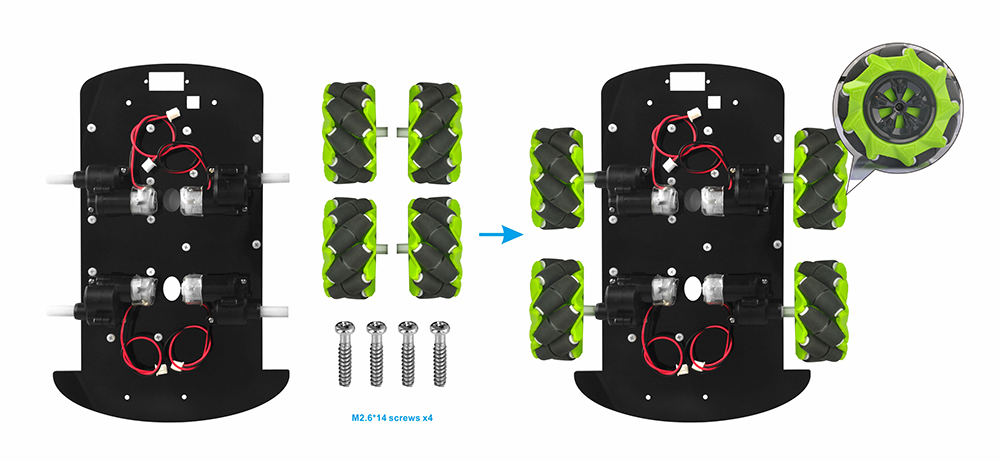
Step3: Fasten the 4 motors onto the 4 standoffs. Make sure the motor directions must be correct(exactly same as picture).
Step4: Install the 4 wheels with 4pcs M2.6×14 screws as per the following pictures (view from bottom of the chassis).
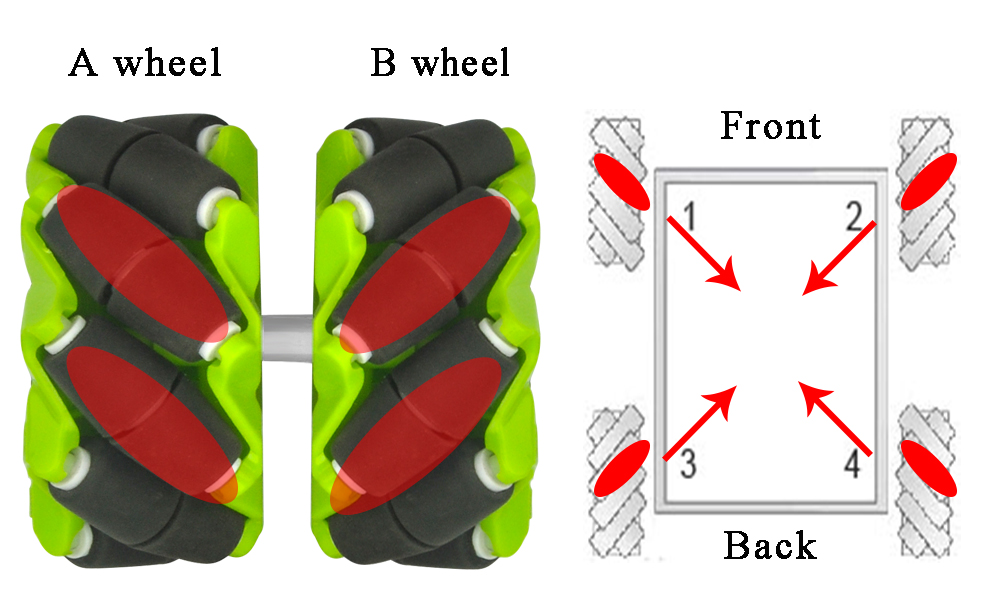
The Mecanum wheel has some sub-wheels on the main wheel. The four Mecanum wheels have two types by the sub-wheel directions. Check the type A wheel and type Wheel by following picture 8 left side . You must 100% sure that correct type of wheel is installed into correct position as per picture 8 right side, the rolling direction of each wheel will determine the whole car moving directions showed in the picture.
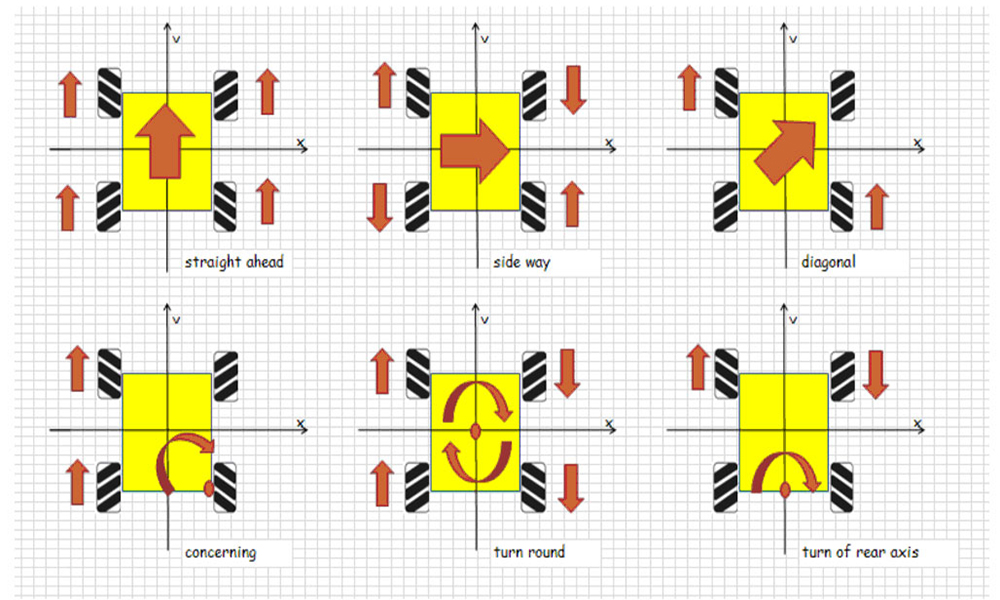
Different rotation combination of 4 wheels will result in different car movement directions. Following pictures shows how they works.
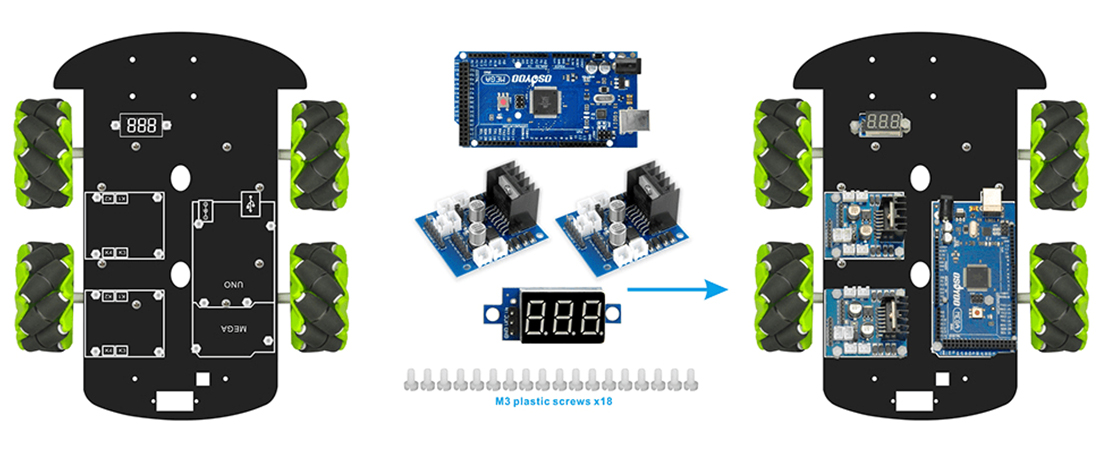
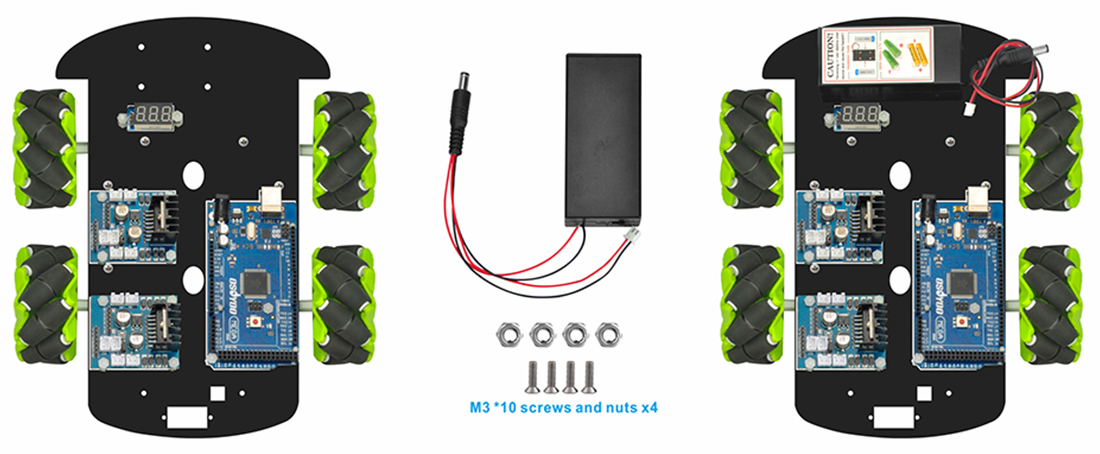
Step5: Install Mega2560, 2pcs model X boards(L298N), WIFI shield and voltage meter onto the chassis with M3 nuts.
Step6: Install battery box with 4pcs M3x10 screws.
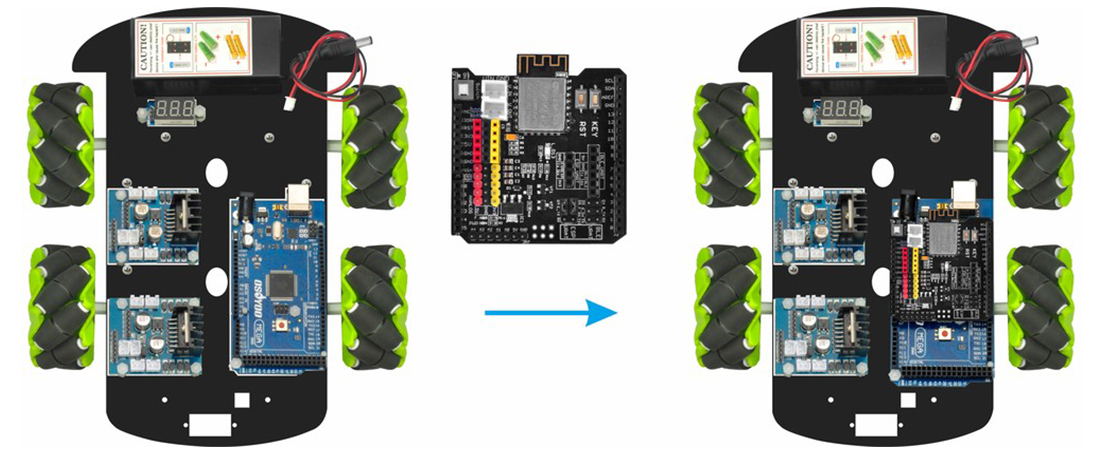
Step7:Insert OSOYOO Uart WIFI shield onto your Mega2560 board.
Caution:
When insert/remove the 6-pin parallel cable plug into Model X 6-pin male socket, please hold the black plastic pin-holder to do operation. Never drag the wires to pull the plug out of the socket, otherwise it will damage the wires.
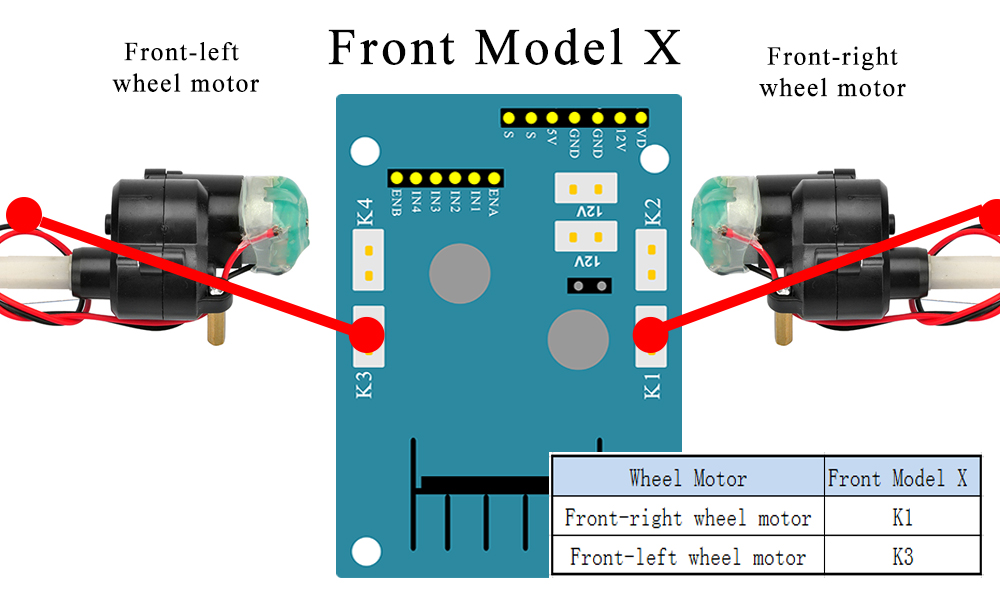
Step1: Connect front model X board (L298N) to front motors as per the picture.
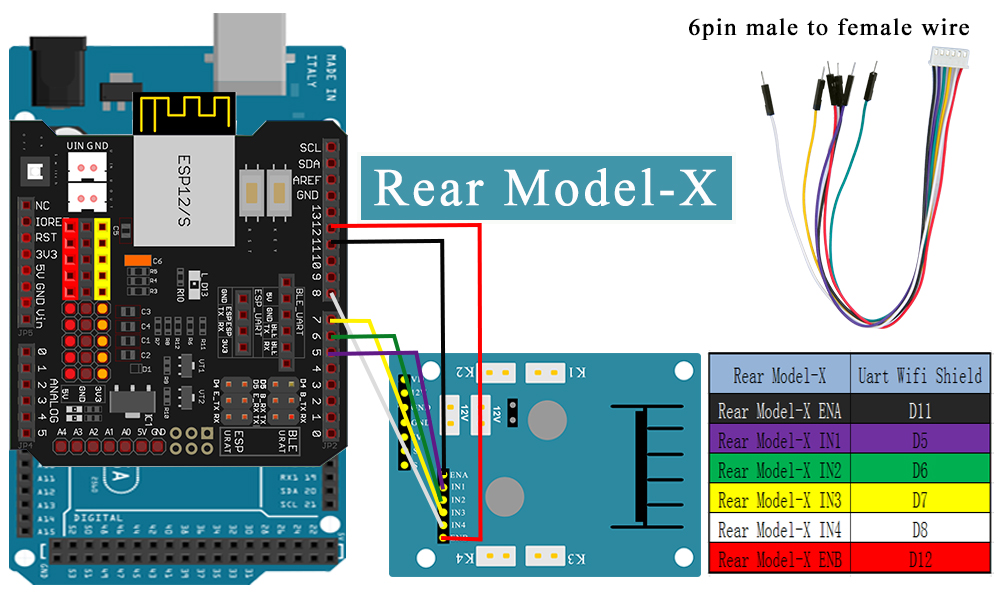
Step2: Connect rear model X board(L298N) to rear motors as per the picture.
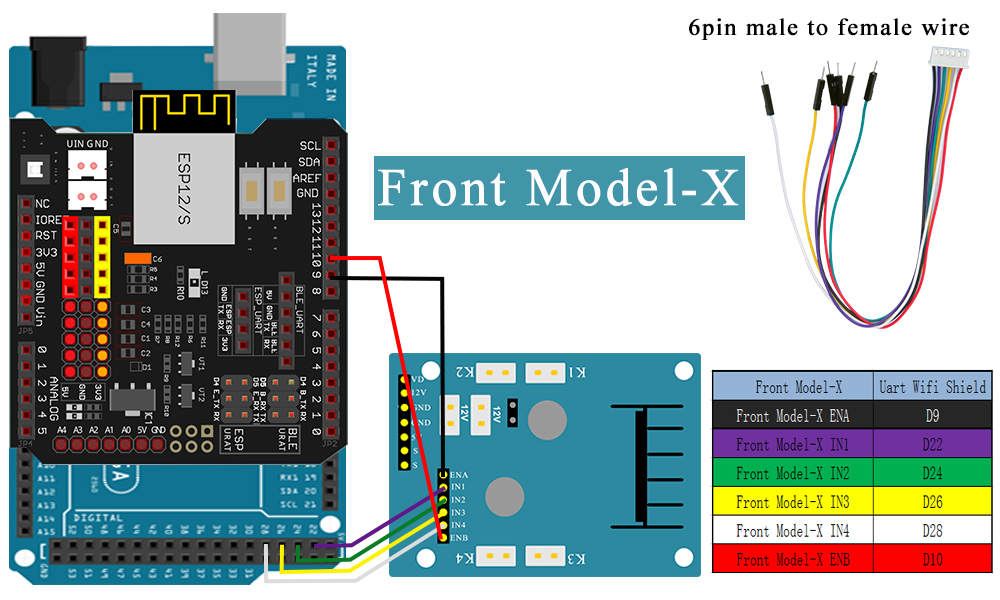
Step3:Connect front model X control pins to MEGA2560 with 6pin male to female jumper wire.
Note: wire(purple wire) is connected to D22 which is located on the SECOND female hole from right in following picture 10. Many people treat the first hole as D22. THIS IS WRONG.
Front Model X board IN1,IN2,IN3,IN4 pin connect to D22,D24,D26,D28.
Step4:Connect Rear model X control pins to Mega2560 with 6pin male to female jumper wire.
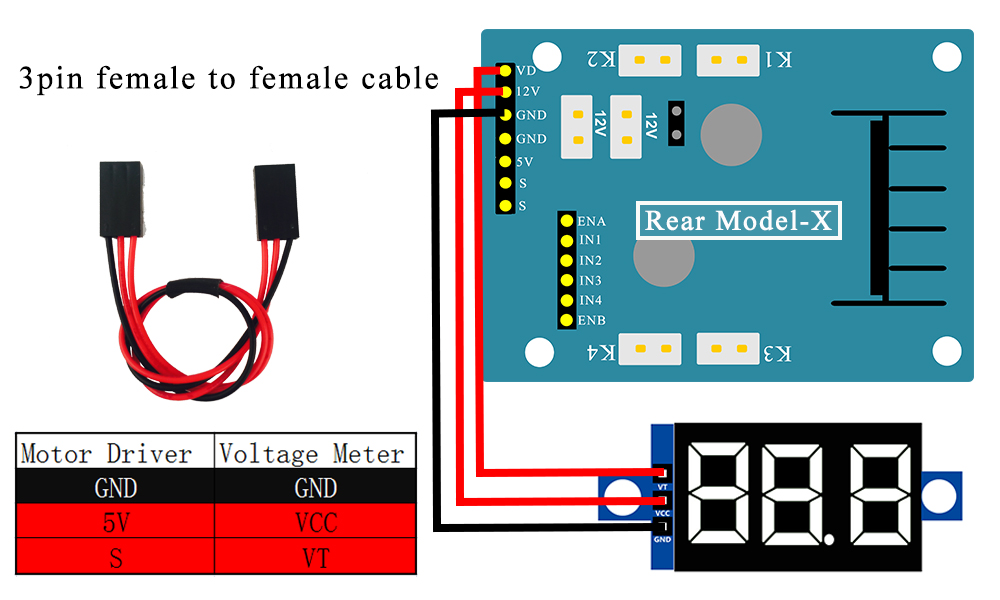
Step5: Connect Voltage meter to model X with 3pin female to female jumper wire.
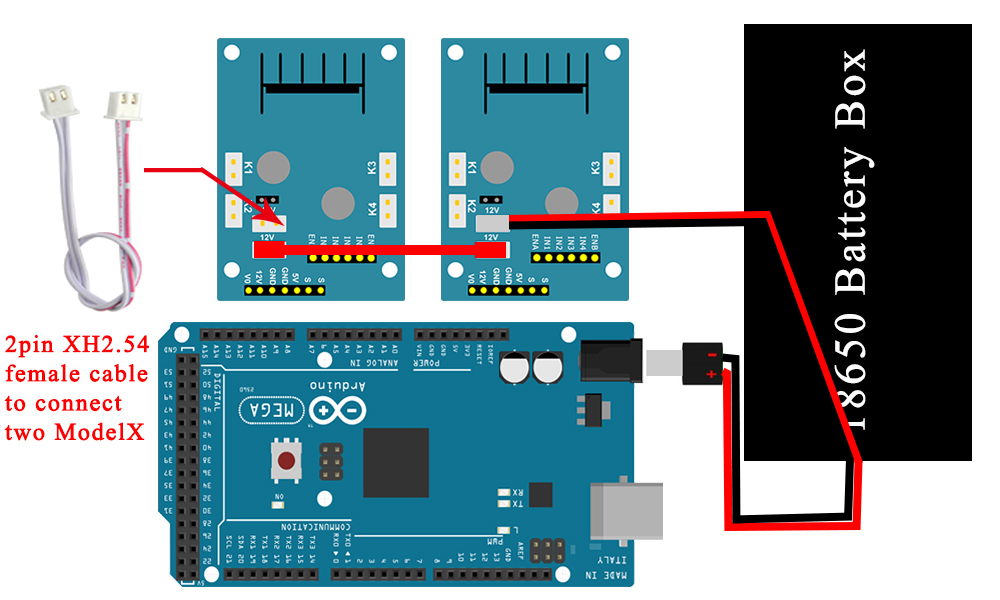
Step6: Connect OSOYOO two model X board 12V-GND socket with 2pin PnP cable 20cm as per following graph.
Step 1: Install latest Arduino IDE (If you have Arduino IDE version after 1.1.16, please skip this step). Download Arduino IDE from https://www.arduino.cc/en/Main/Software?setlang=en , then install the software.
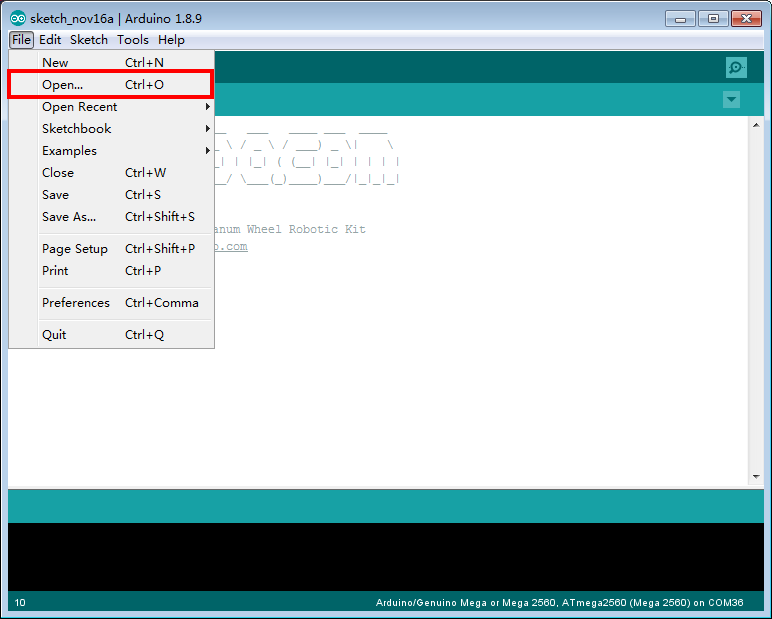
Step 3: Connect Mega2560 board to PC with USB cable, Open Arduino IDE -> click file -> click Open -> choose code “lesson1.ino” in lesson1 folder, load the code into arduino.
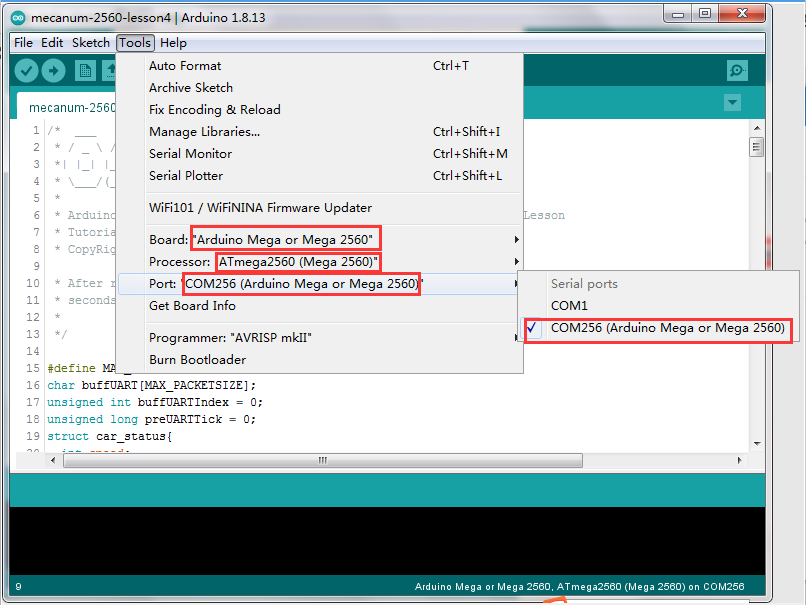
Step 4: Choose corresponding board/port for your project,upload the sketch to the board.
After running Lesson 1 code, the car will move
Forward/Backward
Left/Right Turn
Right Parallel Shift/Left Parallel Shift
Down Left Diagonal / Up Right Diagonal
Up Left Diagonal / Down Right Diagonal
We have two type of motors. Most of our cars are made of Type A motors and a few of them are Type B. Type B motor rotates at reverse direction of Type A motor.
After running Lesson 1 code, the Type A car will move as following sequence:
Forward→Backward→Left turn→Right turn→
Right Parallel Shift→Left Parallel Shift→
Down Left Diagonal→ Up Right Diagonal→
Up Left Diagonal → Down Right Diagonal
If you Mecanum car doesn’t move as per the above sequence, then your motor might be Type B. When type B car is running lesson 1 default sketch, its moving sequence is:
Backward→Forward→Right turn→Left turn→
Left Parallel Shift→Right Parallel Shift→
Up Right Diagonal→Down Left Diagonal→
Down Right Diagonal→Up Left Diagonal
It is important to test whether your car is Type A or Type B. Our default code in all the 5 lessons are designed for Type A motor.
If your car is Type B, then you need use reversed sketch code as following, otherwise the project might not work properly: