Overview
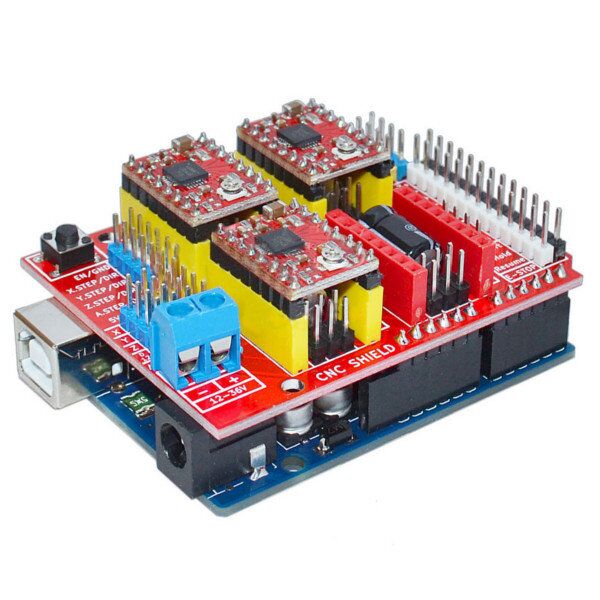
CNC Shield V3.0 can be used as drive expansion board for engraving machine, 3D printer and other devices. There’re 4 slots in the board for stepper motor drive modules, can drive 4 stepper motors, and each step stepper motor only need two IO port, that is to say, 6 IO ports can quite well to manage three stepper motor, it’s very convenient to use. After insert CNC Shield V3.0 into OSOYOO Basic board, and installed GRBL firmware then you can quickly DIY a CNC engraving machine.
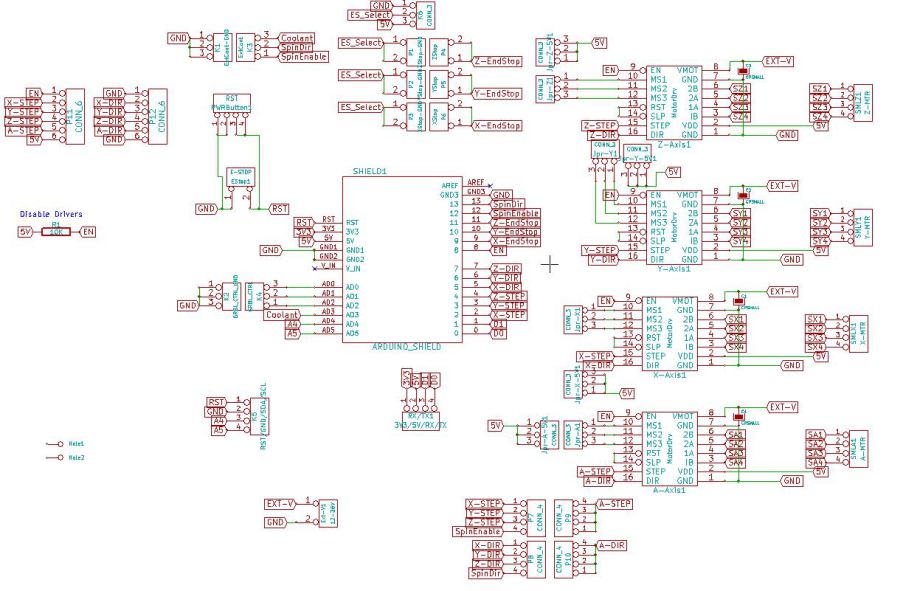
Board Layout
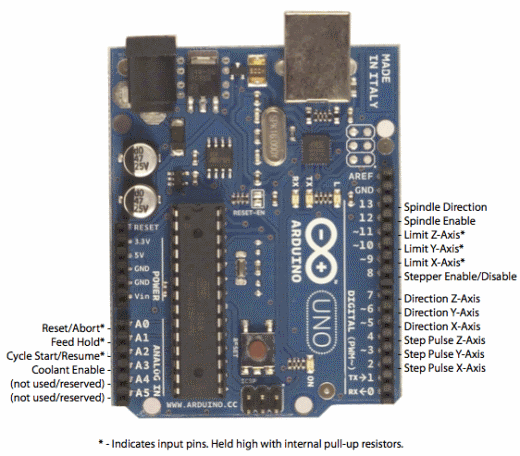
GRBL Pin Layout:

GRBL Pin Layout
In addition to have all the GRBL function pin, Arduino CNC Shield V3.0 also have some additional pins to achieve more features:
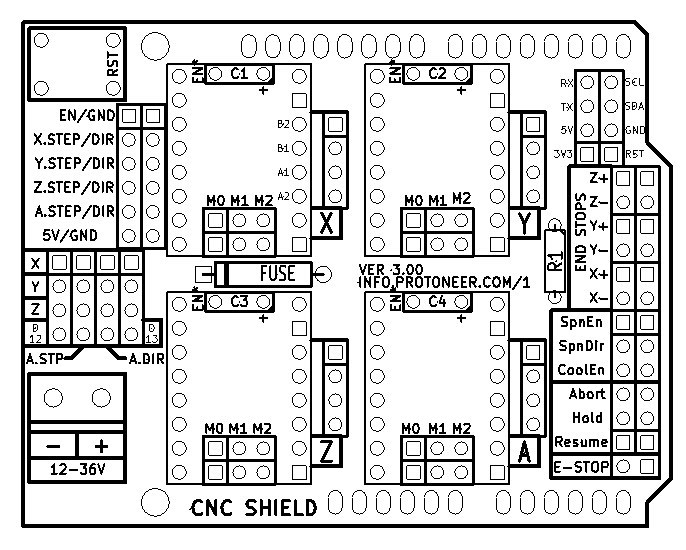
Extra pins:
- Limit switch pins have been doubled up so that each axis has a “Top/+” and “Bottom/-“. This makes it easier to install two limit switches for each axis. (For use with a normally open switch)
- EStop – These pins can be connected to an emergency stop switch. This does the same as the RESET button on the Arduino board. (We do advice that an extra emergency button also be installed that cuts power to all machinery. A REAL EMERGENCY BUTTON)
- Spindle and coolant control has their own pins.
- External GRBL Command Pins have been broken out allowing you to add buttons for Pause/Hold , Resume and Abort.
- Serial Pins (D0-1) and I2C Pins (A4-5) have their own break out pins for future extensions. I2C can later be implemented by software to control things like spindle speed or heat control.
- Version 3.00 of the board added a jumpers to configure the 4th axis(Clone the other axis’s or run from Pin D12-13), Comms Header(RX+TX , I2C) and a Stepper Control Header(All Pins needed to run 4 steppers)
Hardware installation
Connect the components according to the actual situation, such as motors, limit switches, lasers, motor drives and so on.
When installing the hardware, please pay attention to the following points:
1) Incorrect connection of +/- may destroy your devices, even cause fire.
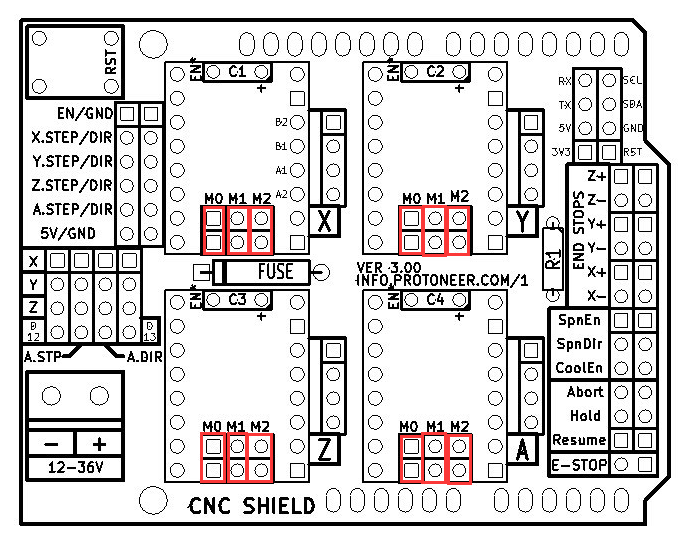
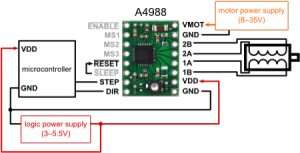
2) Please make sure to insert drivers in correct direction, or it may burn the mainboard and drivers, specific installation direction please integrating Arduino CNC Shield V3.0, refer to the data sheet of motor drive. The picture shows the connection of A4988 motor drivers and Arduino CNC Shield V3.0.
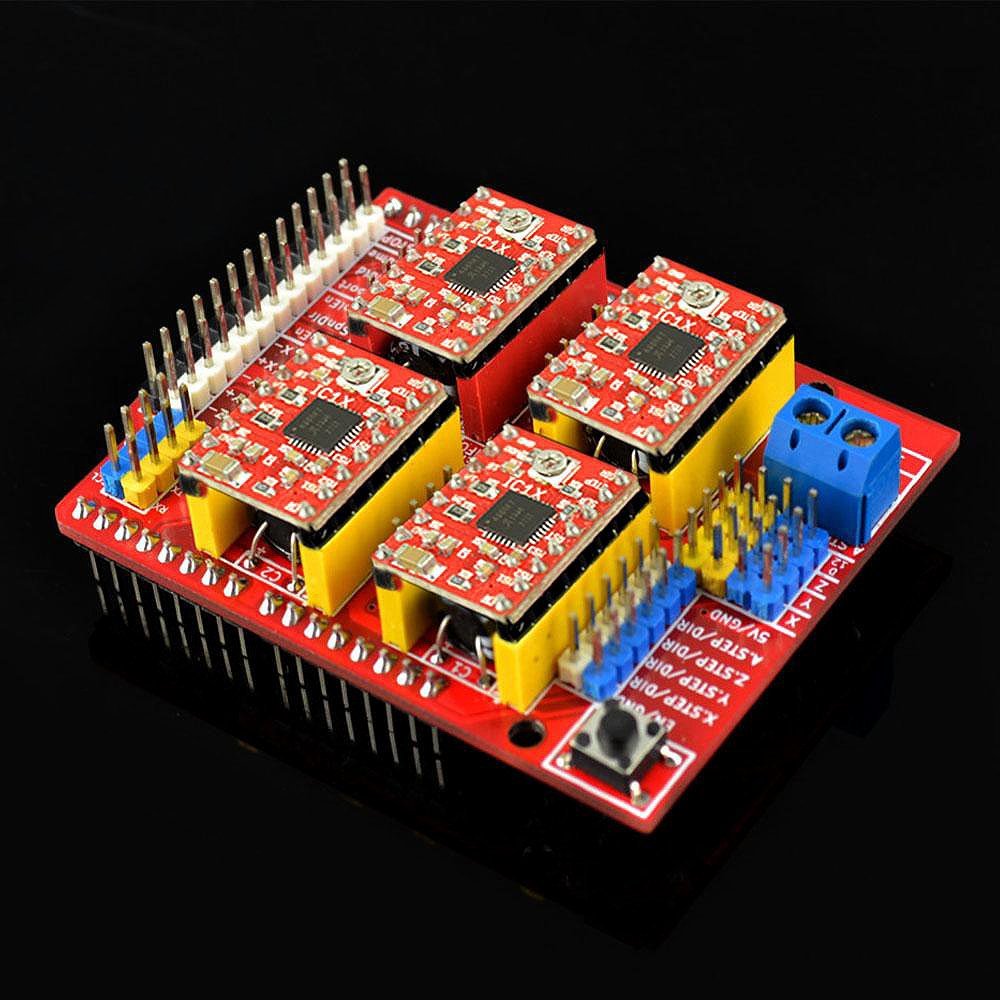
A4988 support 1 segment, 1/2 segment, 1/4 segment, 1/8 segment, 1/16 segment. Each segment is set by the M0, M1, M2 pin header in the Arduino CNC Shield V3.0, cover the jumper cap to the pin header represents high level, do not cover the jumper cap represents low level.
In order to improve the precision of engraving, use 1/16 segment, it needs 3 jumper caps to cover M0, M1, M2. As shown in picture:
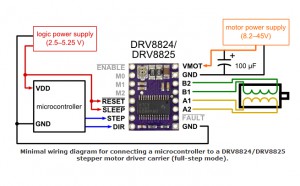
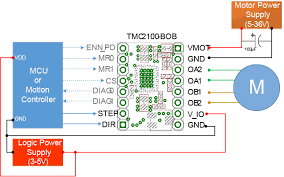
3) The input voltage of Arduino CNC Shield V3.0 is DC 12V-36V, do not input more than 36V voltage. Although the input voltage supports power supplies up to 36V, does not mean that you can use 36v under any circumstances, because some motor drivers supply voltage (VMOT) is less than 36V, such as A4988, its supply voltage is 8-35V, if you use 36V power supply, it will burn the motor driver. So when you select the power supply, please refer to the corresponding the motor driver’s data sheet. Here are a few supply voltage parameters for commonly motor driver:
A4988
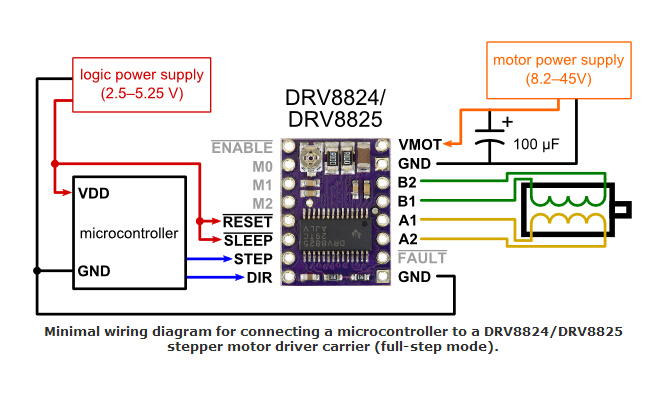
DRV8824/DRV8825
TMC2100
Software installation
1) GRBL Library Installation
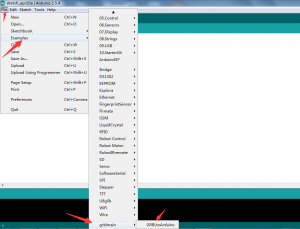
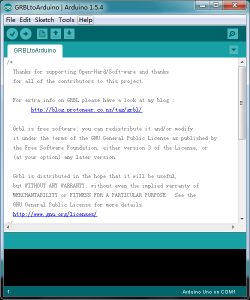
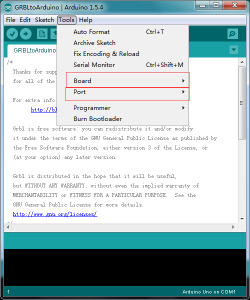
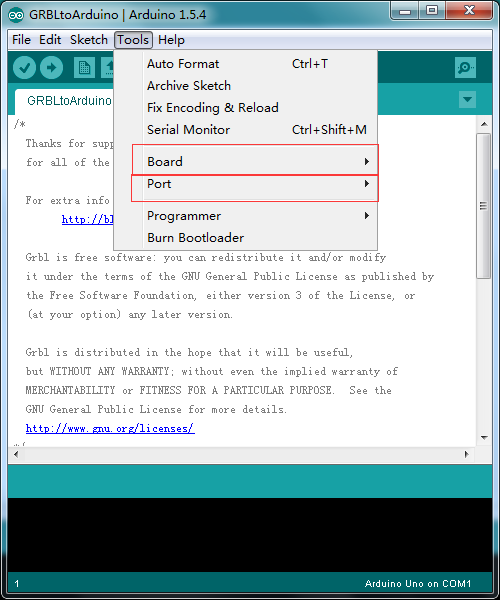
Download and unzip grblmain.zip, put it to libraries folder of Arduino IDE installation directory. Open Arduino IDE, choose File->Examples->grblmain->GRBLtoArduino, then you’ll open a grbl sample program, select the port and board type, burn this grbl sample program to Arduino UNO.
2) Install GRBL Controller
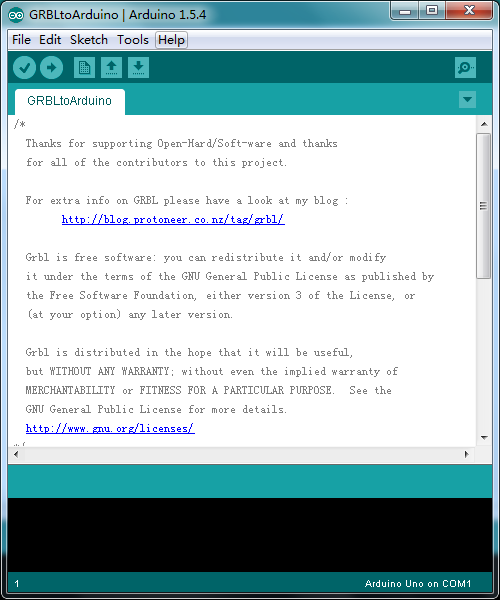
Download and install Grbl Controller, open it, interface as shown in picture:

Use the USB cable to connect your PC and Arduino UNO, select the port and select the baud rate as 9600. Click “Open”, if it connected, “Open” will be “Close/Reset “, the background is red. Click “Choose File” to choose the graphy you want to engrave, after selected click “Begin” to engrave.


hola soy nuevo en esto, tengo una duda quizas sea absurda pero me gustaria saber si puedo conectar la CNC shield a una fuente que me proporciona 25A. GRACIAS
si puedes conectar esa fuente, el driver y motor tomara solo lo que necesita para funcionar.
visita mi pagina en FB electronica para aficionados!
saludos!
Do anybody know how to build a laser cutter with the UNO-cnc-shield V3 or Nano-V4-shield.
How do i use servo motor MG90S at z axis to make the cnc engraving machine into a cnc plotter machine? please help.
every time I plug the power supply in one of the drivers burn up. Why would this happen?