


Robot Tank Car Chassis
| Buy from US |
Buy from UK |
Buy from DE |
Buy from IT |
Buy from FR |
Buy from ES |
 |
 |
 |
 |
 |
 |
Robot Tank Car Electronic Parts Kit
| Buy from US |
Buy from UK |
Buy from DE |
Buy from IT |
Buy from FR |
Buy from ES |
|
|
|
|
|
|

In this lesson, we will install the most basic framework.

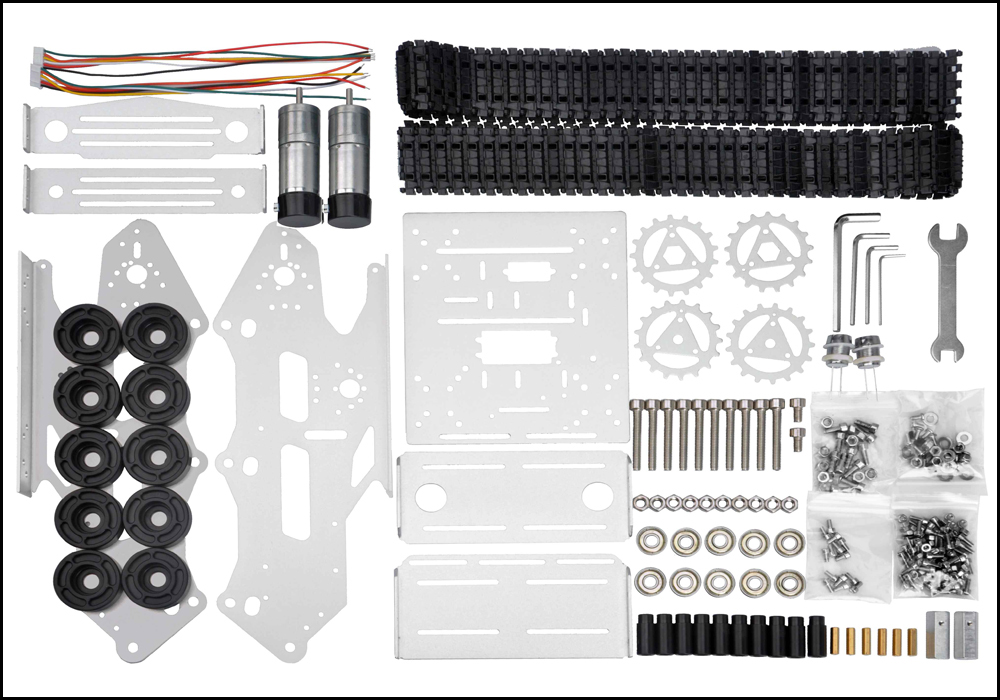
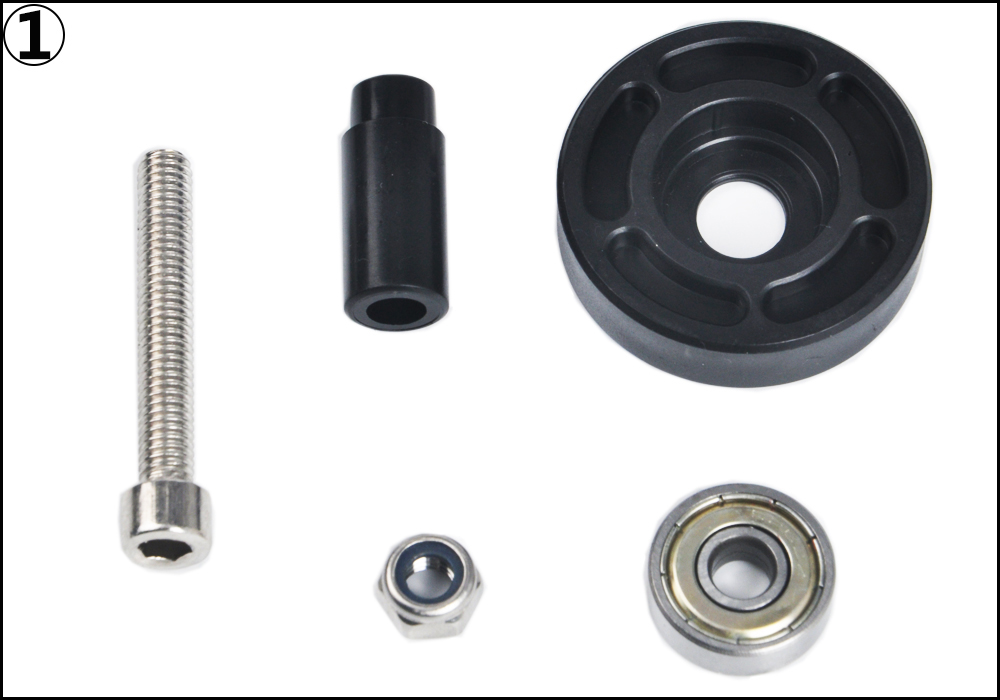
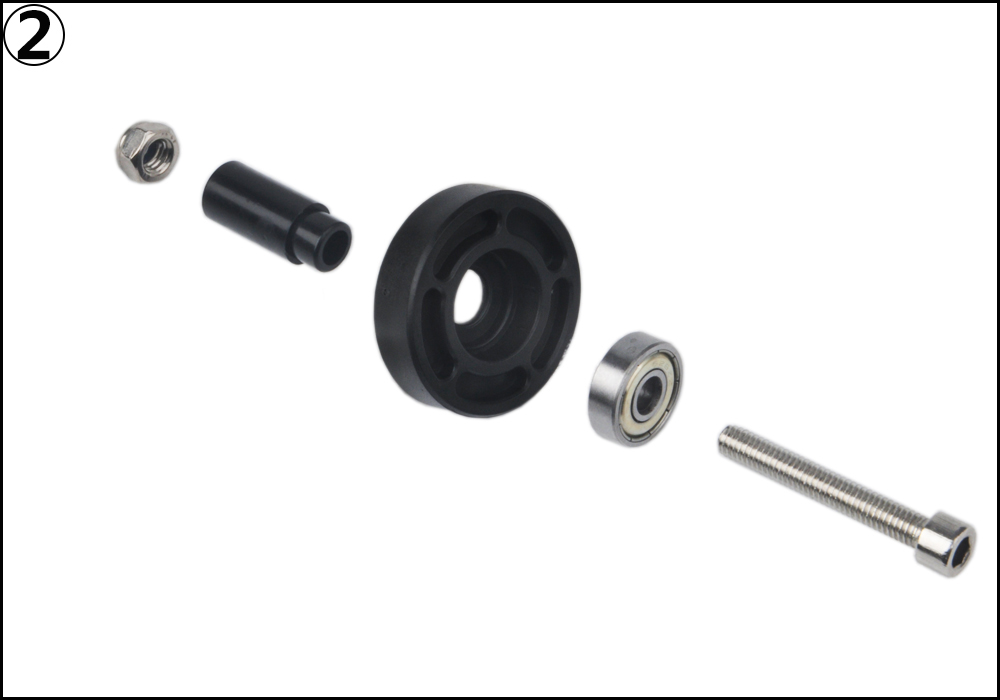
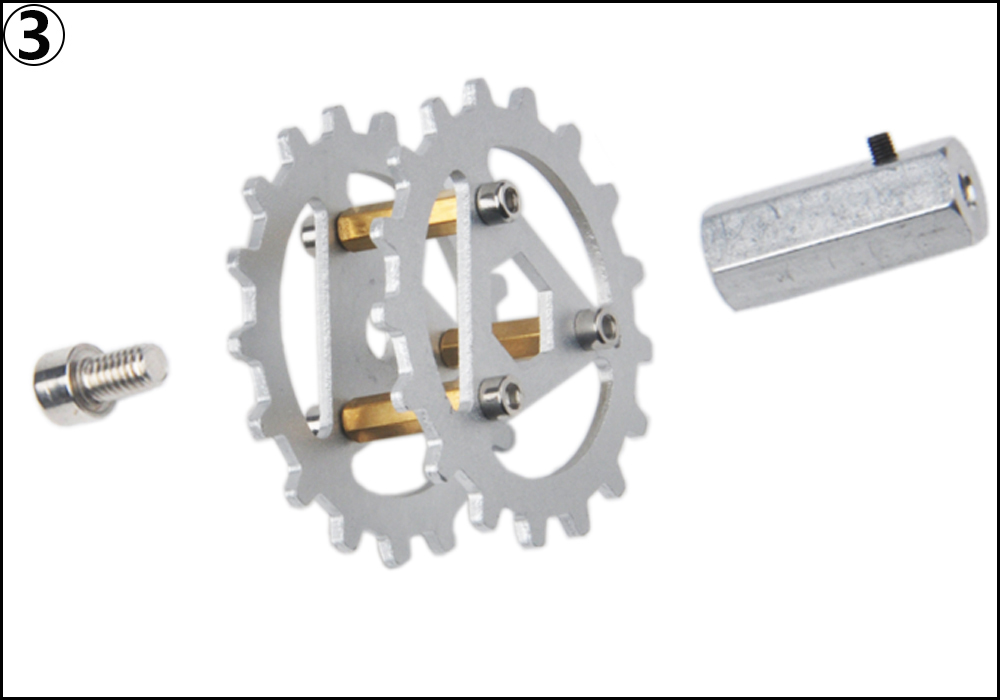
 Step1: Assemble the carrying wheels (x10)
Main components:
1x black wheel
1x bearing
1x circle shaft
1x M6 nuts
1x M6*40 inner hexagon screws
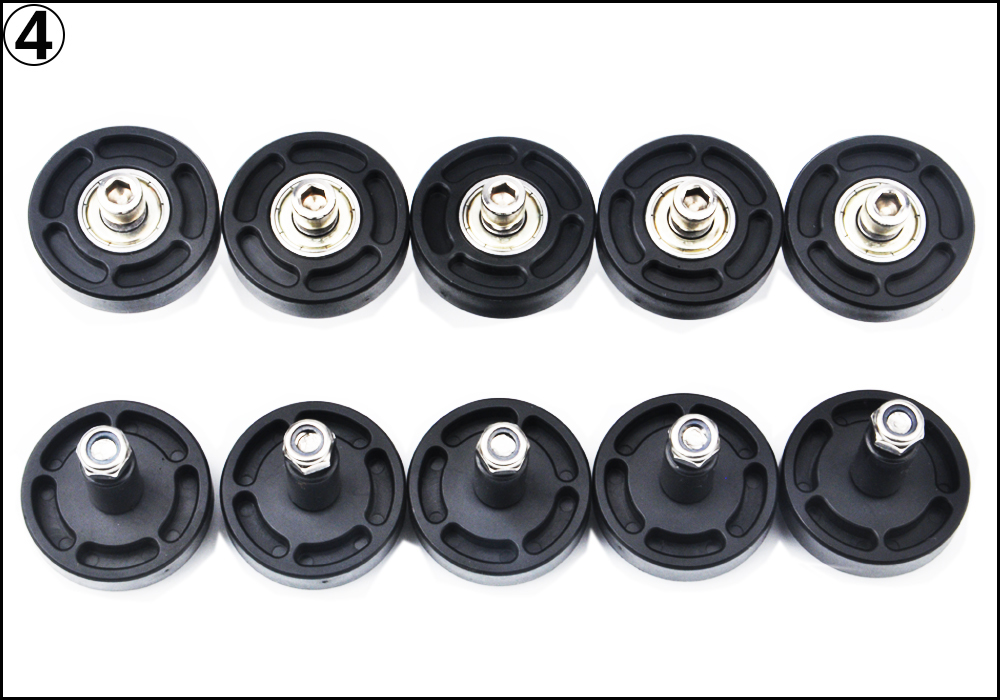
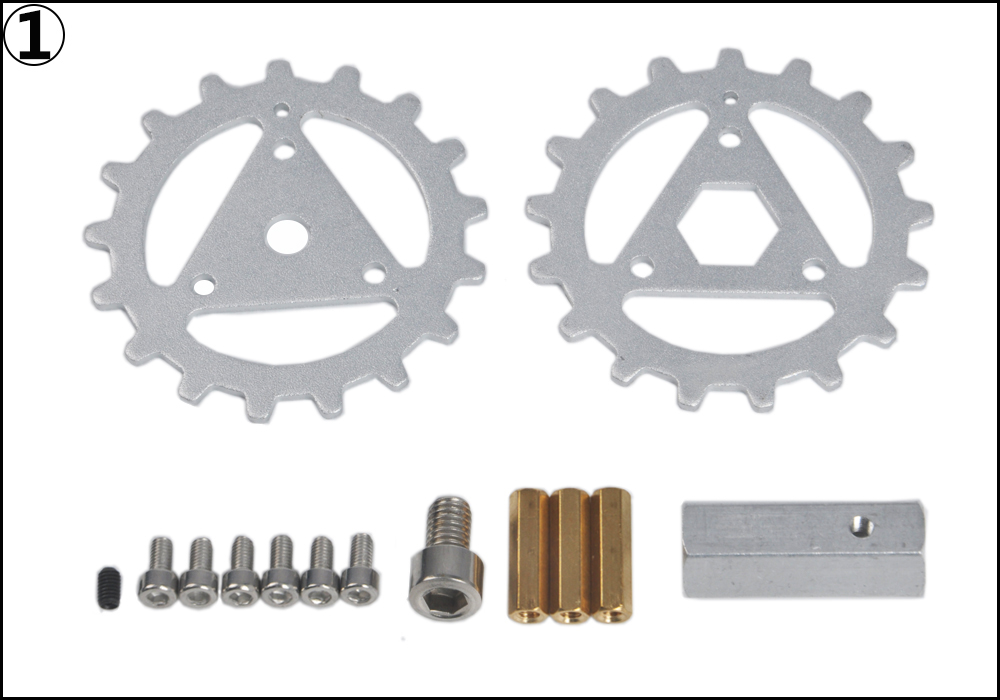
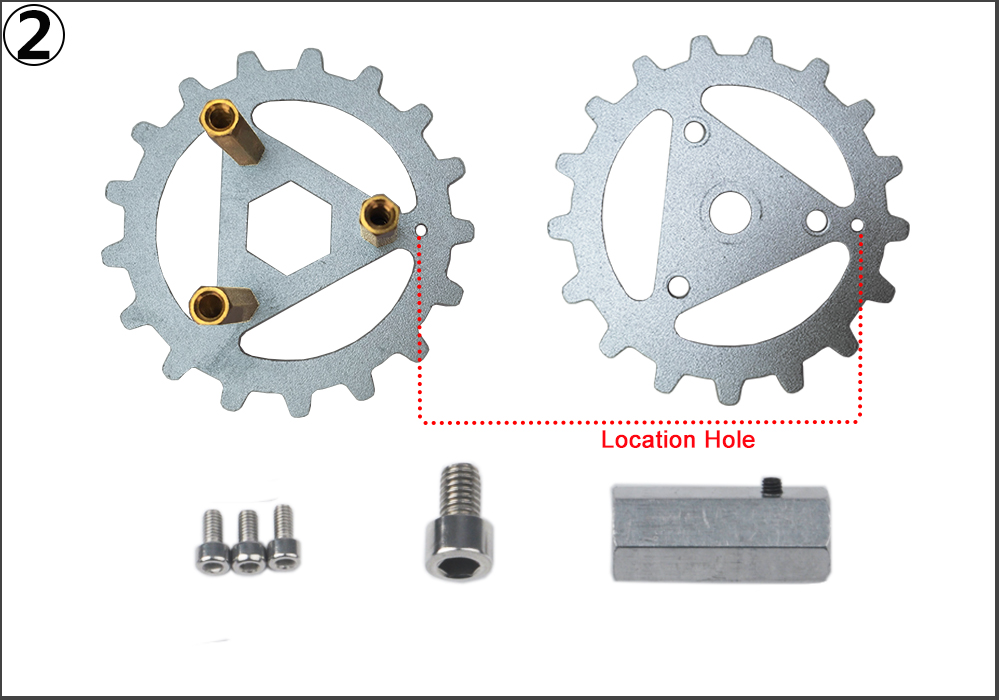
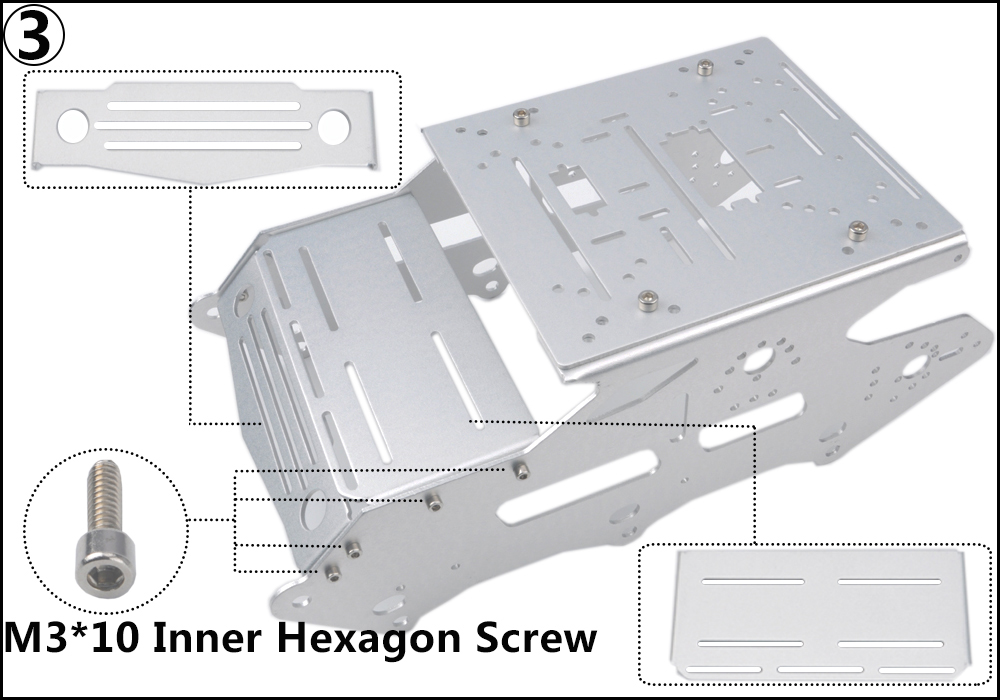
Step2: Assemble the driving wheels(x2)
Main components:
2x wheel pieces
3x copper pillar
1x Al-alloy coupling
1x jackscrews
1x M6*10 inner hexagon screws
6x M3*10 inner hexagon screws
Note:
1)Please align the two location holes in the wheel pieces.
2)Install the jackscrews into the al-alloy coupling, then insert the al-alloy coupling into the big hole of driving wheel, fix the al-alloy coupling with M6 hex screws.
3)To fix the driving wheels on motors easily,do not tighten the jackscrews.
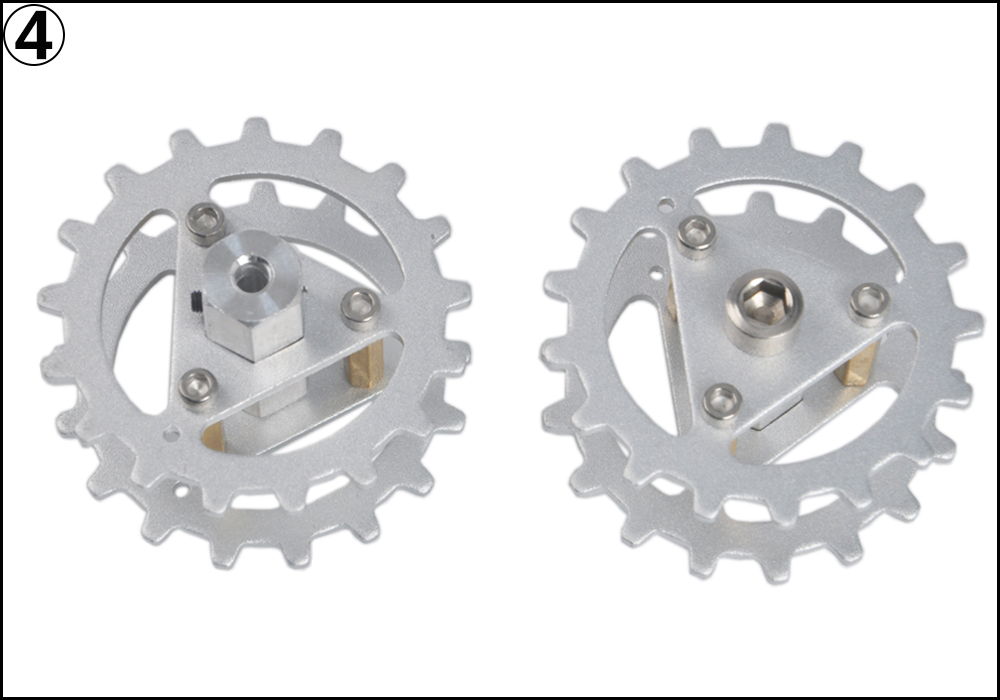
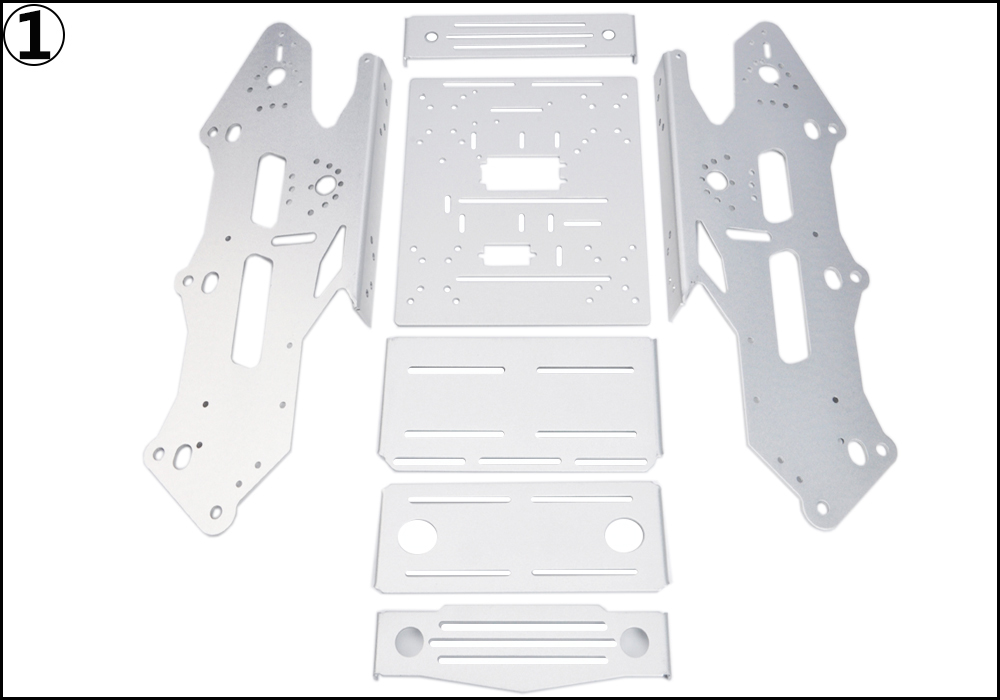
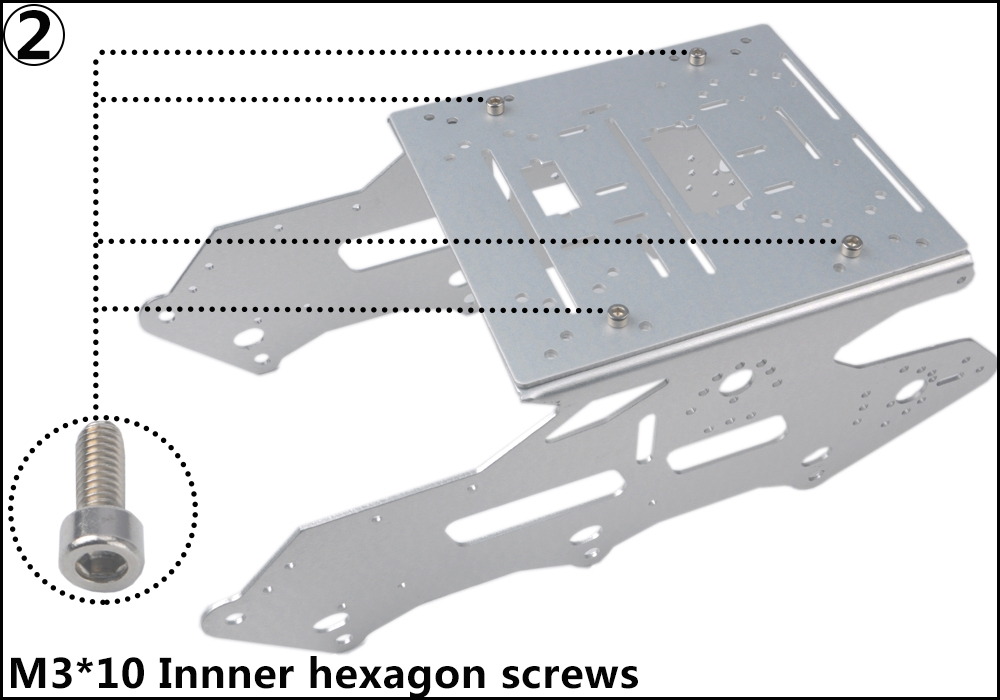
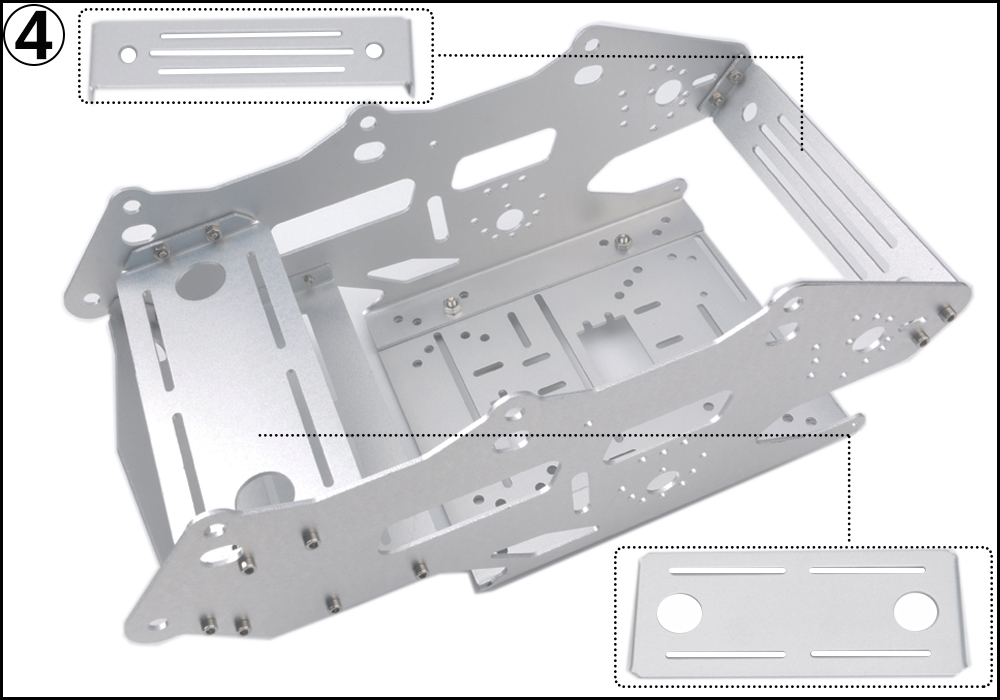
Step3: Install the main plate
Main components:
5x plates (include the base plate and subplates as following pictures)
20x M3*10 inner hexagon screws
Note:
Fix the biggest base plate with 4 pieces M3*10 screws for the first time, then fix the other subplates in turn as the following pictures.
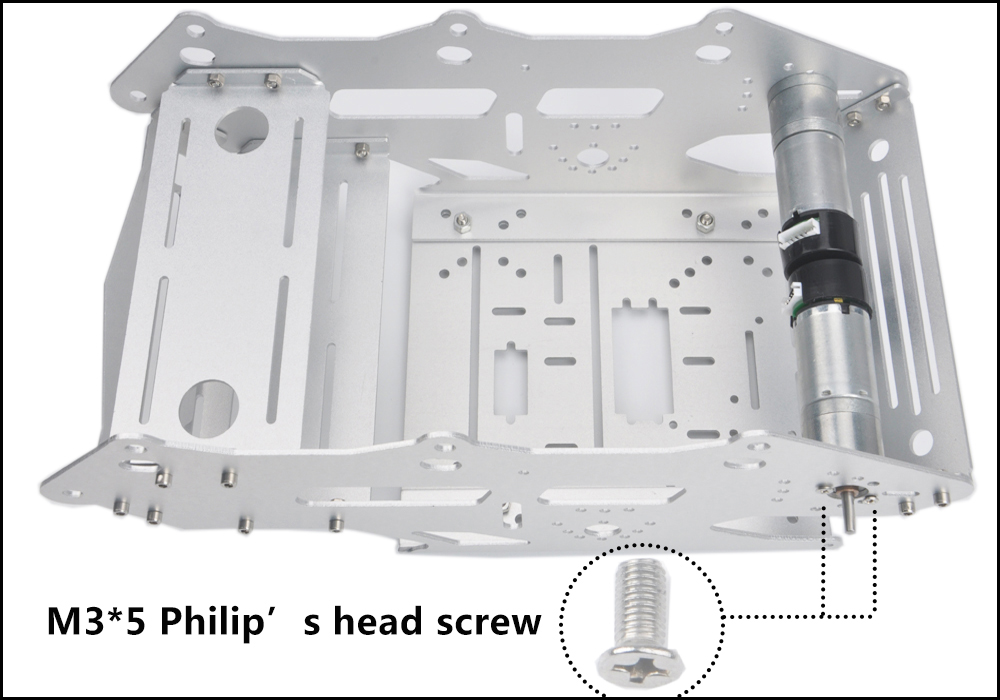
step 4: Install motor
Main components:
2x side plates (include left side plate and right side plate)
2x motors
4x M3*5 screws (phillips head)
Note: When you fix the motor with phillips head screw, please do not use too long screw to avoid getting stuck.
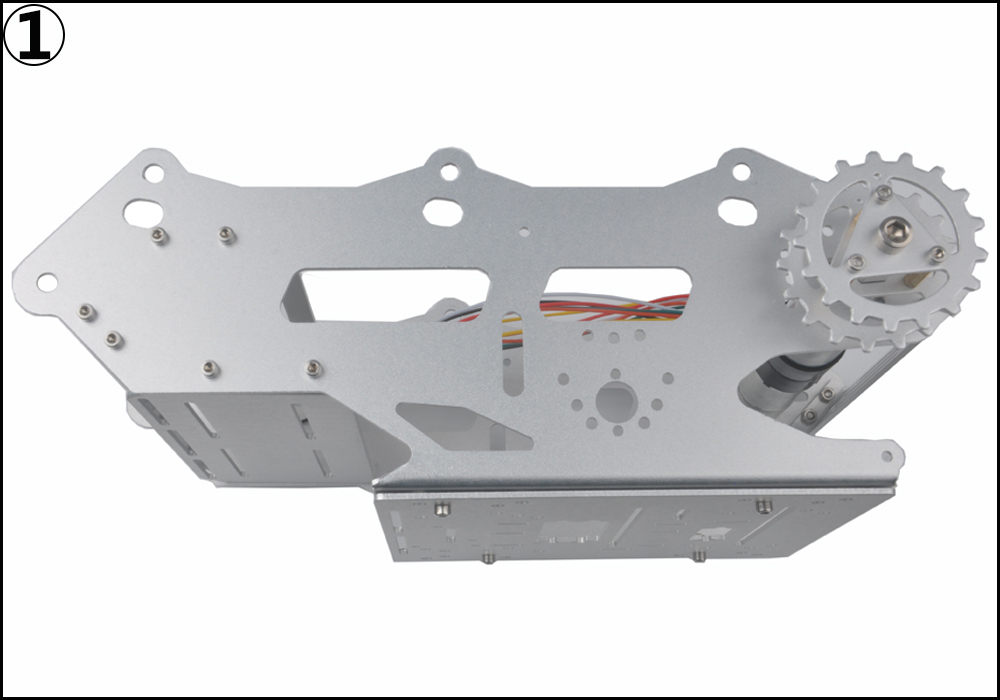
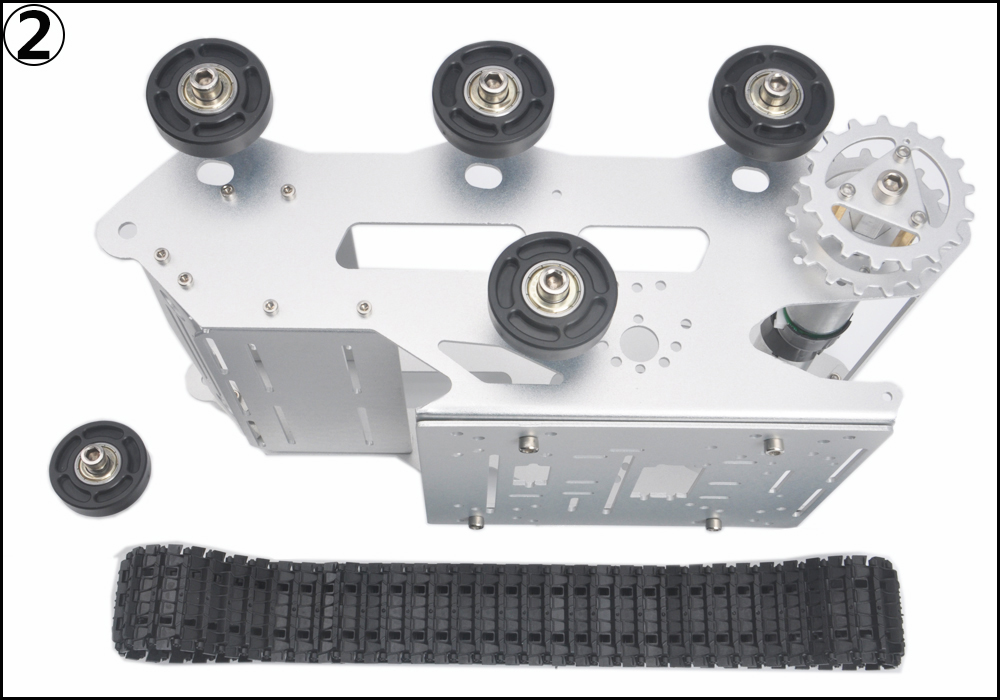
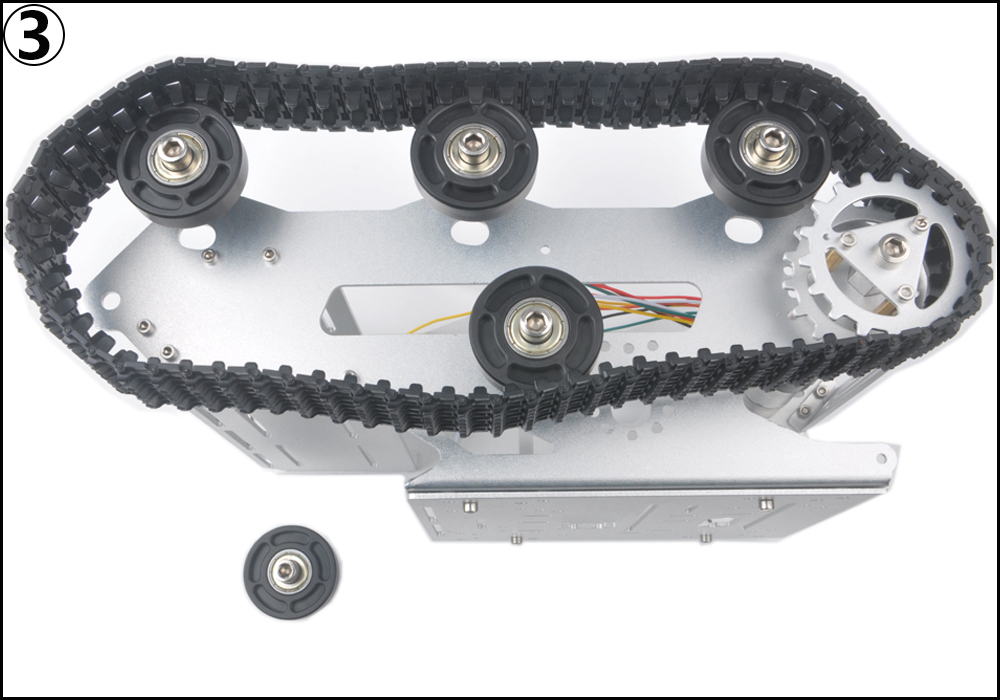
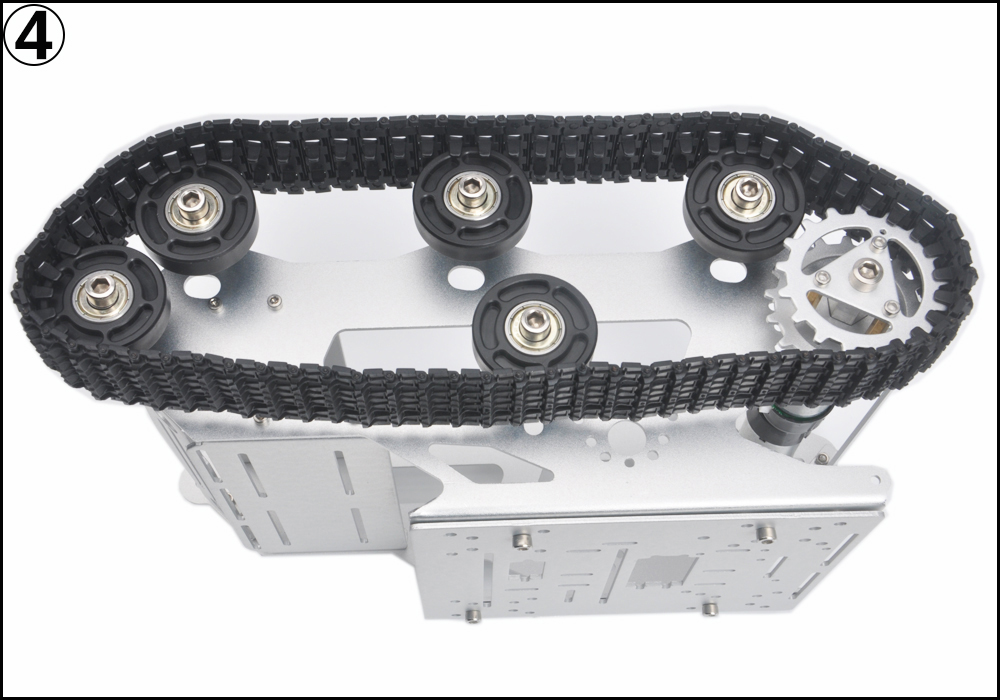
Step5: Install all wheels and tracks on car
Main components:
1x tank car chassis
10x carrying wheels
10x driving wheels
2x Tracks
Note:
1)To make the tracks install more easily, we recommend not to tighten the fifth carrying wheel and adjust the proper width between the driving wheel and side plate.
2)Please tighten the jackscrews with hex wrenches to connect the driving wheels to the motor.If the driving wheel is blocked by its jackscrew and cannot insert into motor axis, please slightly loosen the jack screw driving wheel.
3)Please choose the proper length tracks as per your need before install the tracks.
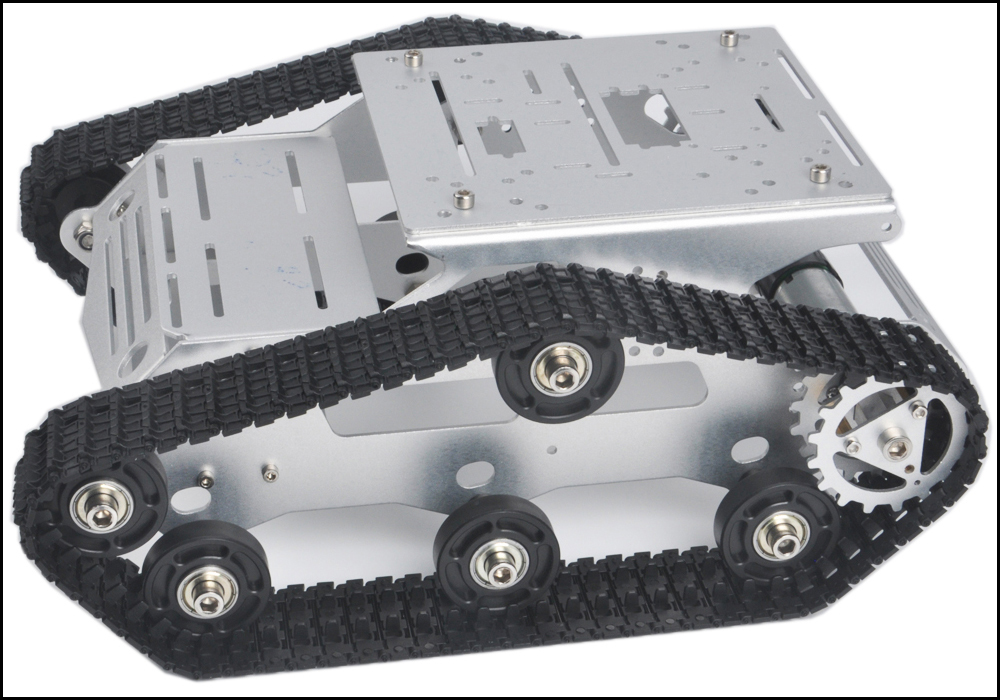
VI.The Finished Presentation
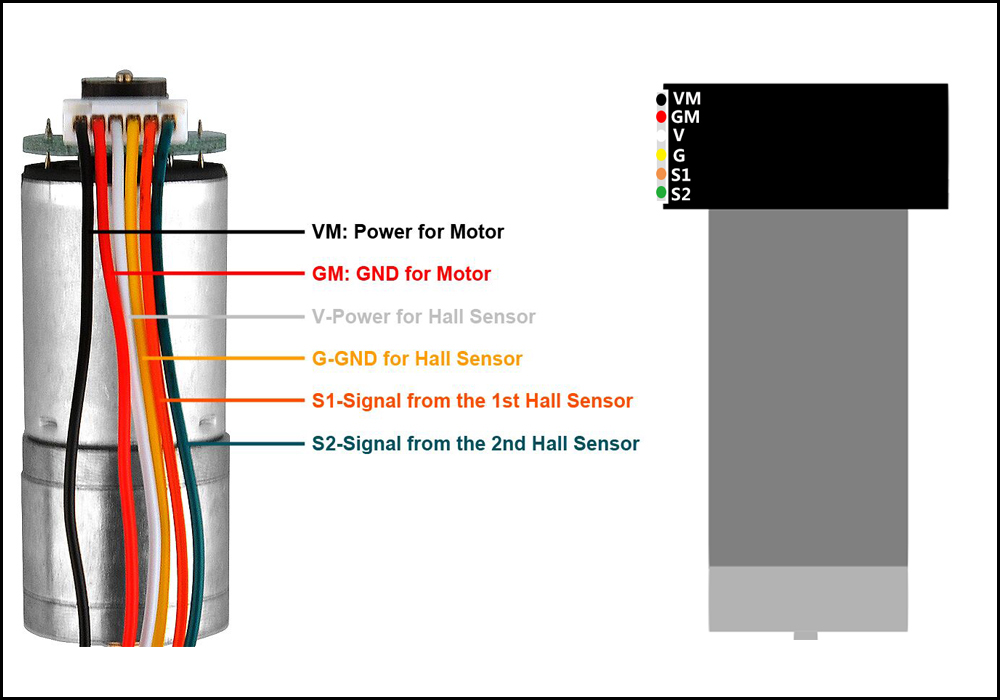
VII. Encoder Motor Pinout
Raspberry Pi Tank Car Tutorials:


Arduino Tank Car Tutorials:


