

Authorized Online Retailers:
Purchase from US Purchase from Japan


Introduction
In this lesson, we will show how to use the 4×4 keypad with the Arduino + Yun shield.
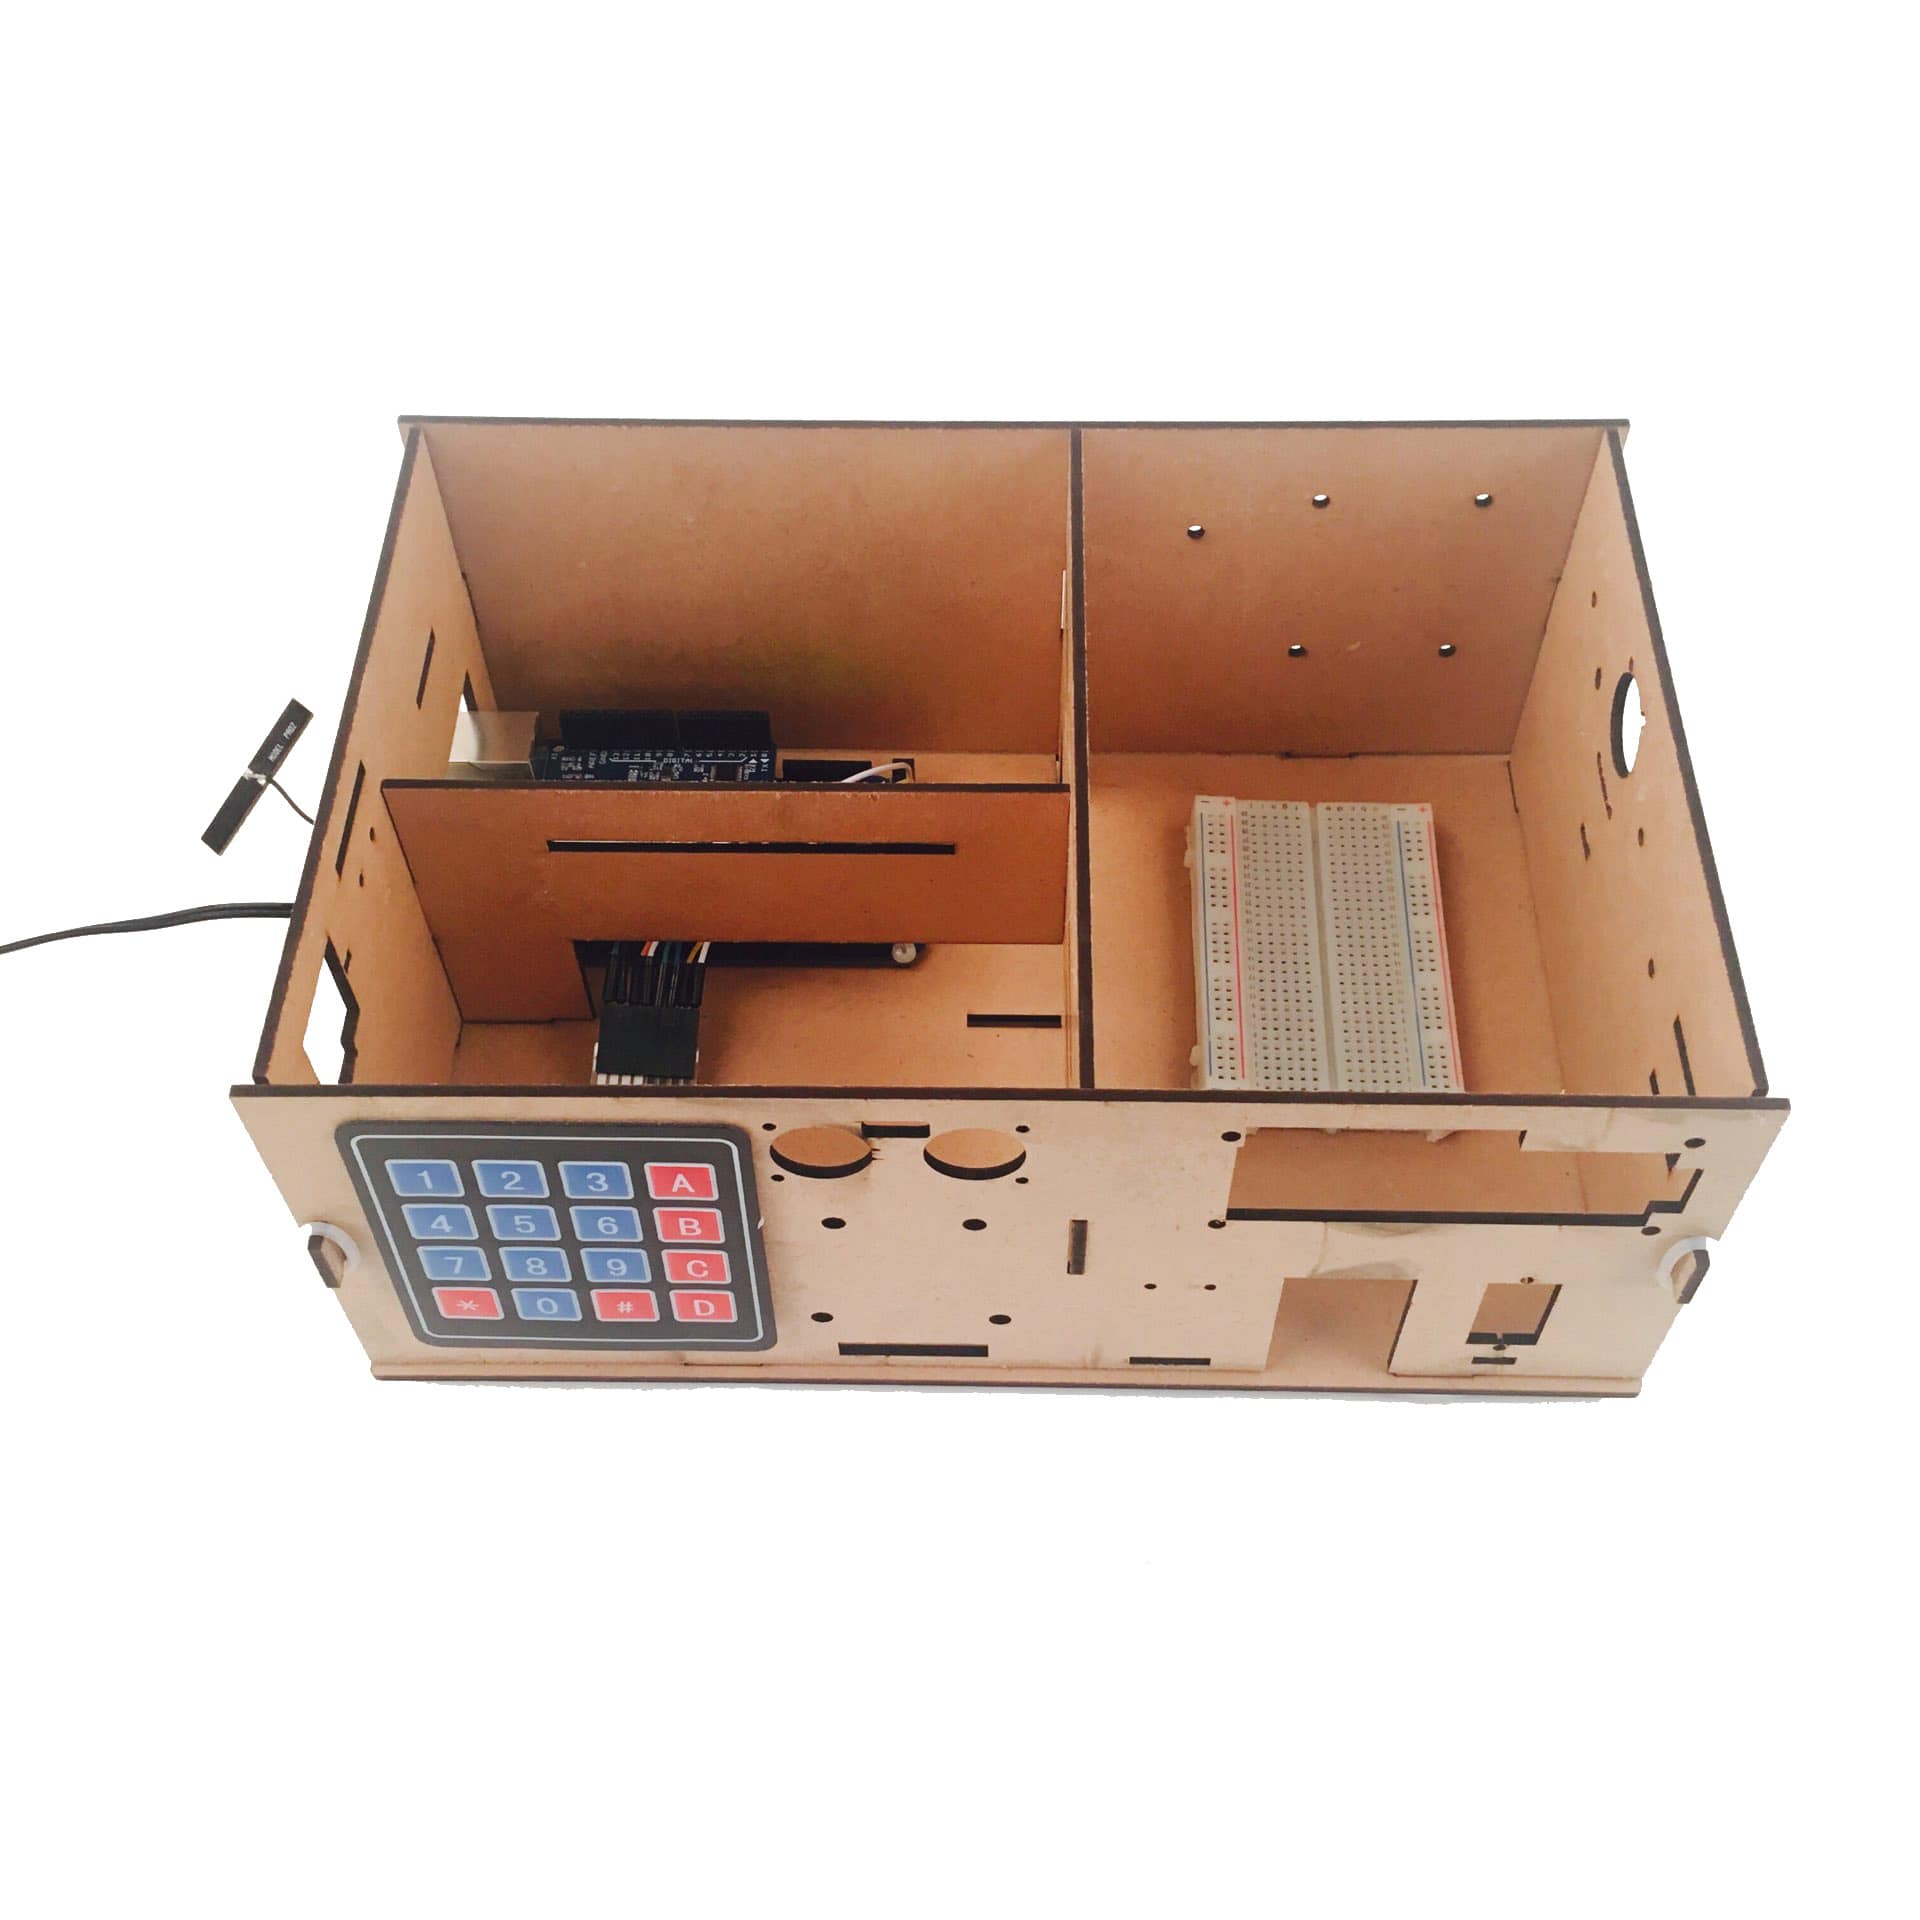
HARDWARE
- Arduino(Osoyoo Mega2560 here) x 1
- Dragino Yun Shield x 1
- 4×4 Keypad x 1
- Jumpers
SOFTWARE
Connection
Build the circuit as below:
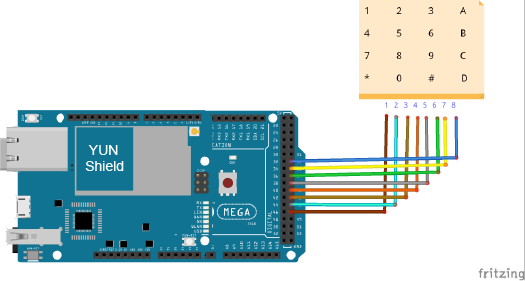
| Arduino+Mega2560 |
4*4 Keypad pin |
| D47 |
1 |
| D45 |
2 |
| D43 |
3 |
| D41 |
4 |
| D39 |
5 |
| D37 |
6 |
| D35 |
7 |
| D33 |
8 |
Code Program
After above operations are completed, make sure that the Yun Shield is on the same network with the computer. Open the Arduino IDE and choose corresponding board type and port type for you project. Then load up the following sketch onto your Arduino.
#include “console.h”
#include “bridge.h”
#include “keypad.h”
const byte ROWS = 4; //four rows
const byte COLS = 4; //four columns
//define the cymbols on the buttons of the keypads
char hexaKeys[ROWS][COLS] = {
{‘1′,’2′,’3′,’A’},
{‘4′,’5′,’6′,’B’},
{‘7′,’8′,’9′,’C’},
{‘*’,’0′,’#’,’D’}
};
byte rowPins[ROWS] = {47, 45, 43, 41}; //connect to the row pinouts of the keypad
byte colPins[COLS] = {39, 37, 35, 33}; //connect to the column pinouts of the keypad
//initialize an instance of class NewKeypad
Keypad customKeypad = Keypad( makeKeymap(hexaKeys), rowPins, colPins, ROWS, COLS);
void setup(){
Bridge.begin();
Console.begin();
while (!Console);
}
void loop(){
char customKey = customKeypad.getKey();
if (customKey){
Console.println(customKey);
}
}
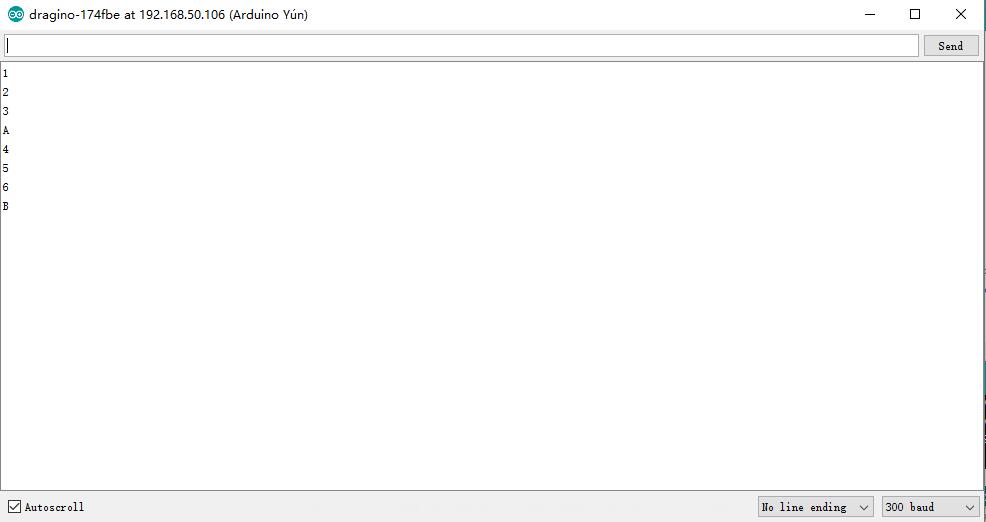
Running Result
After you finished all above operations,once we press a key on the keypad:
It should show up on the serial monitor of the Arduino software.