Introduction
In this lesson, we will show how to use the photoresistor and sound sound sensor to work with the OSOYOO UNO board to control an LED. This project effectively simulates the acoustooptic light control in our daily life. In the daytime, when the corridor is not dim in the sunshine, even if the sound is loud, the corridor light will not turn on; in the night, as long as the sound exceeds the set value, the light will turn on.
HARDWARE
- Osoyoo UNO Board (Fully compatible with Arduino UNO rev.3) x 1
- Breadboard x 1
- Photoresistor x 1
- Sound Sensor Module x 1
- 10k ohm resistor x 1
- 200 ohm resistor x 8
- LED x 8
- Jumpers
- USB Cable x 1
- PC x 1
Connection
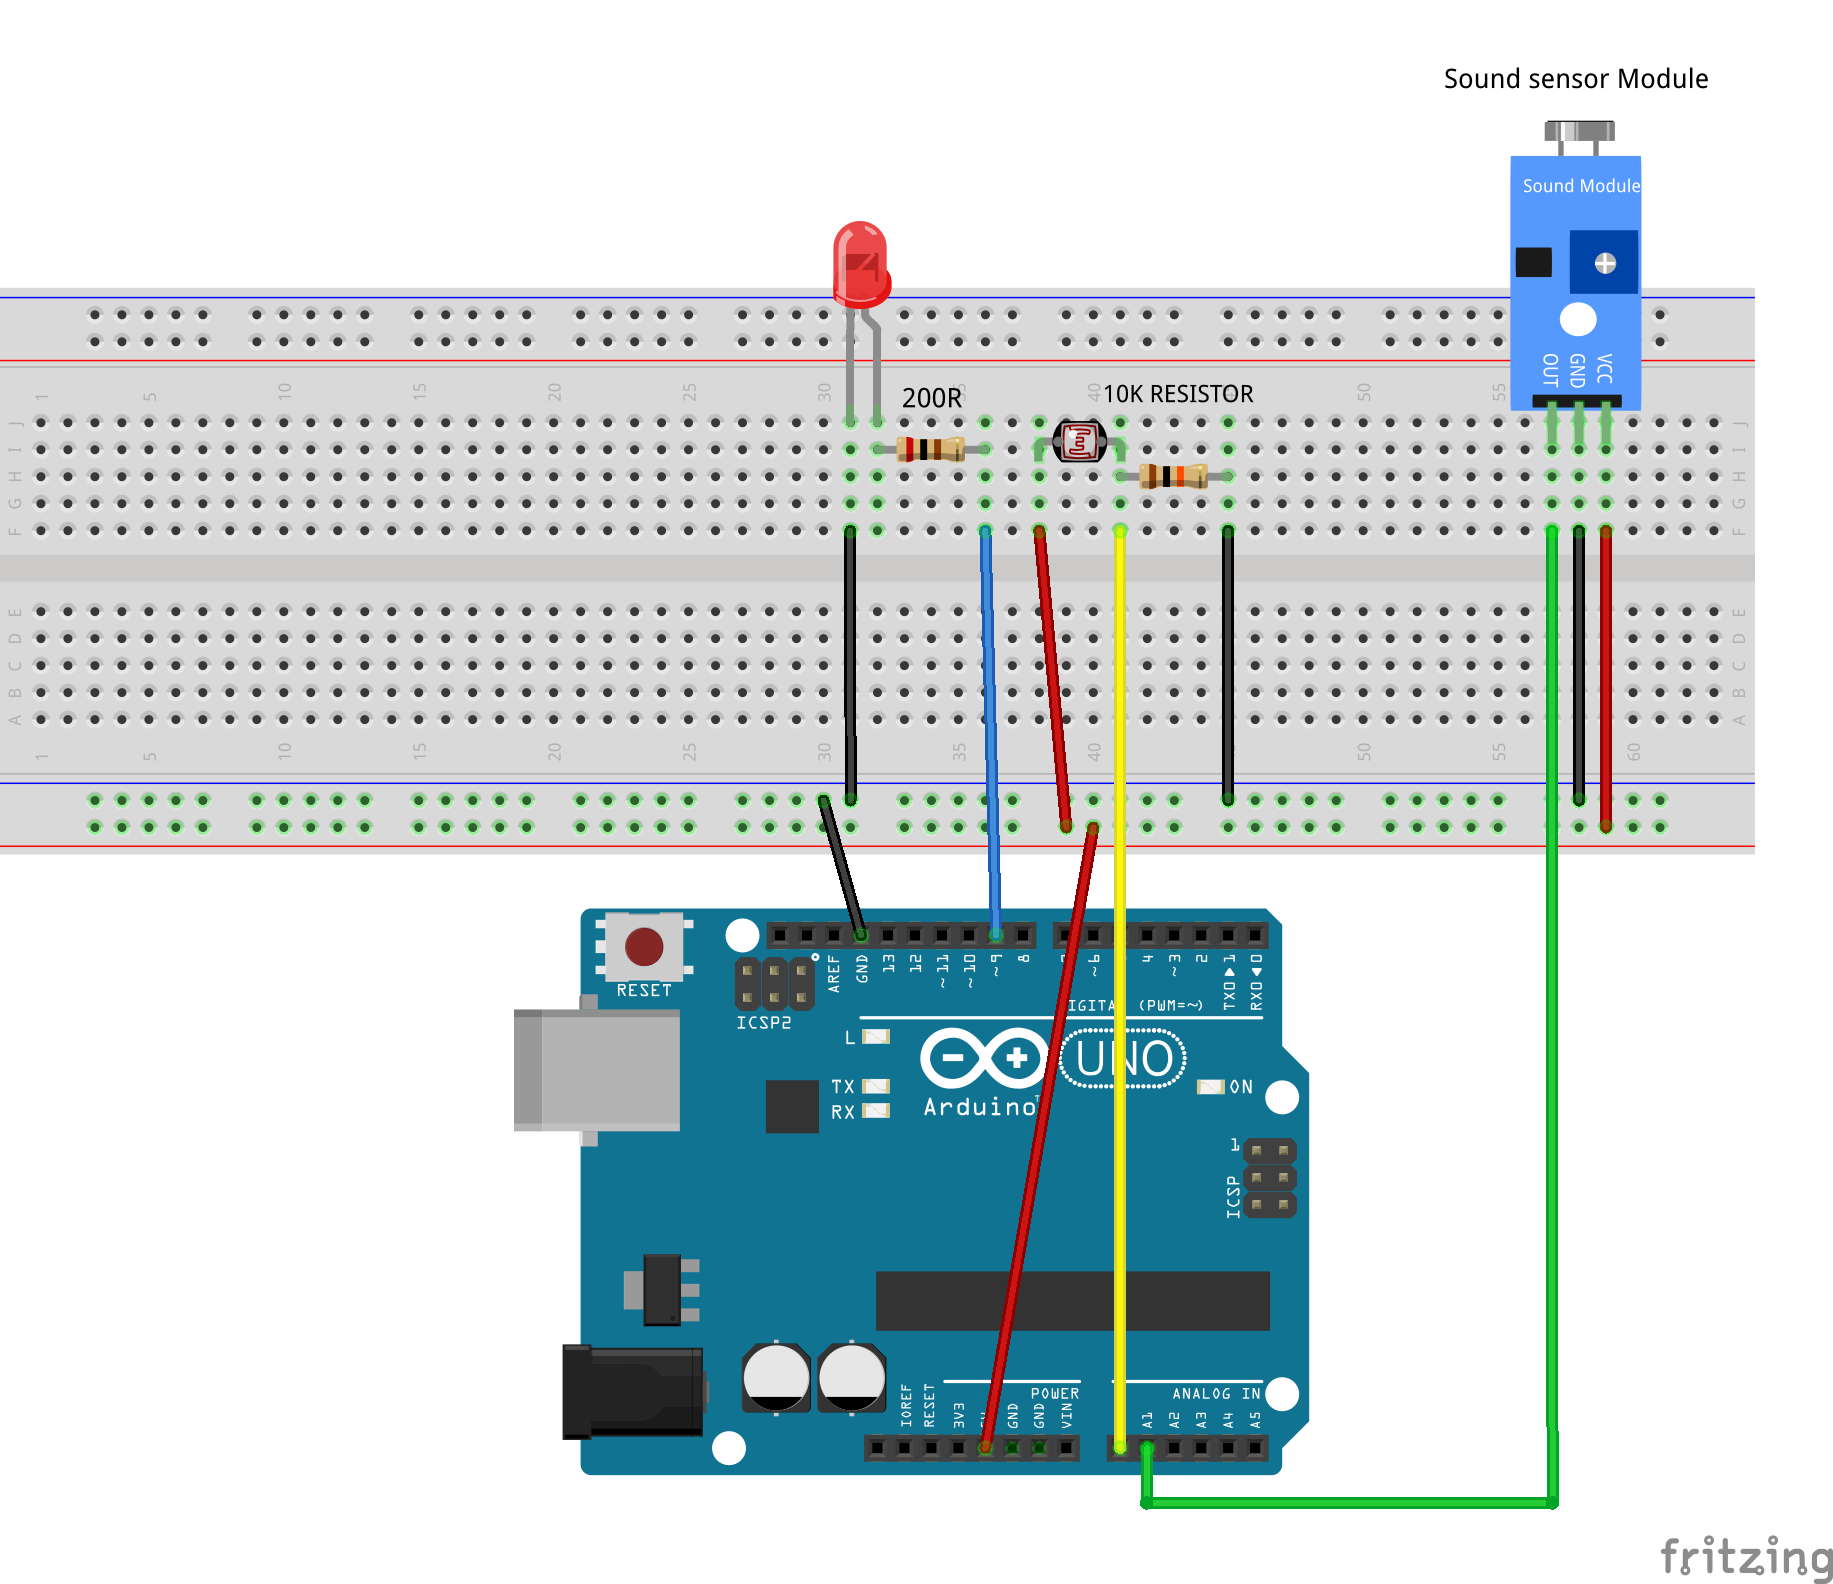
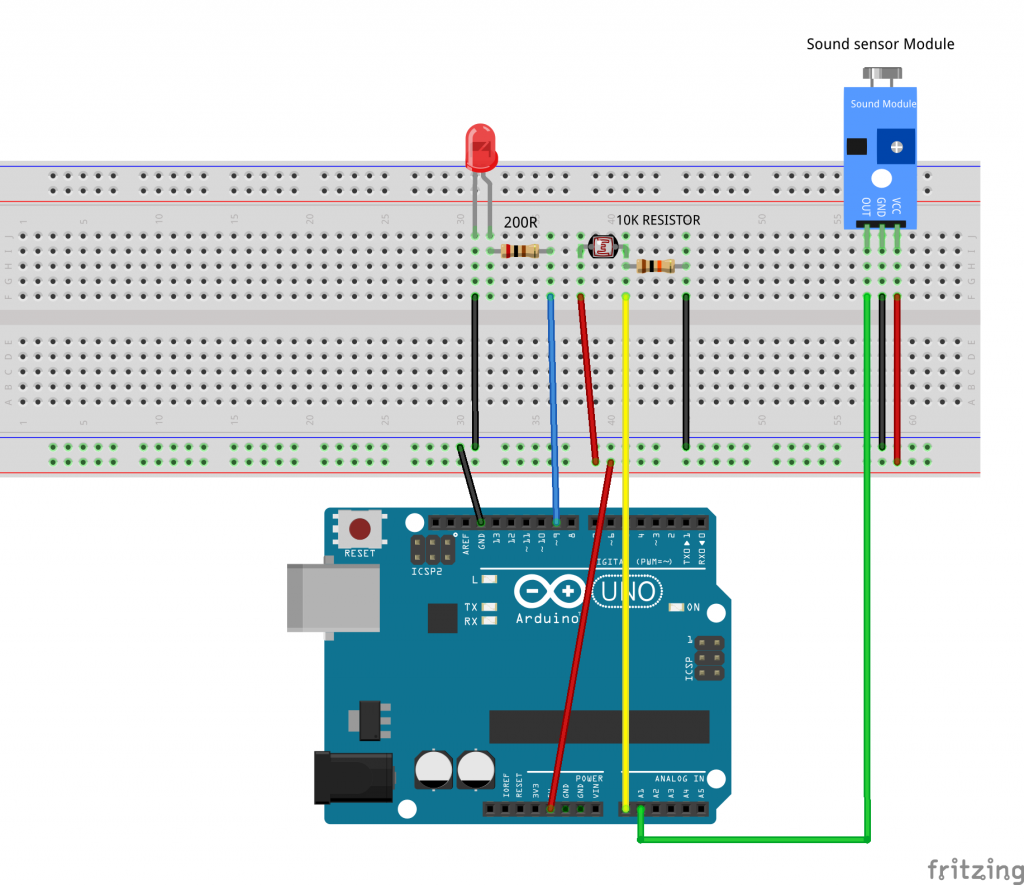
You connect the components as shown in the diagram below. Connect the LED to pin 9 of the Arduino. The 200 ohm resistor is current limiting resistor. One lead of the photo resistor is connected to 5V, the other to one lead of the 10k ohm resistor. The other lead of the 10k ohm resistor is connected to ground. This forms a voltage divider, whose output is connected to pin A0 of the Arduino. Use the A1 as the analog pin to connect with the sound sensor’s A0 pin.
As the light impinging on the photoresistor gets stronger, the resistance decreases, and the voltage output of the divider increase. The reverse happens, when the impinging light gets weaker.
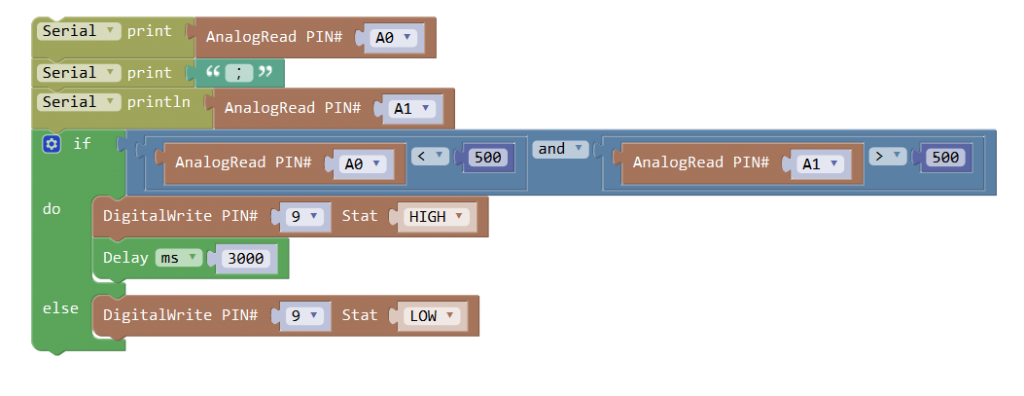
CODE PROGRAM
After above operations are completed, connect the Arduino board to your computer using the USB cable. The green power LED (labelled PWR) should go on.Open the Graphical Programming software Mixly and follow the next operations:
Click Save aftogramming is done. Select the board type and serial port before uploading. For instause a Uno board, just select Arduino/Genuino Uno: if you use a Mega2560, select Arduino/Genuino Mega or Mega2560. 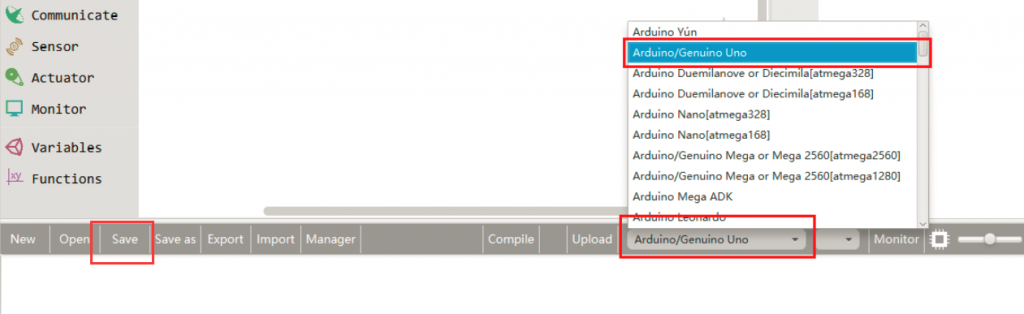
Select the serial device of the Arduino board from the COM menu. This is likely to be COM3 or higher (COM1 and COM2 are usually reserved for hardware serial ports). To find out, you can disconnect your Arduino board and re-open the menu; the entry that disappears should be the Arduino board. Reconnect the board and select that serial port.

Next,upload the code. If the uploading fails, check and correct the code according to the prompts.


Finally, the staus will change to ‘Upload success!’.

Running Result
A few seconds after the upload finishes, when the light is dim and the sound in the environment is louder than the set value, the LED will be lit up.