Objective
本课我们继续智能小车的学习,在前面3课基础上,本课 学习黑白循迹小车DIY制作,所谓循迹就是沿着给定的线路行驶,就像地铁沿着车轨运行一样,可以把小车当成是地铁,你给小车铺设的线路就是地铁轨道。
Parts and Devices
在本课中需要 用到一下器件
|
|
|
|
|
|
补部件图片100 x 100
|
|
|
|
补部件图片100 x 100
|
|
L298N MOTOR driver module
|
补部件图片100 X 100
|
|
Box for 18650 3.7V battery+
DC power connector
|
补部件图片100 x 100
|
|
|
|
补部件图片100 X 100
|
|
|
|
补部件图片100 X 100
|
|
|
|
补部件图片100 X 100
|
|
|
|
补部件图片100 X 100
|
|
Jumper wires(male-male,male-female,female-female)
|
补部件图片100 X 100
|
|
|
|
补部件图片100 X 100
|
|
Installation
本课中只需要在第一课的基础上添加5个黑白循迹模块就可以了,当然第二课中安装的红外接收模块,以及第三课中安装的超声波模块和舵机可以不用拆掉,尽管本课用不到这个部件。
1) 底盘、电机、L298N电机驱动板以及Arduino UNO安装,请参考第一课中关于电机测试的介绍:
OSOYOO Robot Car Starter Kit Lesson 1: Install UNO R3 Board and Motors on Chassis
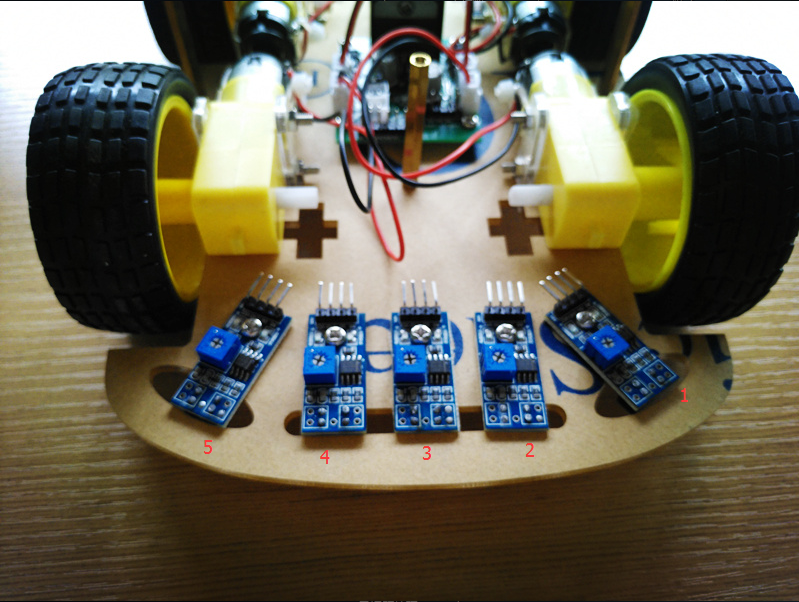
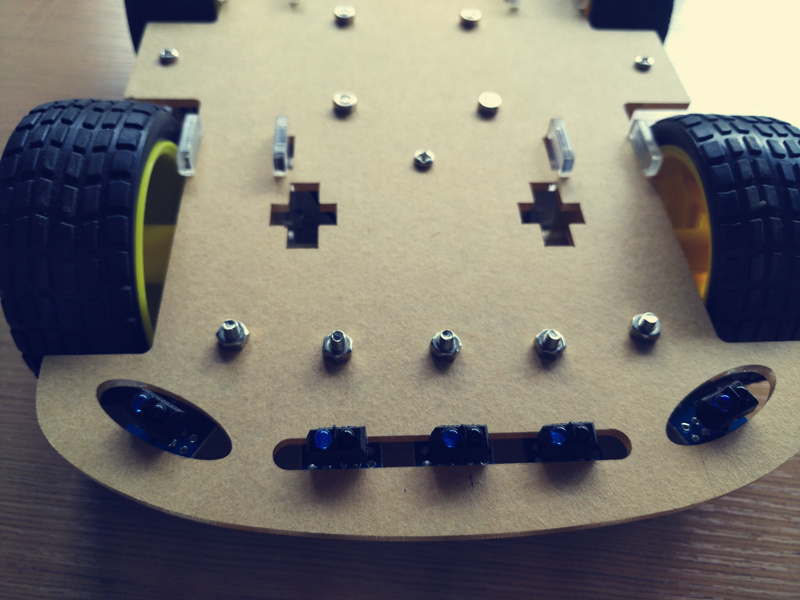
2) 安装黑白红外循迹模块
安装黑白循迹模块需要5颗M3*10螺丝,在较长一块底盘前端有三条缝,是用于安装黑白循迹模块的

将黑白循迹模块的探头卡在缝中,并用M3*10螺丝拧紧
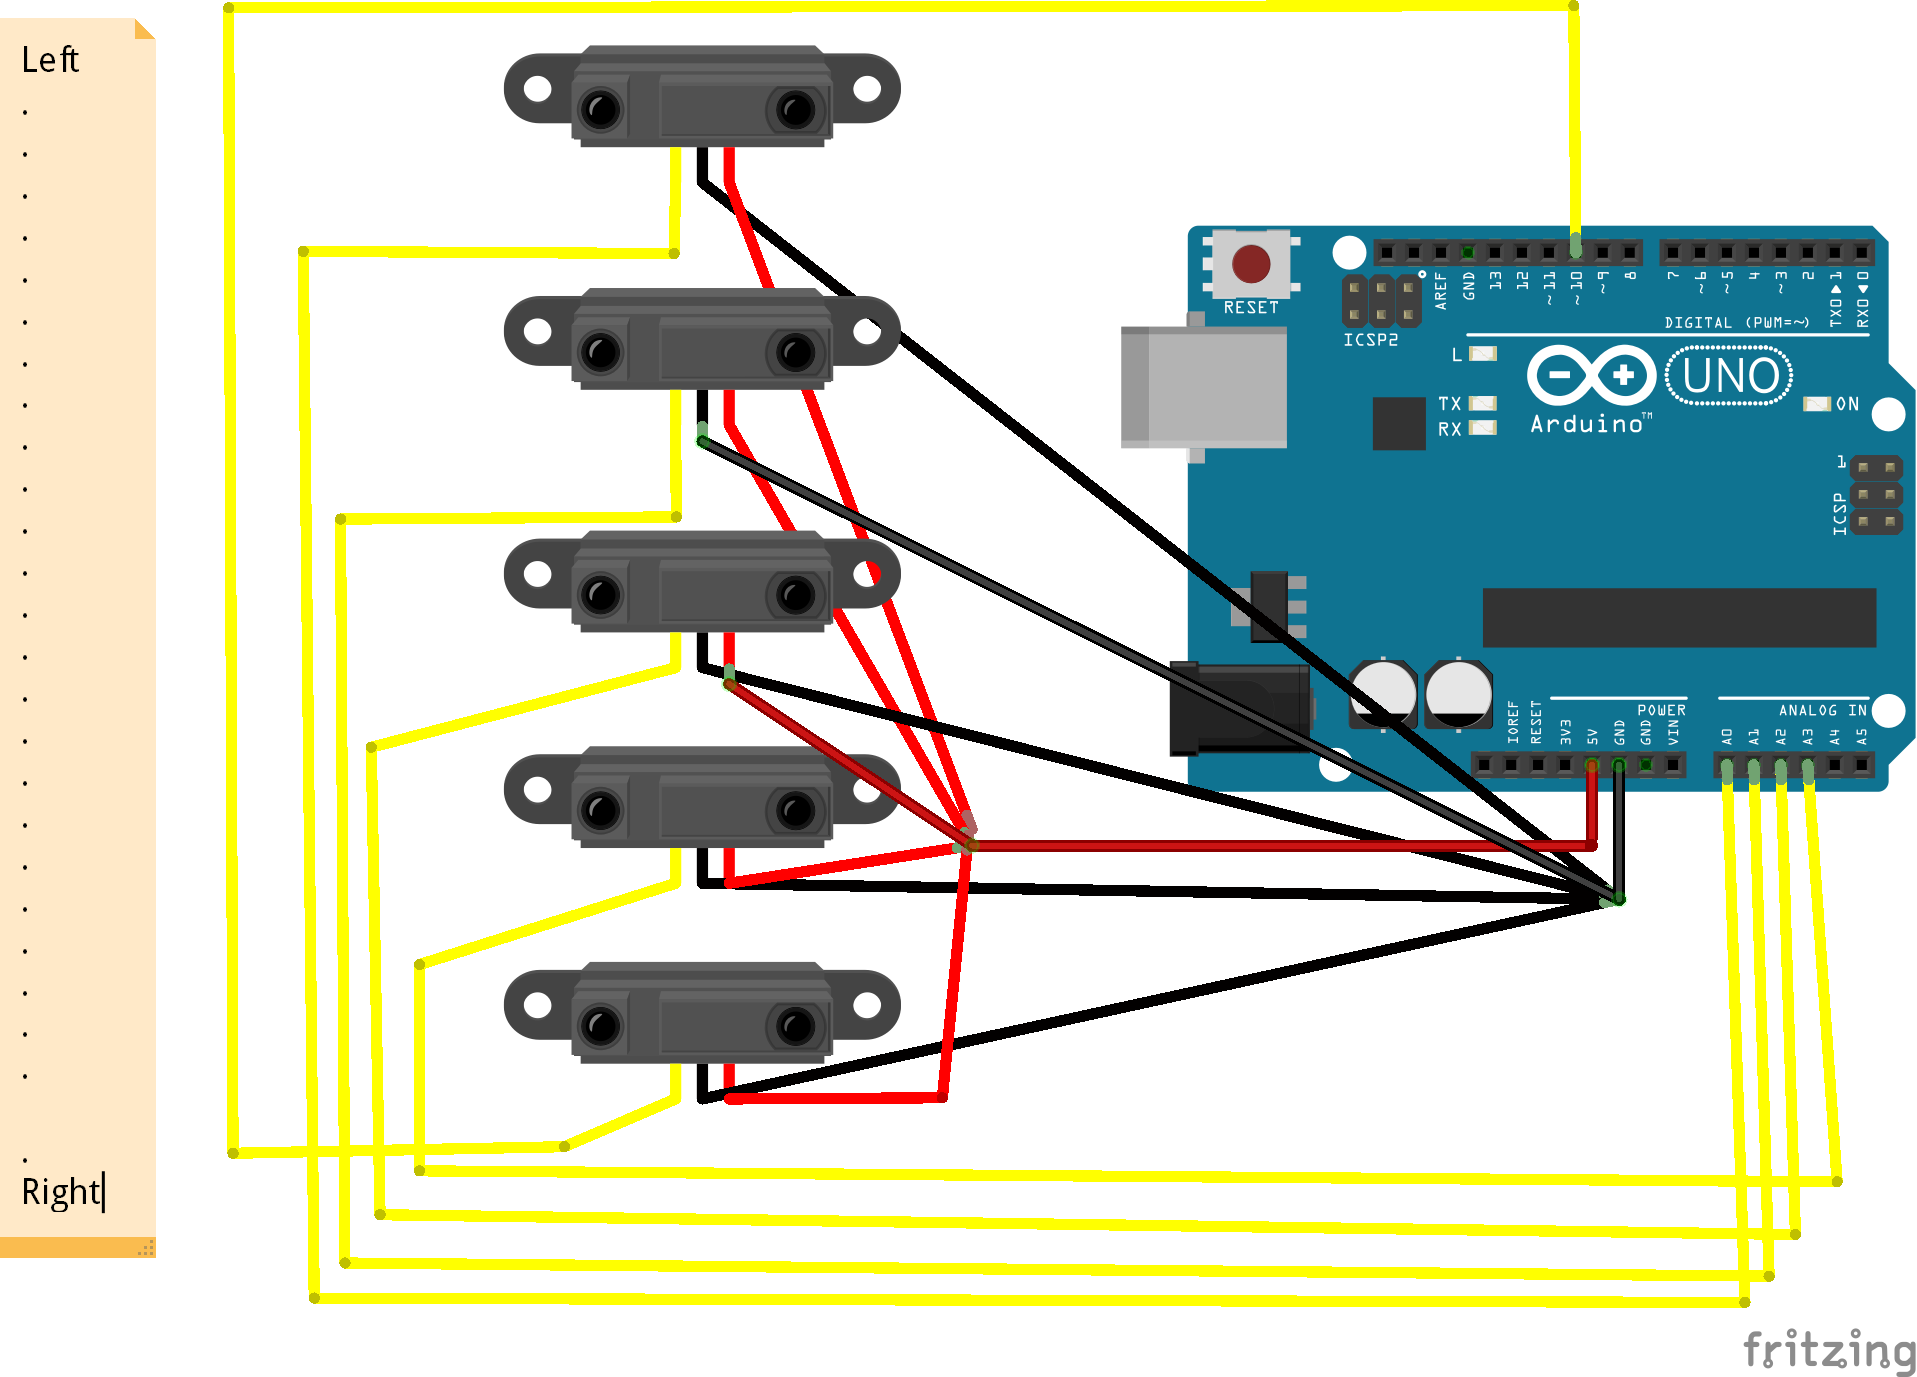
3) 线路
5个黑白循迹模块与UNO之间按照图示连接
4) 铺设轨道
在白色地板上铺设一条大约18mm的黑色轨道,铺设轨道时候在转弯处不要有直角出现,如果弯道角度太大小车循迹时候可能会冲出轨道。循迹模块安装好以后需要调节其灵敏度,将小车上电并放置于地上,用螺丝刀旋转循迹模块上的电位器,是循迹模块在白色地板上信号指示灯亮起,在黑色轨道上信号指示灯搞好熄灭为止。
Software Installation:
Step 1: Install latest Arduino IDE (If you have Arduino IDE version after 1.1.16, please skip this step)
Download Arduino IDe from https://www.arduino.cc/en/Main/Software?setlang=en , then install the software.
Step 2:Download Lesson One sample code from https://osoyoo.com/driver/smartcar-lesson4.zip , unzip the download zip file smartcar-lesson4.zip, you will see a folder called smartcar-lesson4 .
Step 3: Connect Arduino UNO to PC with USB cable, use Arduino IDE to open the file smartcar-lesson4.ino in smartcar-lesson4 folder, load the code into arduino.
Final Testing :
把小车放置在黑色轨道上,使正中间一个黑白循迹模块位于黑色轨道正上方,打开电池盒侧面电源开关,小车会沿着黑色轨道前进。


The steps from the previous lesson have wires the get connected into UNO board GND and other slots and now it says to connect wires to the same place again… What should I do? Please reply Asap i need to finish it by thursday
Also, can we not use the Line tracking and obstacle avoidance at the same time?!!!
You can follow our lesson 5 to change the working mode between Line tracking and obstacle avoidance:
https://osoyoo.com/2017/05/14/wifi-control-smart-car/
One of my sensors has a bad LED. I can run test and view serial monitor to see when sensor is seeing black or white, and adjust for proper sensitivity, but the LED never lights up. Is it possible to get a replacement sensor? [email protected]