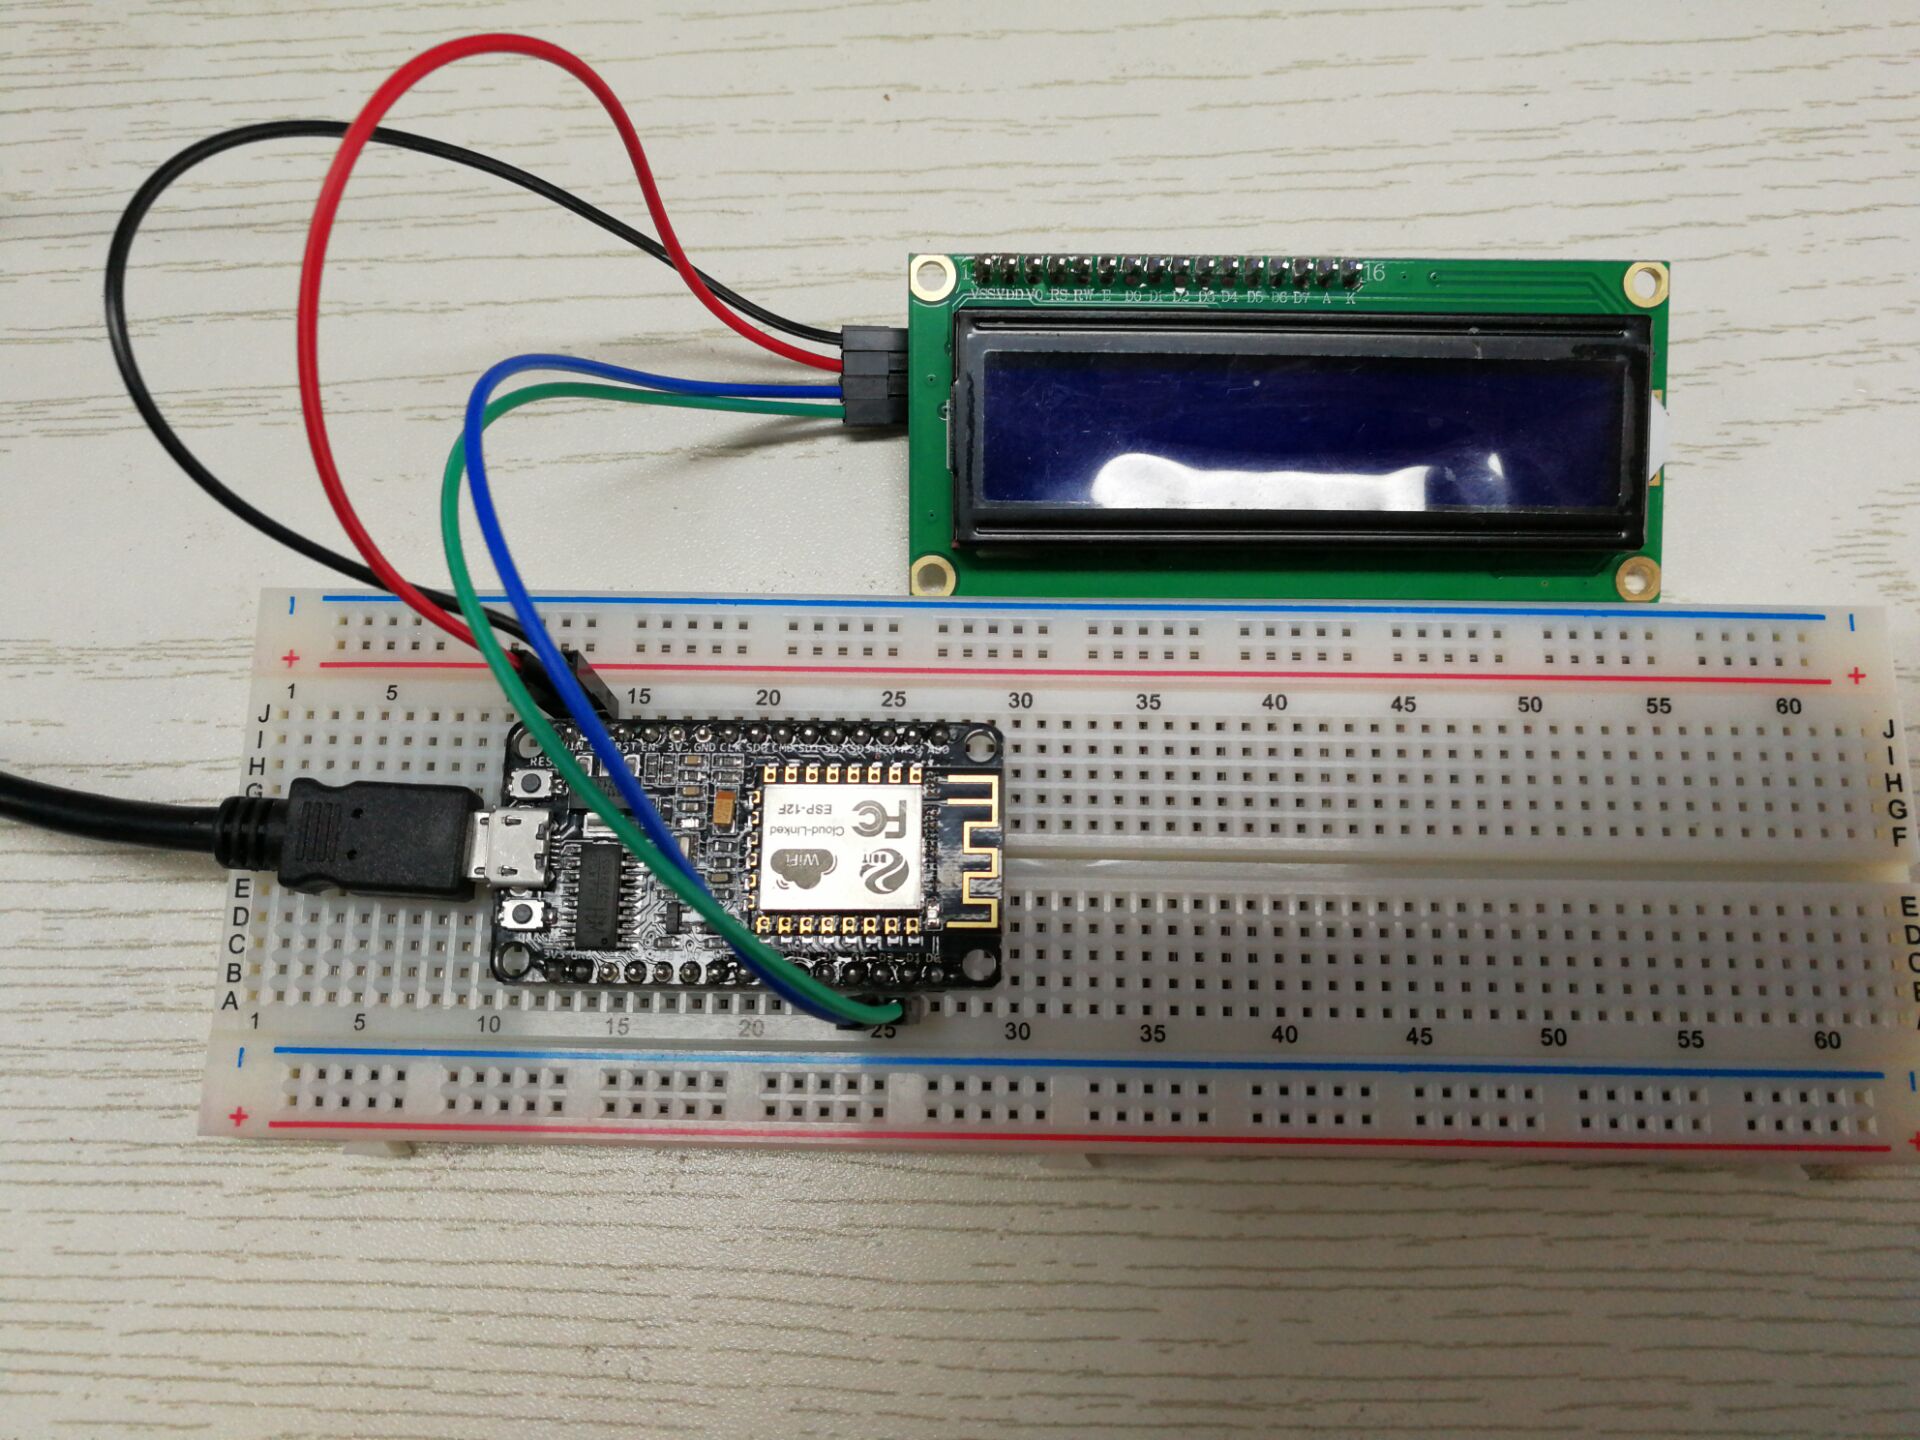
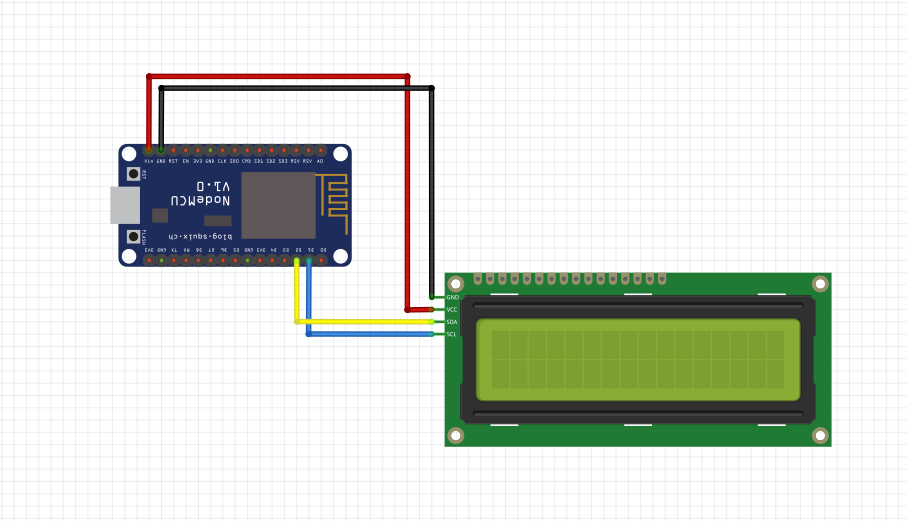
In this lesson, we will show how to use the NodeMCU to subscribe to messages that published by MQTT client,then display these messages on a 1602 I2C LCD display.
Connect the NodeMCU to computer via USB cable,open this sketch by using Arduino IDE(Version1.6.4+):
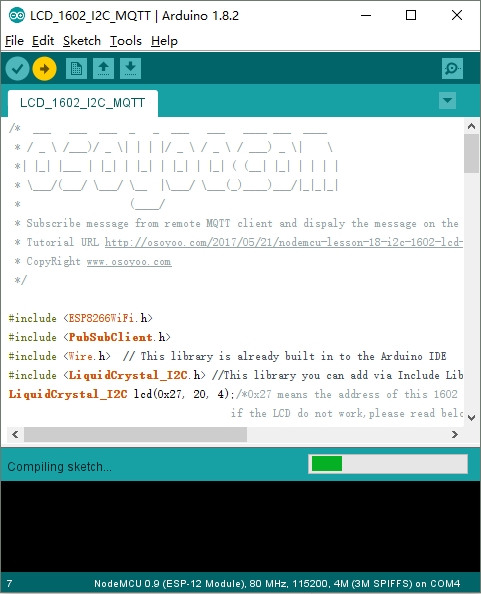
About this line:
LiquidCrystal_I2C lcd(0x27, 20, 4);
*0x27 means the address of this 1602 I2C LCD display,different LCD may have different address,if the LCD do not work,please connect your 1602 I2C LCD dispaly to your NodeMCU,then upload below code to your NodeMCU, you will get the I2C address from the Serial Monitor.You can check following link to get more usages about 1602 I2C LCD dispaly : https://osoyoo.com/2014/12/07/16×2-i2c-liquidcrystal-displaylcd/.
Edit the code to fit your own WiFi and MQTT settings as following operations:
1)Hotspot Configration:
const char* ssid = “your_hotspot_ssid”;
const char* password = “your_hotspot_password”;
Find above code line,put your own ssid and password on there.
You can use your own MQTT broker URL or IP address to set above mqtt_server value. You can also use some famous free MQTT server to test the project such as “broker.mqtt-dashboard.com”, “iot.eclipse.org” etc.
3)MQTT Client Settings
If your MQTT broker require clientID,username and password authentication,you need to change
if (client.connect(clientId.c_str()))
to
if (client.connect(clientId,userName,passWord)) //put your clientId/userName/passWord here
If not,just keep them as default.
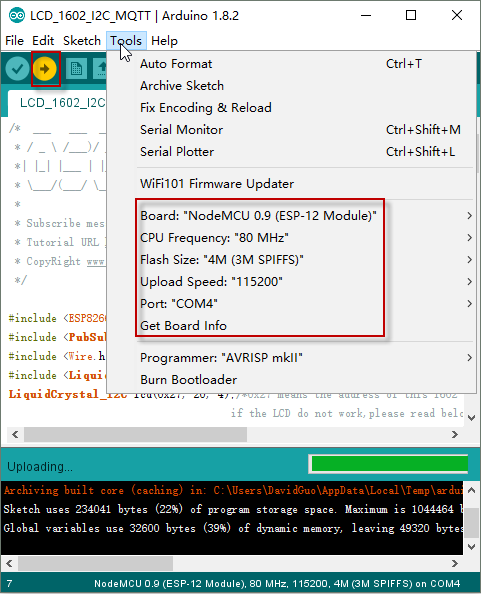
After do that,choose the coresponding board type and port type as below,then upload the sketch to the NodeMCU.
Board:”NodeMCU 0.9(ESP-12 Module)”
CPU Frequency:”80MHz”
Flash Size:”4M (3M SPIFFS)”
Upload Speed:”115200″
Port: Choose your own Serial Port for your NodeMCU
MQTT Client Settings
About how to config the MQTT client,check this link.
Topics Settings:
Topic to publish: OsoyooCommand
Payload Type: Strings/JSON/XML/Characters
Running Result
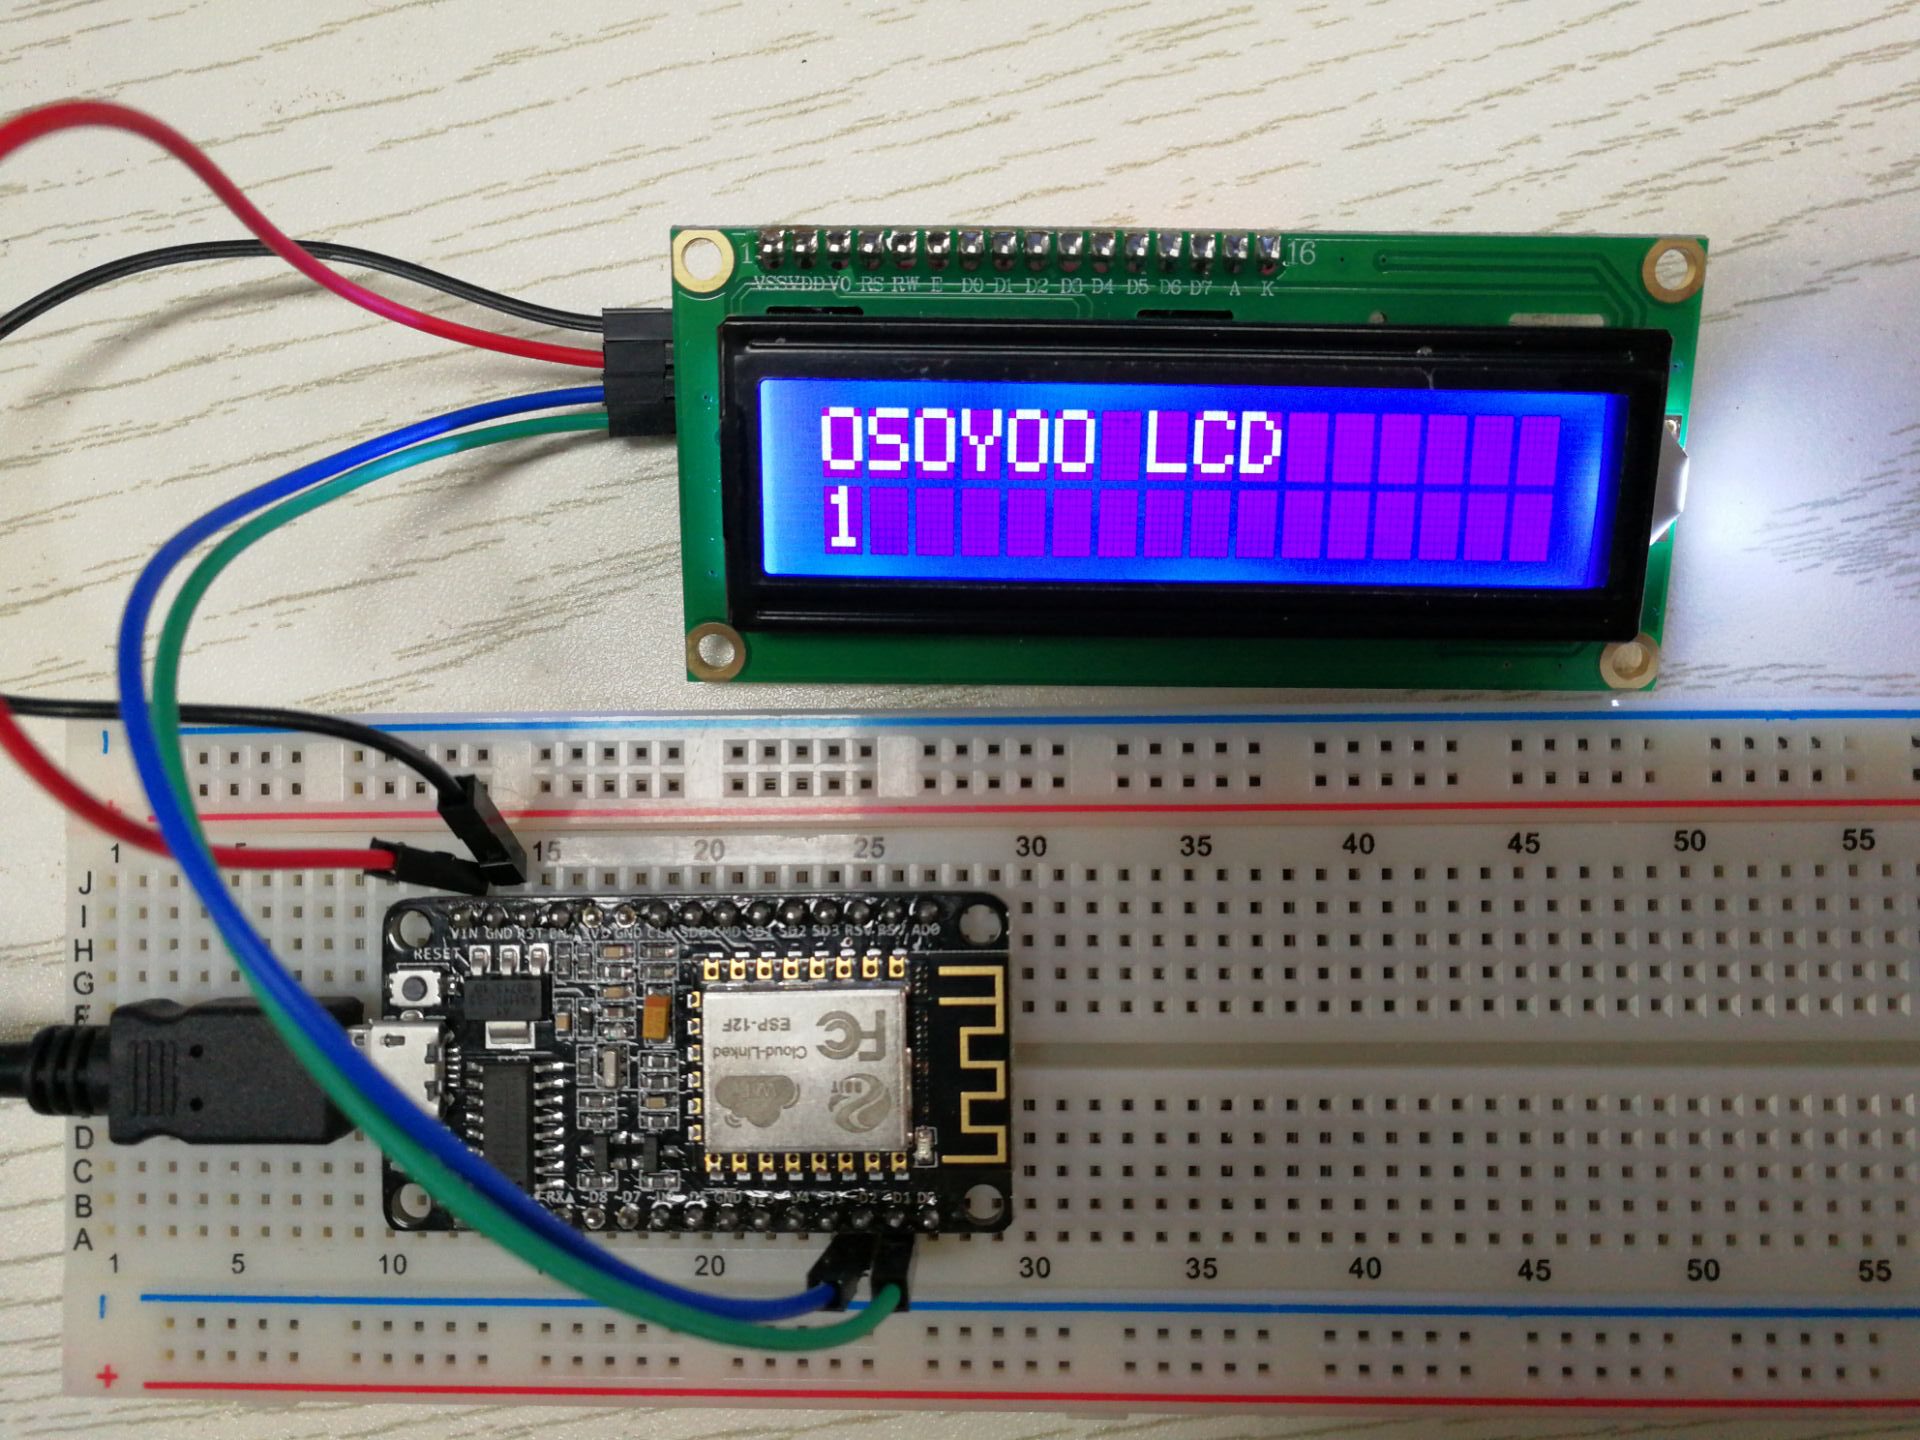
Onece the upload done,if wifi hotspot name and password setting is ok and MQTT broker is connected, open the Serial Monitor,you will see following result:
The NodeMCU serial monitor will show the IP address and the connection satatus,then print the “publish data”.As you can see from the sketch,the initial data is 1.
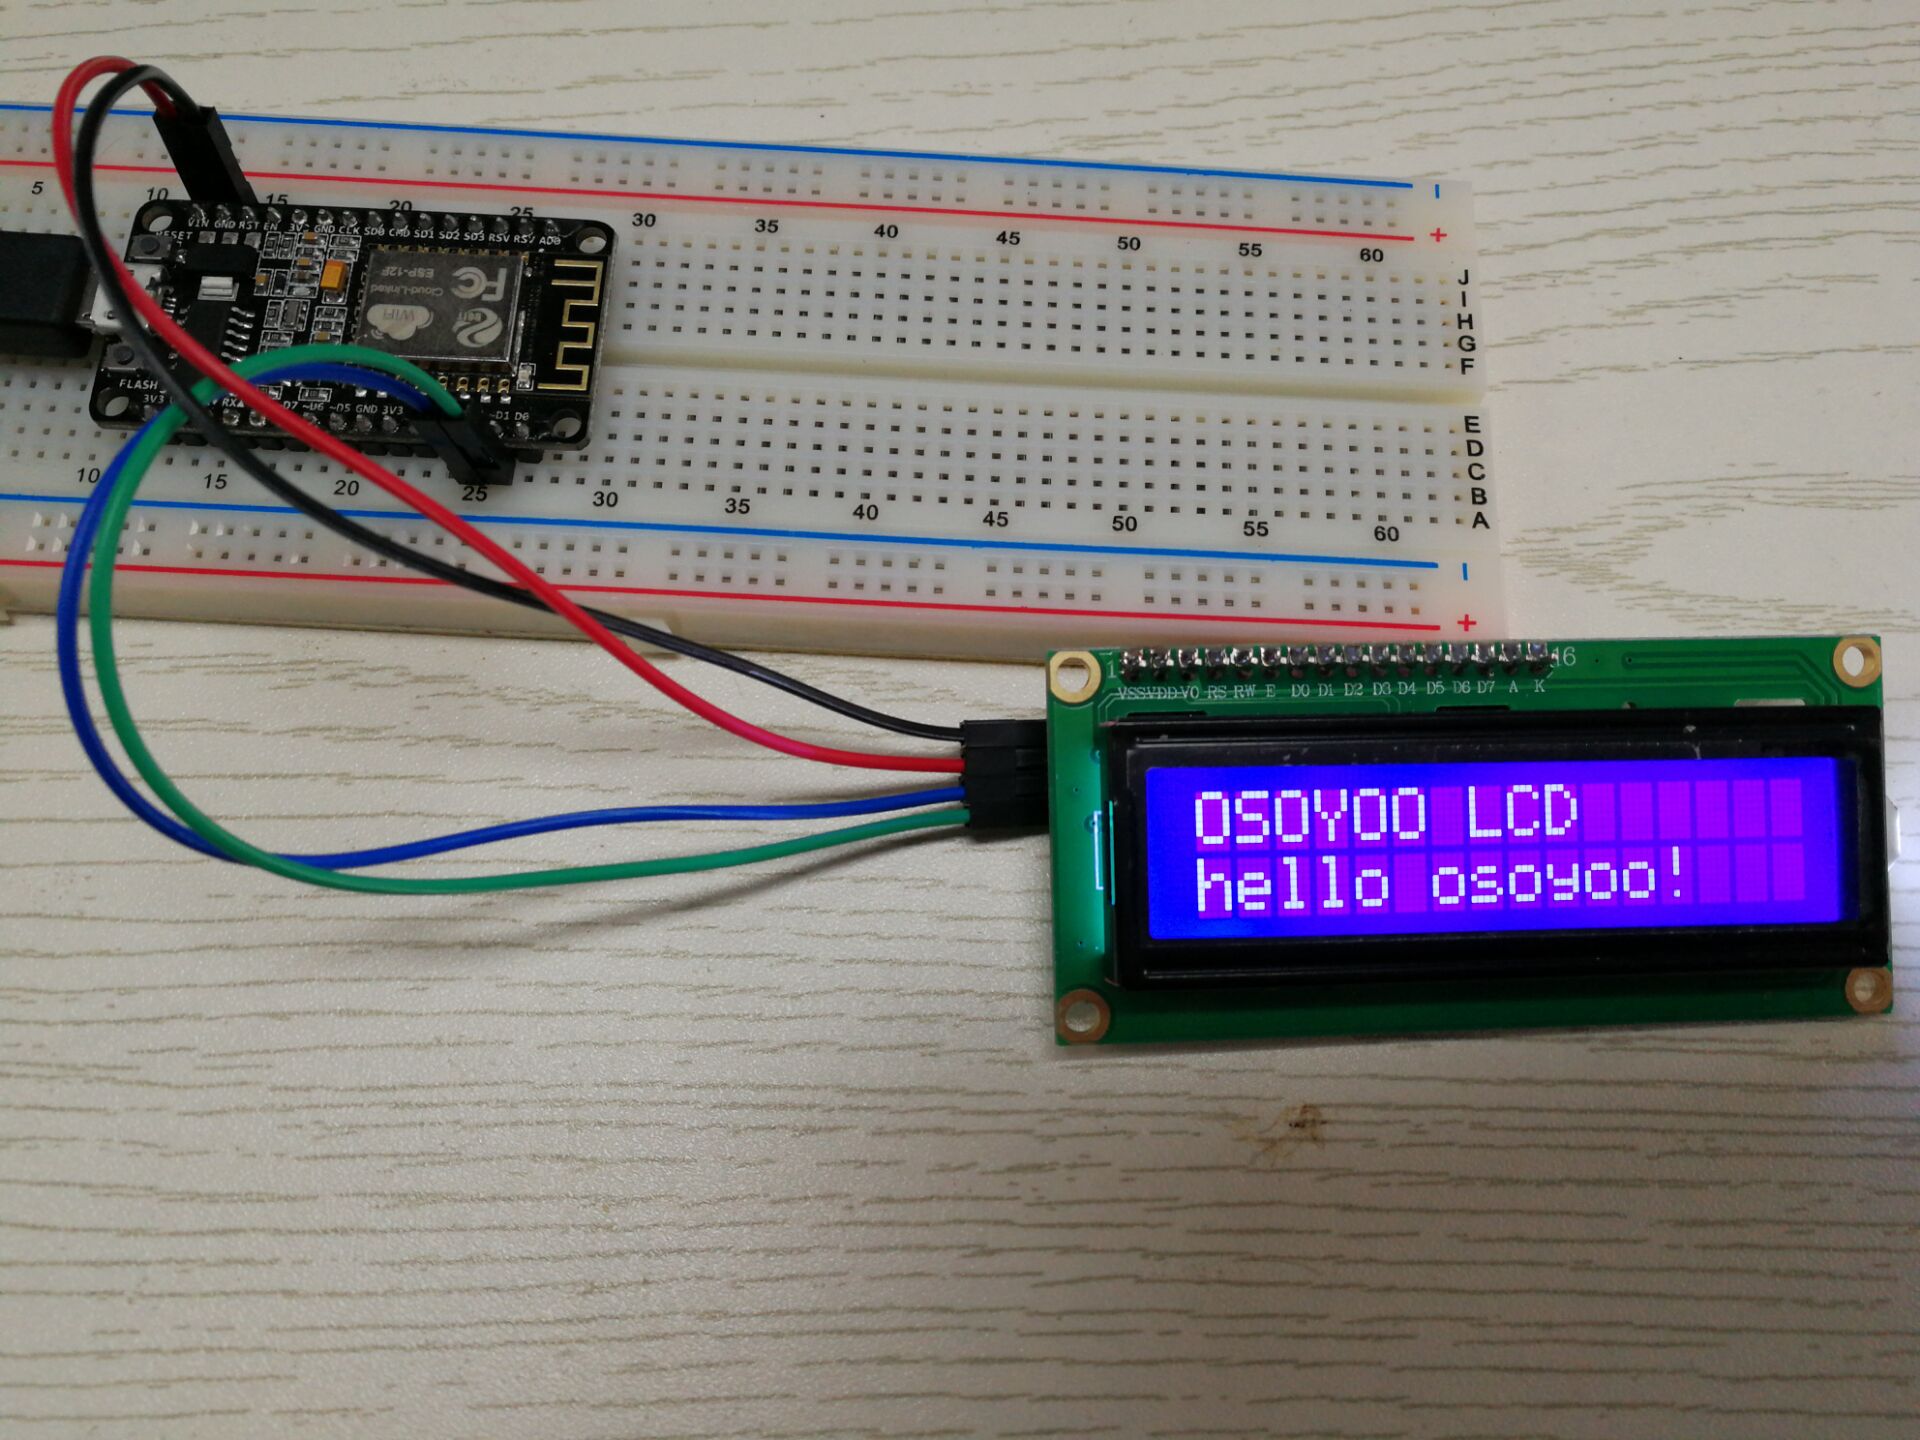
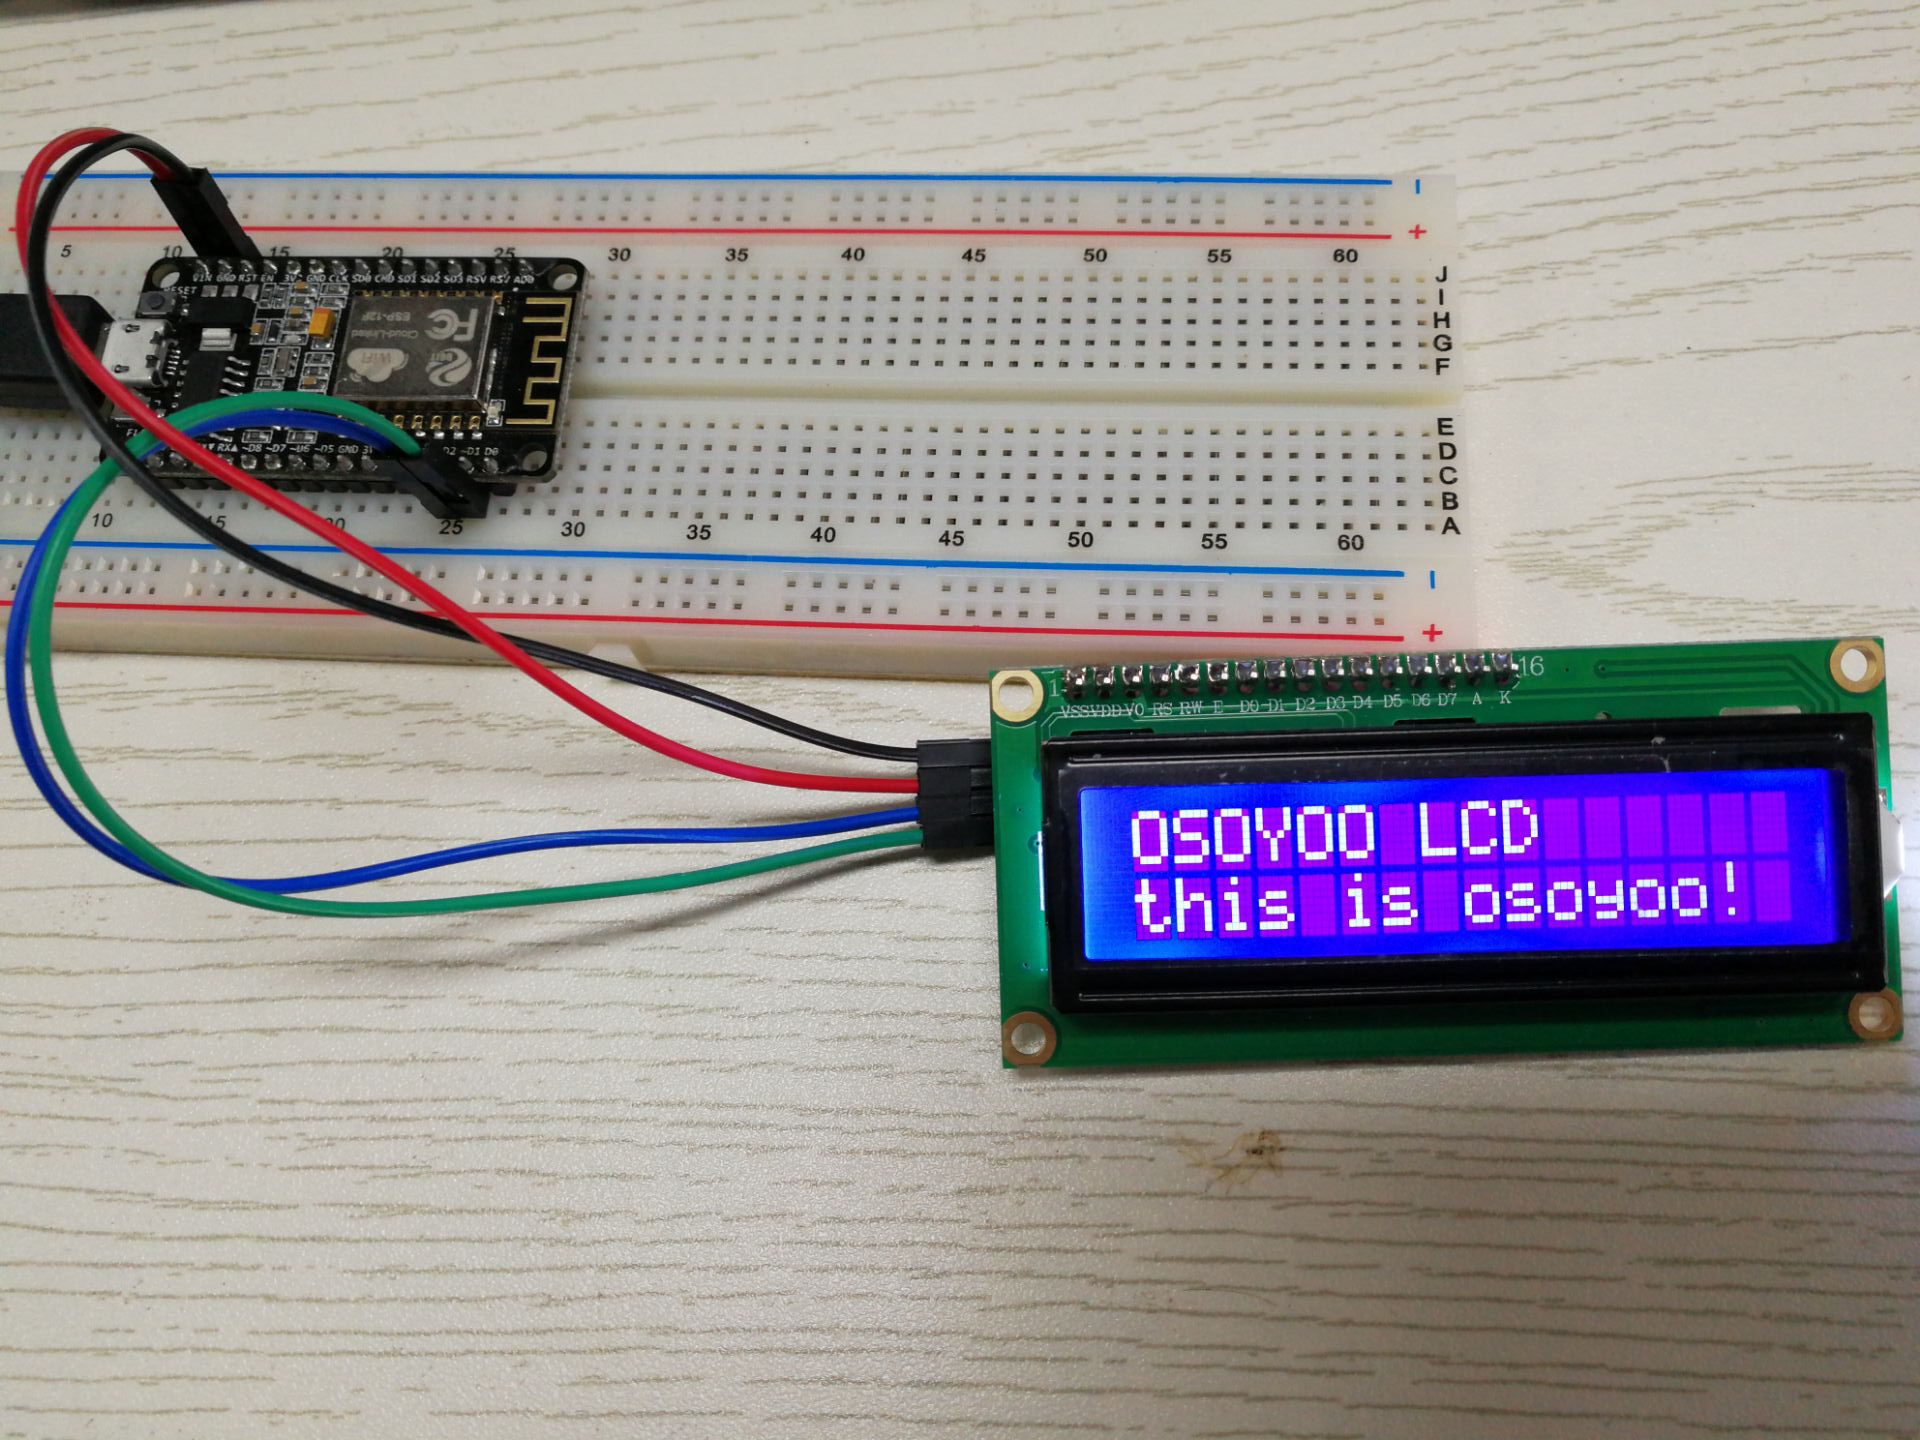
Then,you can type other message into the “Payload” and click the “Publish” button,the NodeMCU will subscribe the data and dispaly it on the LCD: