Authorized Online Retailers:
| Buy from US |
Buy from UK |
Buy from DE |
Buy from IT |
Buy from FR |
Buy from ES |
Buy from JP |
 |
 |
 |
 |
 |
 |
 |
Authorized Online Retailers:
1) Overview
In this lesson, we’ll learn how remote to control a relay switch to turn on/off a led. Actually the code is quite similar to that of Lesson 2. The only difference is that we use Relay to turn on/off the LED.
Relay is switch which is turn on/off a high voltage circuit with low voltage signal. We often use relay to control 110V or 220 V devices in home and office.
2 )Hardware Preparation
|
Quantity |
| OSOYOO Basic board |
1 |
| Ethernet Shield W5100 |
1 |
| USB cable |
1 |
| LED |
1 |
| 1K resistor |
1 |
| Relay |
1 |
| Jumper wires |
several |
| Breadboard |
1 |
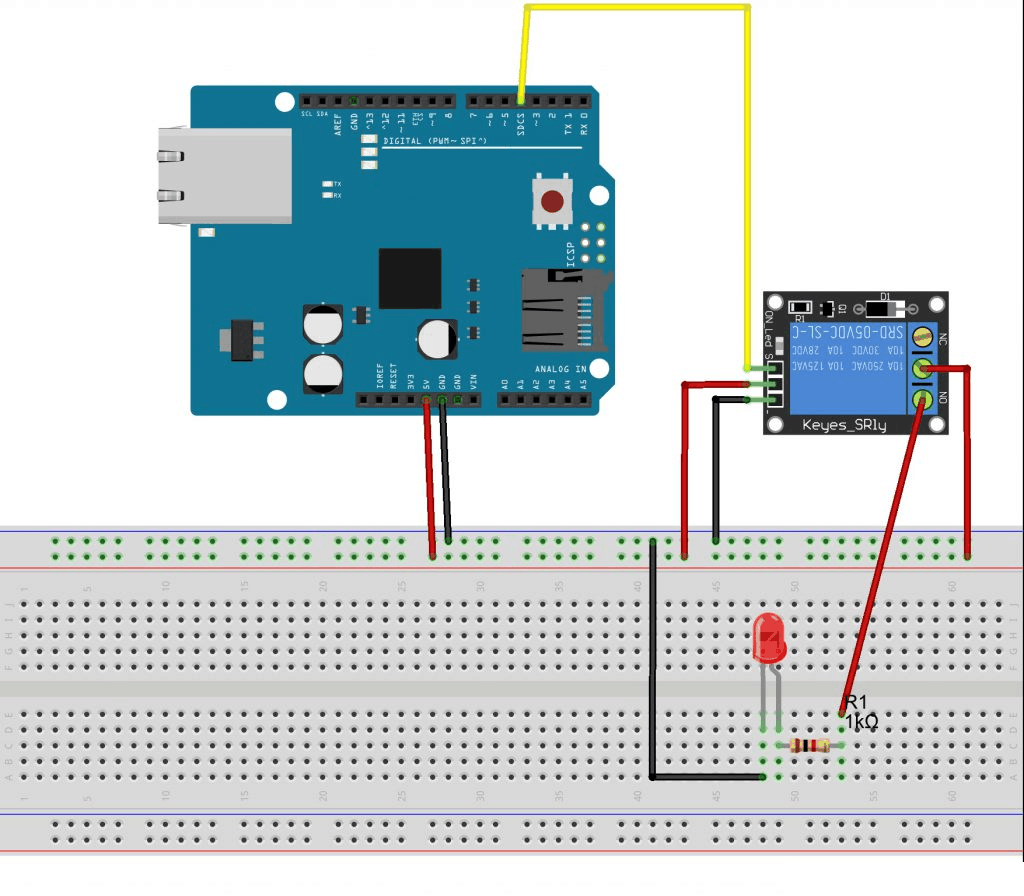
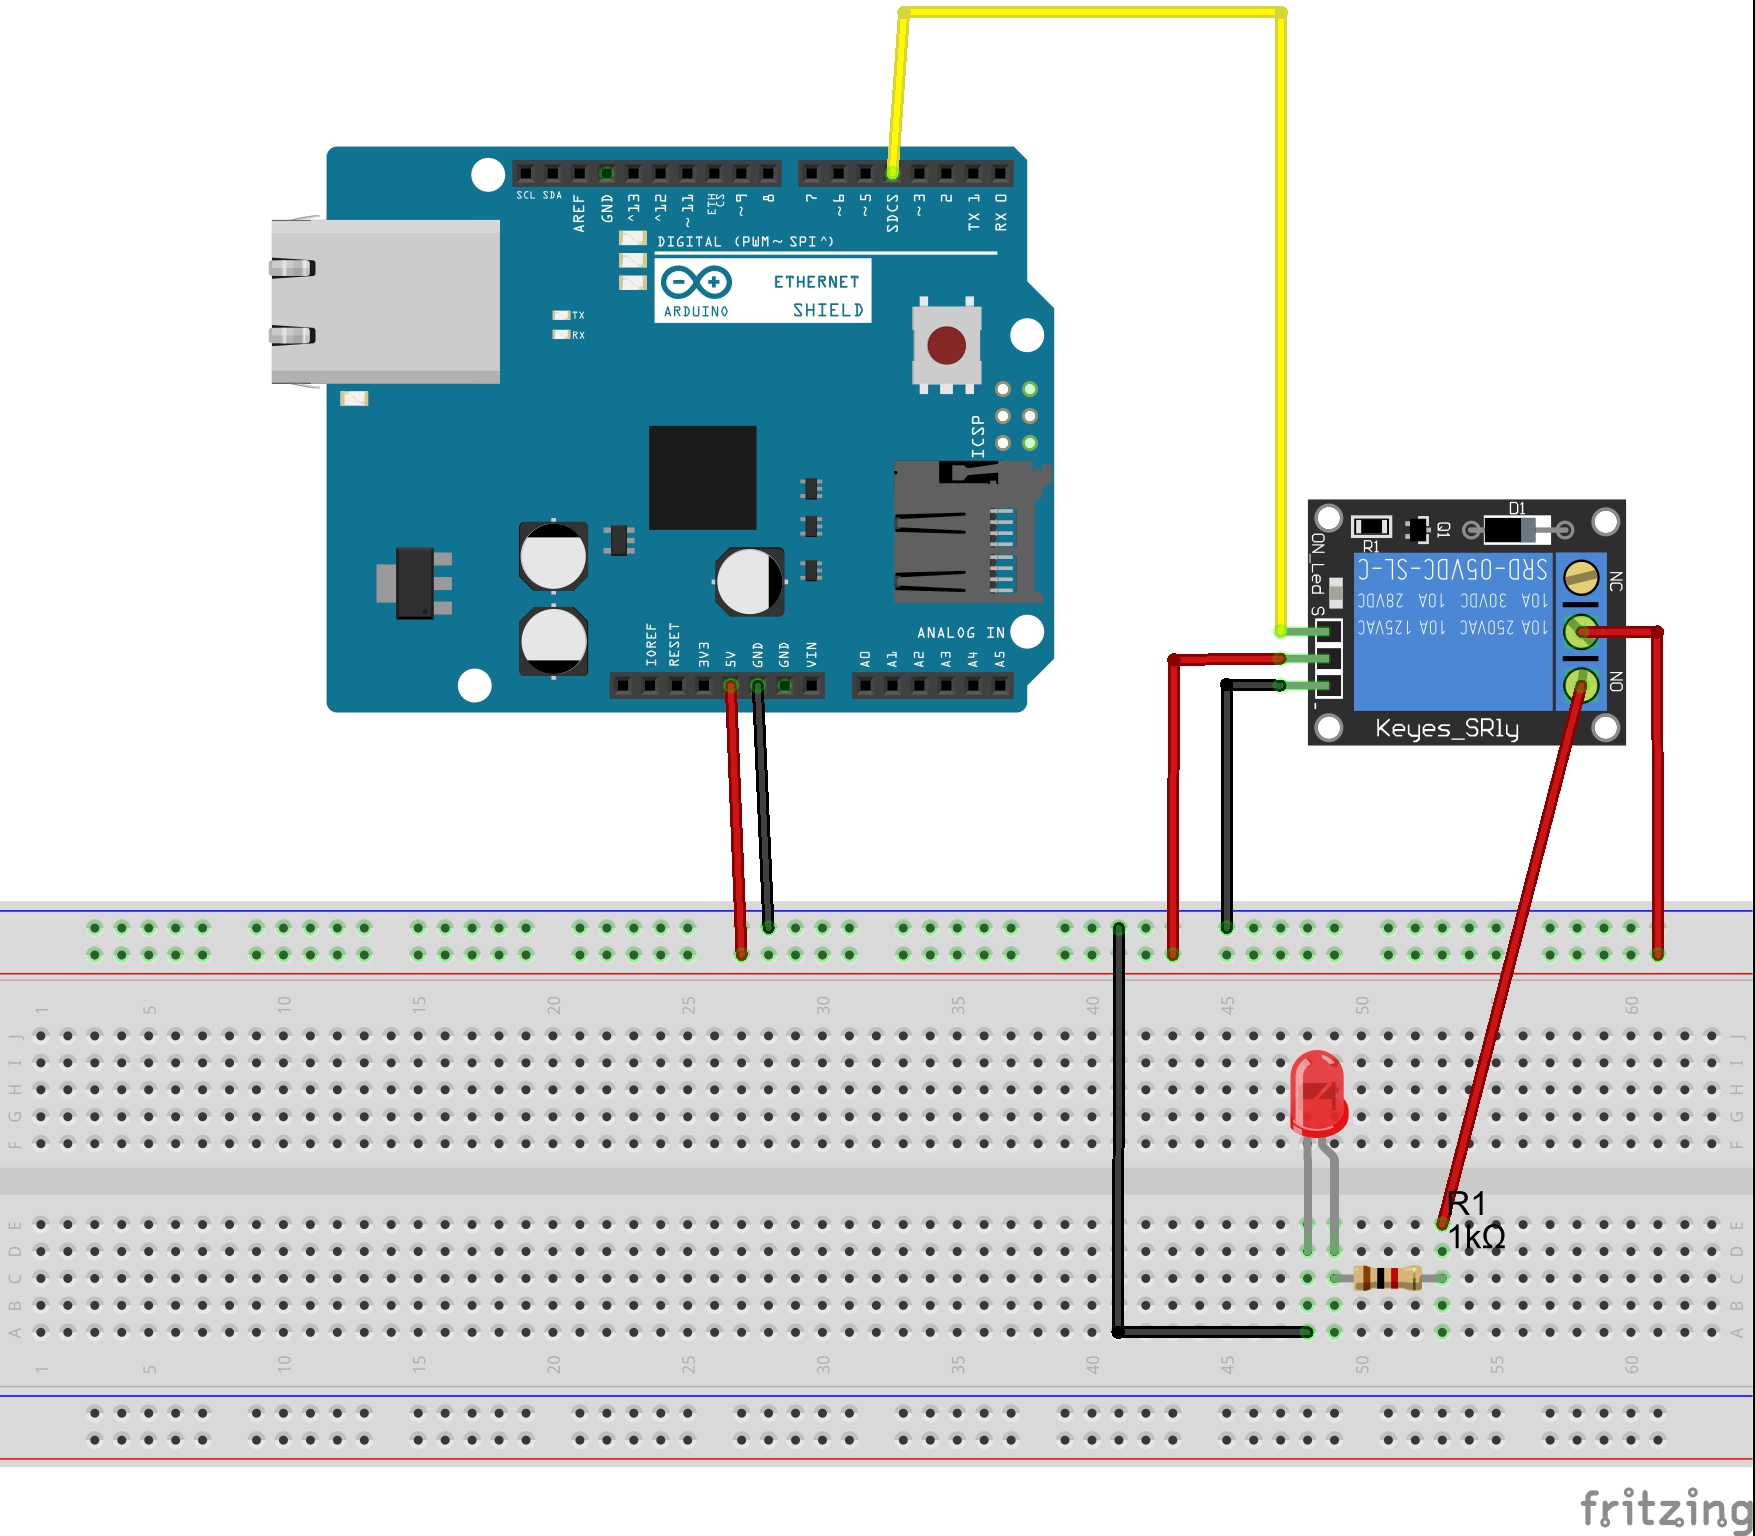
3) Hardware connection
Connect the relay with OSOYOO Basic board as following diagram:
4)Software Installation
Download the sketch file from : https://osoyoo.com/driver/ethernet_iot/lesson12/w5100-lesson12.zip
Unzip the download file and enter the folder W5100-lesson2, double click the w5100-lesson12.ino file, upload the sketch to your IDE . Open your Serial Monitor, you can see your router will assign an IP address to your IDE as following:
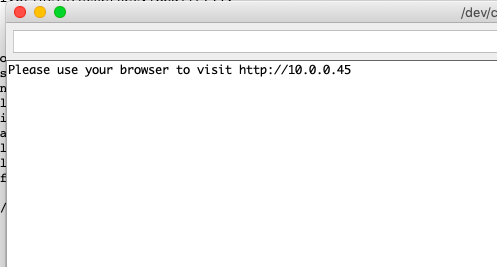 In above example, 10.0.0.45 is the IP address of my mainboard .
Now use another computer or your cell phone’s browser to visit url : http://10.0.0.45
Your browser will show following result:
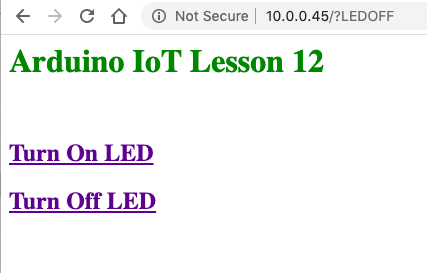
5)Make a Test:
Click Turn On LED link, your LED will be turn on , then click Turn Off LED link, your LED will be turn off.


I can operate it from a personal computer, but I can not operate from a smart phone.
If you want to use Cayenne phone APP, please update it to 1.5.0 version firstly.