Content
- Introduction
- Preparations
- About the Water Sensor
- Examples
Introduction
Osoyoo Water sensor brick WLS-001 is designed for water detection, which can be widely used in sensing the rainfall, water level, even the liquid leakage. The brick is mainly comprised of three parts: An Electronic brick connector, a 1 MΩ resistor, and several lines of bare conducting wires.
In this lesson we will learn what a Water Sensor is and how to use it with the Osoyoo Uno Board for detecting water.
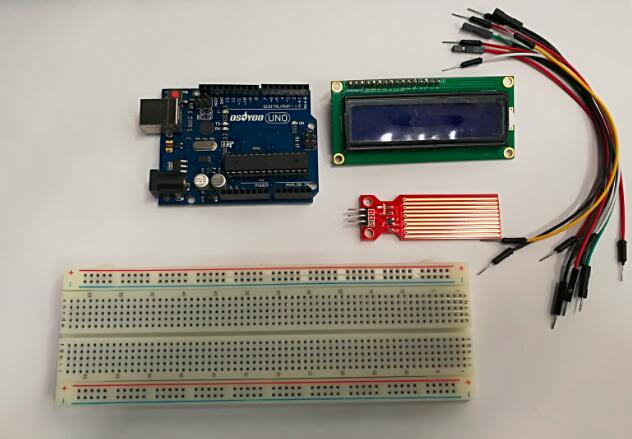
Preparations
Hardware
- Osoyoo UNO Board (Fully compatible with Arduino UNO rev.3) x 1
- Water Sensor x 1
- Red LED x 1
- I2C 1602 LCD x 1
- Breadboard x 1
- Jumpers
- USB Cable x 1
- PC x 1
Software
- Arduino IDE (version 1.6.4+)
About Water Sensor

Overview
Water Sensor is a easy to use, compact and light weight, high cost of water, droplets identification and detection sensor. And domestic and foreign products compared not only small, powerful, and cleverly designed with the following features :
- Judge the water level through with a series of exposed parallel wires stitch to measure the water droplet/water size .
- Can easily change the water size to analog signal, and output analog value can directly be used in the program function, then to achieve the function of water level alarm.
- Low power consumption, and high sensitivity, which are the biggest characteristics of this mdoule.
- Compatible with SainSmart UNO SainSmart Mega2560 SainSmart ADK etc.
Working principle
This sensor works by having a series of exposed traces connected to ground and interlaced between the grounded traces are the sens traces. The sensor traces have a weak pull-up resistor of 1 MΩ. The resistor will pull the sensor trace value high until a drop of water shorts the sensor trace to the grounded trace. Believe it or not this circuit will work with the digital I/O pins of your Arduino or you can use it with the analog pins to detect the amount of water induced contact between the grounded and sensor traces.
Use as a level in a tank
To use it as level detector in a deposit have to install the sensor on the inside of the tank at the level where we want to control the water level. The sensor must be positioned so that parallel lines are perpendicular to the sensor water level. The pin S will give us a greater value as the sensor is immersed.
Use as rain detector
To detect whether it is raining with this sensor have to position it horizontally so that rain falling on the sensor, as raindrops fall on the sensor film of water on the surface will be formed by increasing the value of the pin S, this how we can deduce if it is raining.
Specifications:
- Working voltage: 5V
- Working Current: <20ma
- Interface: Analog
- Width of detection: 40mm×16mm
- Working Temperature: 10?~30?
- Weight: 3g
- Size: 65mm×20mm×8mm
- Arduino compatible interface
- Low power consumption
- High sensitivity
- Output voltage signal: 0~4.2V
Pin definition:

- “S” stand for signal input
- “+” stand for power supply
- “-” stand for GND
2 of the pins are for power, 1 connecting to the +5V of the Arduino and the other connecting to the ground terminal of the arduino. The other pin, with an S, is the signal pin. This is the pin that outputs the analog voltage signal in proportion to the amount of the sensor which is covered with liquid. This pin connects to an analog pin on the Arduino board to be read.
Applications:
- Rainfall detecting
- Liquid leakage
- Tank overflow detector
Examples
Arduino Liquid Level Detector
In this example, we will explain how to use a water sensor to detect the amount of water we have in a tank. We will use the S pin as analog input connecting Arduino, the value read will be higher depending on the sensor surface is covered with water. This is because the water acts as a conductor, given that the water we use in our deposits not be pure water (H2O), since if water is nonconductive. But rarely we will use this type of sensors to measure the water level in a tank of pure water.
Connection
Build the circuit as below:
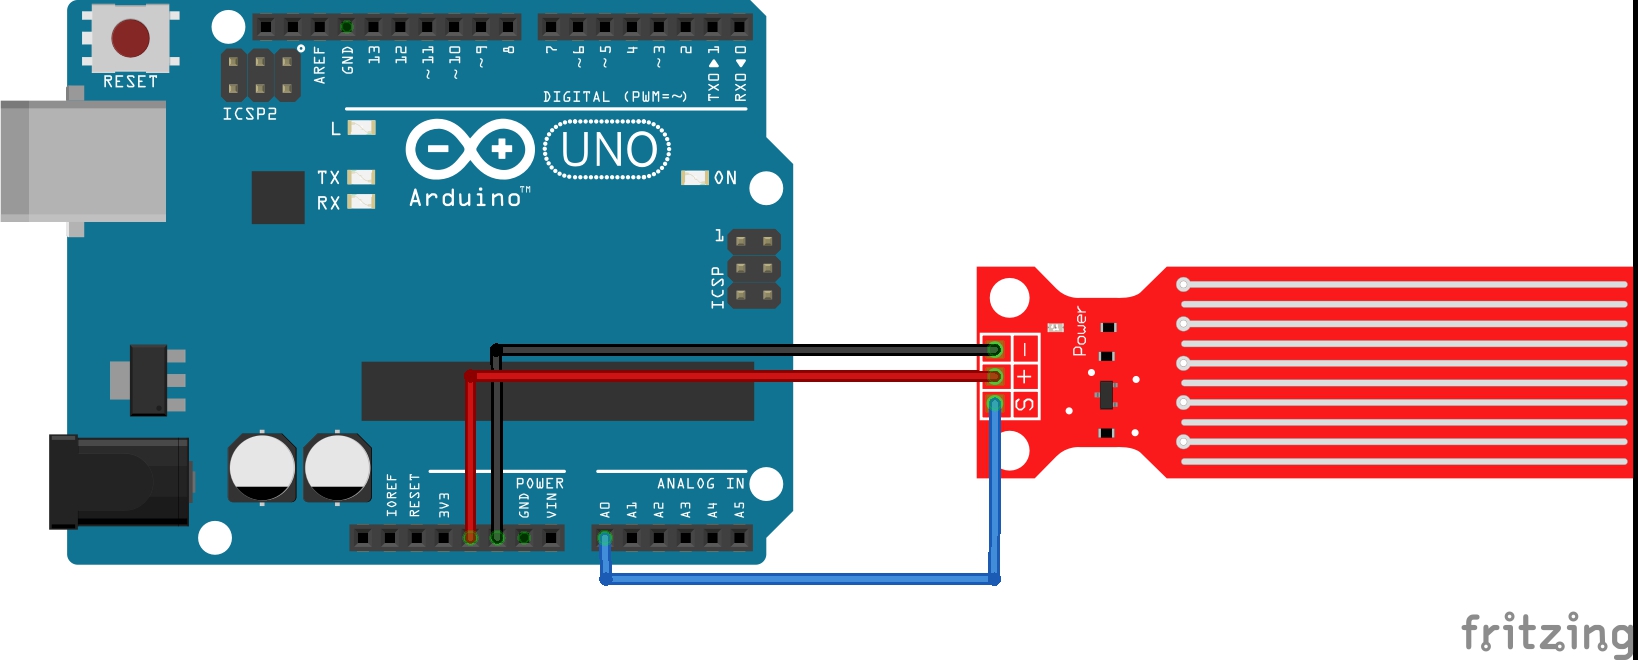
Here we connect the signal pin (S) to analog pin A0. This allows the Arduino board to be able to read the analog voltage value.
Code Program
After above operations are completed, connect the Arduino board to your computer using the USB cable. The green power LED (labelled PWR) should go on.Open the Arduino IDE and choose corresponding board type and port type for you project. Then load up the following sketch onto your Arduino.
const int analogInPin = A0; int sensorValue = 0; void setup() { Serial.begin(9600); } void loop() { sensorValue = analogRead(analogInPin); Serial.print("Sensor = " ); Serial.print(sensorValue*100/1024); Serial.println("%"); delay(1000); }
In the first block of code, we declare the analogInPin variable and initialize it to 0. We then declare a sensorValue variable, which will hold the value of the analog value output from the sensor, serving as our sensor reading, which represents the liquid level.
In our setup() function, we set the baud rate and make the sensorPin input, since it is an input value into the Arduino board to be read.
In our loop() function, which is the code that repeats over and over, we read the value from the sensorPin and store it in the variable sensorValue. We then output this value to the Serial Monitor to be read. The code is constantly running this code over and over, so it obtains new readings endlessly. We give a delay of 100ms in between each reading to create a small pause in between.
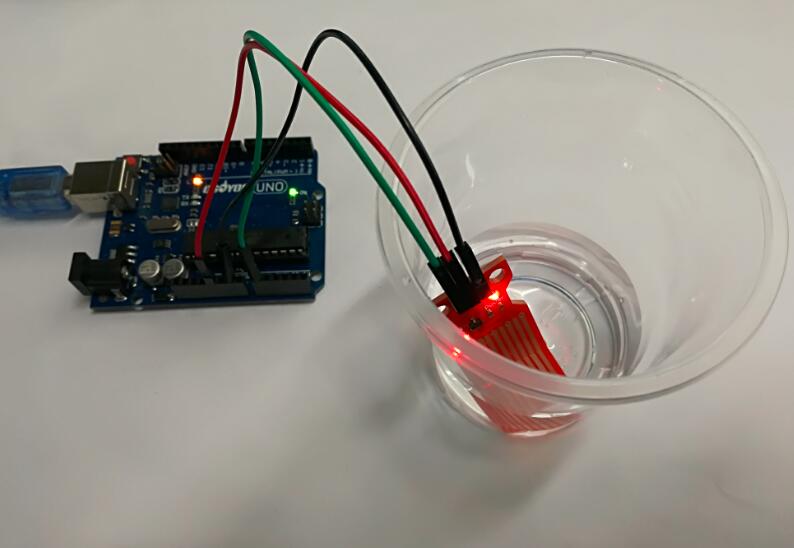
Running Result
A few seconds after the upload finishes, if you immerse the sensor in water,

Open the Serial Monitor, you can see the running result as below:
Arduino I2C 1602 LCD Liquid Level Detector
In this example, we will use a water sensor to detect the depth of the water and display the result on an I2C 1602LCD.
Connection
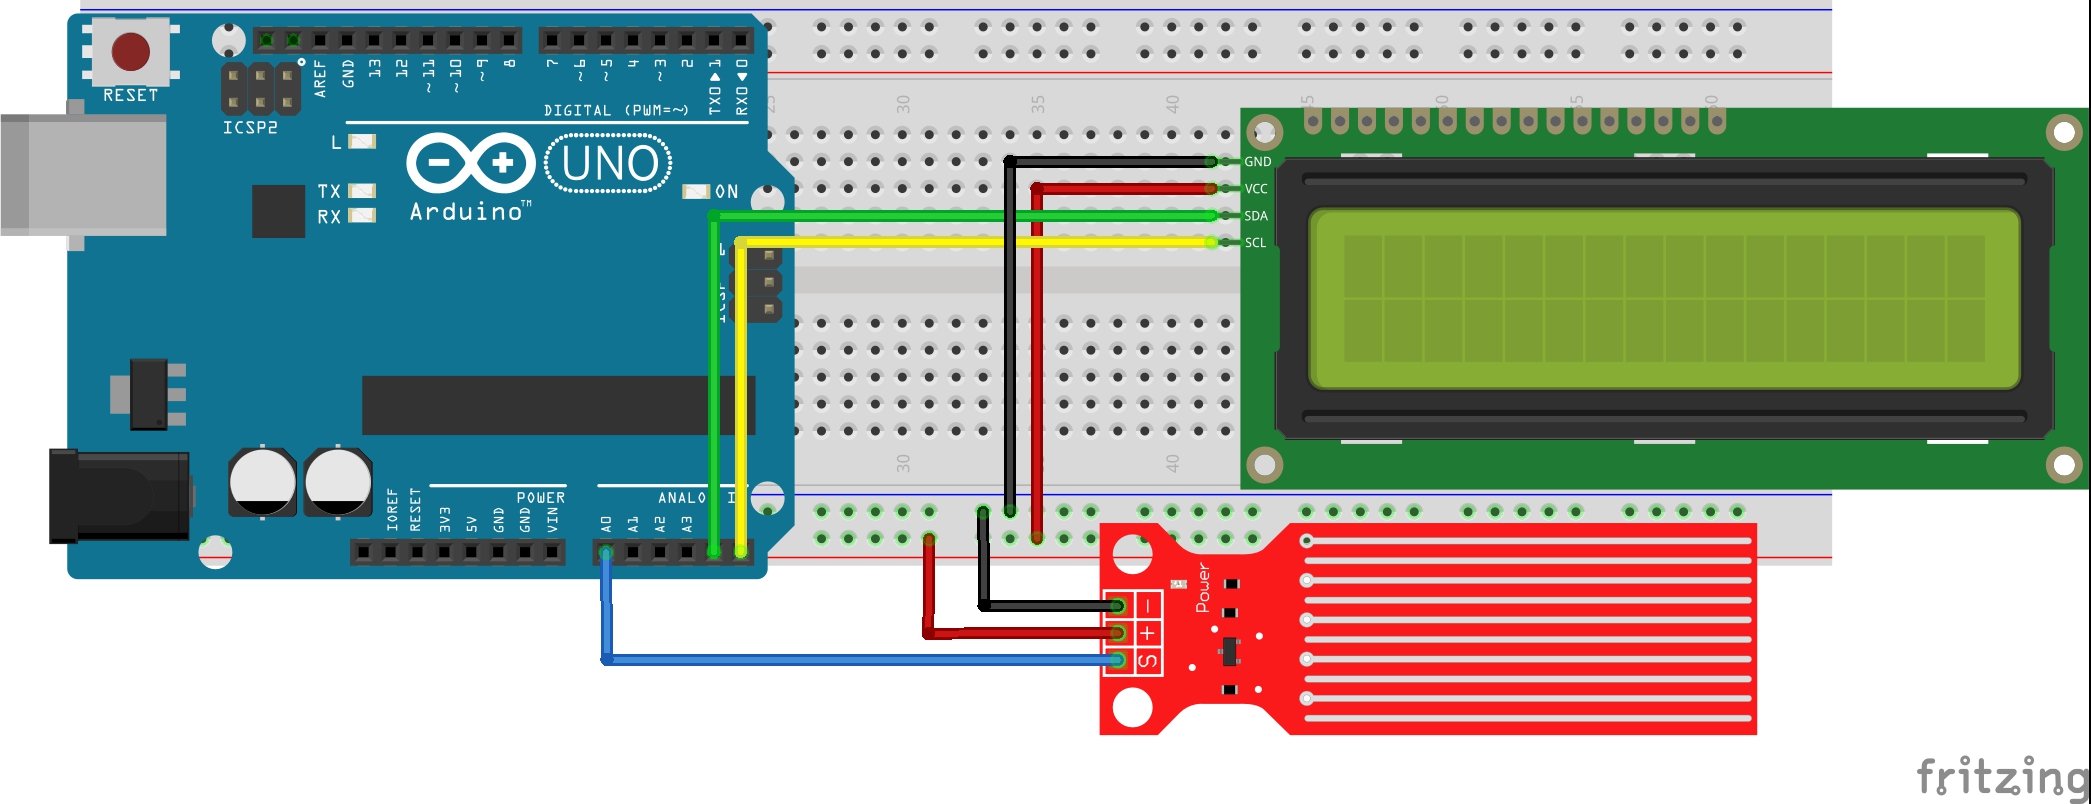
Build the circuit as below:
| I2C 1602LCD |
Osoyoo UNO board |
| VCC |
5V |
| GND |
GND |
| SDA |
A4 |
| SCL |
A5 |
| Water Sensor |
Osoyoo UNO board |
| – |
GND |
| + |
5V |
| S |
A0 |
Code Program
After above operations are completed, connect the Arduino board to your computer using the USB cable. The green power LED (labelled PWR) should go on.Open the Arduino IDE and choose corresponding board type and port type for you project. Then load up the following sketch onto your Arduino.
#include <Wire.h> #include <LiquidCrystal_I2C.h> // initialize the library with the numbers of the interface pins LiquidCrystal_I2C lcd(0x27,16,2); // set the LCD address to 0x27 for
                                  //a 16 chars and 2 line display const int waterSensor = 0; int waterValue = 0; void setup() { lcd.init(); //initialize the lcd lcd.backlight(); //open the backlight lcd.setCursor(0,0); lcd.print(" Water Sensor "); } void loop() { int waterValue = analogRead(waterSensor); // get water sensor value lcd.setCursor(6,1); //place cursor at 6 column,2 row lcd.print(waterValue); //value displayed on lcd delay(200); //delay 200ms lcd.setCursor(0,1);//place cursor at 1 column,2 row lcd.print(" "); //Add 16 spaces to make sure the remaining characters
                  //in Line 1,if any, are cleared }
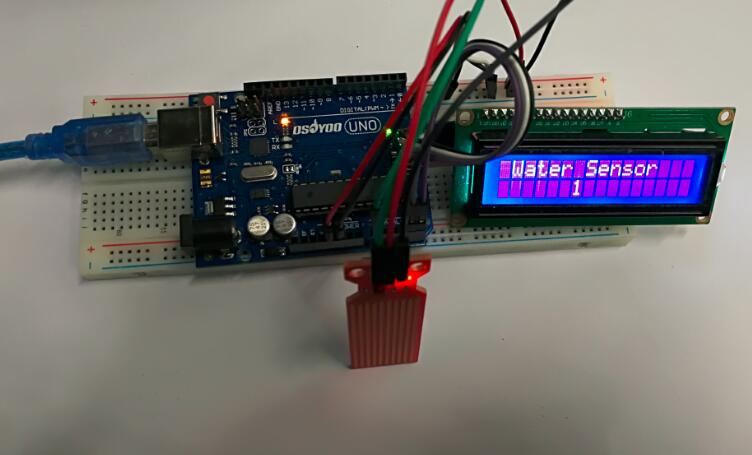
Running Result
A few seconds after the upload finishes, if you immerse the sensor in water, you can see the depth to which the sensor is soaked displayed on the I2C LCD1602.