OSOYOO Children Science Lab Learning Kit is to introduce someone to electricity through do some interesting experiments, which can inspires children’s inquisitiveness and interests in science field.
It include 6 sections:
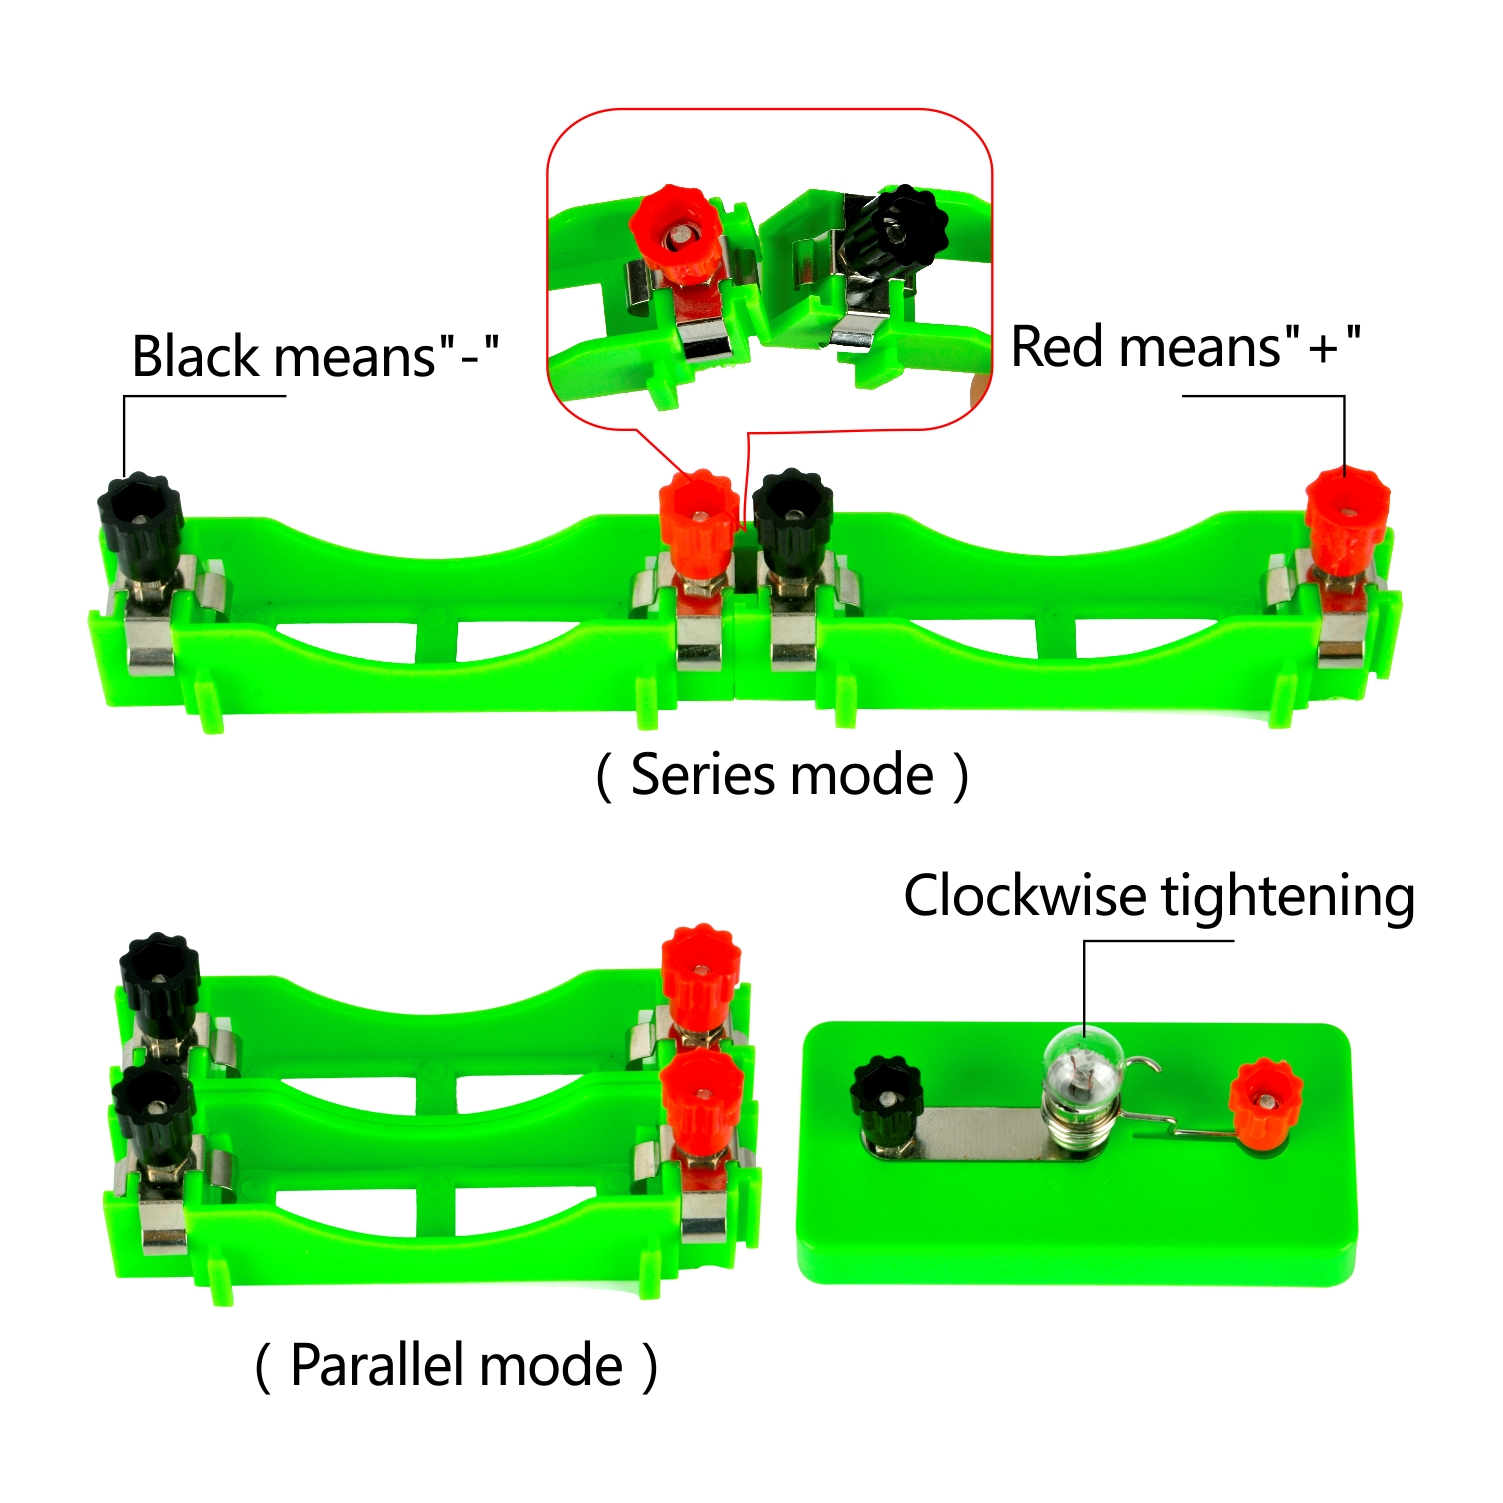
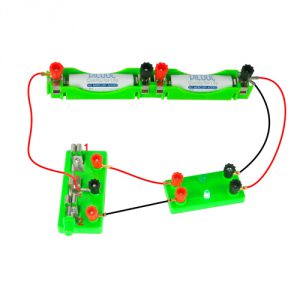
Section 1:Preparation
Section 2: Get a lightbulb to light
Section 3: Series Circuits & Parallel Circuits
Section 4: LED
Section 5: Electromagnet
Section 6: DC motor
Section 1:Preparation
Section 2: Get a lightbulb to light.
Any closed loop allowing electric charges to flow is called an electric circuit.In this experiment, you will investigate conditions that create current in an basic electric circuit.
Materials:
one AA battery battery
one Lightbulb
some Wire
One Switch
One battery holder
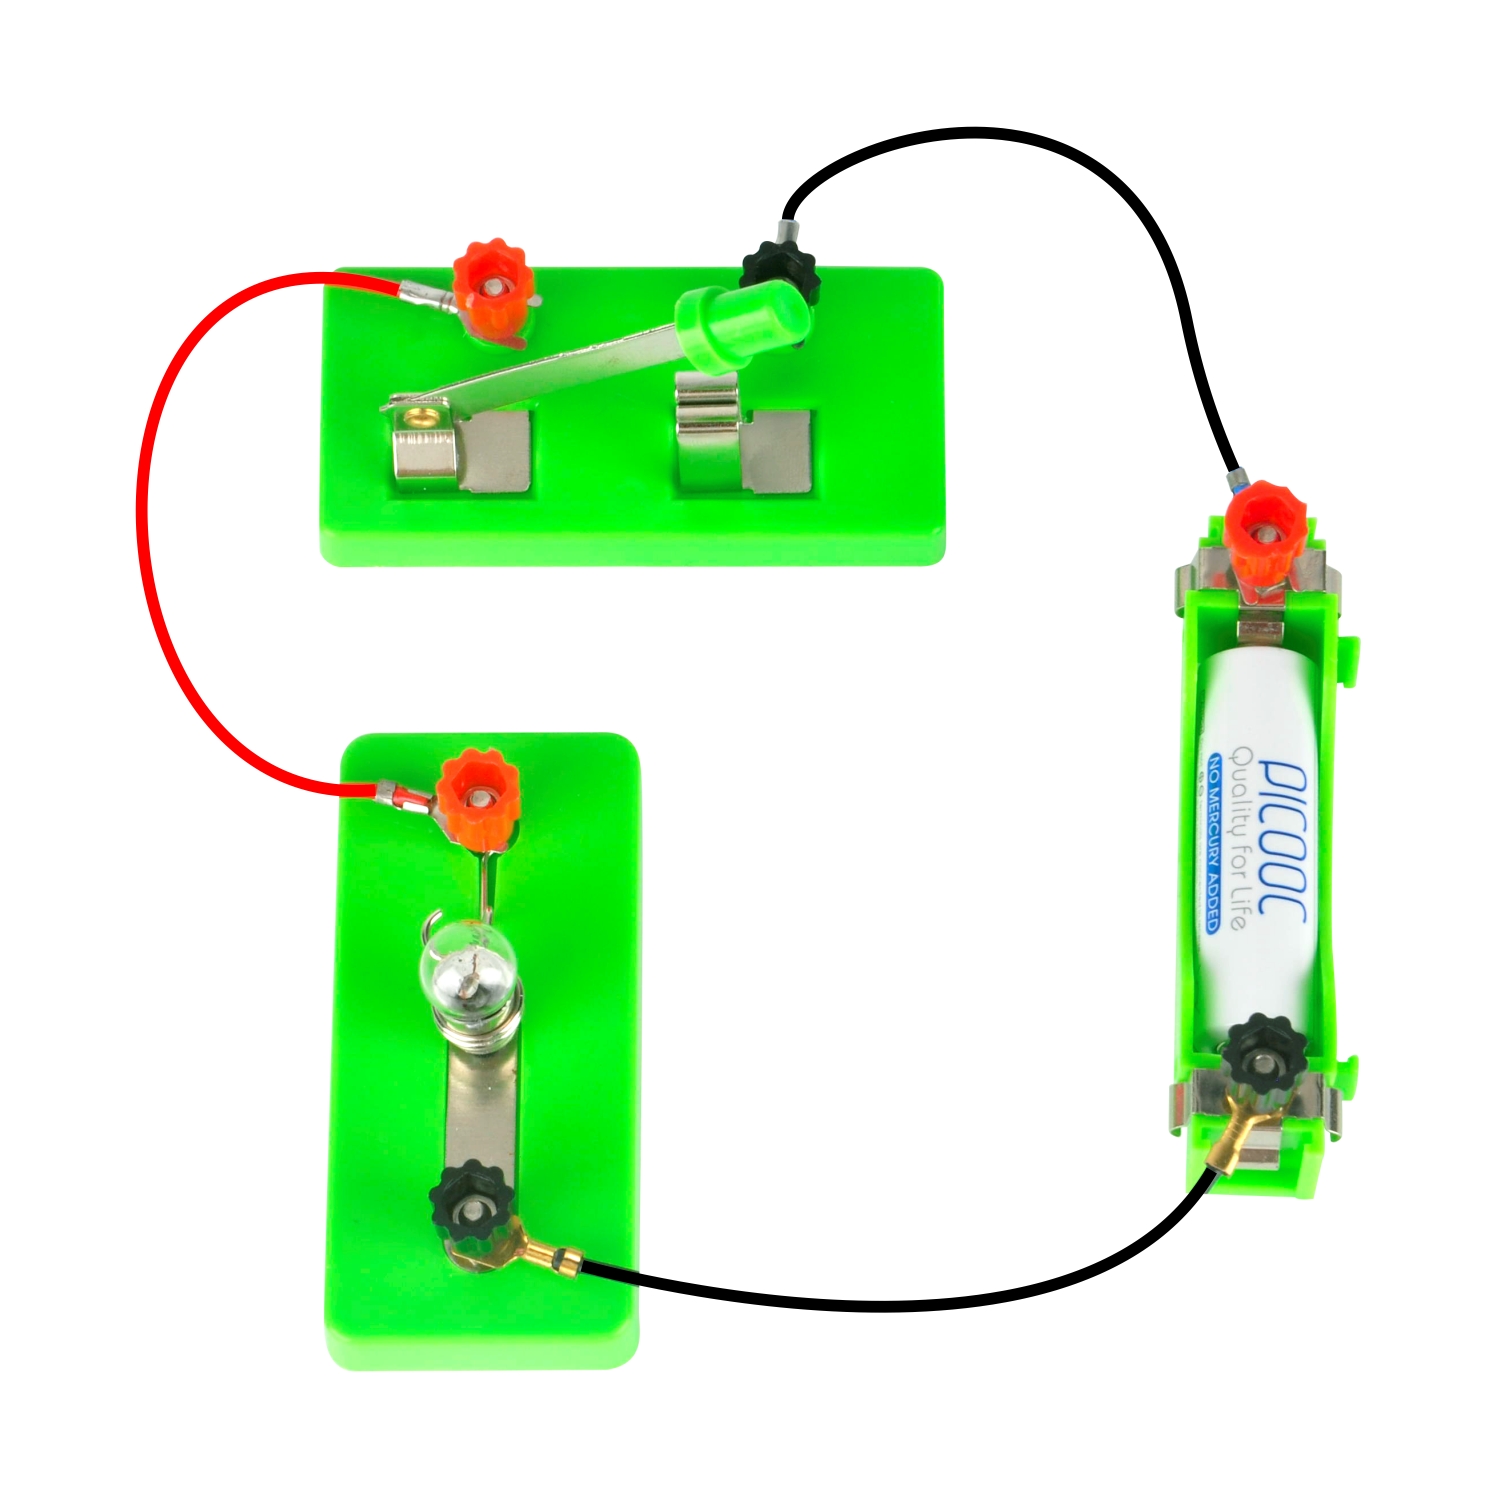
Steps:
1.connect then as follow:
 (picture 2-1)
2.Make observations of the lightbulb when the switch is turned on and off.
Result: when the switch is turned off, the lightbulb is on, when the the switch is turned on, the lightbulb is off.
An electric circuit includes a charge pump (in this experiment, the battery), a device (in this experiment, the lightbulb) and conductors (in this experiment, the wire), and they must be a closed loop.
Section 3: Series Circuits & Parallel Circuits
In this experiment ,you will learn about Series Circuits and Parallel Circuits, and know the difference between them.
Materials:
Two AA batteriess
Two Lightbulbs(A and B)
Two Lightbulb sockets (A and B)
one Switch
some Wires
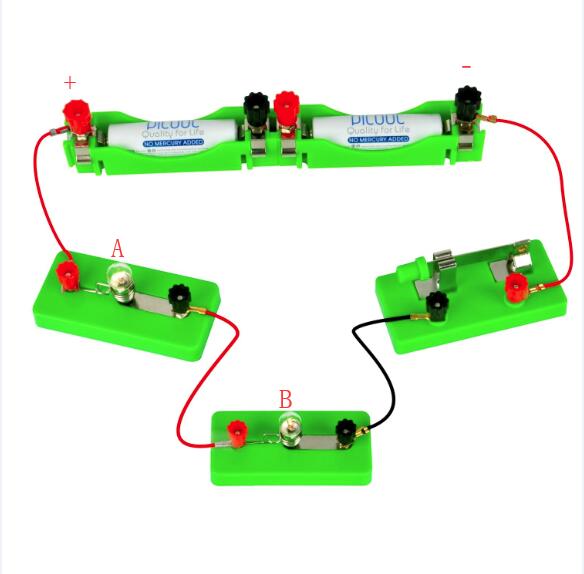
Experiment 1:series circuit
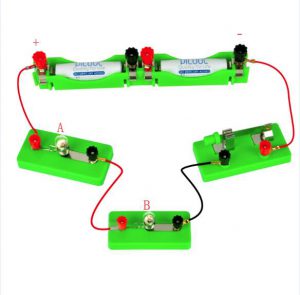 (picture 3-1)
1.Connect the “+” pole of the battery to one terminal of a lightbulb(A).
2.Connect the other terminal of the lightbulb(A) to one terminal of a lightbulb(B)
3.Connect the other terminal of the lightbulb(B) to one terminal of a switch.
4.Connect the other terminal of the switch to the “﹣” pole terminal of the battery.
5.Observe:
a), the change of the lightbulb when the switch is turned on and off.
b)what would happen if one lightbulb be removed?
Conclusion:A circuit like the one in Experiment 1, in which all current travels through each device, is called a series circuit. If the circuit become open when the switch is turned off or one lightbulb be removed, the current stops flowing.
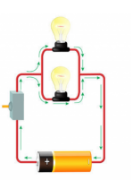
Experiment 2:parallel circuit
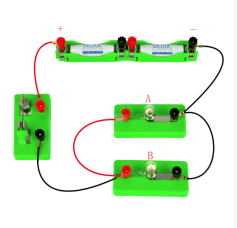 (picture 3-2)
1.Connect the “+” pole of the battery to one terminal of switch.
2.Connect the other terminal of switch to one terminal of lightbulb(A) and lightbulb(B).
3.Connect the other terminal of the lightbulb(A) and lightbulb(B) to the “﹣” pole of the battery.
4.Observe :
a)the change of the lightbulb when the switch is turned on and off.
b)what would happen if one lightbulb be removed?
Conclusion:A circuit like the one in Experiment 2, in which there are several current paths is called a parallel circuit. The current from power supply goes through both lightbulbs. When lightbulb(A) be removed , the current through the lightbulb(A) stop flowing, which cause the lightbulb(A) not working anymore. On the other hand, the lightbulb(B) will still be lighting because it is still a close loop and the current through it didn’t stop flowing.
Conclusion of Series Circuits & Parallel Circuits:
Series Circuits :
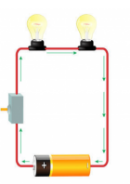 (picture 3-3)
1.The whole electric circuit can be wrote in one stroke.
(There is a circuit diagram, please try to follow from the positive pole of the battery to the negative pole with your finger. I think that I could write it with a single stroke when I traced.)
2.The current is the same for all of the elements.
(we knew that the brightness of a lightbulb depends on the current through it, in the experiment 1, you can see the brightness of the lightbulbs are the same, this means that the current is the same everywhere in the circuit)
3.the voltage is addition of all the voltage elements.
(voltage is different in each lightbulb, the total voltage is the sum of the voltages applied to each of lightbulb)
4.The lightbulb get dimmer every time you add one.
5.One lightbulb be removed causes the rest all to be removed.
Parallel Circuits:
 (picture 3-4)
1.the whole electric circuit can’t be wrote in one stroke.
2.the current is not same for all of the elements.
3.the voltage is the same for all elements.
4.Nothing happens to the brightness of the light bulbs every time you add one.
5.one light be removed and the rest remain on.
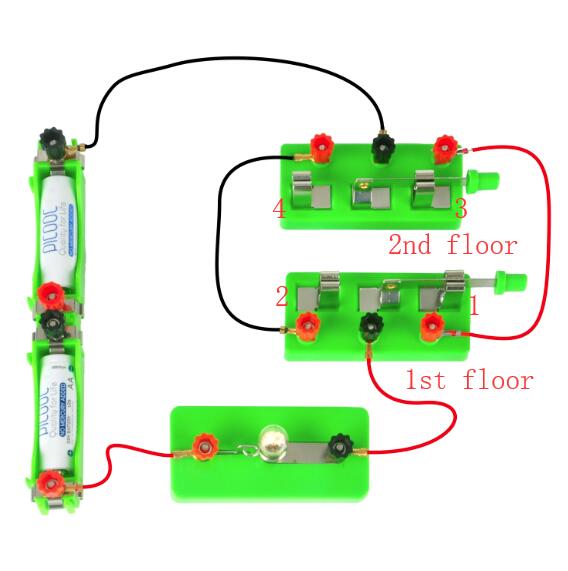
Real-World Series Circuits & Parallel Circuits:
In daily life , You often stand the 1st floor to turn on the light which on the 2nd floor, when we arrive at 2nd floor, we can turn off the light directly. Now , you can do same experiment.
Connect it as follow:
 (picture 3-5)
Imagine that you stand on 1st floor now, you put the ploe of switch to “1” position, the lightbulb will on , when you arrive at 2nd floor, you can put the ploe of switch to “4” position,the lightbulb will off.
Section 4: LED
LED,which stands for “light emitting diodes”, LED technology is used in many electronic devices used frequently in the average home.In an LED light, electrified energy causes the semiconductor contained inside the LED bulb to emit light. LED technology is used in computers, televisions, remote controls, and flashlights, as well as in signs, traffic lights, and architectural and stage lighting.
Let’s do two experiments with LED.
Experiment 1
Materials:
2 AA batteries
2 battery holder
1 SPST Switch
1 LED
Connect them as follow,please connect all parts via wires firstlly, then put the batteries finally.
 (picture 4-1)
Result:when the switch is turned off, the LED is on.
Experiment 2. ( traffic lights)
In this experiment, we will use LED to demonstrate traffic lights in daily life.
Materials:
2 AA batteries
2 battery holder
1 SPDT Switch
1 LED
Connect them as follow,please connect all parts via wires firstlly, then put the batteries finally.
 picture 4-2)
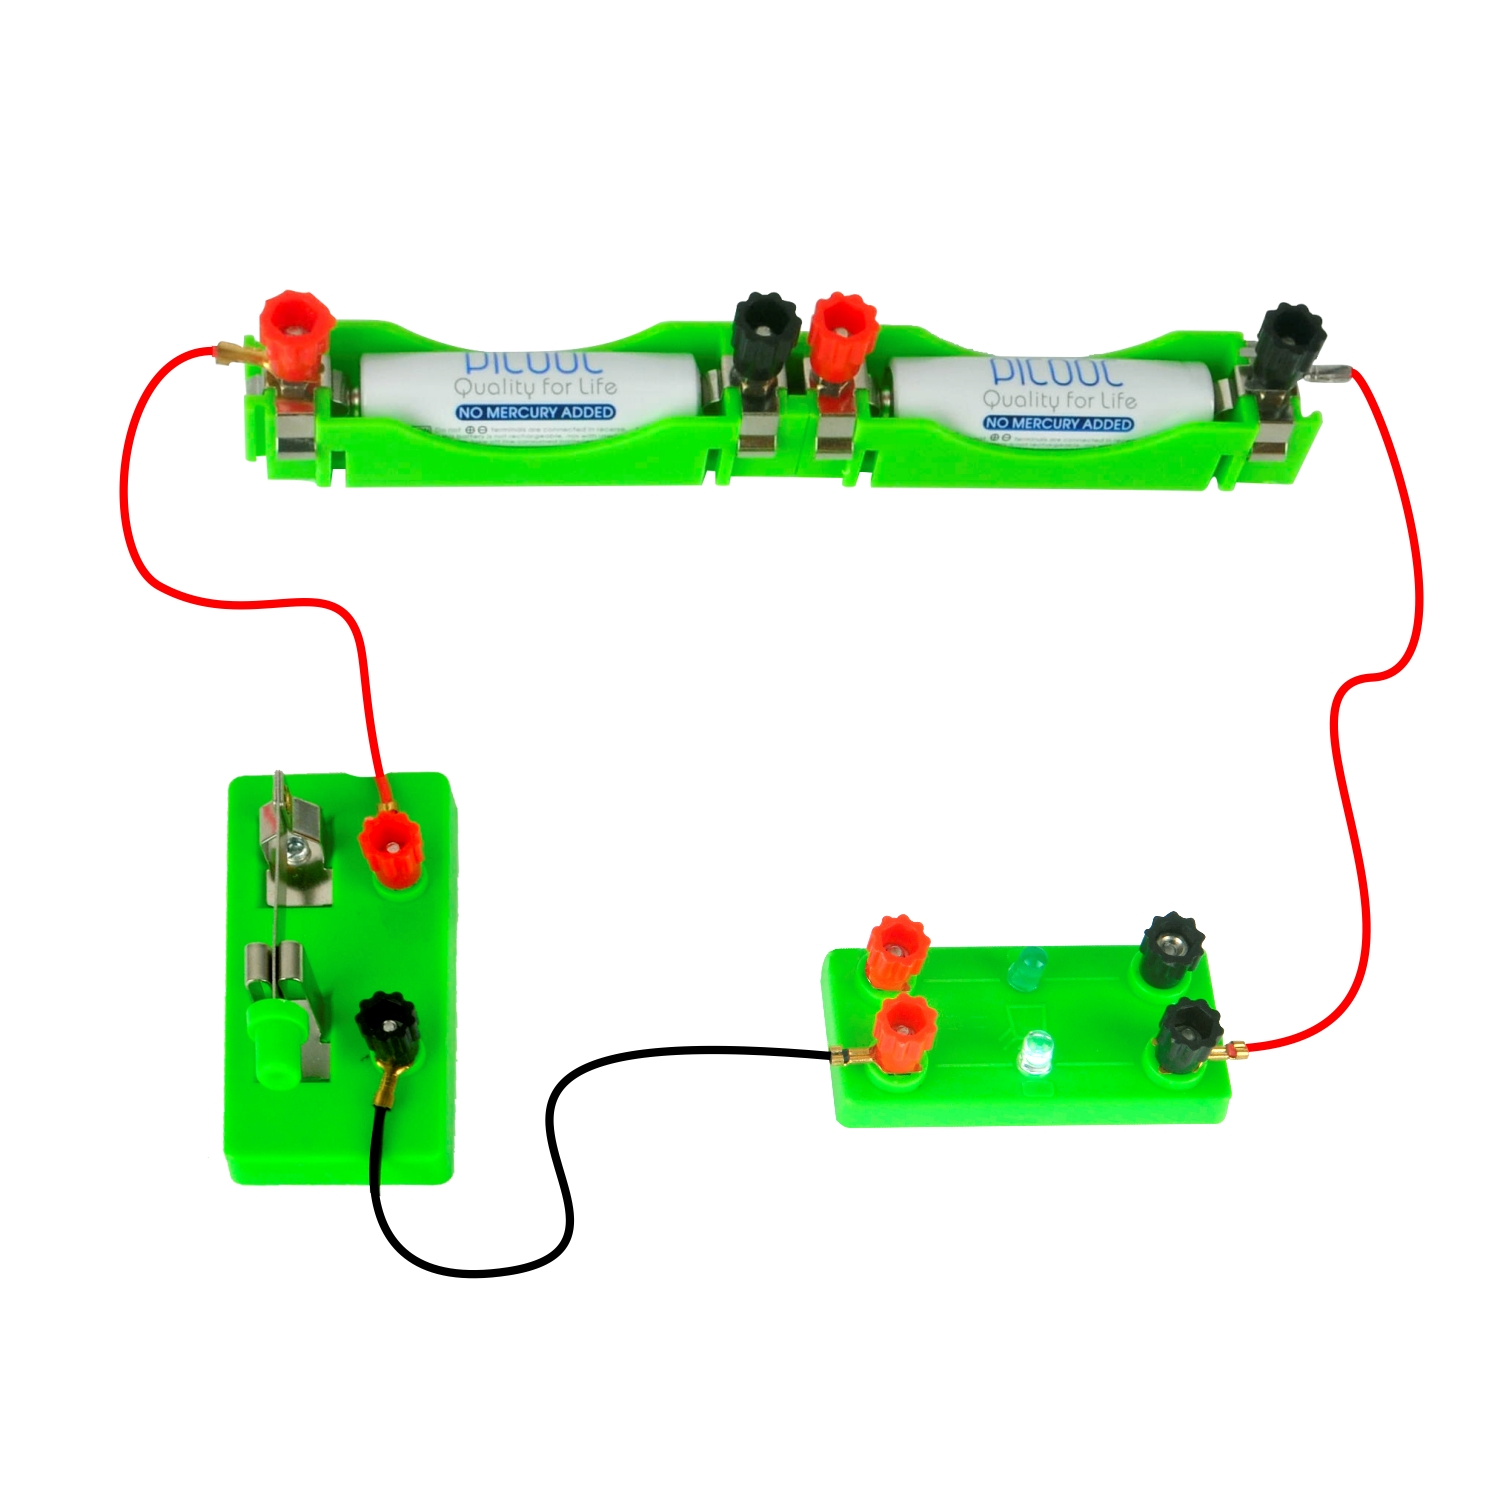
Result: when you put the Pole of switch to “1”, the green LED will on;
when you put the Pole of switch to “2”, the White LED will on;
Section 5: Electromagnet
we played with magnet, in this Chapter, we will introduce a new item—- electromagnetism. The study of electricity and magnetism and how they are connected, is called electromagnetism.
Let’s do a experiment with Electromagnet.
Materials:
2 AA batteries
2 battery holder
1 SPST Switch
1 solenoid
Some wires
Steps:
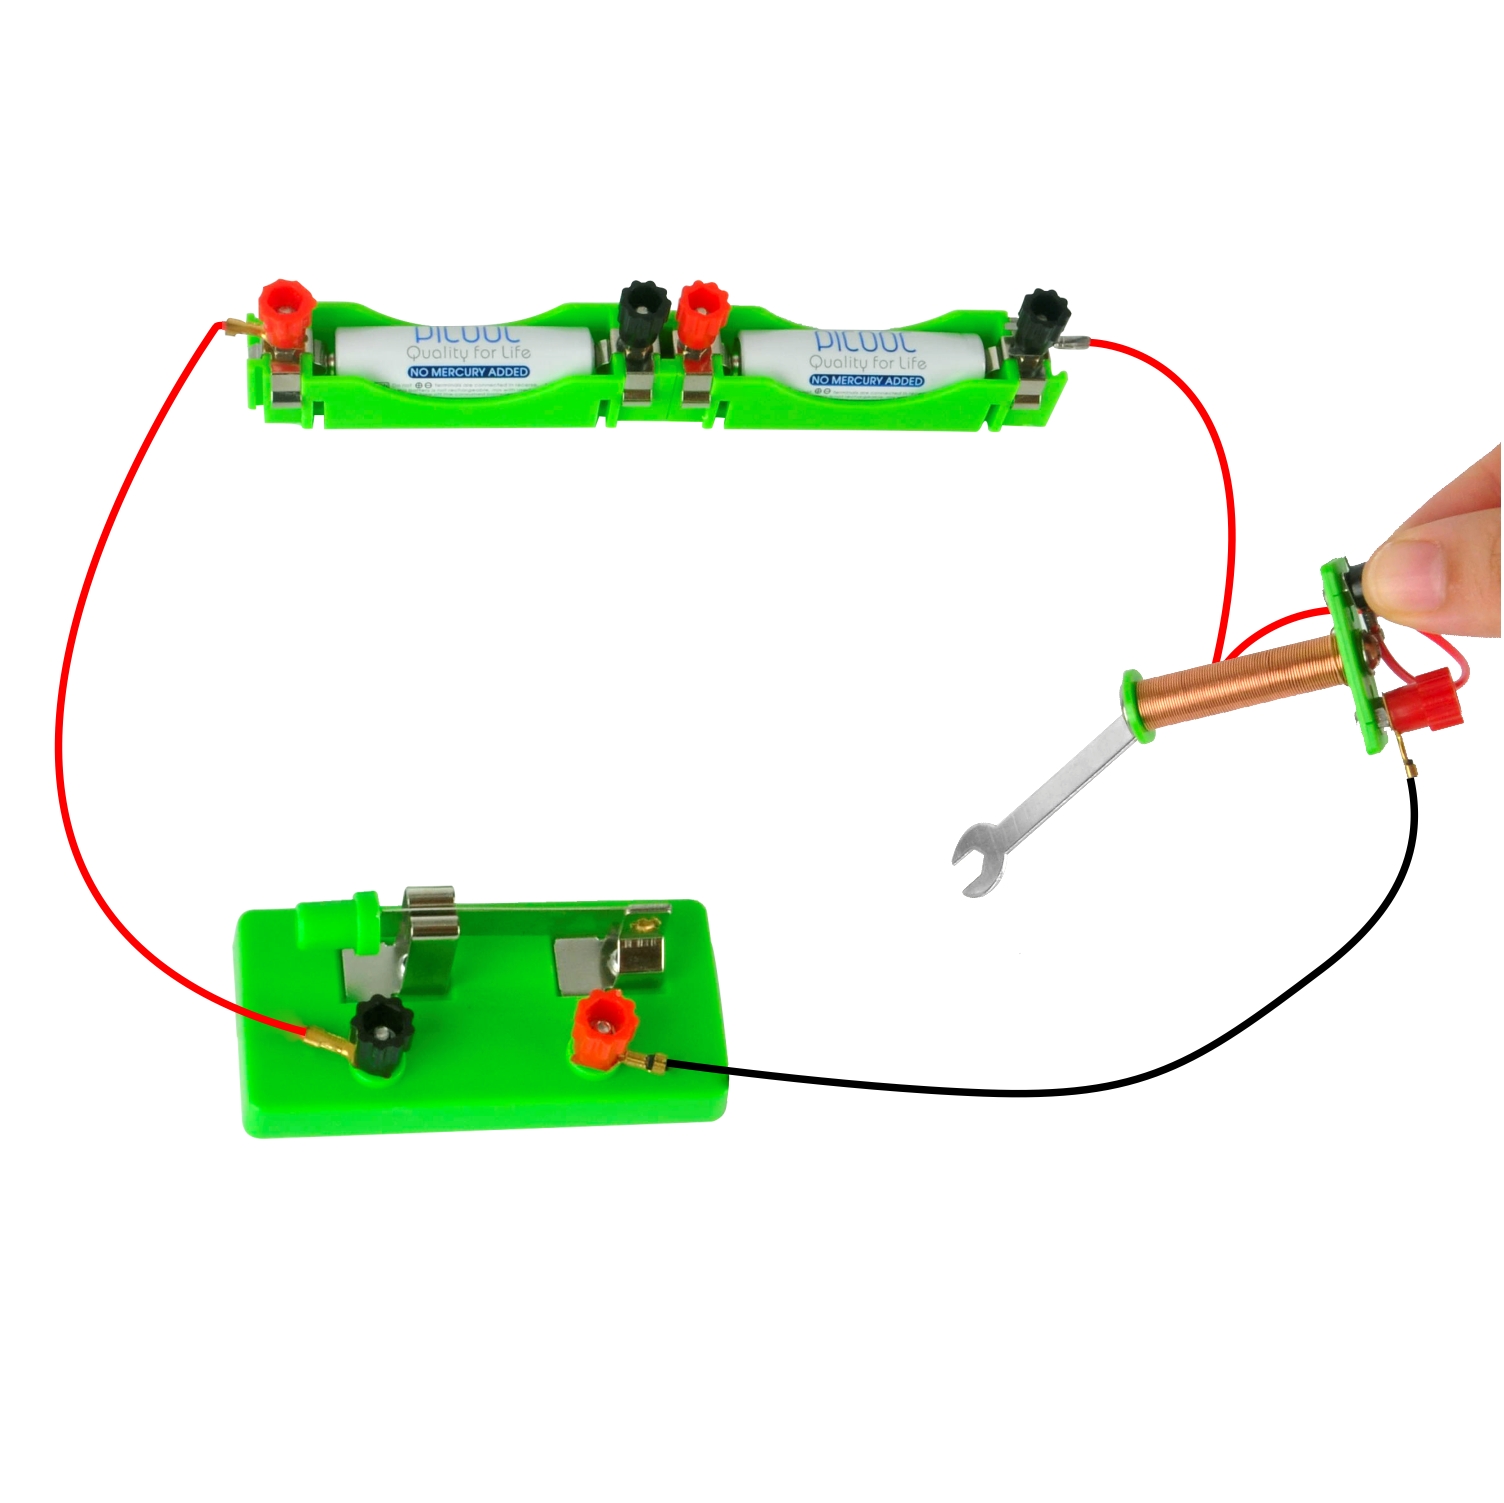
1.Connect them as follow,please connect the Circuit firstlly.
2.Put the batteries to battery holder.
3.Put the solenoid close to the wrench iron
Notice : Solenoid will become hot, Don’t touch.
 (picture 5-1)
Result: while the solenoid is closing the wrench iron, the wrench iron will be attracted by the solenoid.
knowledge point : Electromagnet will produce magnetic field when it is electrified.
Chapter 5: DC motor
In this chapter you will do two interesting Experiment with a small DC motor. A DC motor is electrical machines that converts direct current electrical energy into mechanical energy. DC motors were widely used,Small DC motors are used in tools, toys, and appliances.Larger DC motors are used in propulsion of electric vehicles, elevator and hoists, or in drives for steel rolling mills.
Experiment 1:
QUESTIONS :Can you get a lightbulb to light with a motor?
Materials:
1 DC Motor
1 Lightbulb Socket
1 Lightbulb
1 Crank Device
some Wires
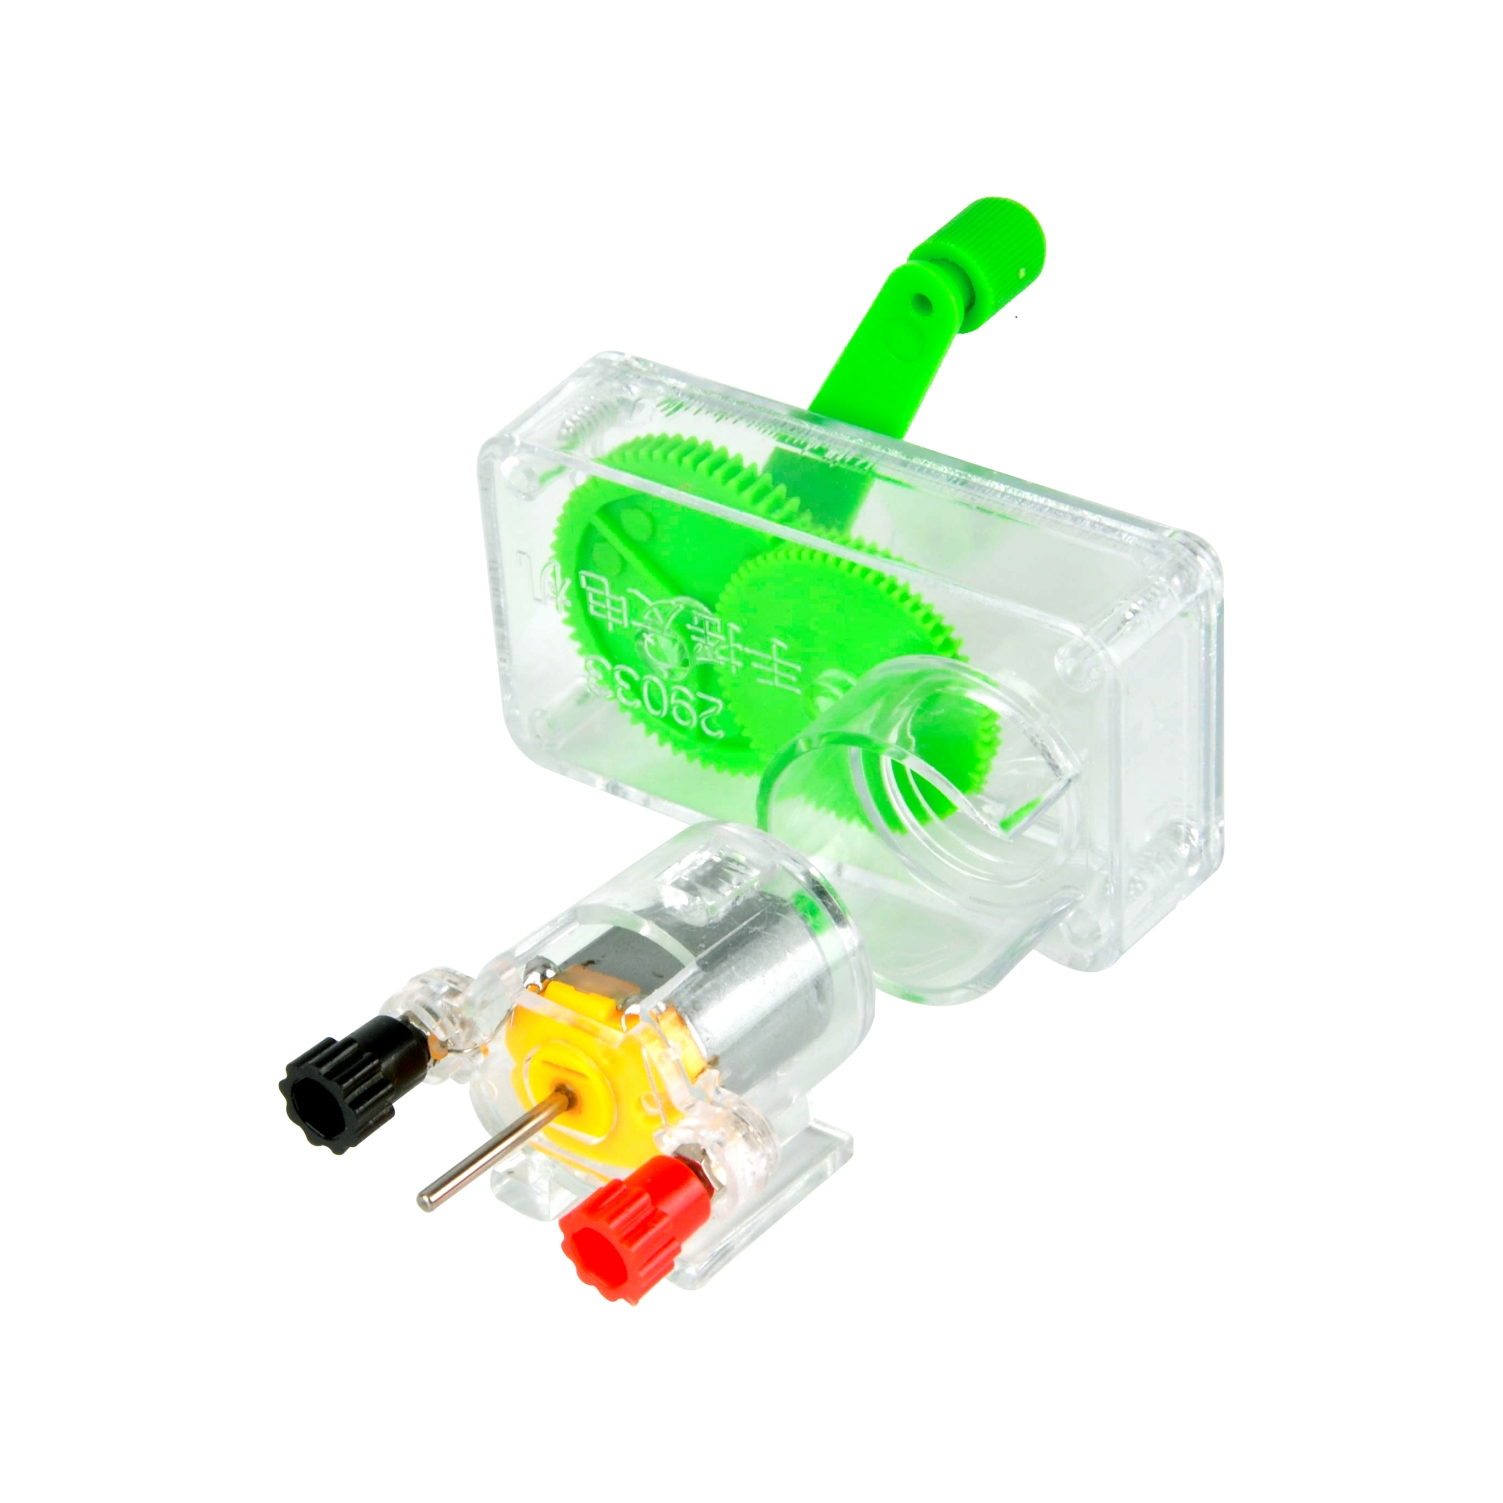
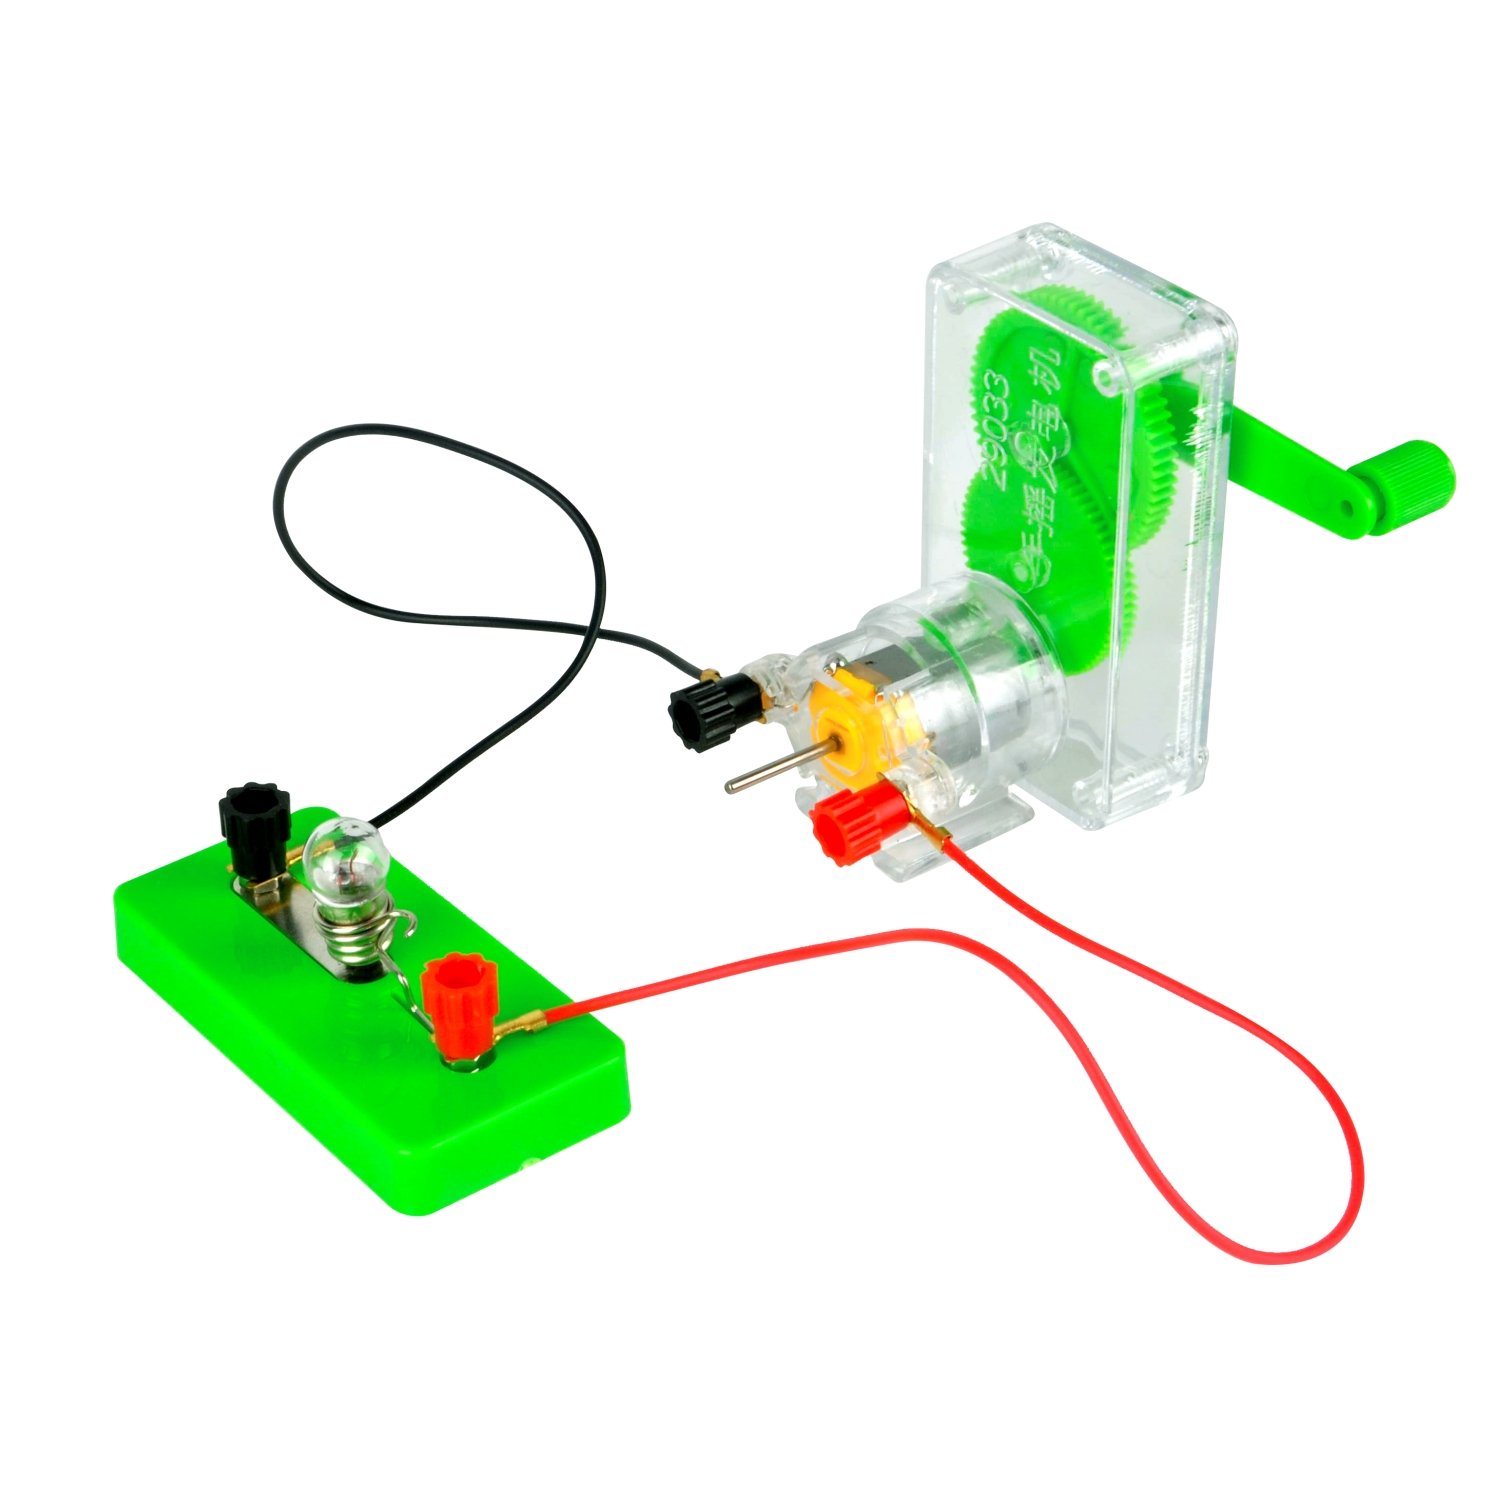
1.Put the DC motor into the crank device.(Picture 5-1)
2.Connect one terminal of the lightbulb with one terminal of the DC motor.
3.Connect the other terminal of the DC motor with the other terminal of the lightbulb.
4.Crank the motor with your hands.
5.Make observation on the lightbulb.
 (Picture 5-1)
 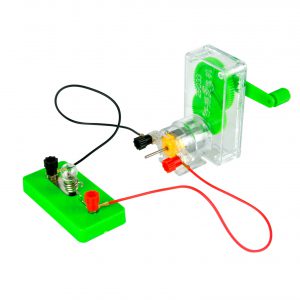 (picture 5-2)
Result: when you crank the motor with your hands, the lightbulb will on. In this Experiment, it is mechanical energy convert into electrical energy.when you crank the motor with your hands, it produce mechanical energy, then mechanical energy convert into electrical energy via DC motor, so the lightbulb will on.
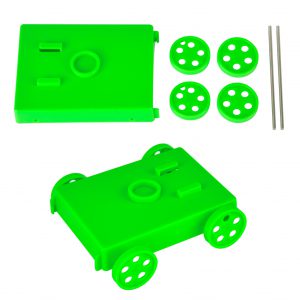
Experiment 2: Wind Car
Materials:
1 DC Motor
1 toy car
1 fan
1 AA battery
1 battery holder
some Wires
Steps:
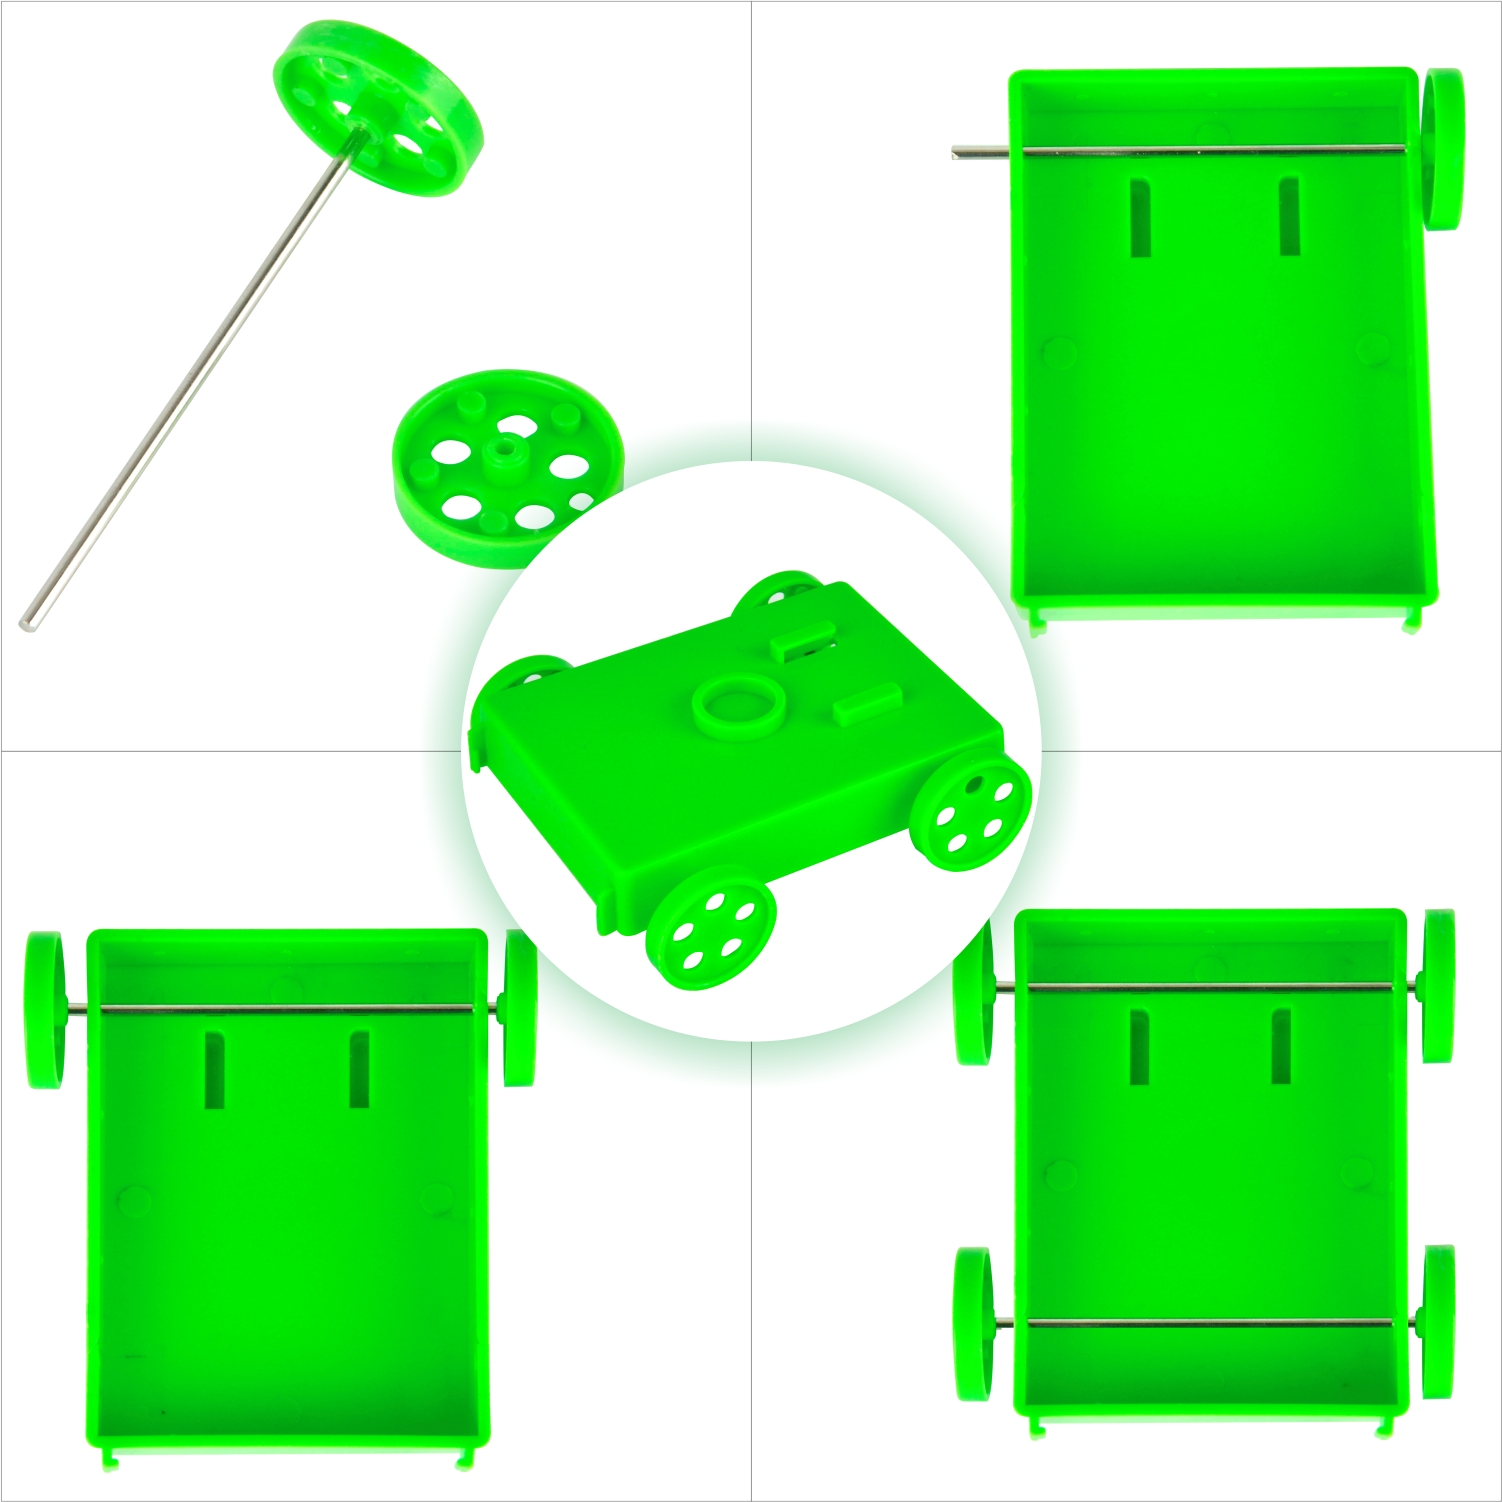
1.Install the car as follow:
 (picture 5-3)
 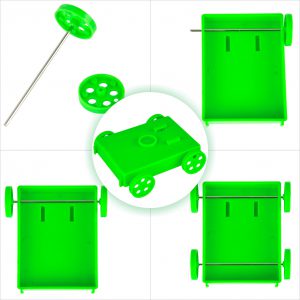 (picture 5-4)
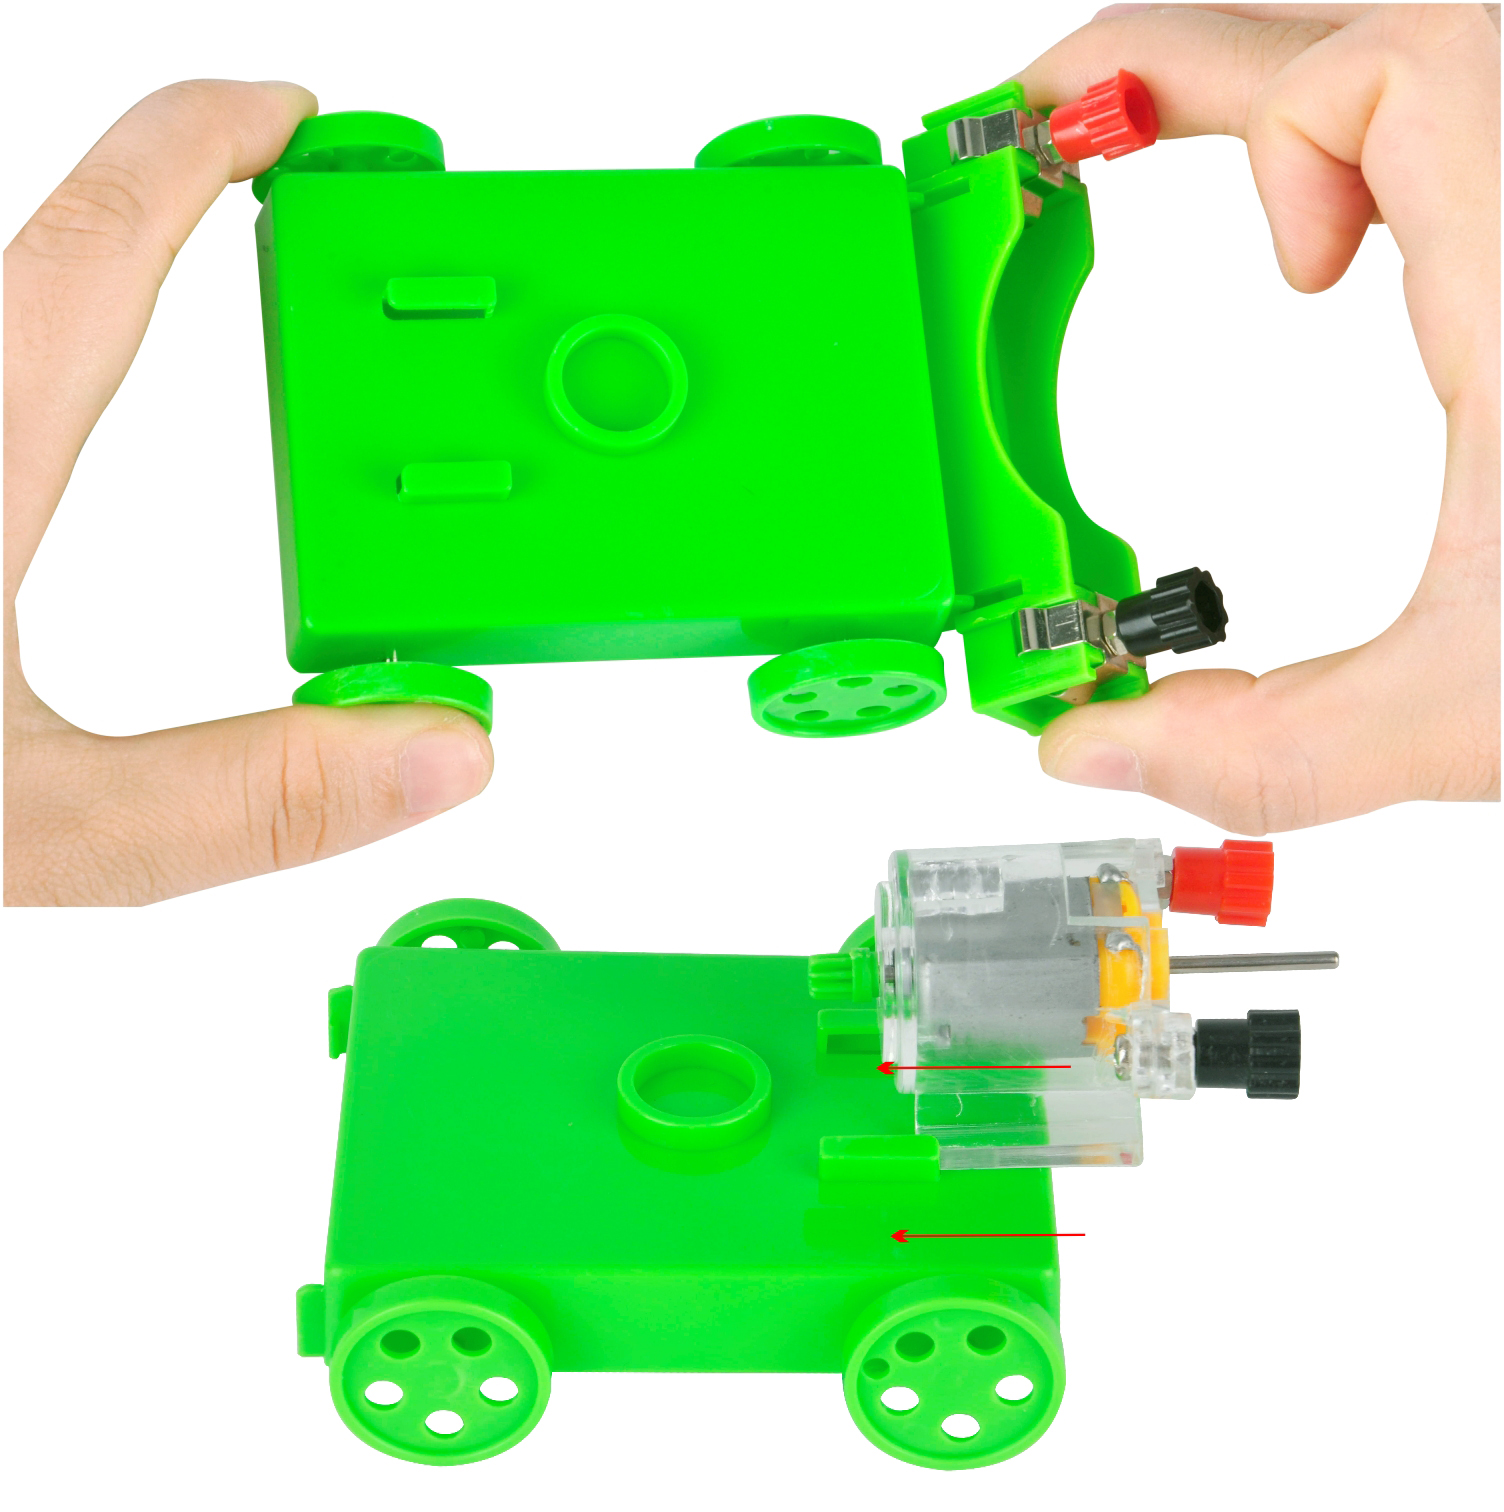
2. Put the battery holder into the car, and put the DC motor into the car.
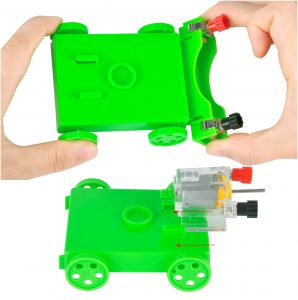 (picture 5-5)
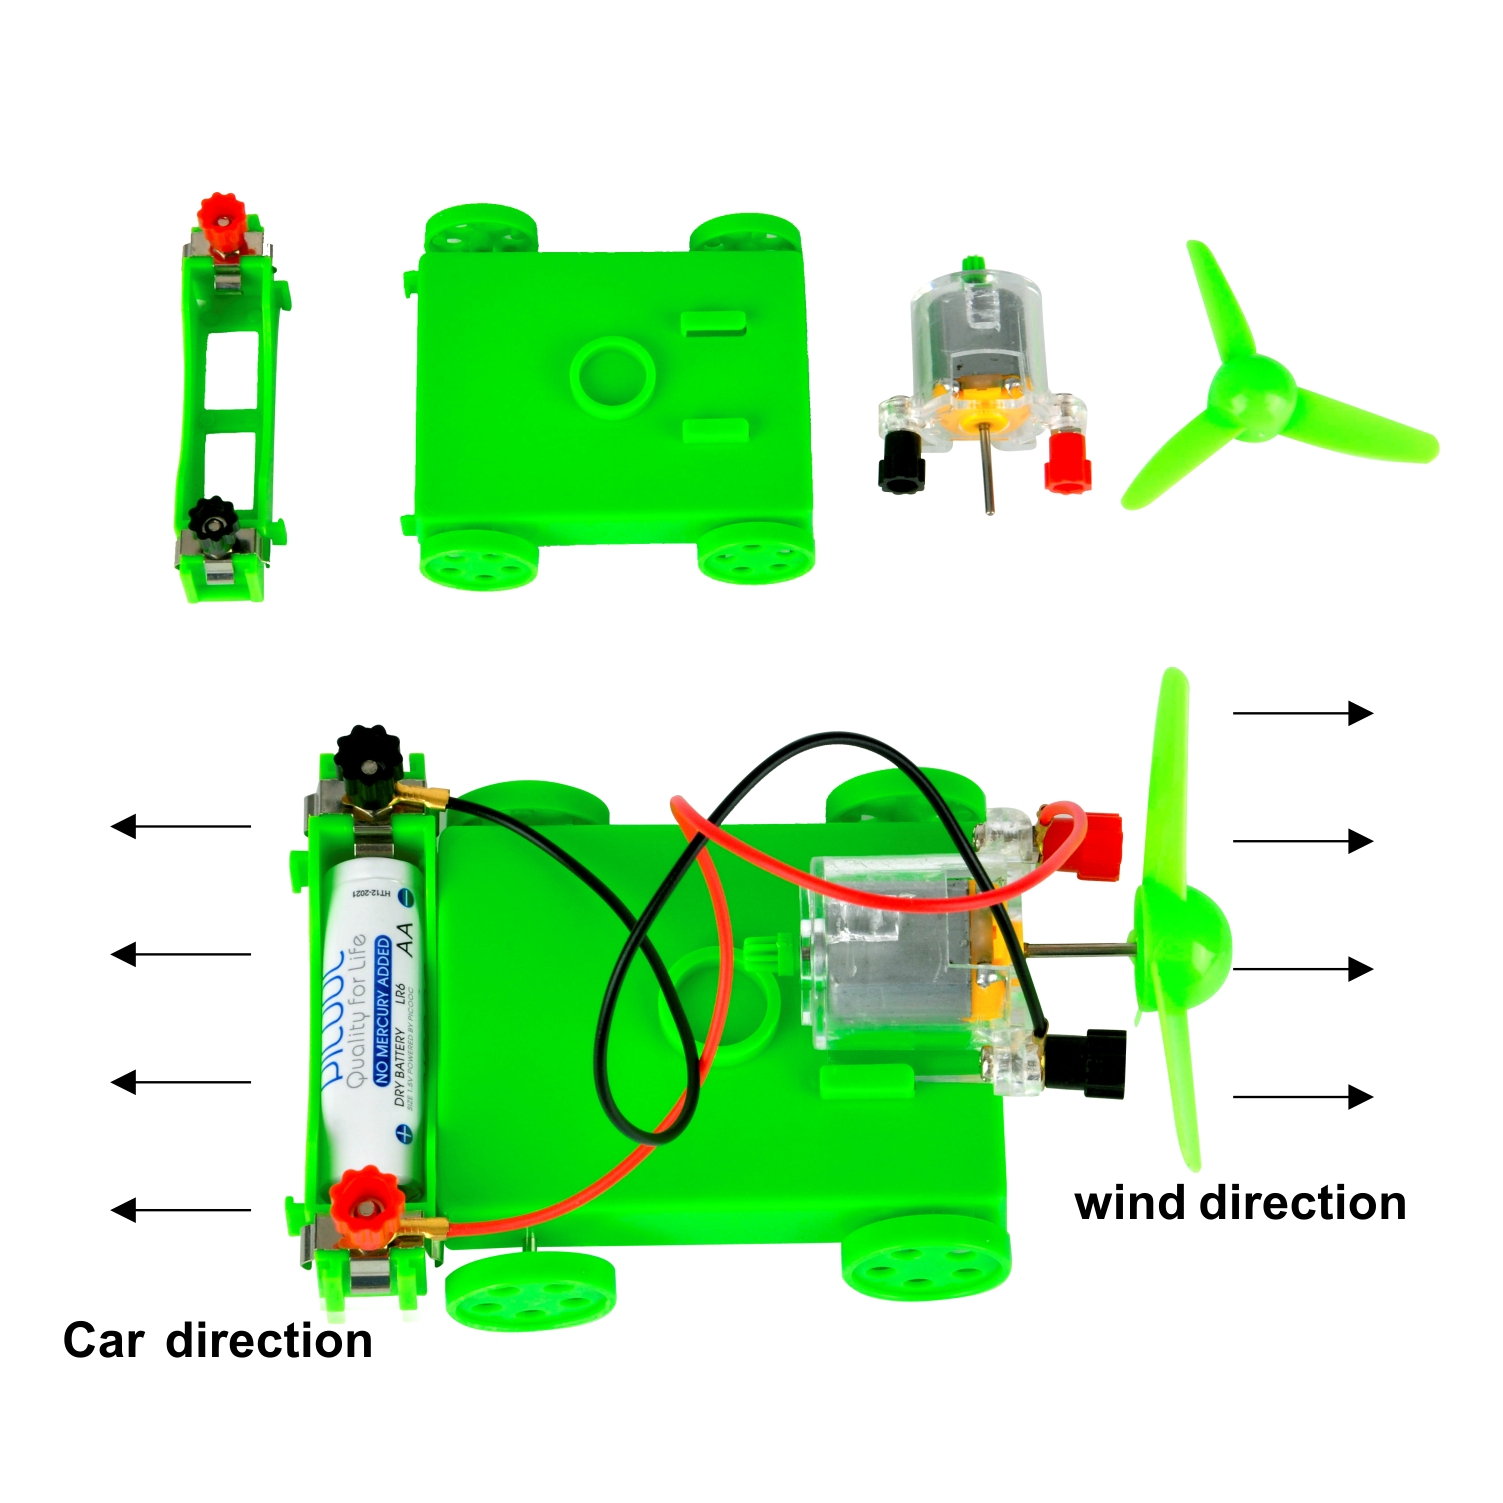
3.connect via wires as follow:(black to black, red to red), and install the battery into battery holder.
 (picture 5-6)
Result: the car can move automatically, wind direction and car direction is opposite. In this experiment,the battery offer energy to fan via DC motor, so fan can spin and form wind, at the same time, wind offer energy to car, so the car can move.