In this lesson, we will show you how to use the DHT11 sensor module to work with a micro bit and display the real-time value on the I2C 1602 LCD screen.
Parts Needed You will need the following parts:
1x micro:bit
1x Micro B USB Cable
1x micro:bit Breakout (with Headers)
1x Breadboard
5x Jumper Wires
1x DHT11 Sensor Module
1x I2C 1602 LCD
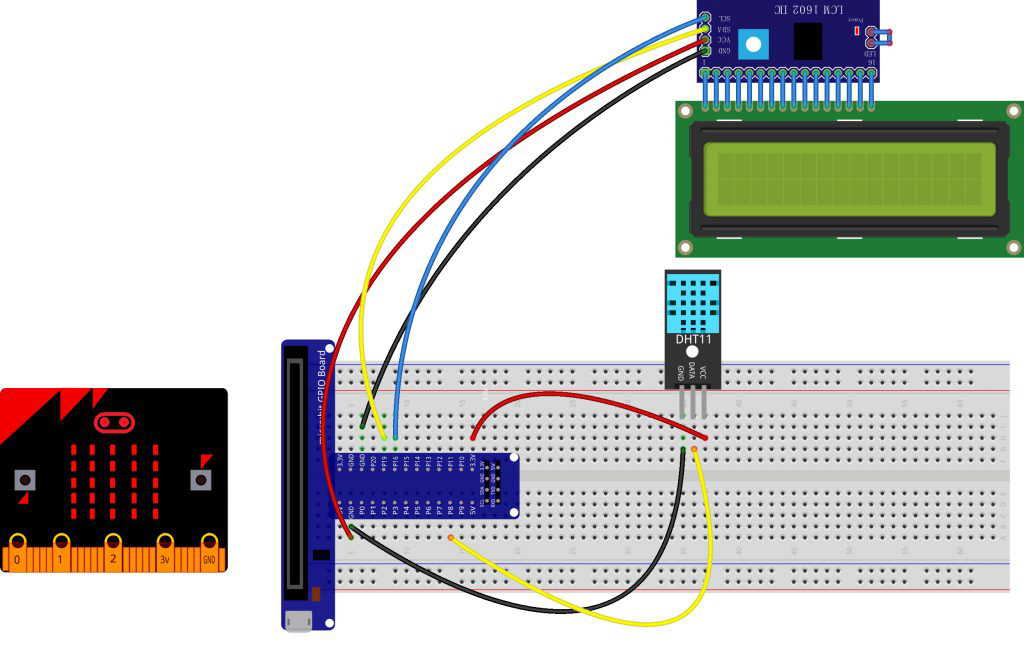
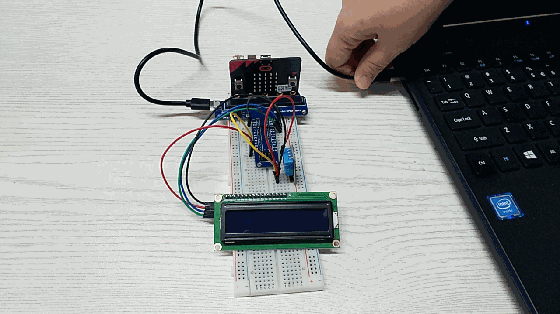
WIRING
Connect the DHT11 to the micro bit breakout as below:
Micro bit Breakout
DHT11 sensor
3.3v
VCC
P8
DATA
GND
Ground
Connect the I2C 1602 LCD to the breakout board as below:
Micro bit Breakout
LCD1602
5V
VCC
GND
GND
P19/SCL
SCL
P20/SDA
SDA
Run Your Script
If you are not familiar to make code, don’t worry. At first, you can enter this link: https://makecode.microbit.org/reference to get the reference of microbit block.
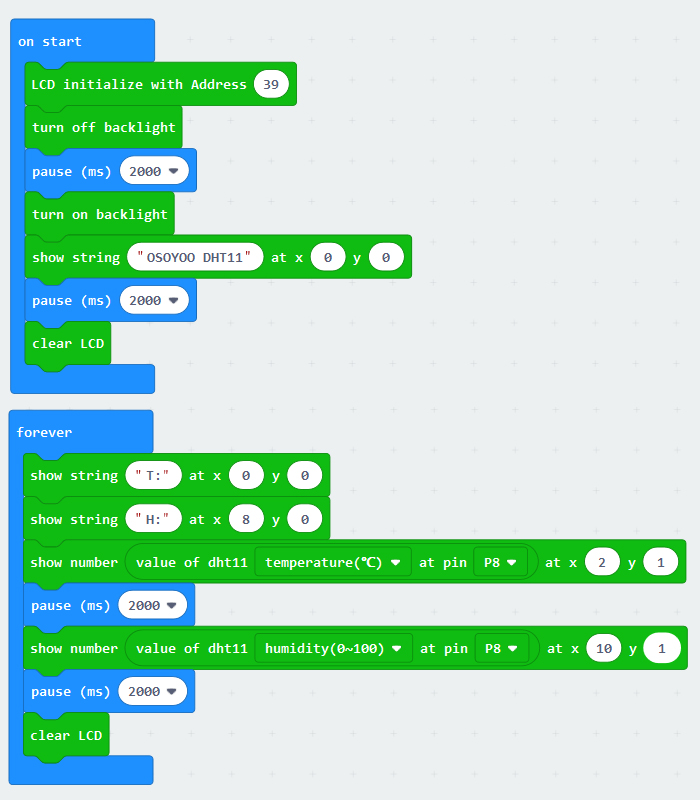
Either copy and paste, or re-create the following code into your own MakeCode editor by clicking the open icon in the upper right-hand corner of the editor window. You can also just download this example by clicking the download button in the lower right-hand corner of the code window.
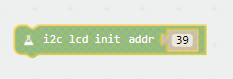
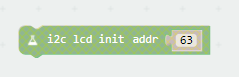
Overhere, the I2C address of this device is “0x27”, so we type “39” in the address bar.If your device I2C address is “0x3F”, please enter “63” to the address bar.About how to use the micropython with this display, please check https://github.com/shaoziyang/microbit-lib/tree/master/lcd/I2C_LCD1602.
RESULT
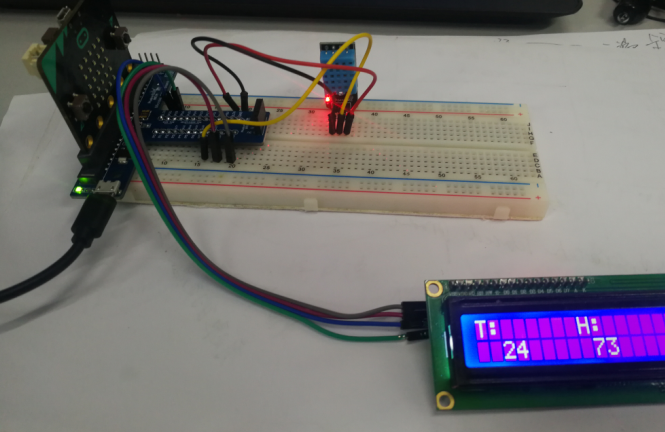
After downloaded this code to your micro bit, pull out the USB line and insert the USB line to the expansion board, you will see “OSOYOO DHT 11” on the LCD screen, then you will see the real-time humidity and temperature data displayed on the LCD.
Note:
If the screen is not bright, please check the wires. If the screen is bright, but you do not see the above results, please check you I2C address.
I tested the environment_IoT blocks (read dht11 temp and humi) with your lessons 20 and 18, both with the DHT11 and I got in both cases the same strange values for the temp and humidity. It looks like an error in the environment_IoT blocks for the DHT11 sensor.


Hi OSOYOO!
I tested the environment_IoT blocks (read dht11 temp and humi) with your lessons 20 and 18, both with the DHT11 and I got in both cases the same strange values for the temp and humidity. It looks like an error in the environment_IoT blocks for the DHT11 sensor.
I used the program from your link (https://makecode.microbit.org/_Lc0AzqY2pabh) as well as I typed in the program code myself, no difference.
In your video it works OK. Do I have a wrong version of the environment_IoT blocks?
I tried the circuit with different DHT11 sensors and every time I get the strange temp and humi values.
Can you check the environment_IoT codeblocks for getting temp and humi for the DHT11 for me? Or give me a tip how to solve the problem??