Banana keyboard
Build your own micro:bit piano using bananas!
Duration: ~20 minutes.
Materials
- micro:bit, battery holder and 2 AAA batteries
- Banana
- Orange
- 4 Crocodile clips
Activities
Step 1 – Connect the ground lead

Using the 1st crocodile clip, connect the end of the crocodile clip onto GND pin of the micro:bit.
Step 2 – Connect the sound lead
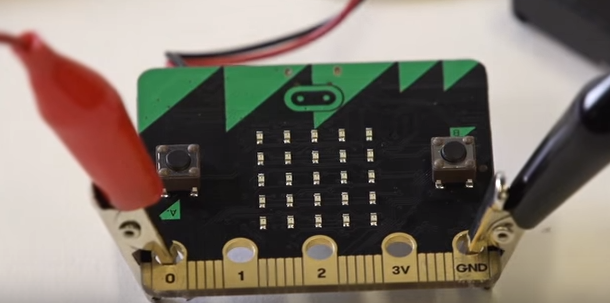
Using the 2nd crocodile clip, connect the end of the crocodile clip onto pin 0 of the micro:bit.
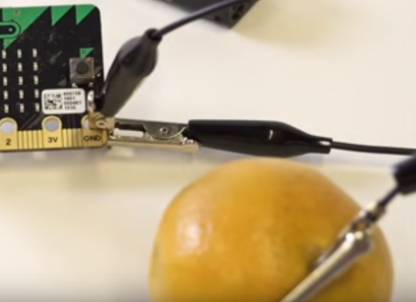
Step 3 – Connect the headphone to ground
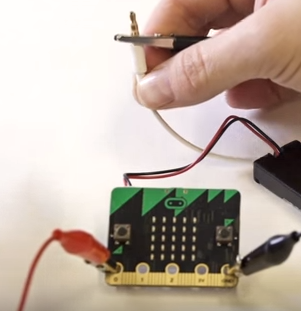
Using the 1st crocodile clip, connect the second end of the crocodile clip onto based of the headphone jack.

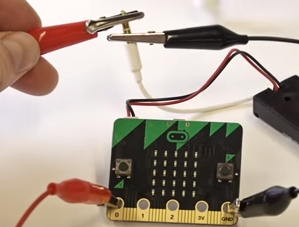
Using the 2nd crocodile clip, connect the second end of the crocodile clip onto tip of the headphone jack.
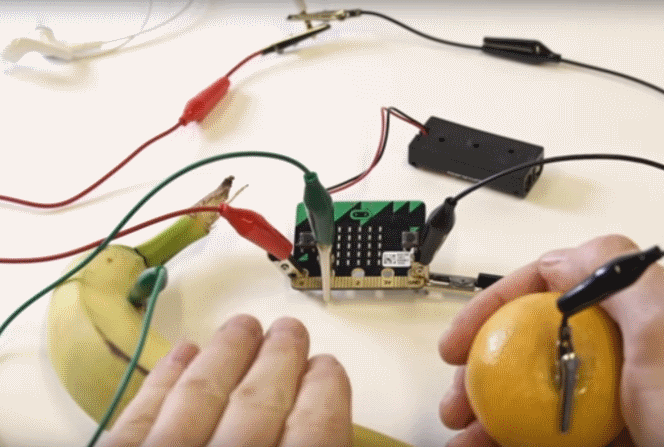
Step 5 – Connect a fruit lead

Using the 3rd crocodile clip, connect the end of the crocodile clip onto the 1st crocodile clip already clipped onto GND.
Step 6 – Connect the orange to ground
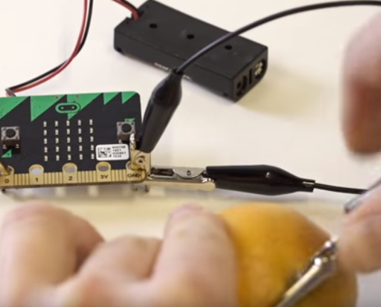
Using the 3rd crocodile clip, connect the unattached end of the crocodile clip onto the orange.
Step 7 – Connect a second fruit lead
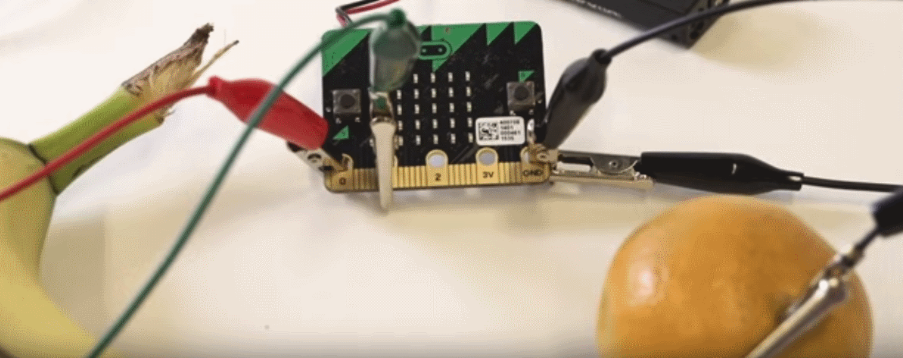
Using the 4th crocodile clip, connect the end of the crocodile clip onto pin 1 on the micro:bit.
Step 8 – Connect the banana
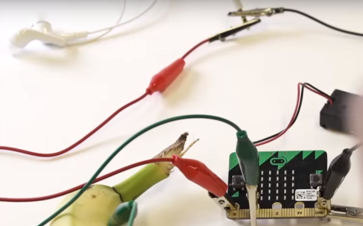
Using the 4th crocodile clip, connect the unattached end of the crocodile clip onto the banana.
Step 9 – Complete banana keyboard
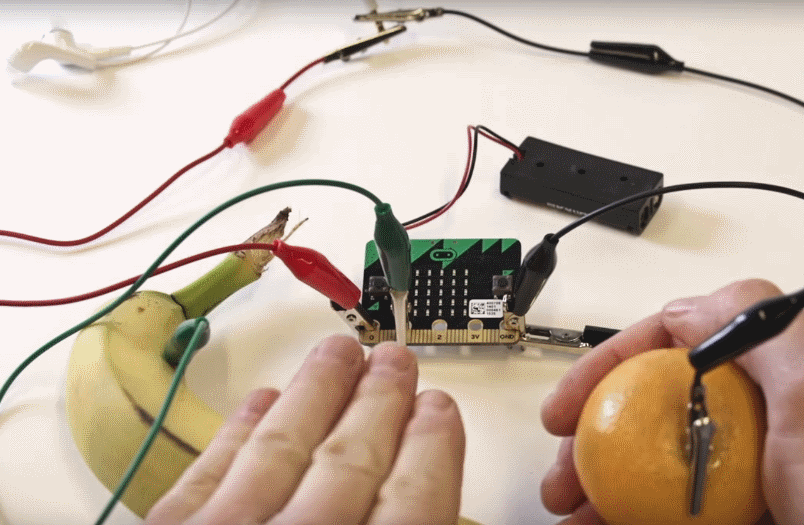
Your banana keyboard is ready!
Step 10 – Test the keyboard
Connect your micro:bit to your computer using your USB cable and run this script:

Link: https://makecode.microbit.org/_8FfbM4EasiFm
Grab a the orange with one hand. With the fingers of your other hand, tap the banana to play sound. Your banana keyboard is ready!
Code
Have you ever tried making beat box sounds? Let’s try making a beatbox with code and, yes, a banana!
Code the banana key
Start by adding a variable to store a musical note. Rename the variable to sound. Set the value of the variable to the note block Middle A from the Music drawer.

We want to play music when the fruit connected to a pin pressed. So, we register an event handler that executes whenever pin 1 is pressed. Pin 1 is, of course, connected to the banana. Add a on pin pressed block from the Input drawer.

Now, let’s create some notes to play when the banana is pressed. Click on the Loops drawer then insert a repeat loop into the on pin pressed block. Click on the Variables drawer and pull out a change item by block and put it into the loop. Rename the variable to sound. Change the value from 1 to 25. This will increase the variable sound from the note frequency of block Middle A to Middle A plus 25 and so on. Put a set to block for sound right after the loop. Set it to Middle A a in order to reset the sound after a banana press.

Finally, insert a play tone above the change by. Pull out the sound variable block and drop it in the note slot of play tone. Change the beat fraction from 1 to 1/4.
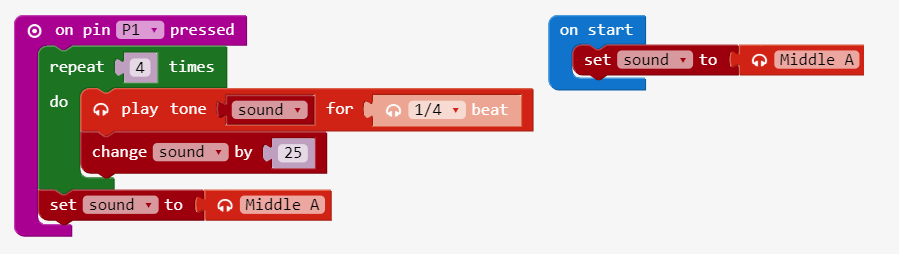
Link: https://makecode.microbit.org/_JewEk1RMiLEV
Click Download and try a banana press. Did you hear 4 notes play?
Add another banana key
Go back to Make and repeat steps 7 and 8 with another banana but this time connect the crocodile clip to pin 3.
Duplicate the on pin pressed event handler to make a second one. For the new on pin pressed, change the pin name to P2. In the pin P2 event, let’s have the the frequency in the variable sound decrease by 25 instead of having it increase. Change the 25 in the change byblock to -25. OK, your code now looks like this:

Click Download again and play both bananas. It’s a fruit jam session!
Link: https://makecode.microbit.org/_fyLRTr09vC03


