Note: ALL OSOYOO Products for Arduino are Third Party Board which is fully compatitable with Arduino
Authorized Online Retailers:
Content
- Introduction
- Preparations
- About TMP36
- Connection
- Upload Sketch
- Program Running Result
Introduction
It really doesn’t get much easier to measure temperature with an OSOYOO basic board than with Analog Device’s TMP36 temperature sensor! The sensor can measure a fairly wide range of temperature (-50°C to 125°C), is fairly precise (0.1°C resolution), and is very low cost, making it a popular choice. In this Lesson we will go over the basics of the TMP36 and writing some basic code to read the analog input it is connected to.
Preparations
Hardware
- Osoyoo basic Board (Fully compatible with Arduino UNO rev.3) x 1
- TMP36
- Breadboard x 1
- Jumpers
- USB Cable x 1
- PC x 1
Software
- Arduino IDE (version 1.6.4+)
About TMP36
Overview
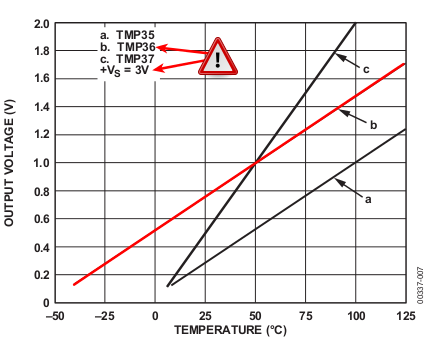
The TMP36 are low voltage, precision centigrade temperature sensors. They provide a voltage output that is linearly proportional to the Celsius (centigrade) temperature. The TMP36 do not require any external calibration to provide typical accuracies of ±1°C at +25°C and ±2°C over the −40°C to +125°C temperature range.
Features and Benefits of TMP36
- Low voltage operation (2.7 V to 5.5 V)
- Calibrated directly in °C
- 10 mV/°C scale factor (20 mV/°C on TMP37)
- ±2°C accuracy over temperature (typ)
- ±0.5°C linearity (typ)
- Stable with large capacitive loads
- Specified −40°C to +125°C, operation to +150°C
- Less than 50 μA quiescent current
- Shutdown current 0.5 μA max
- Low self-heating
- Qualified for automotive applications
Pin Definitions
The IC has just 3 pins, 2 for the power supply and one for the analog output. The output pin provides a voltage output that is linearly proportional to the celsius (centigrade) temperature. In order to get the temperature in fahrenheit, we have to write code to the board to convert this celsius temperature into fahrenheit.
Below is the pinout of the TMP36 IC:
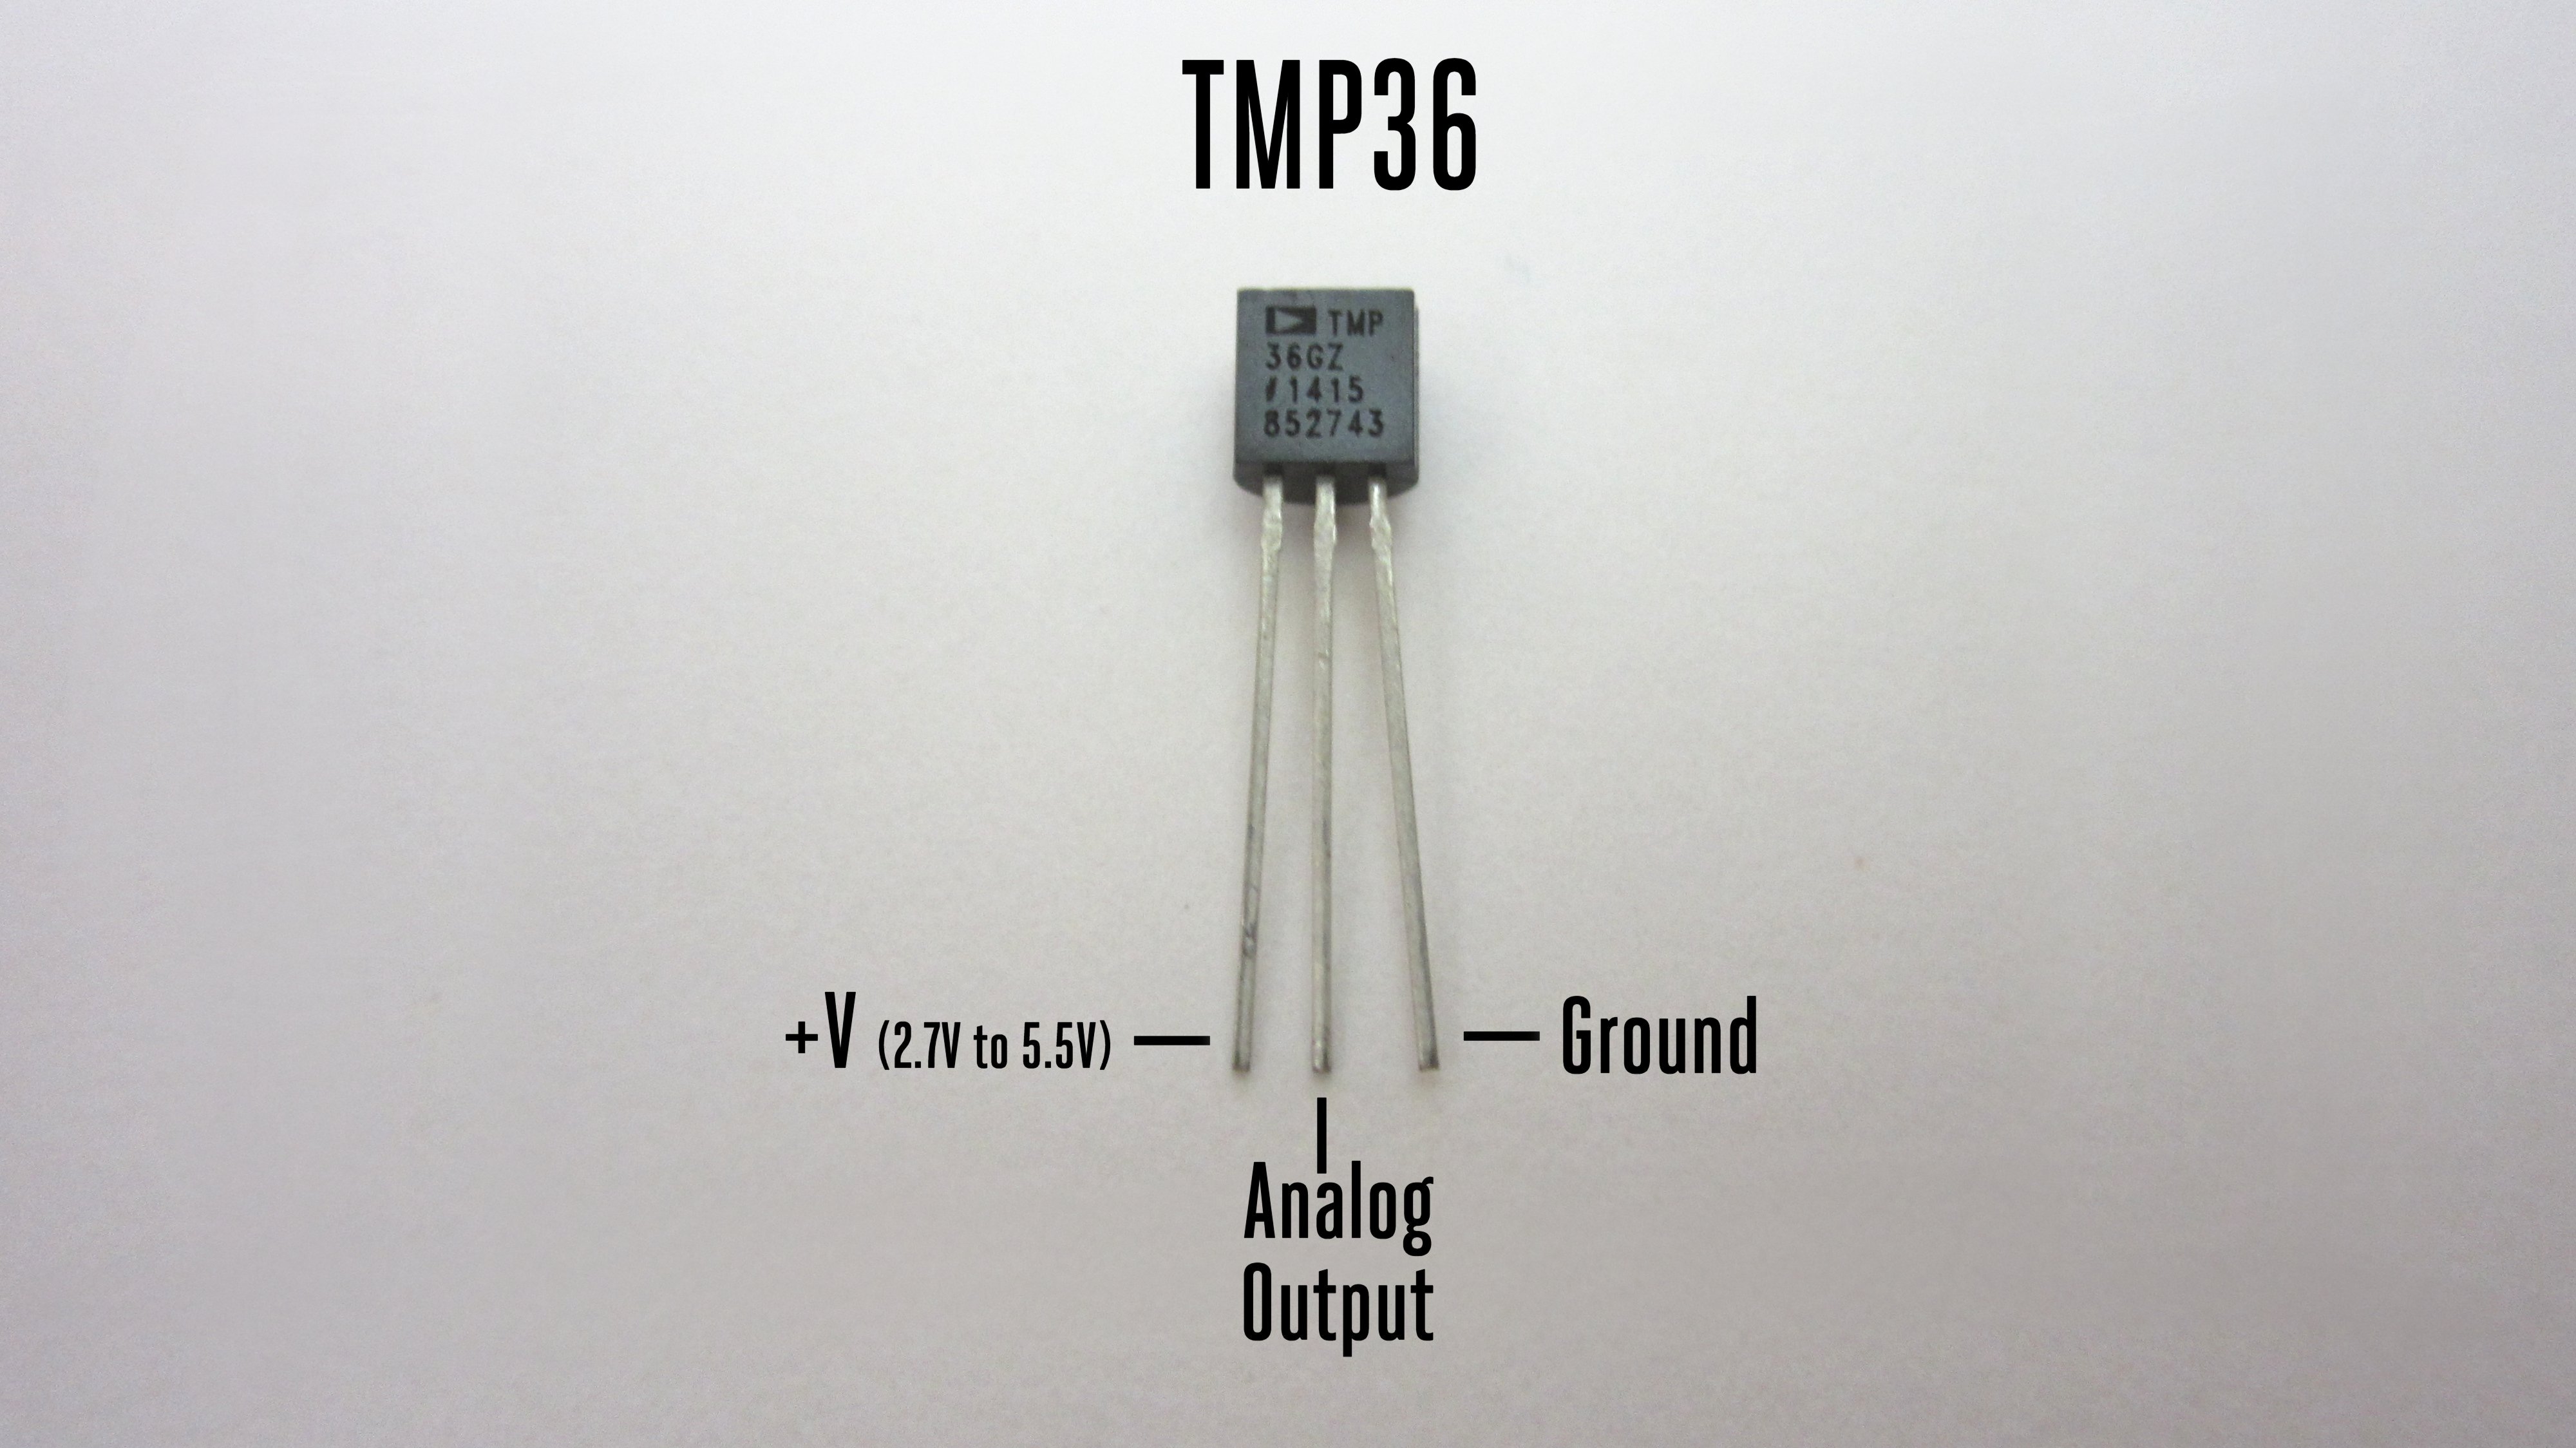
Pin 1 receives positive DC voltage in order for the IC to work. This, again, is voltage between 2.7-5.5V. Pin 3 is the ground, so it receives the ground or negative terminal of the DC power supply. And Pin 2 is the output of the IC, outputting an analog voltage in porportion to the temperature it measures.
How to Measure Temperature
Using the TMP36 is easy, simply connect the left pin to power (2.7-5.5V) and the right pin to ground. Then the middle pin will have an analog voltage that is directly proportional (linear) to the temperature. The analog voltage is independant of the power supply.
To convert the voltage to temperature, simply use the basic formula:
Temp in °C = [(Vout in mV) – 500] / 10
So for example, if the voltage out is 1V that means that the temperature is ((1000 mV – 500) / 10) = 50 °C
Problems you may encounter with multiple sensors:
If, when adding more sensors, you find that the temperature is inconsistant, this indicates that the sensors are interfering with each other when switching the analog reading circuit from one pin to the other. You can fix this by doing two delayed readings and tossing out the first one.
Eaxmples
Unlike the photocell sensors we have looked at, the TMP36 and friends doesn’t act like a resistor. Because of that, there is really only one way to read the temperature value from the sensor, and that is plugging the output pin directly into an Analog (ADC) input.
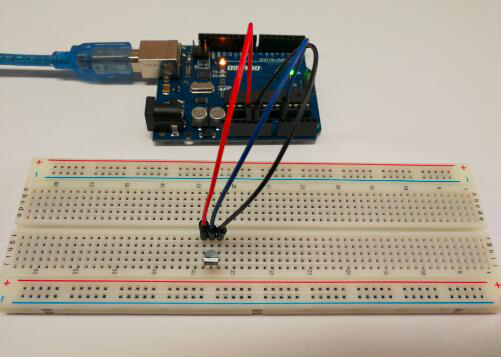
Connection
The temperature sensor circuit we will build is shown below:
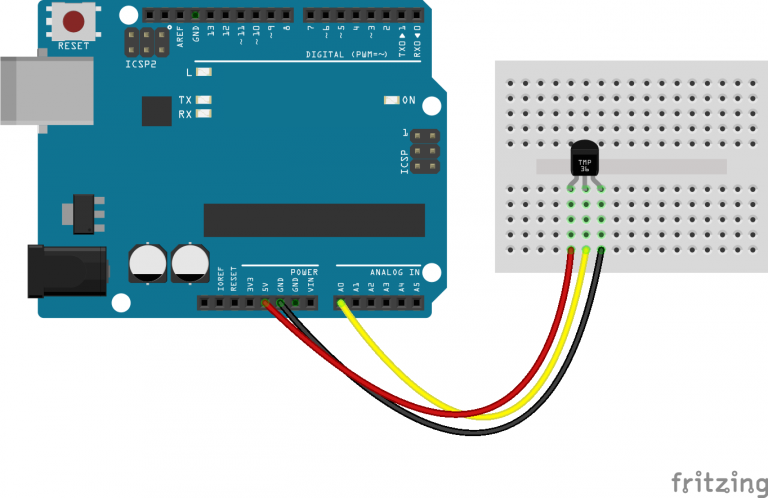
Pin 1 of the TMP36 goes into +5V of the board
Pin 2 of the TMP36 goes into analog pin A0 of the board
Pin 3 of the TMP36 goes into ground (GND) of the board
Remember that you can use anywhere between 2.7V and 5.5V as the power supply. For this example I’m showing it with a 5V supply but note that you can use this with a 3.3v supply just as easily. No matter what supply you use, the analog voltage reading will range from about 0V (ground) to about 1.75V.
If you’re using a 5V, and connecting the sensor directly into an Analog pin, you can use these formulas to turn the 10-bit analog reading into a temperature:
Voltage at pin in milliVolts = (reading from ADC) * (5000/1024)
This formula converts the number 0-1023 from the ADC into 0-5000mV (= 5V)
If you’re using a 3.3V, you’ll want to use this:
Voltage at pin in milliVolts = (reading from ADC) * (3300/1024)
This formula converts the number 0-1023 from the ADC into 0-3300mV (= 3.3V)
Then, to convert millivolts into temperature, use this formula:
Centigrade temperature = [(analog voltage in mV) – 500] / 10
Code Program
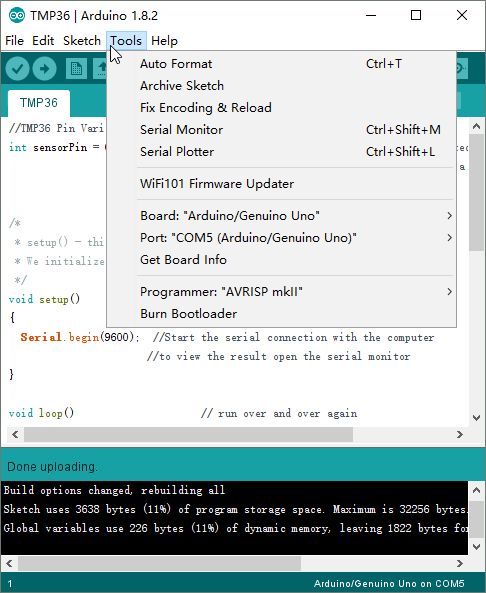
After above operations are completed, connect the board to your computer using the USB cable. The green power LED (labelled PWR) should go on.Open the Arduin IDE and choose corresponding board type and port type for you project. Then load up the following sketch onto your board.
//TMP36 Pin Variables
int sensorPin = 0; //the analog pin the TMP36's Vout (sense) pin is connected to
                        //the resolution is 10 mV / degree centigrade with a
                        //500 mV offset to allow for negative temperatures
/*
 * setup() - this function runs once when you turn your Arduin on
 * We initialize the serial connection with the computer
 */
void setup()
{
  Serial.begin(9600);  //Start the serial connection with the computer
                       //to view the result open the serial monitor
}

void loop()           // run over and over again
{
 //getting the voltage reading from the temperature sensor
 int reading = analogRead(sensorPin);
 // converting that reading to voltage, for 3.3v Arduino use 3.3
 float voltage = reading * 5.0;
 voltage /= 1024.0;
 // print out the voltage
 Serial.print(voltage); Serial.println(" volts");
 // now print out the temperature
 float temperatureC = (voltage - 0.5) * 100 ;//converting from 10 mv per degree wit 500 mV offset
 //to degrees ((voltage - 500mV) times 100)
 Serial.print(temperatureC); Serial.println(" degrees C");
 // now convert to Fahrenheit
 float temperatureF = (temperatureC * 9.0 / 5.0) + 32.0;
 Serial.print(temperatureF); Serial.println(" degrees F");
 delay(1000); //waiting a second
}
At the end of this program, we put a delay of 1000ms to take the temperature reading every one second. You can adjust this value to meet your personal preference or program needs.
Running Result
A few seconds after the upload finishes, open the Serial Monitor, you should now see the voltage and temperature readings displayed at one second intervals.
Note: Please make sure you have choosed the correct port and the correct baudrate for you project.