Summary
In this lessn, we’ll learn how to remote console Pi with console cable. When using console cable, you need connect USB keyboard, USB mouse and screen monitor to console pi. For Windows users, you may install tooterminal emulation softwarel (like PuTTY) to log into Raspberry Pi remotely and install USB to TTL driver. For Mac or linux users, you may install USB to TTL only, as Mac or linux has terminal emulation software.
The Raspberry Pi uses its built-in serial port to allow devices to connect to its console and issue commands just as if you were logged in.
Hardware preparation
Raspberry Pi Zero/W (with GPIO pins) or Pi2/Pi3 x 1
Console Cable x 1
USB to Micro USB cable x 1
Micro USB power cable x 1
5V/2A or 5V/2.5A USB power adapter x 1
Enabling Serial Console
There are two way to enable or close Enabling Serial Console. One way is editing config.txt of raspberry OS, and the other is enter raspi-config comman.
Option 1. Enabling in /boot/config.txt
Please insert the SD card which install the OS for pi in your PC and open the file config.txt via text editor and add “enable_uart=1" as the end of file.

Option 2. Enabling via Raspi-Config
Using a monitor and keyboard, log into the shell and run
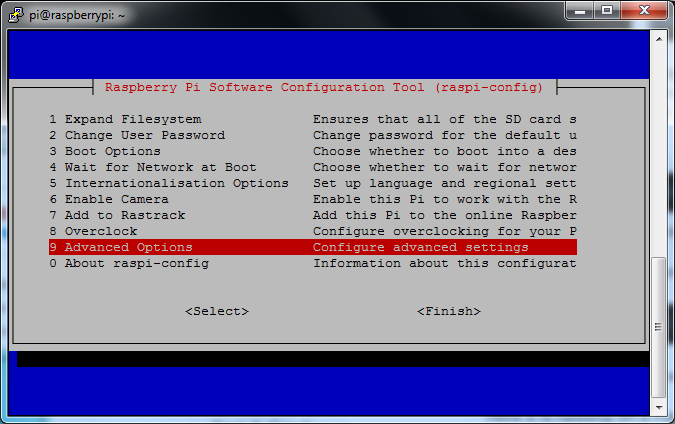
sudo raspi-config
go down to Advanced Options
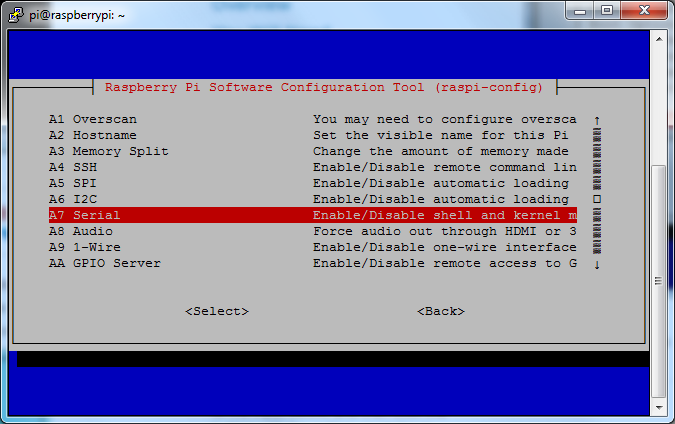
Hit enter and then go down to Serial
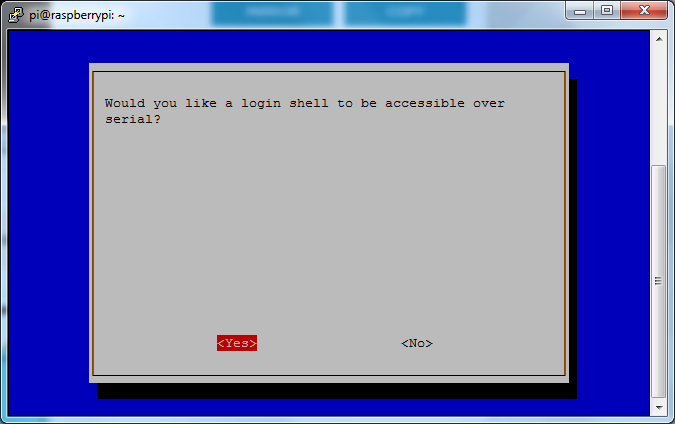
Select Yes
Hit return then select Finish
When it asks you to reboot, go to Yes and hit return
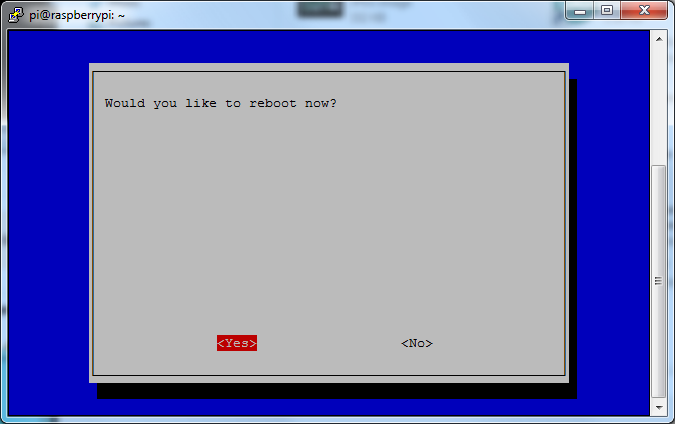
OK the serial console is now enabled!
Software Installation (Mac)
OSX includes terminal emulation software that you can use from the command line, so we only need to install the USB drivers for the cable.
Install Drivers
Download and install the latest drivers:Driver for MacOSX
Software Installation (Windows)
Download and install Putty from here: http://www.putty.org/
From the list of downloads select the binary called just putty.exe from the section For Windows on Intel x86. This will prompt you to save the file. Save it onto the Desktop for now.
Download and install the latest drivers:Driver for Windows
Install Drivers
Next, install the latest drivers for the cable chipset.
Software Installation (Linux)
Linux Kernels 2.4.31 and above already have the PL2303 and CP210X USB driver for the Console Lead built-in, so you should not need to install that.
Some distributions such as Ubuntu 12.10 do not include the “screen” command. Try running the command “screen” and if you get an error message, you can install it by typing the following command:
sudo apt-get install screen
Connect the Lead
Console lead has 4Pin : 5V、GND、Tx and Rx. To ensure Pi work well, please don’t use GPIO as power source. you can use micro USB power cable and 5V@2A or [email protected] power adapter as power supply, or USB port on PC can replace power adapter.
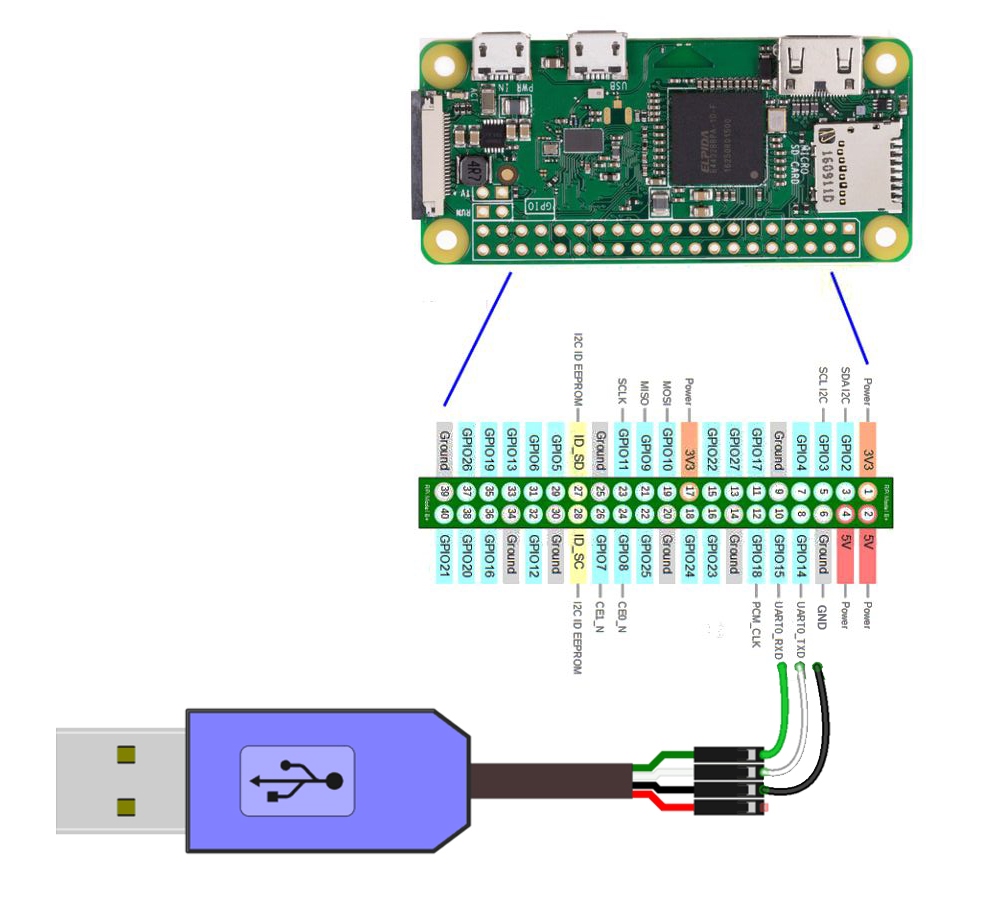
- Please do not connect red lead
- The black lead to GND (3rd pin down)
- The white lead to TXD on the Pi (4th pin down)
- The green lead to RXD on the pI (5th pin down)
Test & Configure
Take Windows 10 as example
If you are using a PC, then before you start Putty, you need to know which com port is being used for the cable. You can find this by looking in the Ports section of the Windows Device Manager.
The Device Manager is accessible from the Control Panel under System.
图片
Find com port for console cable in the Ports section of the Windows Device Manager, such as com7, and enter the com port in putty’s serial line.
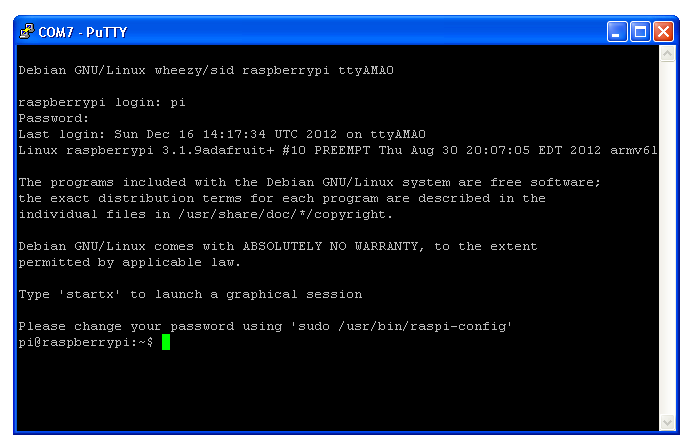
Now start Putty and you will see a connection window.
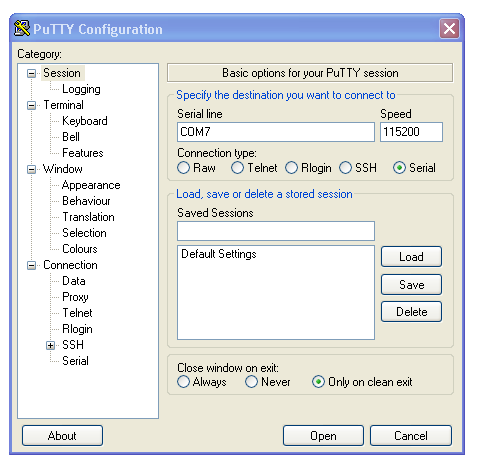
Select a connection type of “Serial” from the radio buttons, then set the speed to 115200 and the serial line to COM7
Finally click ‘Open’ to connect. Remember to press ENTER to start communications.