

Authorized Online Retailers:
Purchase from US Purchase from Japan


Introduction
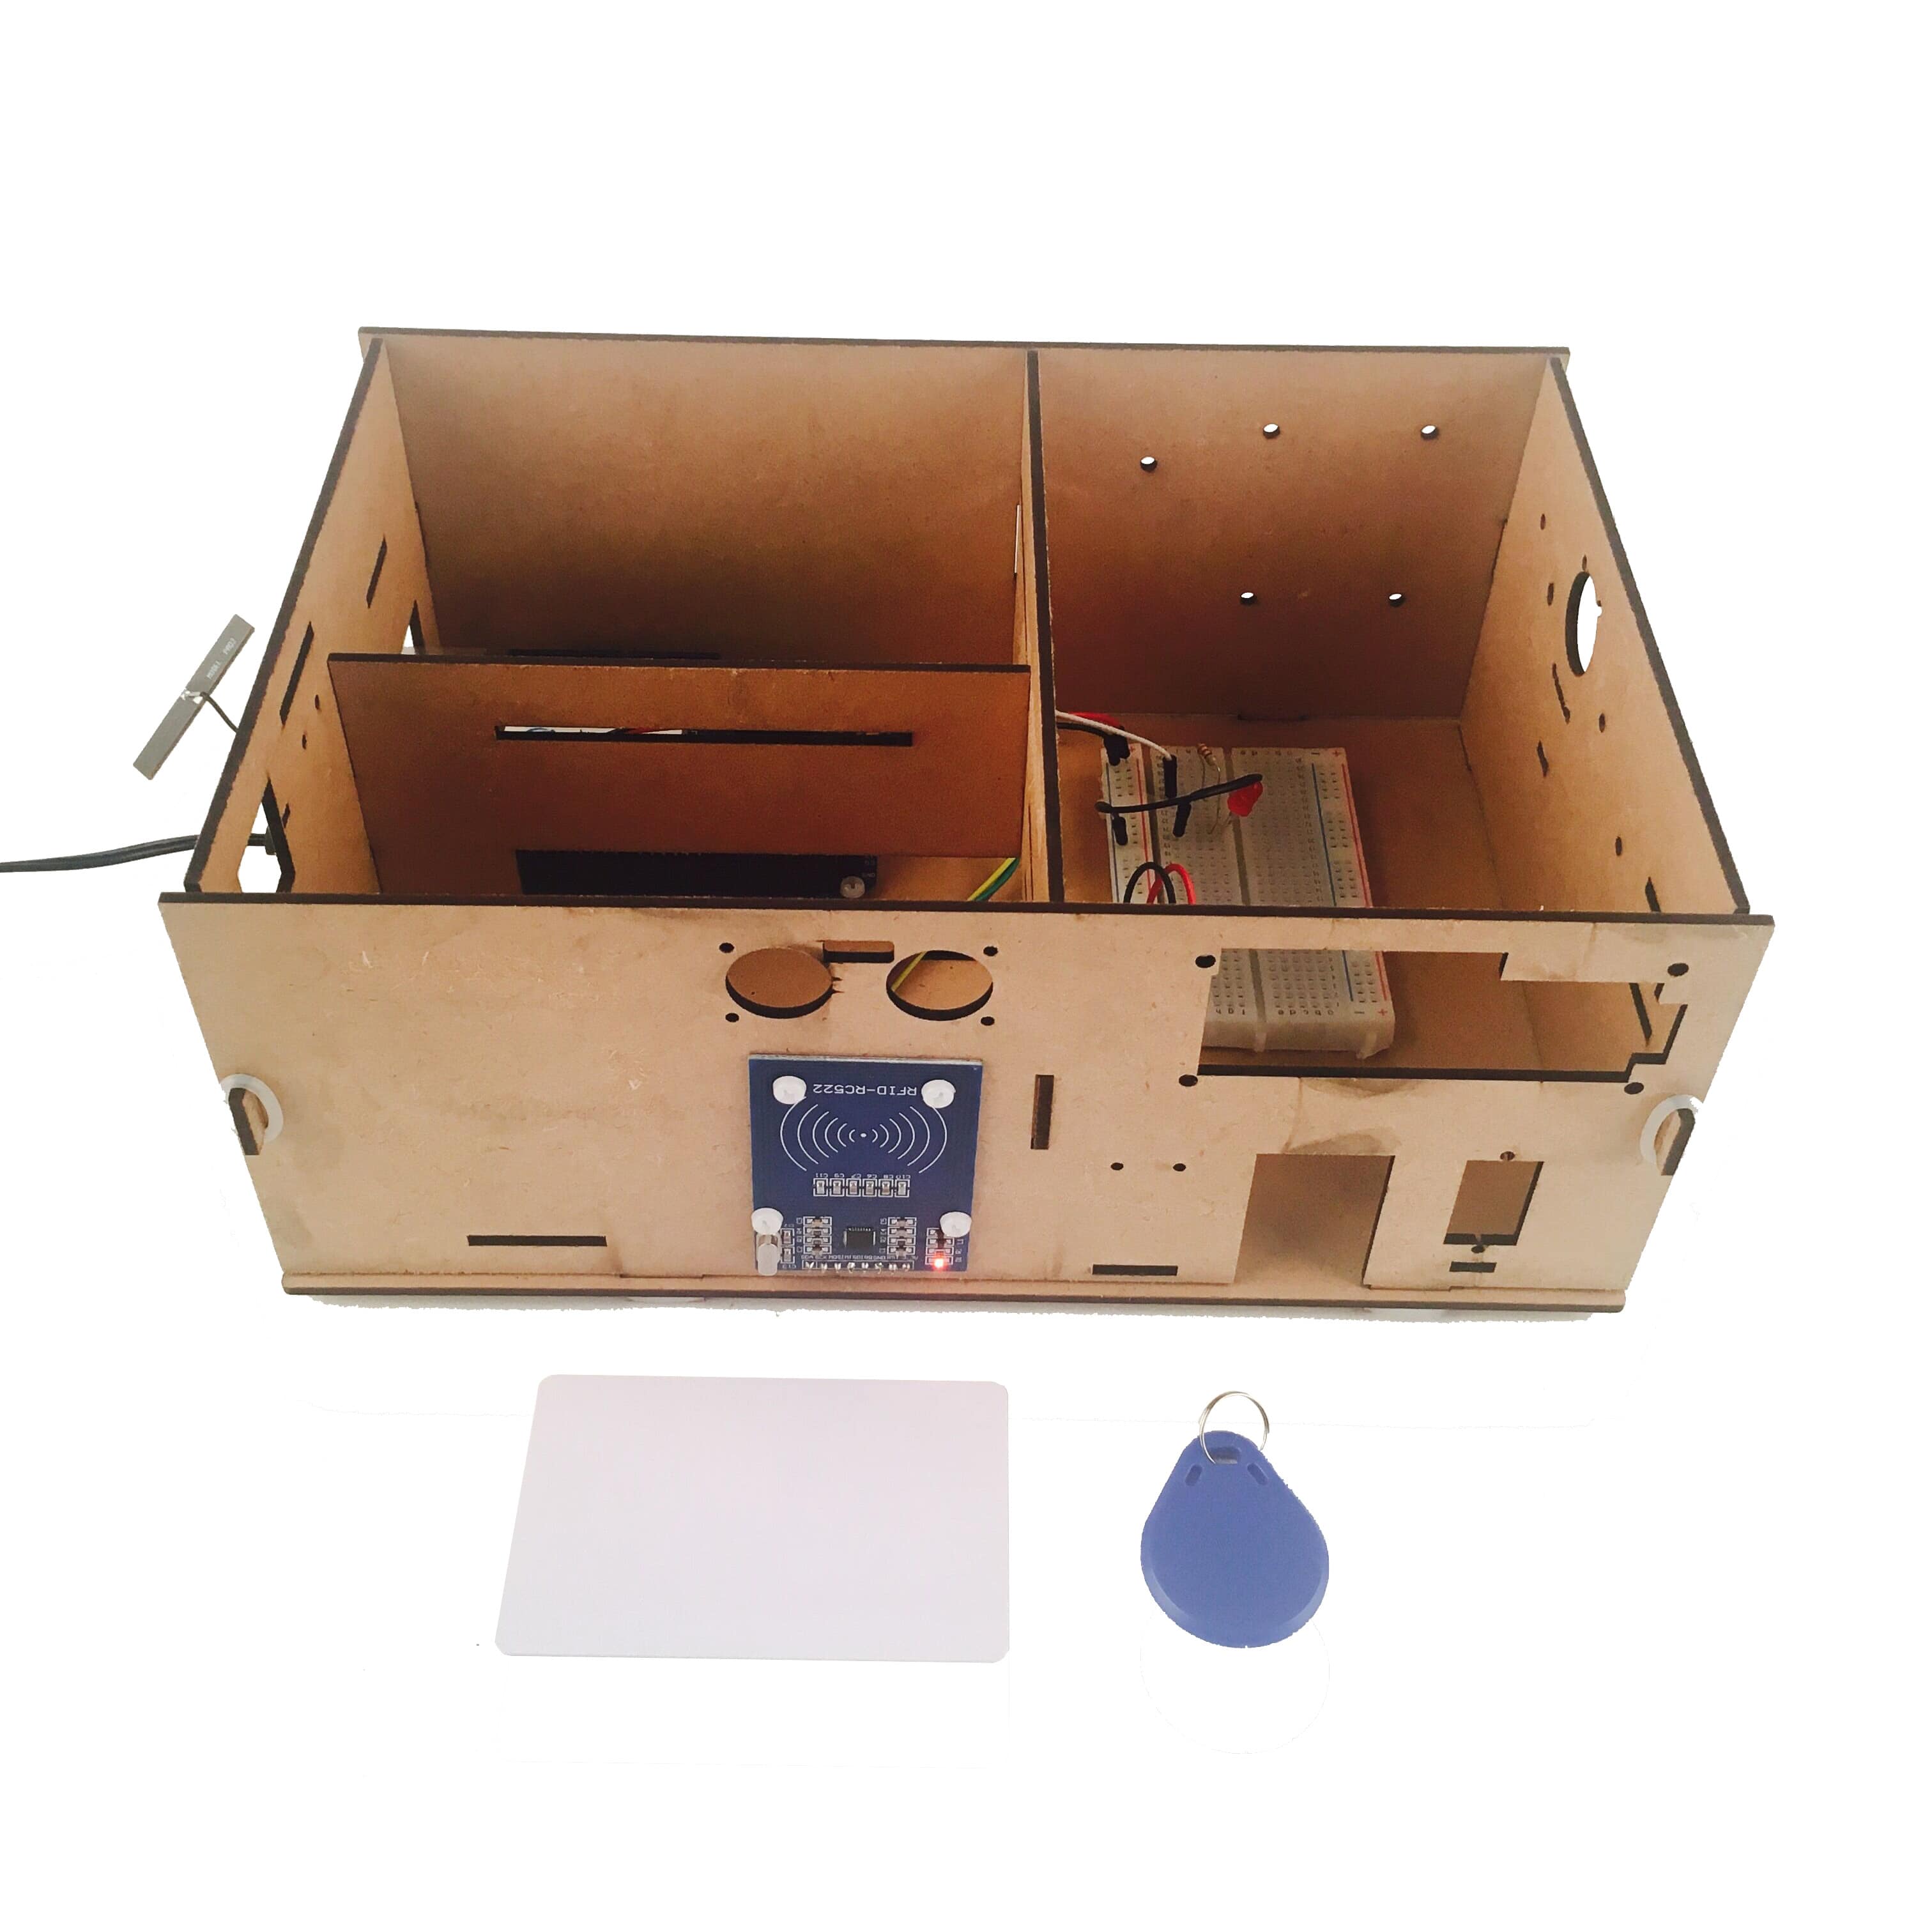
In this lesson, we will show how to use the Osoyoo Yun IoT Kit to build a RFID access control system. Before starting this lesson, you can get more information about the RFID module from this link.
HARDWARE
- Arduino(Osoyoo Mega2560 here) x 1
- Dragino Yun Shield x 1
- RFID Module x 1
- LED x 1
- 200Ω x 1
- Breadboard x 1
- Jumpers
SOFTWARE
Connection
Build the circuit as below:
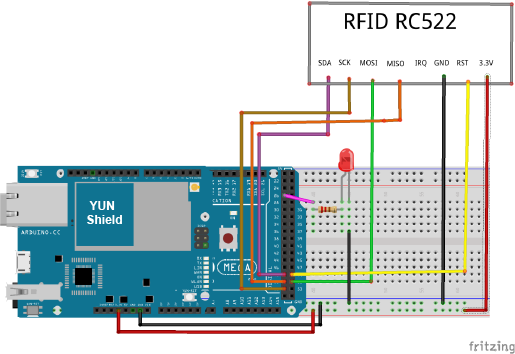
PIN WIRING
| Pin |
Mega2560+Yun Shield |
| SDA |
Digital 48 |
| SCK |
Digital 52 |
| MOSI |
Digital 51 |
| MISO |
Digital 50 |
| IRQ |
unconnected |
| GND |
GND |
| RST |
Digital 49 |
| 3.3V |
3.3V |
Caution: You must power this device to 3.3V!We connect the LED to D26
Code Program
After above operations are completed, make sure that the Yun Shield is on the same network with the computer. Open the Arduino IDE and choose corresponding board type and port type for you project. Then load up the following sketch onto your Arduino.
#include “SPI.h”
#include “RFID.h”
#include “Console.h”
RFID rfid(48,49); //SDA,RST
int LED = 26;
bool state=true;
void setup()
{
Bridge.begin();
Console.begin();
SPI.begin();
rfid.init();
pinMode(LED, OUTPUT);
digitalWrite(LED,LOW);
while (!Console);
}
void loop()
{
unsigned char type[MAX_LEN];
//Find the card
if (rfid.isCard( )) {
Console.println(“Find the card!”);
// Show card type
ShowCardType(type);
//
if (rfid.readCardSerial()) {
Console.print(“The card’s number is : “);
Console.print(rfid.serNum[0],HEX);
Console.print(rfid.serNum[1],HEX);
Console.print(rfid.serNum[2],HEX);
Console.print(rfid.serNum[3],HEX);
Console.print(rfid.serNum[4],HEX);
Console.println(” “);
ShowUser(rfid.serNum);
}
//Select card, return card capacity (lock card, prevent most read), remove the line to read the card continuously
Console.println(rfid.selectTag(rfid.serNum));
}
rfid.halt();
}
void ShowCardType( unsigned char* type)
{
Console.print(“Card type: “);
if(type[0]==0x04&&type[1]==0x00)
Console.println(“MFOne-S50”);
else if(type[0]==0x02&&type[1]==0x00)
Console.println(“MFOne-S70”);
else if(type[0]==0x44&&type[1]==0x00)
Console.println(“MF-UltraLight”);
else if(type[0]==0x08&&type[1]==0x00)
Console.println(“MF-Pro”);
else if(type[0]==0x44&&type[1]==0x03)
Console.println(“MF Desire”);
else
Console.println(“Unknown”);
}
void ShowUser( unsigned char* id)
{
//32 DA 94 10 6C
if( id[0]==0x32 && id[1]==0xDA && id[2]==0x94 && id[3]==0x10 ) {
Console.println(“Hello Mary!”);
digitalWrite(LED, HIGH); // turn the LED on (HIGH is the voltage level)
delay(1000);
digitalWrite(LED, LOW); // turn the LED off by making the voltage LOW
delay(1000);
}
//75 C0 D0 65 0
else if(id[0]==0x75 && id[1]==0xC0 && id[2]==0xD0 && id[3]==0x65) {
Console.println(“Hello MicroHao!”);
digitalWrite(LED, HIGH); // turn the LED on (HIGH is the voltage level)
delay(1000);
digitalWrite(LED, LOW); // turn the LED off by making the voltage LOW
delay(1000);
}
else{
Console.println(“Hello unkown guy!”);
}
}
Running Result
After you finished all above operations, approximate the RFID card or the keychain to the reader. Open the Serial Monitor and you will get some informations of the card. If you update your card information to the code, when you use the corresponding card, Let the reader and the tag closer , you will see that the corresponding name is printed in the serial monitor, and LED will be lit for a second.