Step 1: Connect It
Connect the micro:bit to your computer via a micro USB cable (using a phone or tablet? Click here to discover how to code the micro:bit from a mobile device). Macs, PCs, Chromebooks and Linux systems (including Raspberry Pi) are all supported. It comes with a fun application, give it a try!
Your micro:bit will show up on your computer as a drive called ‘MICROBIT’. Watch out though, it’s not a normal USB disk!
Step 2: Program It
Using one of our fantastic editors, write your first micro:bit code. For example drag and drop some blocks and try your program on the Simulator in the MakeCode Editor, like in the image below that shows how to program a Flashing Heart.
Step 3: Download It
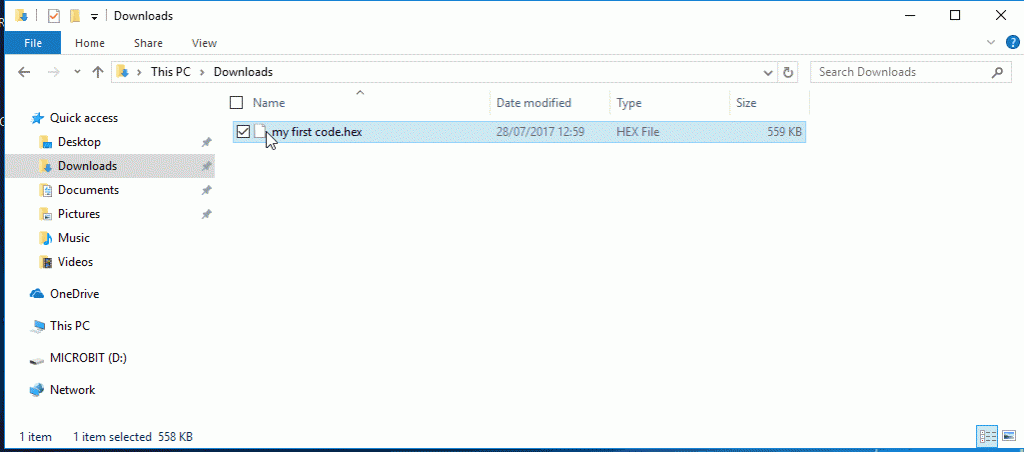
Click the Download button in the editor. This will download a ‘hex’ file, which is a compact format of your program that your micro:bit can read. Once the hex file has downloaded, copy it to your micro:bit just like copying a file to a USB drive. On Windows you can right click and choose “Send To→MICROBIT.”
Windows “Send To”

Mac Drag and Drop
Step 4: Play It
The micro:bit will pause and the yellow LED on the back of the micro:bit will blink while your code is programmed. Once that’s finished the code will run automatically!
The MICROBIT drive will automatically eject and come back each time you program it, but your hex file will be gone. The micro:bit can only receive hex files and won’t store anything else!
What cool stuff will you create? Your micro:bit can respond to the buttons, light, motion, and temperature. It can even send messages wirelessly to other micro:bits using the ‘Radio’ feature.
Check out the ideas page for more inspiration.
Step 5: Master it
This page shows you how to get started with micro:bit, but as well as MakeCode you can use Python and text-based JavaScript to program your micro:bit. Head over to the Let’s Code page to see the different languages, or check out the ideas page for some things you might like to try out.
Contact support to get more help with your micro:bit.


