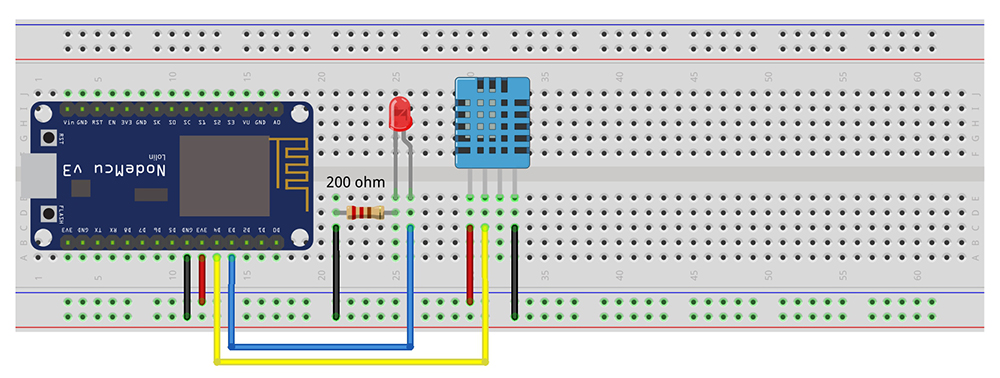
In this lesson, we will show how to use NodeMCU to work as Web Server to get remote temperature/humidity from DHT11 sensor and control LED throw browser(or mobile APP).
Edit the code to fit your own WiFi settings as following operations:
1)Hotspot Configration:
const char* ssid = “your_hotspot_ssid”;
const char* password = “your_hotspot_password”;
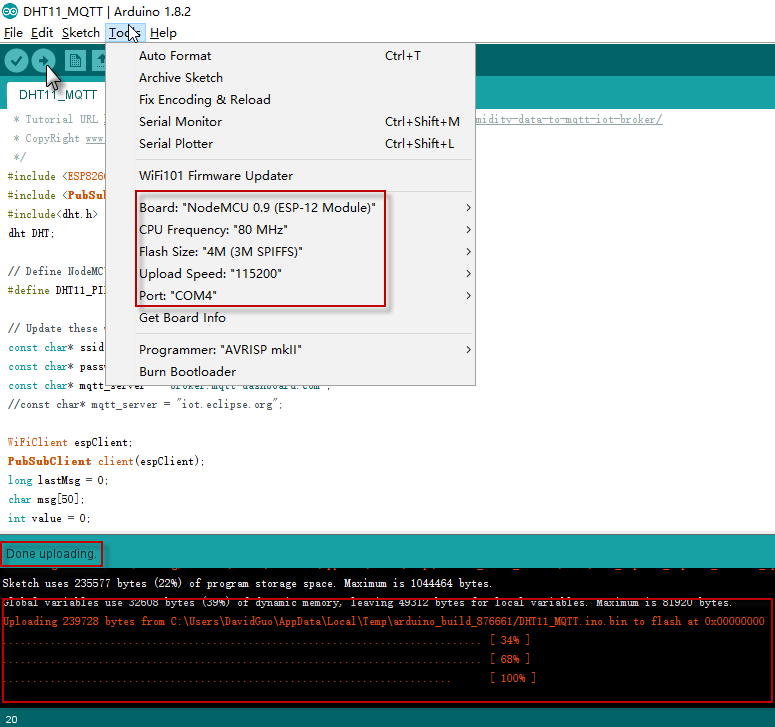
After do that,choose the corresponding board type and port type as below,then upload the sketch to the NodeMCU.
Board:”NodeMCU 0.9(ESP-12 Module)”
CPU Frequency:”80MHz”
Flash Size:”4M (3M SPIFFS)”
Upload Speed:”115200″
Port: Choose your own Serial Port for your NodeMCU
Running Result
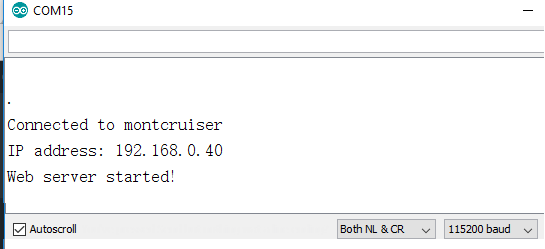
Once the upload done,if wifi hotspot ssid and password setting is ok, all the connections are normal, open the Serial Monitor(set baud rate to 115200 in lower right corner),you will see following result:
Now you can see the nodemcu_ip_address of your IoT web server is 192.168.0.40, write down this IP address and we will use this ip address to access the web page.
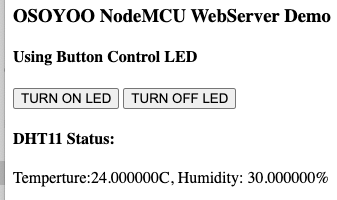
Now go to your PC which is in the same LAN of NodeMCU wifi router, open browser and visit url: http://nodemcu_ip_address (in our example, nodemcu_ip_address is 192.168.0.40)
You will see web page as following:
When you click TURN ON LED button in this page, the LED connected to D3 will turn on, if you click TURN OFF LED button, then LED will be off.