In this guide, you will learn how to sense the light level using a micro:bit. By using of a clever bit of coding the micro:bit’s display LEDs can be used to measure the light level, without the need for any extra hardware. However, this feature is only available when using the JavaScript blocks editor.
You can however attach a resistor and photoresistor to the micro:bit and use an analog input of the micro:bit to measure the light level. This has the advantage that once you know how to do this, you can attach other analog sensors to your micro:bit and make measurements with them.
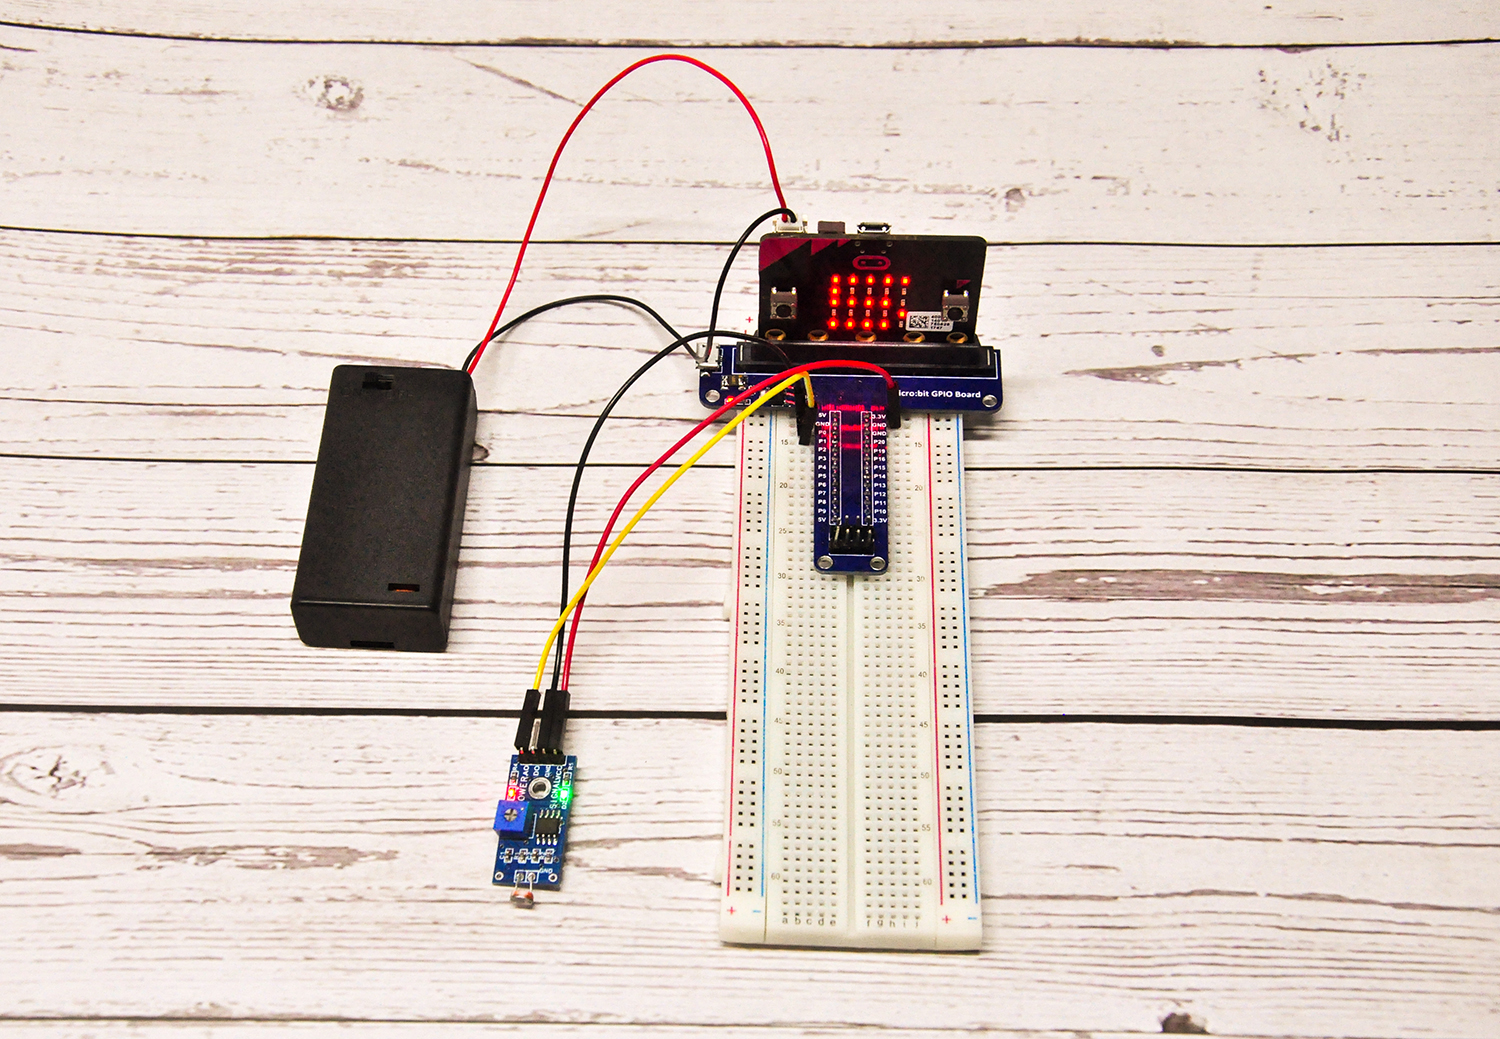
Parts Needed You will need the following parts:
1x micro:bit
1x Micro B USB Cable
1x micro:bit Breakout (with Headers)
1x Breadboard
5x Jumper Wires
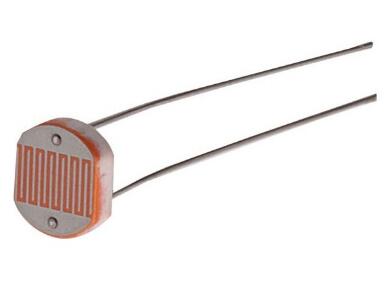
1x Light Detection Sensor
About Photoresistor
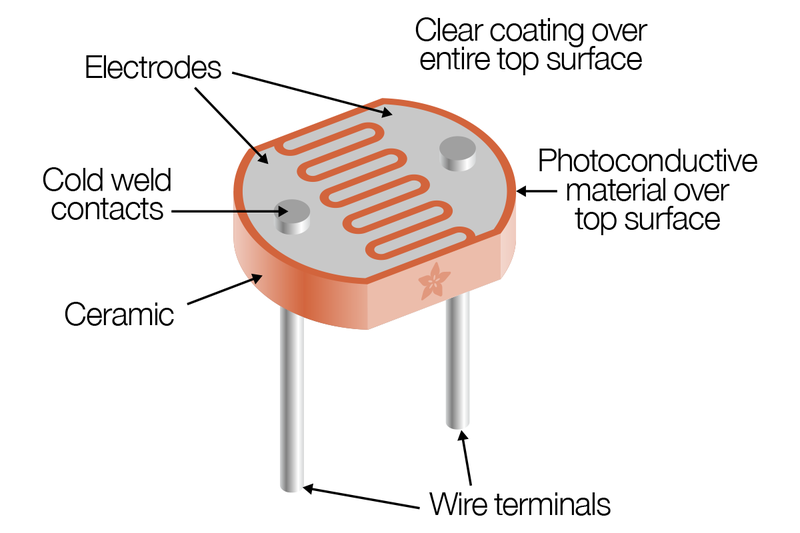
Photocells are sensors that allow you to detect light. They are small, inexpensive, low-power, easy to use and don’t wear out. For that reason they often appear in toys, gadgets and appliances. They are often referred to as CdS cells (they are made of Cadmium-Sulfide), light-dependent resistors (LDR), and photoresistors.
Photocells are basically a resistor that changes its resistive value (in ohms Ω) depending on how much light is shining onto the squiggly face.When it is dark, the resistance of a photoresistor may be as high as a few MΩ. When it is light, however, the resistance of a photoresistor may be as low as a few hundred ohms. They are very low cost, easy to get in many sizes and specifications, but are very innacurate. Each photocell sensor will act a little differently than the other, even if they are from the same batch. The variations can be really large, 50% or higher! For this reason, they shouldn’t be used to try to determine precise light levels in lux or millicandela. Instead, you can expect to only be able to determine basic light changes.
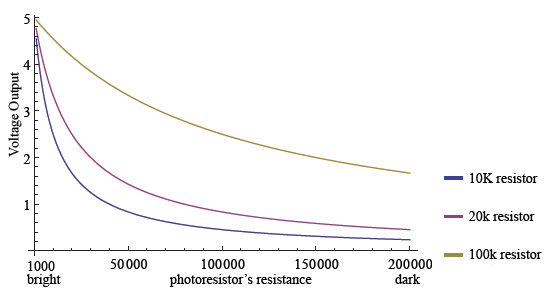
This graph indicates approximately the resistance of the sensor at different light levels:
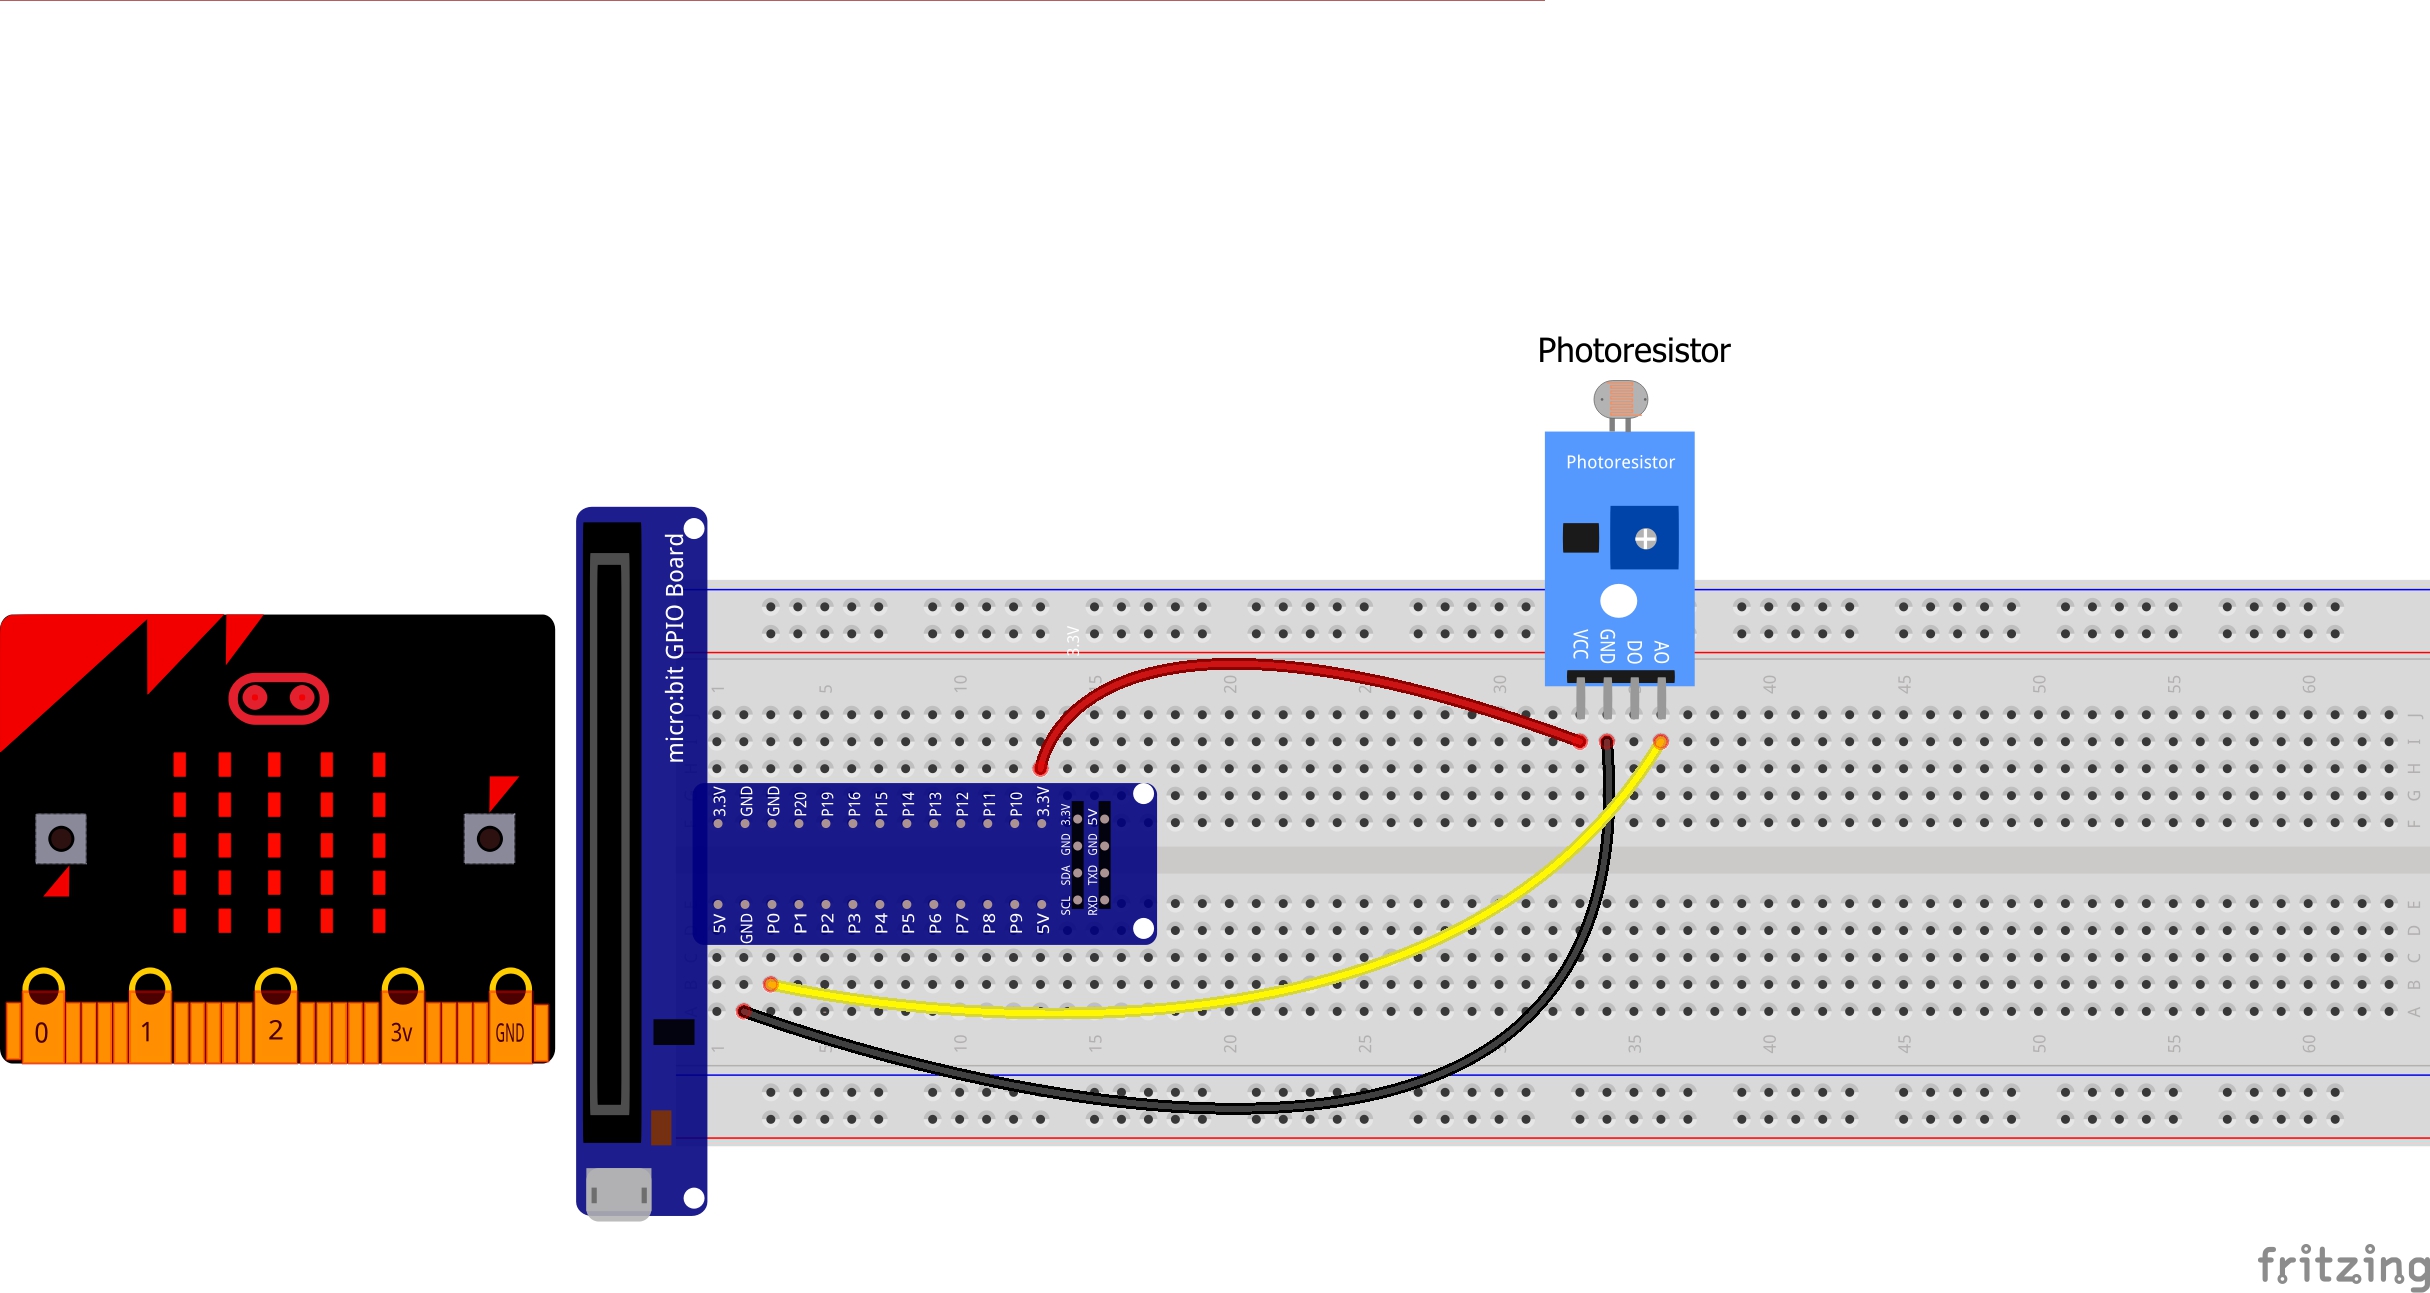
In this lesson, we use the light sensor module as below:
You can check the features here:
Using sensitive photosensitive resistance sensor
The comparator output signal is clean, good waveform, driving ability, more than 15mA.
With adjustable potentiometer to adjust the brightness of the light detection
The working voltage 3.3V-5V
The output form: DO digital switching outputs (0 and 1) and AO analog voltage output
A fixed bolt holes for easy installation
PCB Size: 3.2cm x 1.4cm
Using a wide voltage LM393 comparator
Connection
<class=”headline”>
Software
Whatever language you use to measure the light level, the program will follow the same basic pattern. The voltage will be read at pin 2 and then scaled to produce a number between 0 and 9 to be displayed on the micro:bit’s LED display.
JavaScript Block Code
The JavaScript Blocks Code editor is embedded directly on this page below. From the editor, you can click on Download button (bottom right) and then copy the downloaded file onto your micro:bit. Alternatively, you can Click here to open the editor in a separate browser tab.
The result of the analog read pin block will be a number between 0 and 1023 where 0 represents 0V and 1023 represents 3V. This value is stored in the variable reading. This is then scaled to be a single digit number by dividing by 50. You can change the number 50 to make the light readings more or less sensitive depending on the range of light you are interested in. For instance the light level indoors is considerably less then outdoors on a sunny day.
MicroPython
To run the MicroPython version of the code, open up the online Python editor here and paste the following code into the editor window.
from microbit import*
whileTrue:
reading = pin0.read_analog()
number =int(reading /50)
display.show(str(number))
So that the display only shows a single digit, the number is converted to the integer part of the number (no decimal point) using the int function.
The str function must then be used inside the show method, to convert the integer value into the string that show expects.