


Robot Tank Car Chassis
| Buy from US |
Buy from UK |
Buy from DE |
Buy from IT |
Buy from FR |
Buy from ES |
 |
 |
 |
 |
 |
 |
Robot Tank Car Electronic Parts Kit
| Buy from US |
Buy from UK |
Buy from DE |
Buy from IT |
Buy from FR |
Buy from ES |
|
|
|
|
|
|

In this project we will connect Robot Car to WIFI and Use an APP to control the car through Internet. This is a typical Internet of Things(IoT) Application.

TR300 tank car chassis x1 +Acrylic board chassis x1
OSOYOO UNO R3 board fully compatible with Arduino x1
OSOYOO V1.3 WIFI shield x1
OSOYOO Model X motor driver x1
OSOYOO Battery box x 1
OSOYOO Voltage meter x1
OSOYOO SG90 Micro Servo Motor x1
OSOYOO Ultrosonic avoidance module x1
OSOYOO 5-Point tracking sensor module x1
18650 batteries(3.7V) x 2
some screws and jumper wires

Install the tank car basic frame work as per Lesson 5 .If you have already completed installation in Lesson 5 , Everything keep it as it is.
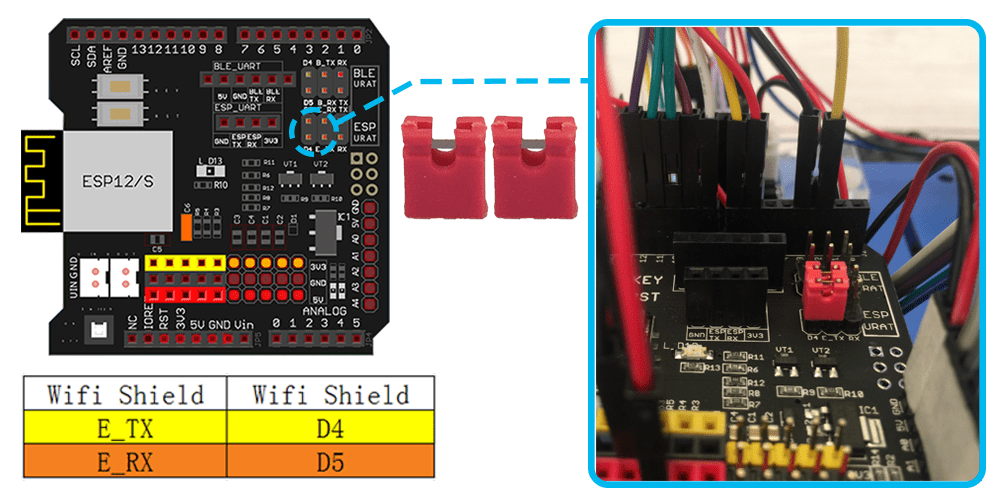
Connect E_TX (in wifi shield)to D4 (in Arduino) and and E_RX(in wifi shield) to D5 (in Arduino) as per following picture.

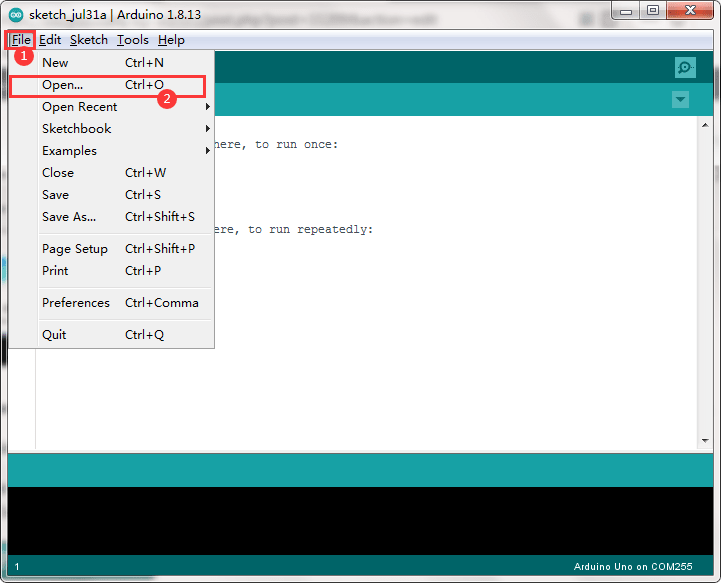
STEP 1: Install latest Arduino IDE (If you have Arduino IDE version after 1.1.16, please skip this step). Download Arduino IDE from https://www.arduino.cc/en/Main/Software?setlang=en , then install the software.
STEP2: Please download the library zip file from WiFiEsp-master .Open Arduino IDE ->click Sketch ->Include Library ->Add .ZIP library , then load above zip file into Arduino.

STEP3: Search Google Play or Apple Store with the Keywords “OSOYOO WIFI UDP Robot Car Controller ” and Download the APP.
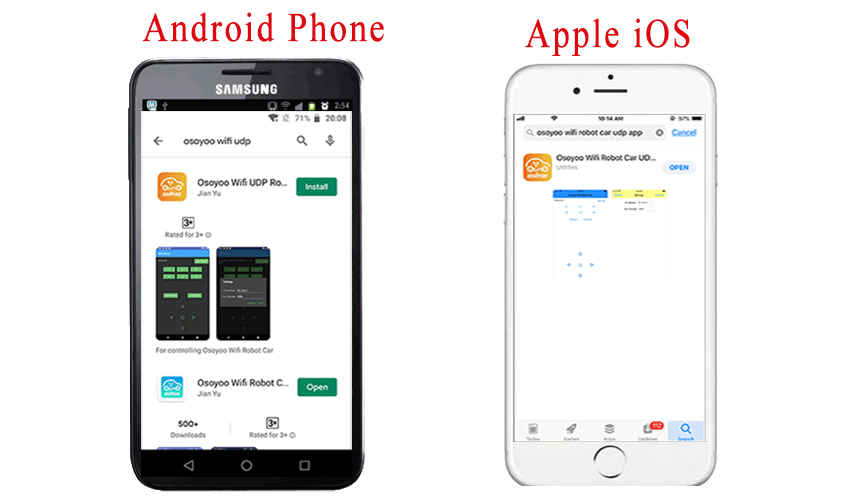
You can also directly download APP from https://osoyoo.com/driver/arduino-udp/udp-robot.apk
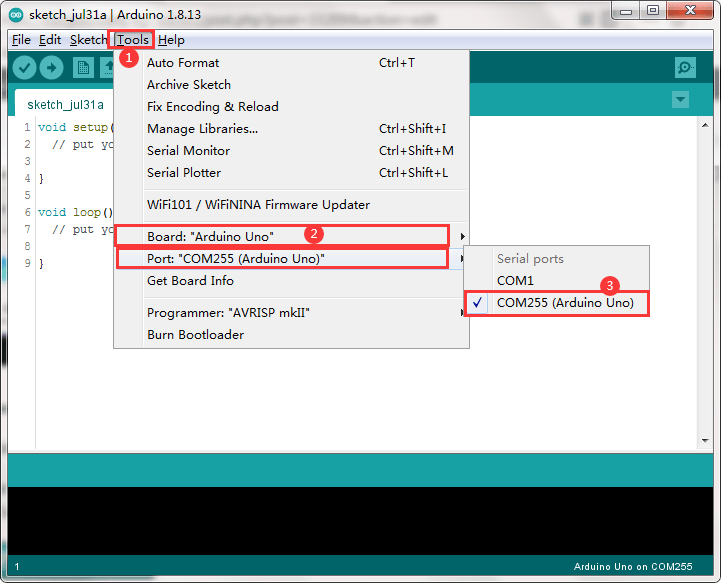
Step 4:Please download sketch from following link: https://osoyoo.com/driver/TR300_tank/arduino_tank_carV2.0/tankcarV2.0-lesson6.zip Unzip the file and you will see a folder named tankcarV2.0-lesson6C and tankcarV2.0-lesson6D , upload the code into Arduino. (Notice: Shut off your battery or Unplug your power adapter when upload sketch code to Arduino.)
Arduino Sketch code Installation:
Robot Car can work in two WIFI modes:AP mode and STA mode. The Arduino sketches for these two modes are different. Let’s explain these two modes one by one as following:

In STA mode, robot car does not work as a wifi hotspot. Instead, it will become an internet node in your LAN. You need tell Arduino sketch what is your local router’s WIFI SSID and password, then Arduino talks to router and get its own LAN IP address from DHCP server. You can use Mobile APP to access the robot car’s IP address and control its movement.
(1) Unzip the file and you will see a folder named tankcarV2.0-lesson6C, then load the tankcarV2.0-lesson6C.ino code into Arduino.
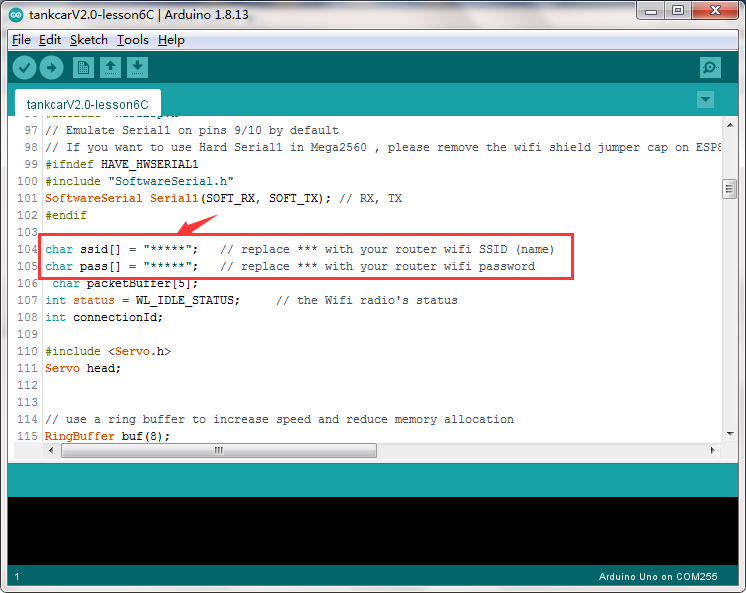
(2) You need change the code Line 104 and Line 105 :
char ssid[] = “YOUR_ROUTER_SSID”; // replace this with your router wifi SSID
char pass[] = “YOUR_ROUTER_WIFI_PASSWORD”; // replace with your wifi password
(3) Upload the sketch to Arduino. Finally, click the Serial monitor window in upper right corner of Arduino IDE, you will see following result:
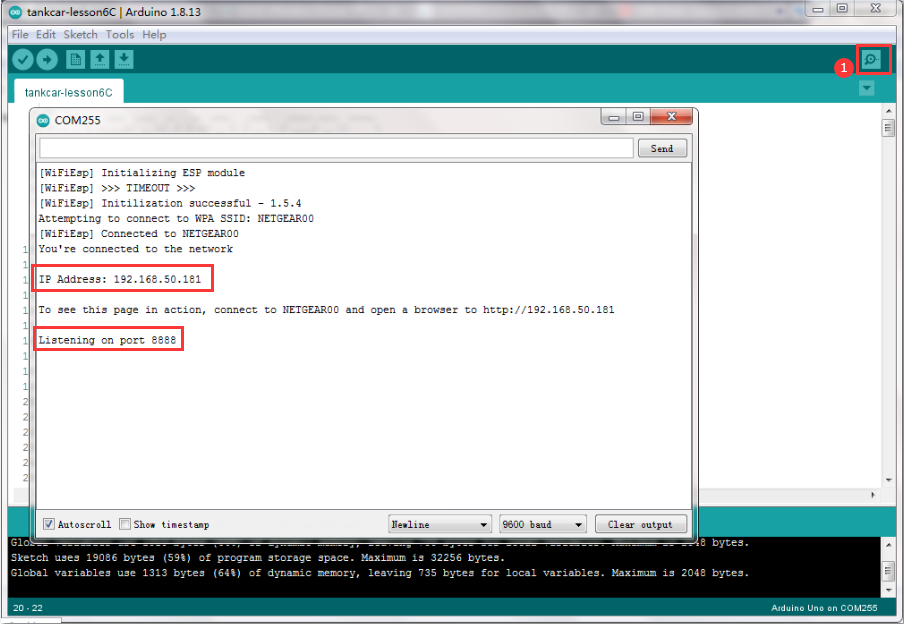
(4)In this mode, your will see an IP address which is our LAN IP address assigned by my router. Please write down this IP address and click Setting to set up robot IP address and set this IP address to your APP Setting section (no need change default port 8888 in APP).
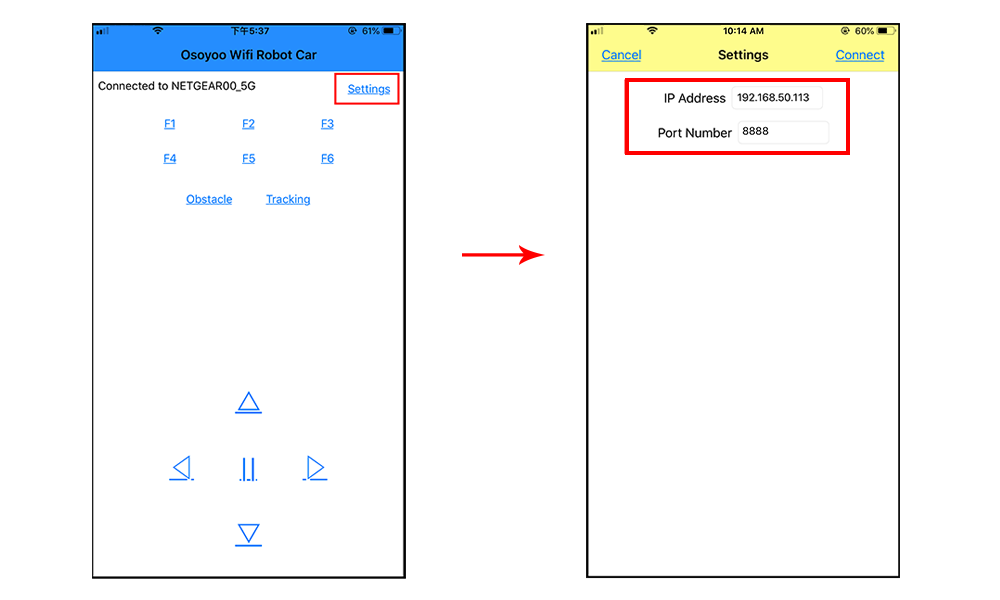
(5)Now your Robot car is connected to your LAN, you can use Mobile phone under same LAN to control the robot car. If your APP is in WAN, you need to go to your Router Control Panel, forward Port 8888 to Robot car LAN IP address, then you can use Router IP to control the car. This feature makes our robot car A REAL INTERNET OF THING device
(6)You can click the ◄ ► ▲ ▼ direction keys to make the car move. Use “||” pause key to stop the car movement.

When working in AP mode, our robot car itself will become a WIFI Hot Spot. Our cell phone can connect to Robot Car as its wifi client. The IP address of Robot is fixed as 192.168.4.1 and It is not connected to WAN.
(1) Unzip the file and you will see a folder named tankcarV2.0-lesson6C, then load the tankcarV2.0-lesson6C.ino code into Arduino.
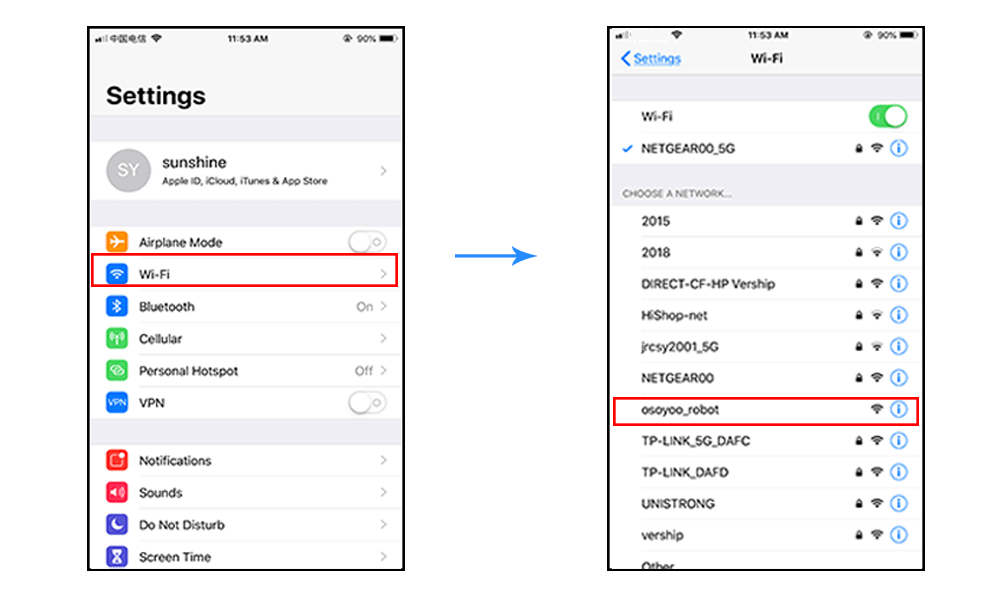
(2) Open your Arduino Serial monitor, and you will see a similar result as AP mode. A new WIFI SSID “osoyoo_robot” with IP address 192.168.4.1 will show up in the window. This means your Robot car has a WIFI Hot Spot name “osoyoo_robot” , its IP address is 192.168.4.1
(3)Now your Robot car become a WIFI Hot Spot and set IP address as “192.168.4.1” to your APP Setting section.
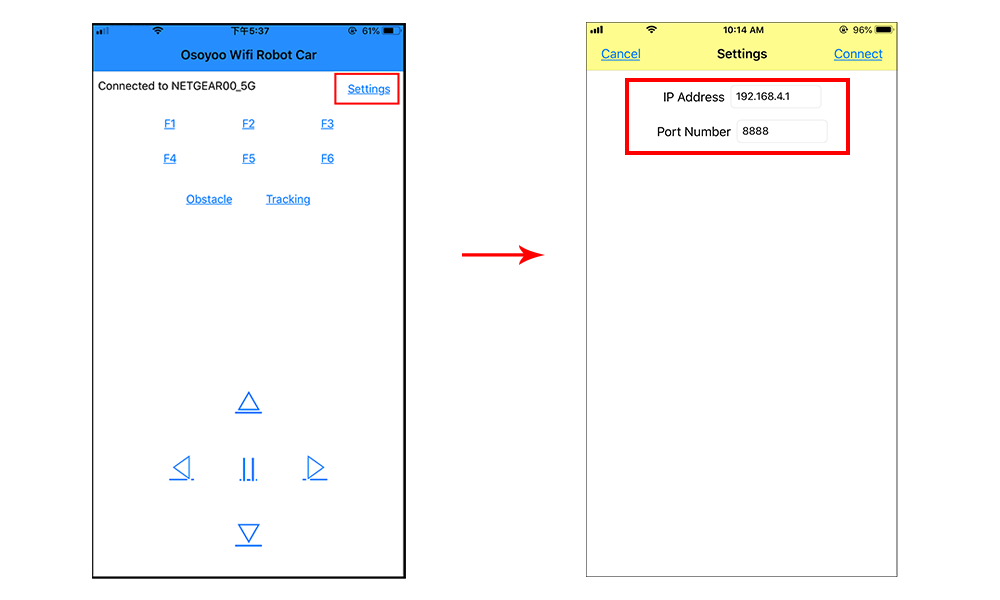
(4) Connect your cell phone to “osoyoo_robot” wifi hot_spot, and you can use Mobile phone control the robot car.
(5)You can click the “< ” “>” ” ^” ” v ” direction keys to make the car move. Use “||” pause key to stop the car movement.


