In this project, we use tracking(black/white) sensor to design a simple line follower Robot car.
We first use black tape to paste a circle on the white ground (also on white paper), and the robot will continue to run patrol along the circle.
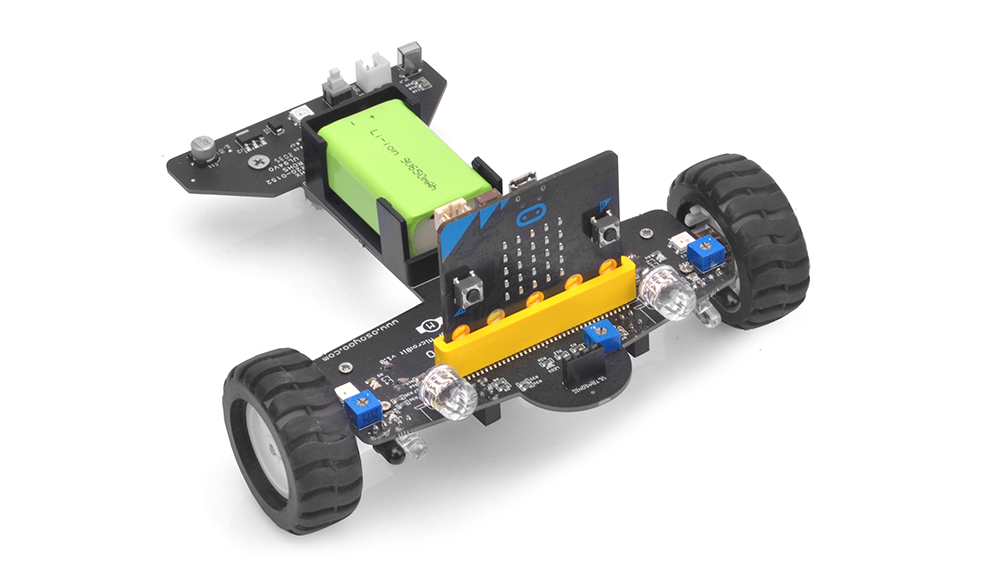
● 1 x USB cable
● 1 x micro:bit board
● 1 x 9V battery
● 1 x OSOYOO Robot for Micro bit
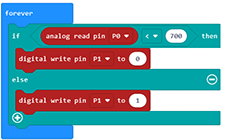
A Line Follower Robot, as the name suggests, is an auto-driving vehicle which follows a black track line printed in white ground. Tracking sensors in the robot keeps checking if the current car location is out of the track. If yes, then car will make a negative movement to draw the robot car back to track.
Block
Analyse
Examples
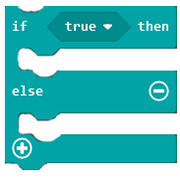
If then else block;
if a value is ture ,then do the first of block statements.Otherwise ,do the second of block statements
and block;
return ture if both inputs are ture
line Sensor direct block;
Tracking mode setting direction and color
CarCtrlSpeed block Set the speed of the car in the running direction
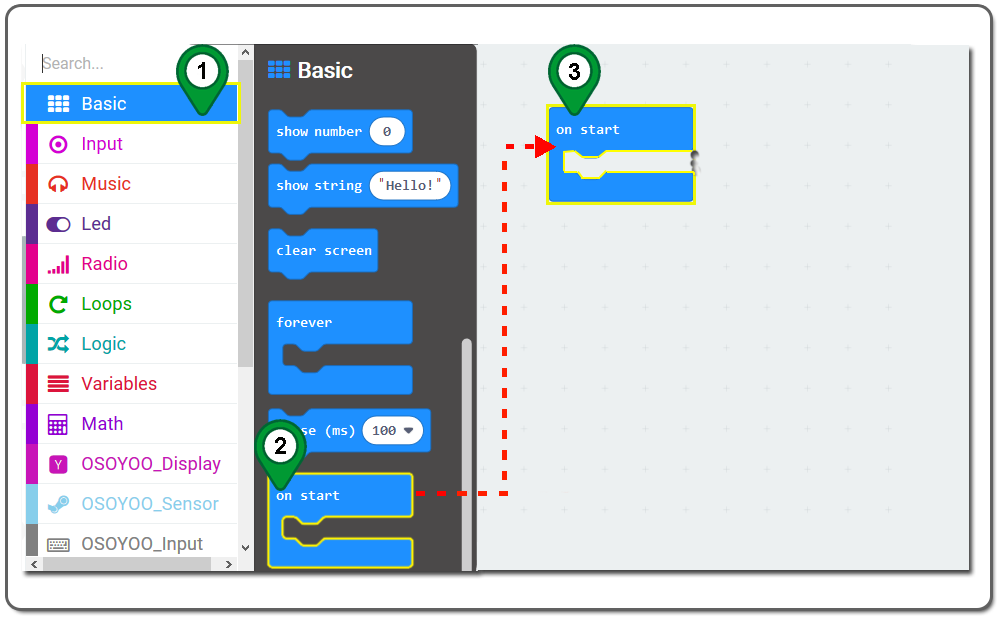
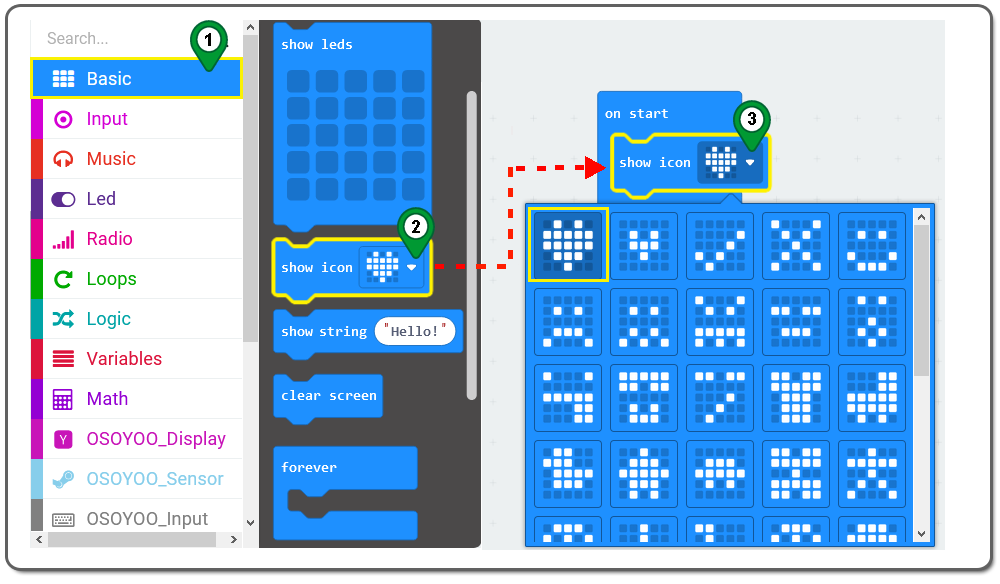
Step 1.In the Toolbox, click on the Basic category and then click the on start block , and then Drag as following figure:
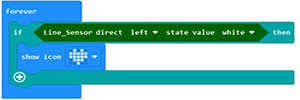
Step 2. Click on the Basic category again. Then drag the show icon block and drop it inside the on start block ,and choose the icon from the drop-down menu as following figure.
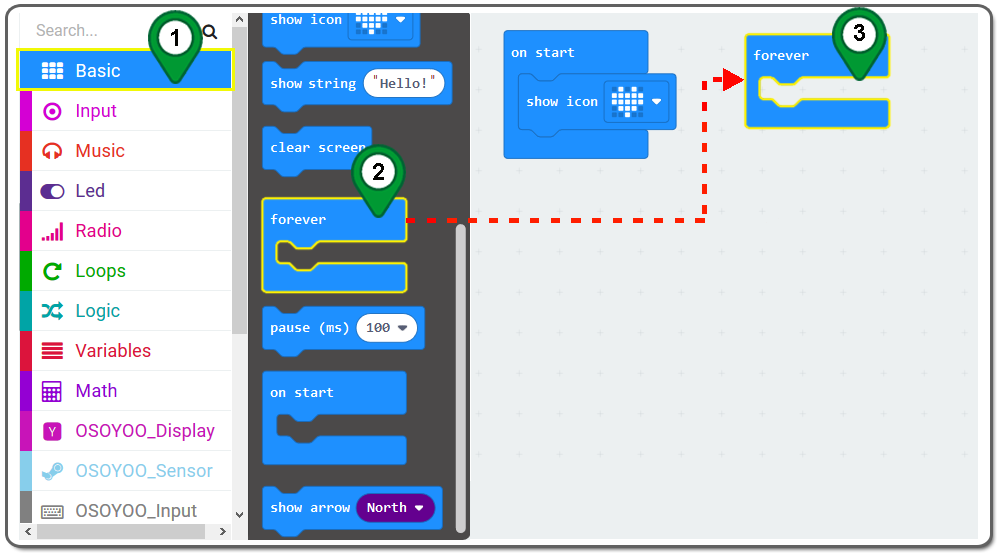
Step 3. Click on the Basic category and then click the forever block, and then Drag as following figure:
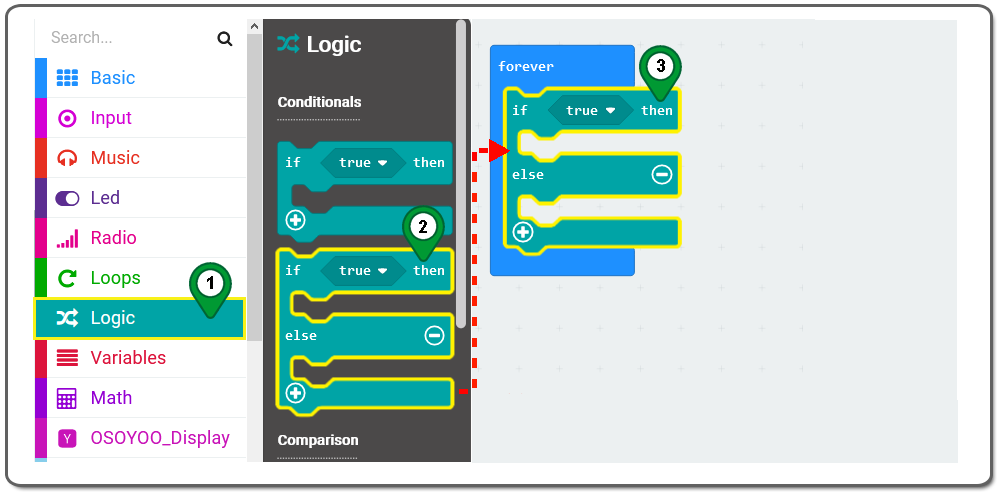
Step 4. Click on the Logic category and then click the if then else block, and then Drag as following figure:
Step 5. Drag and drop a Boolean block,and place it on the placeholder of the if-then-else block as following figure.
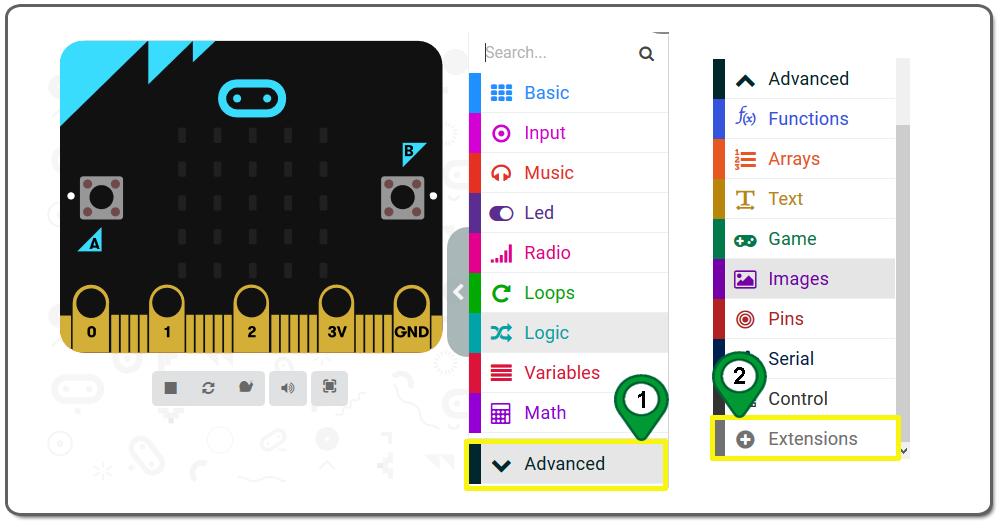
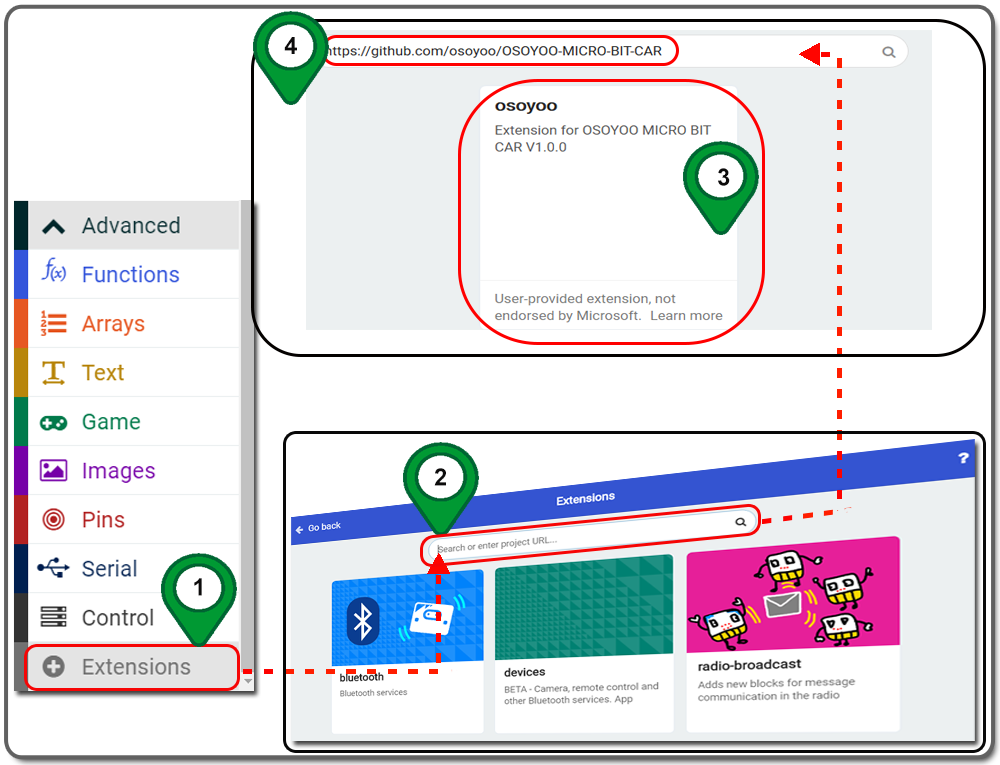
Step 6.In the Editor controls, click on the Advanced button and then Extensions as following figure.
Step 7. In the Extensions page , enter project URL “https://github.com/osoyoo/OSOYOO-MICRO-BIT-CAR ” in the Search textbox and click on the Search button. The page will show you all the matching extensions based on your search string. Now, click on OSOYOO to add it into your project .
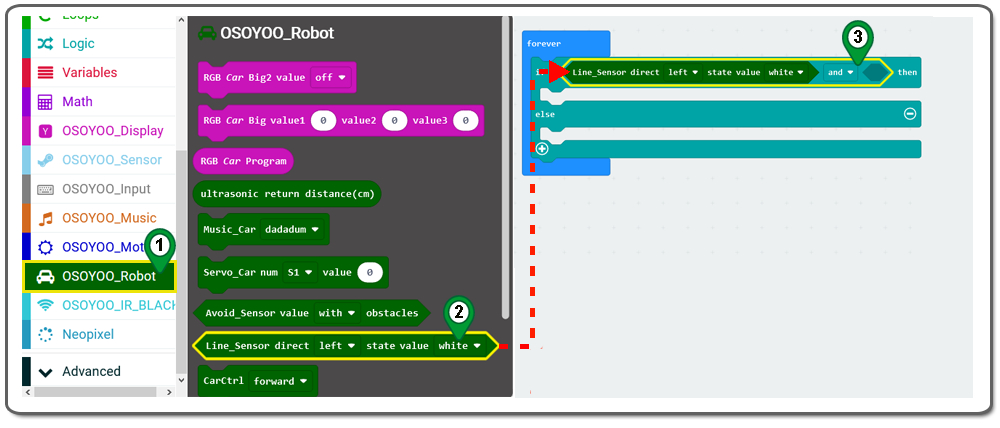
Step 8.Click on the OSOYOO_Robot category. Drag line Sensor direct state value block and place it on the first placeholder of Boolean block as following figure.
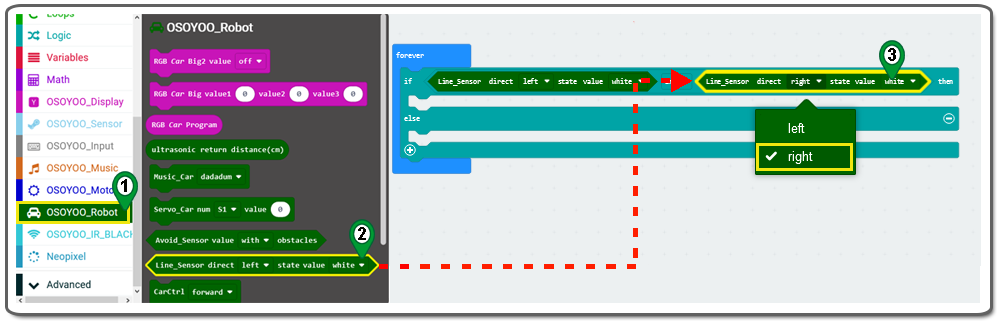
Step 9. Drag and drop a line Sensor direct state value block,and place it on the second placeholder of Boolean block ,and choose the right from drop-down menu.
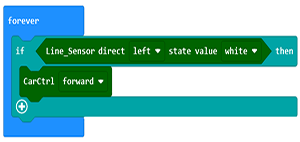
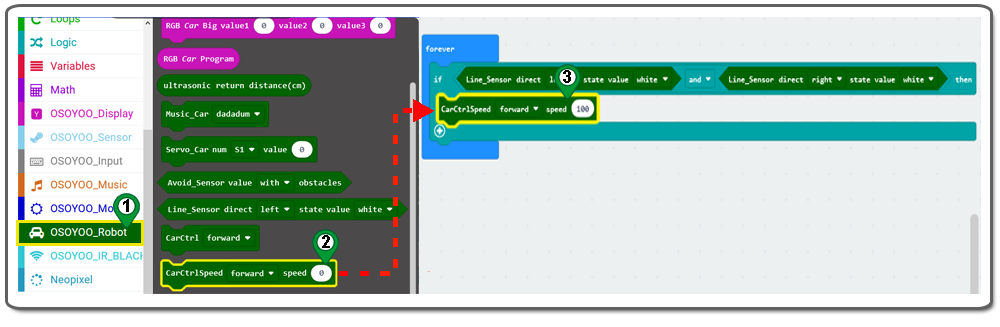
Step 10. Drag and drop a CarCtrlSpeedblock over and place it inside the “then” section of the if-then-else block, and change the direction to forward and speed to 100,as following figure.
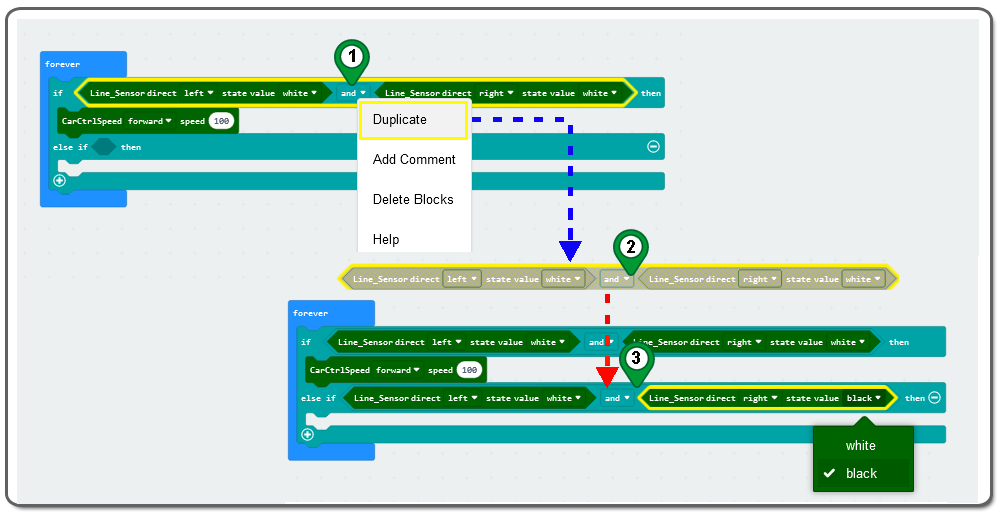
Step 11. Duplicate aComparison section block and drag and drop it over and place it inside the “else if” section of the if-then-else block ,and choose therightand blackfrom drop-down menu.as following figure:
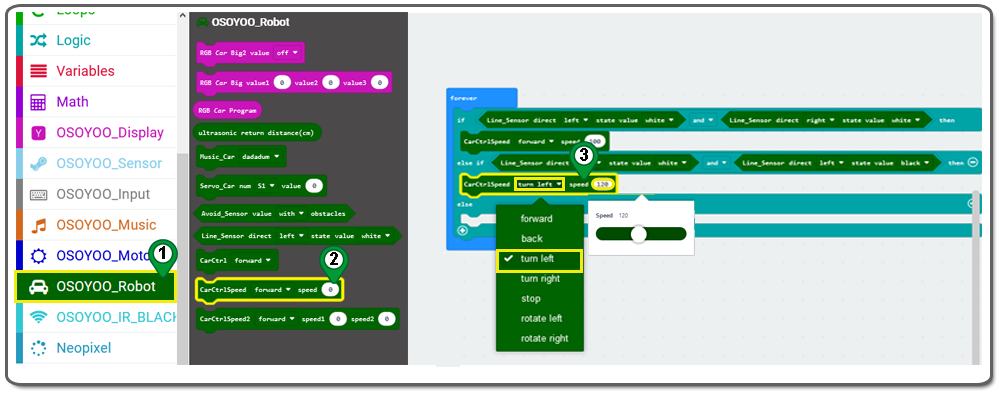
Step 12. Drag and drop a CarCtrlSpeedblock,and place it in the second “then” section of the if-then-else block then choose turn left and set 120 as speed as following figure.
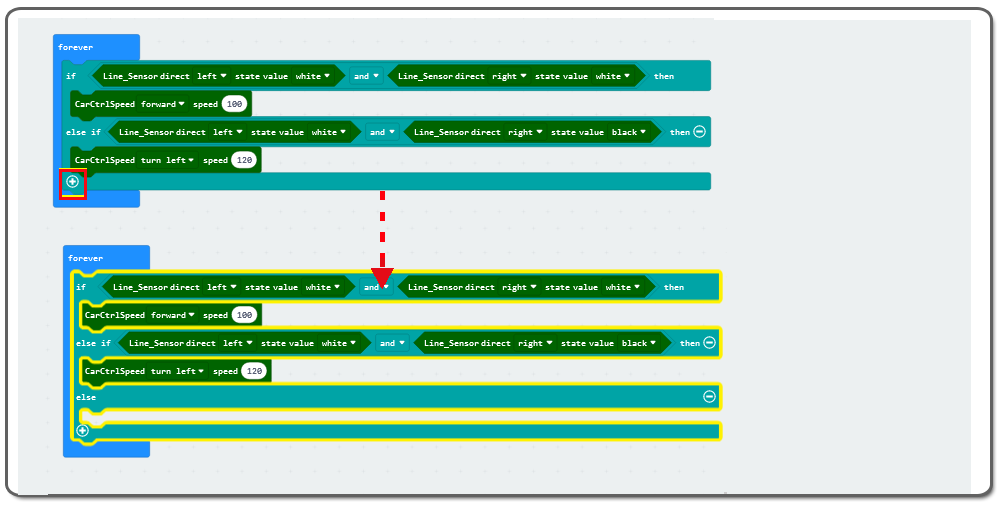
Step 13. Click “+” to add an else section as following
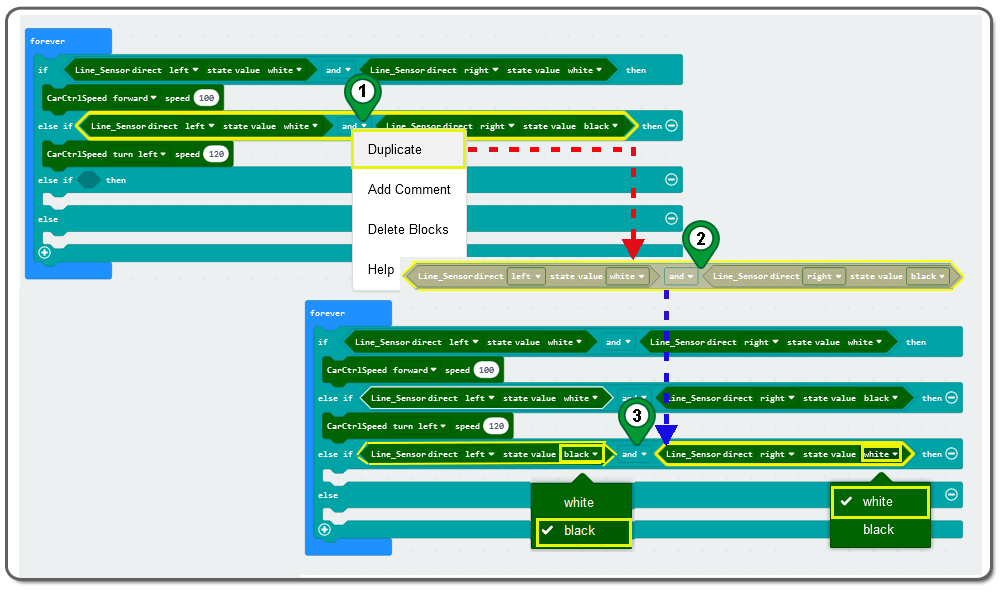
Step 14. Duplicate aComparison section block and drag and drop it over and place it inside the “else if” section of the if-then-else block, and choose theblack and whitefrom drop-down menu as following:
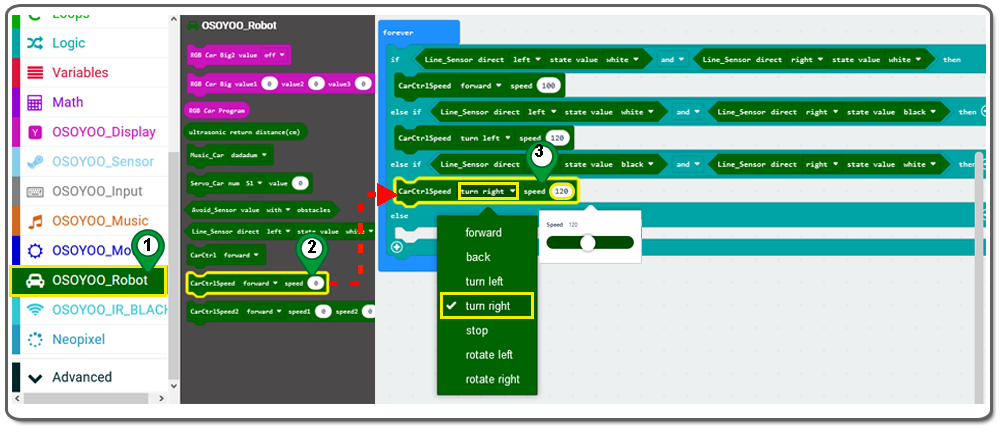
Step 15. Drag and drop a CarCtrlSpeed block,and place it in the second “then” section of the if-then-else block then choose turn right and set 120 as speed as following figure.
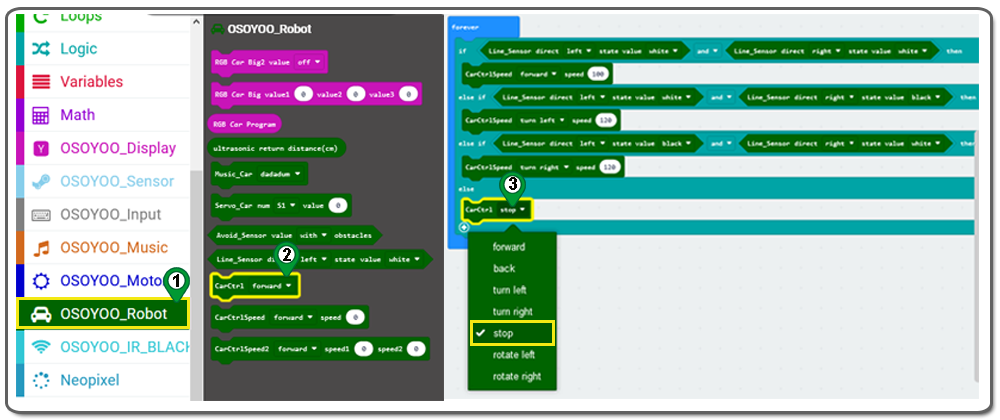
Step 19. Drag and drop a CarCtrl block over and place it inside the fourth “then” section of the if-then-else block, and change the direction to stop.
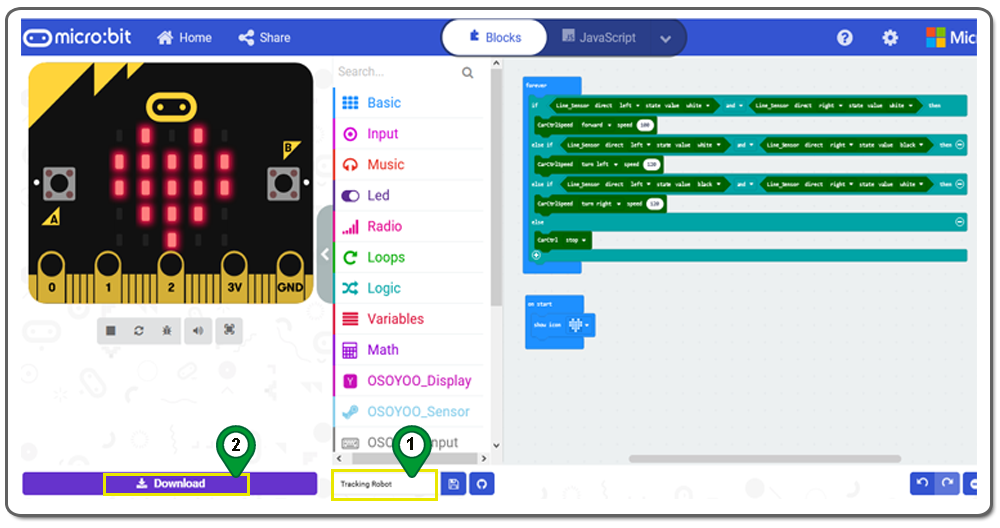
Step 20.Rename this project and download the hex file as following figure.
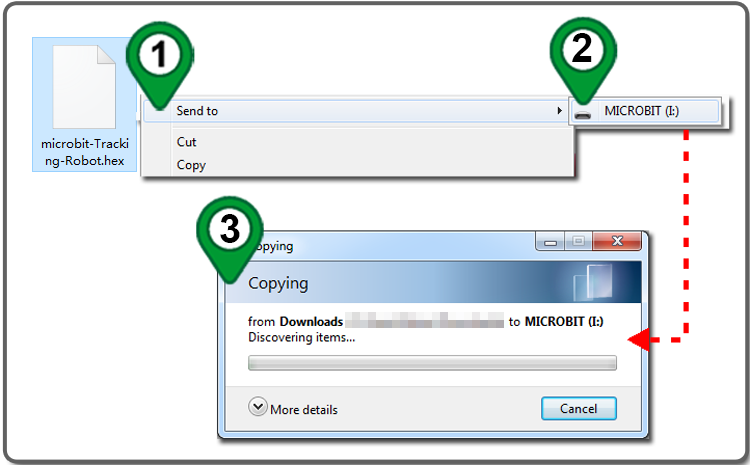
Step 20. Save it to your MICROBIT disk Driver as following figure.
Step A)Connect the micro:bit with the computer through USB cable, and the computer will pop up a U disk and send the download file(.hex)to your micro:bit.
Step B)Insert the micro:bit main board into the robot, and connect a 9v battery into the battery box.
Step C)Turn the POWER switch ON.
Note:
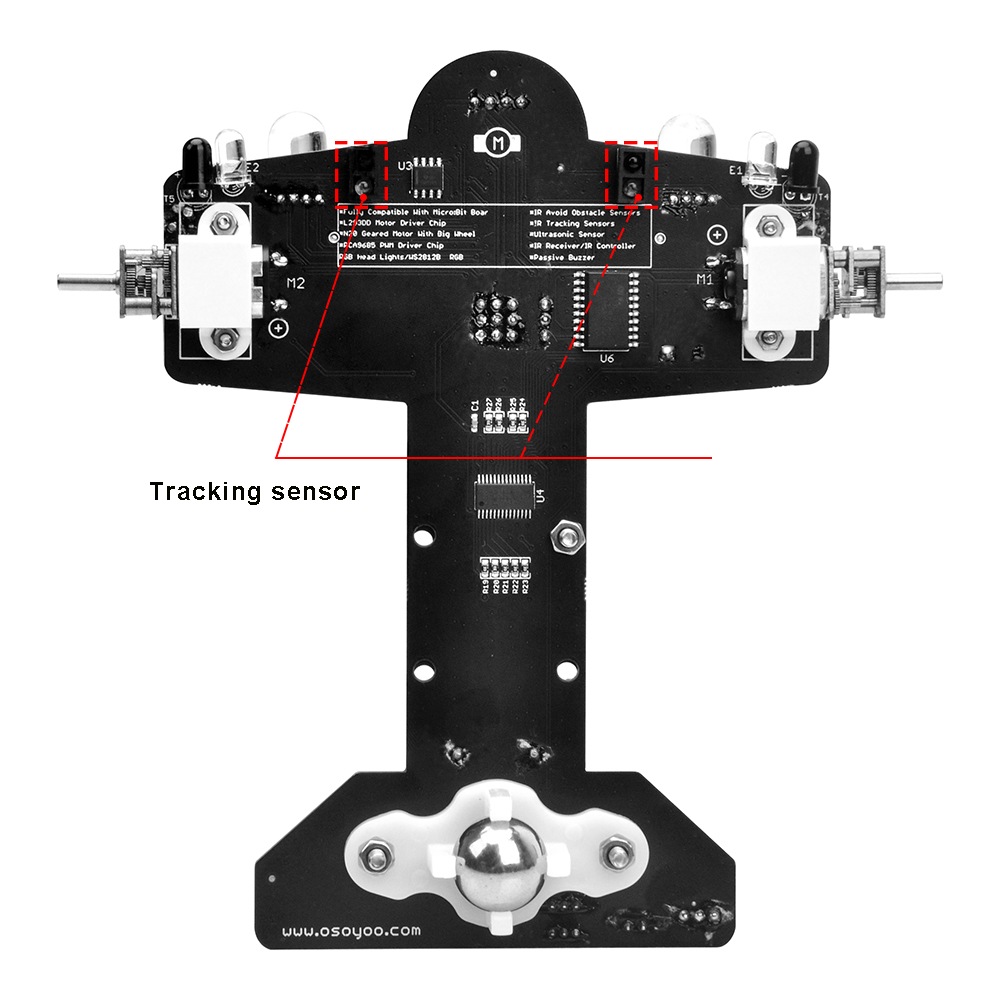
Before the experiment, please adjust the R18 potentiometer to ensure that the two infrared tracking sensors can work normally.
If the tracking is not normal, the robot car will quickly run out of the tracking trajectory, we need to adjust its speed to be slower.