What we will learn in this lesson is robot following. We can use infrared obstacle avoidance sensor to achieve robot following, or we can use ultrasonic sensor to achieve it. In this lesson, we learn to follow the ultrasonic following. Ultrasonic following can realize that if the robot has an object in front of the ultrasonic sensor, the robot will follow.
1 x BBC micro:bit board
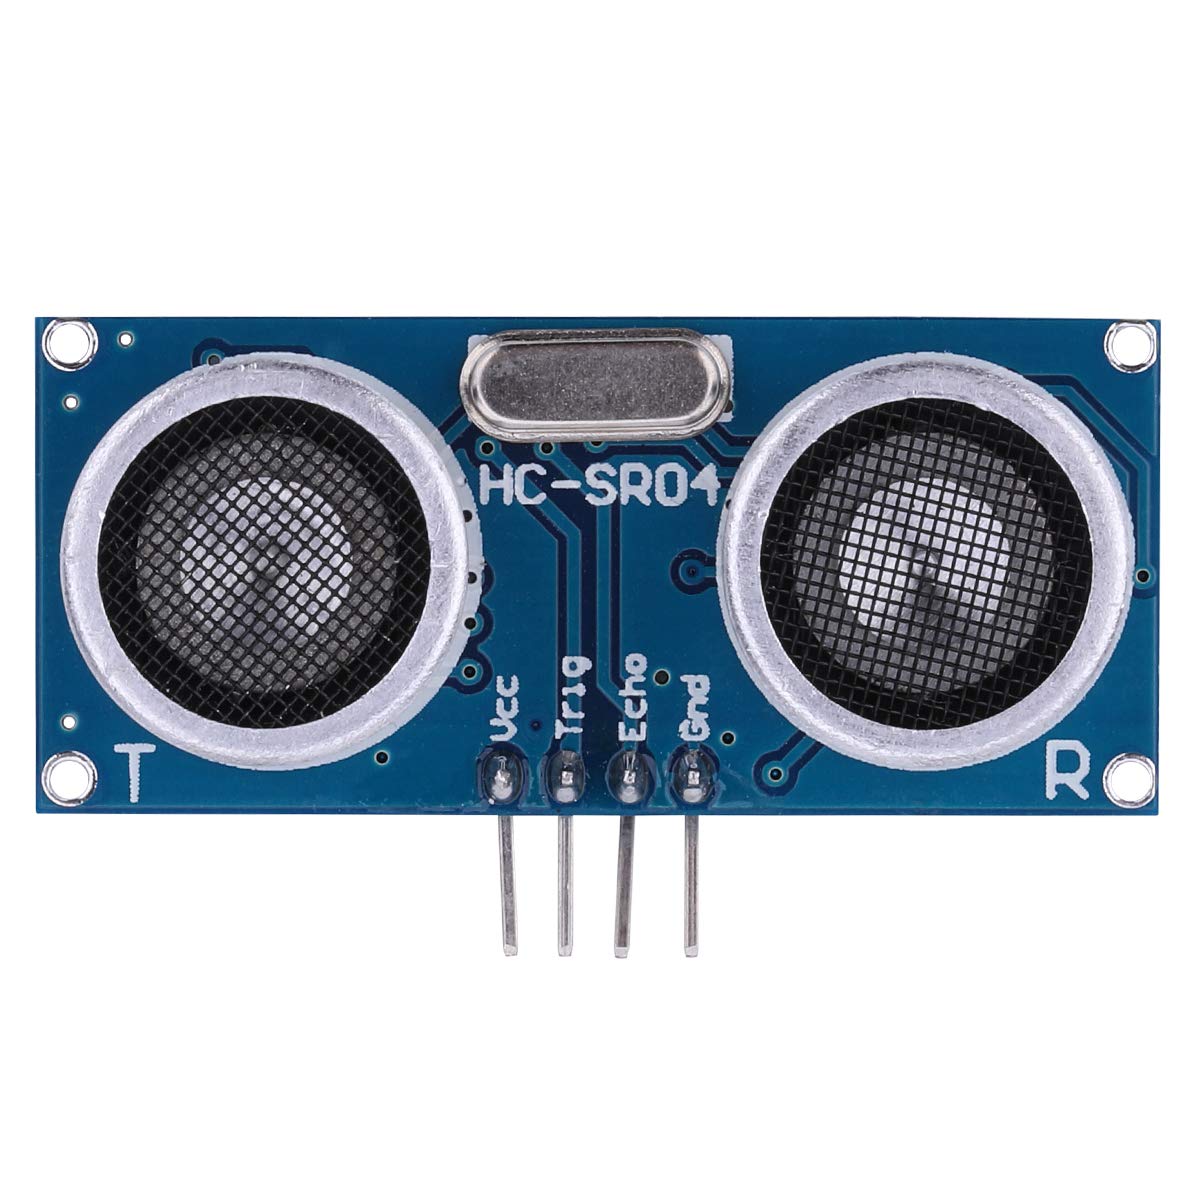
1 x Ultrasonic sensor
1 x Micro USB cable
1 x 9V battery
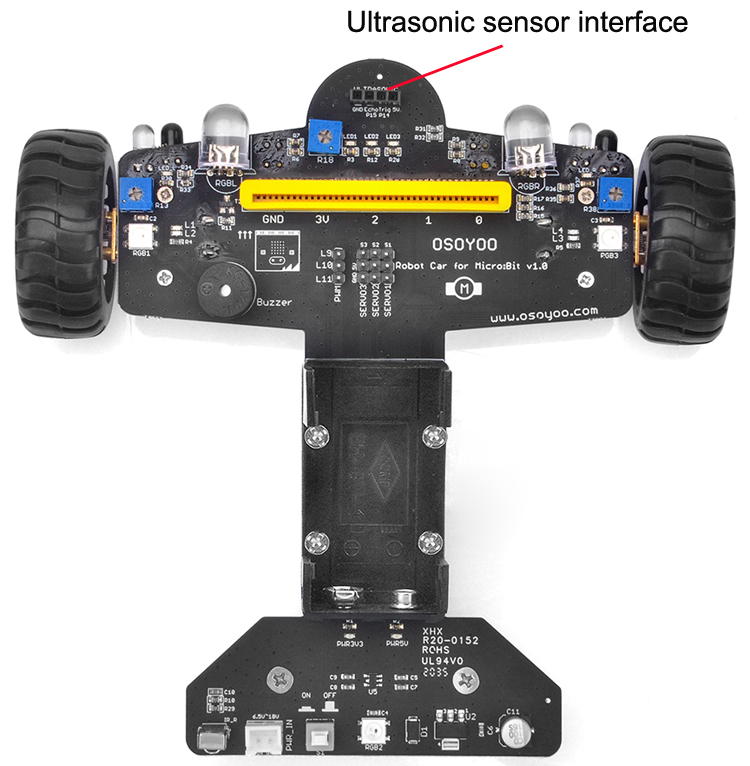
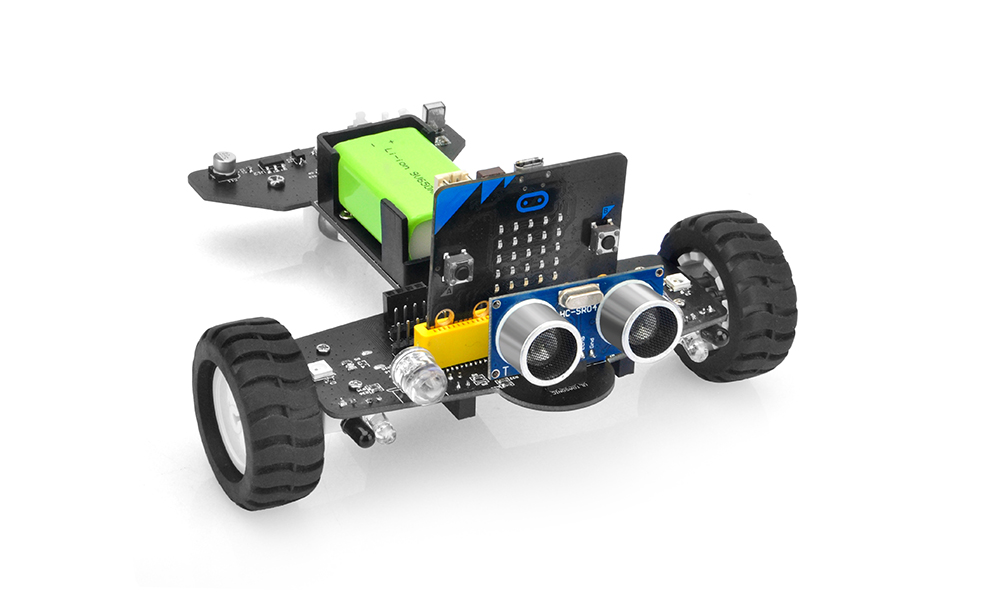
1 x OSOYOO Robot for Micro bit
NOTE:when you work on this project, and find the car always goes back, please contact customer service email: [email protected], and we’ll send a new Ultrasonic sensor to you
Ultrasonic sensor uses sonar to determine distance to an object like bats do. It offers excellent non-contact range detection with high accuracy and stable readings in an easy-to-use package. Please click here to learn more
Ultrasonic sensor interface: use ultrasonic sensor to detect the distance, connect Trig to p14, connect Echo to P15.
Block
Analyse
Examples
From OSOYOO sensor category
You need to add OSOYOO MICRO BIT CAR package, and then you can drag it from OSOYOO sensor category. It indicates the distance between object and Ultrasonic sensor. You can choose Trig to p14, and Echo to P15 in this project, as the Ultrasonic sensor interface for OSOYOO Robot car connects Trig of Ultrasonic sensor to p14 of micro:bit board, connect Echo to P15.
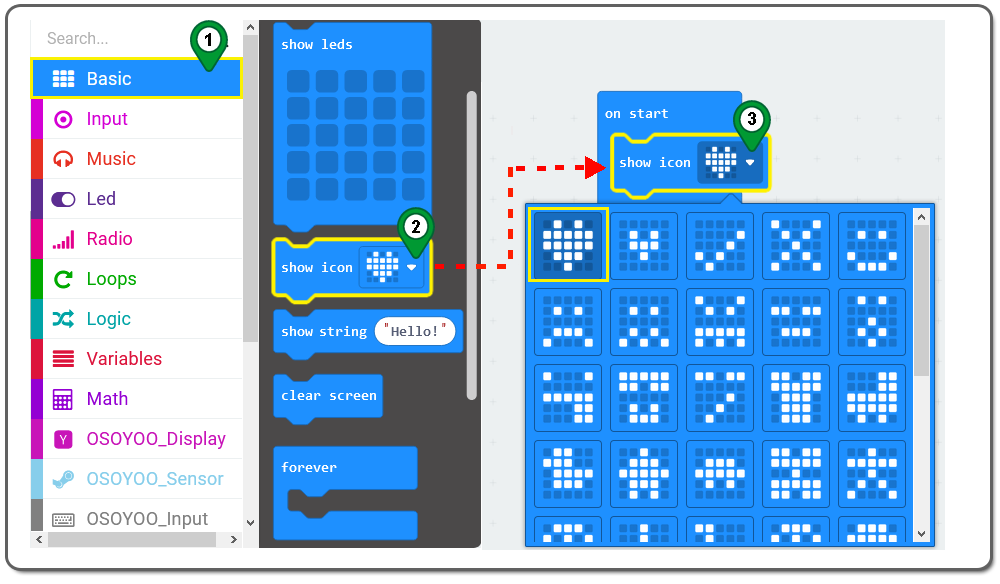
Step 1. Click on the Basic category again. Then drag the show icon block and drop it inside the on start block ,and choose the icon from the drop-down menu as following figure.
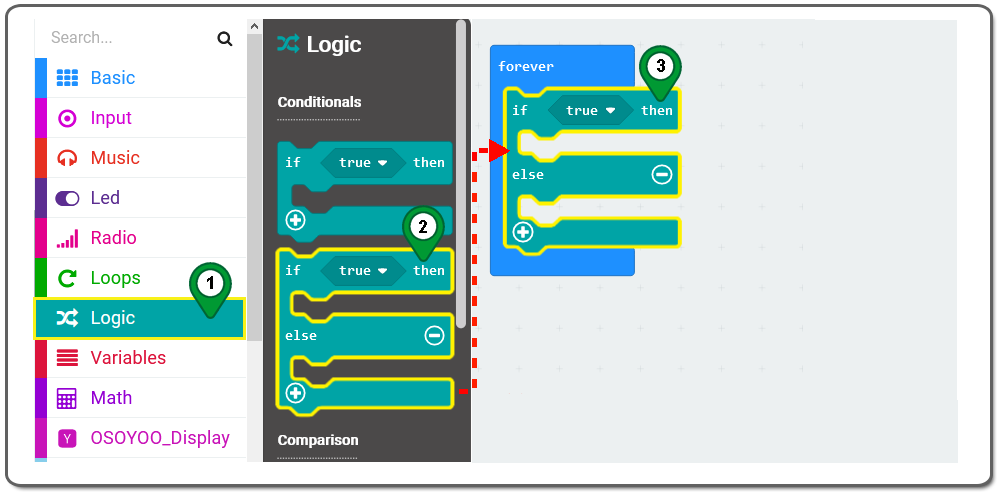
Step 2. Click on the Logic category and then click the if then else block, and then Drag inside forever block as following:
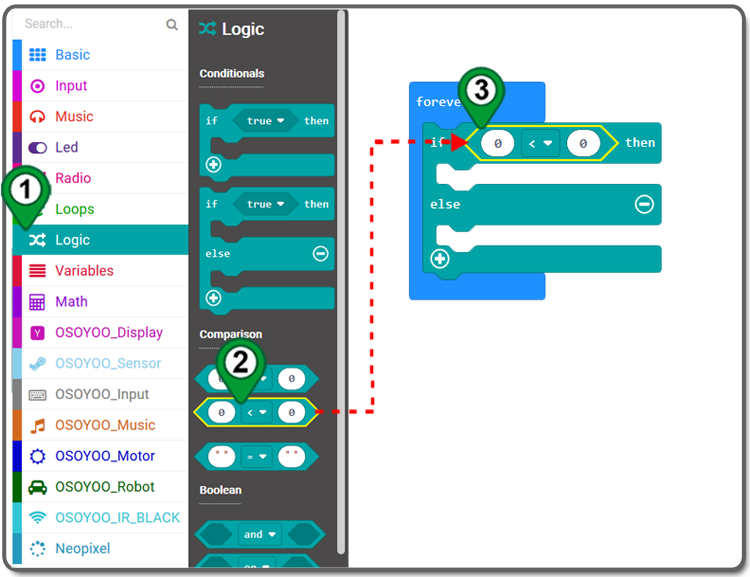
Step 3. Click on the Logic category again. Under the Comparison section, drag “0 < 0” blocks over, and place it on the placeholder of the if-then-else block, as following:
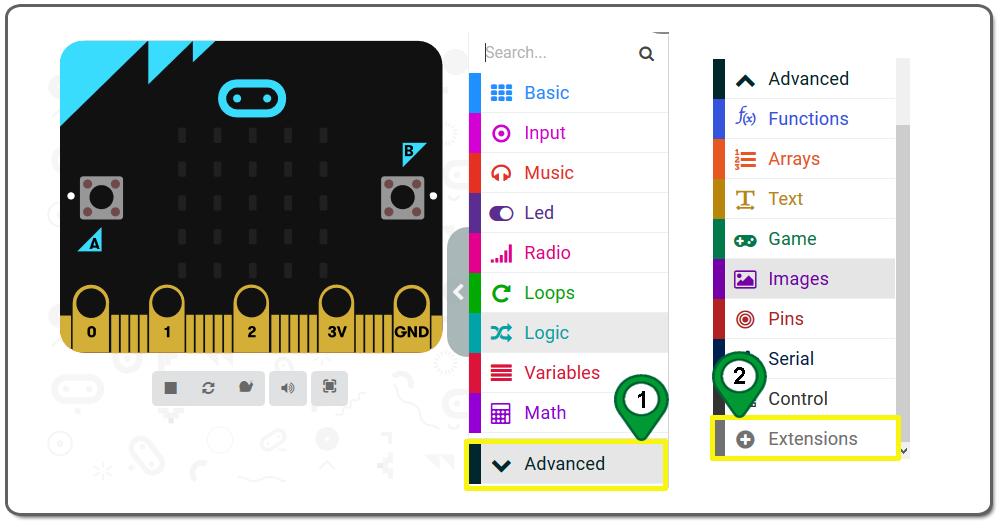
Step 4.In the Editor controls, click on the Advanced button and then Extensions as following figure.
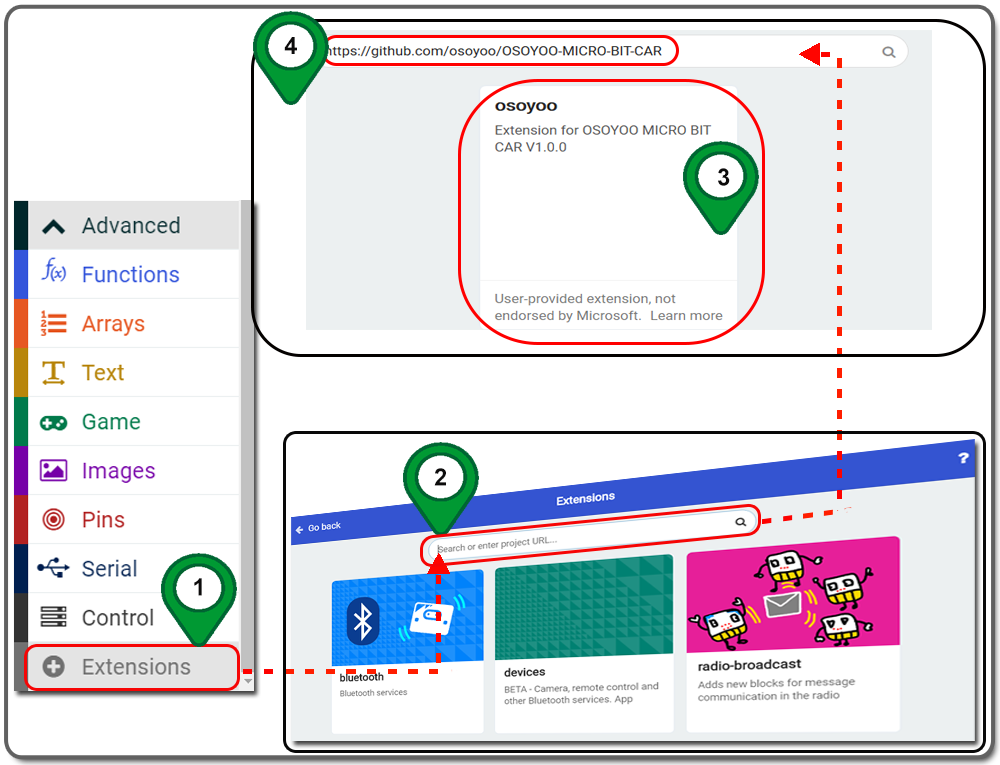
Step 5. In the Extensions page , enter project URL “https://github.com/osoyoo/OSOYOO-MICRO-BIT-CAR ” in the Search textbox and click on the Search button. The page will show you all the matching extensions based on your search string. Now, click on osoyoo to add it into your project .
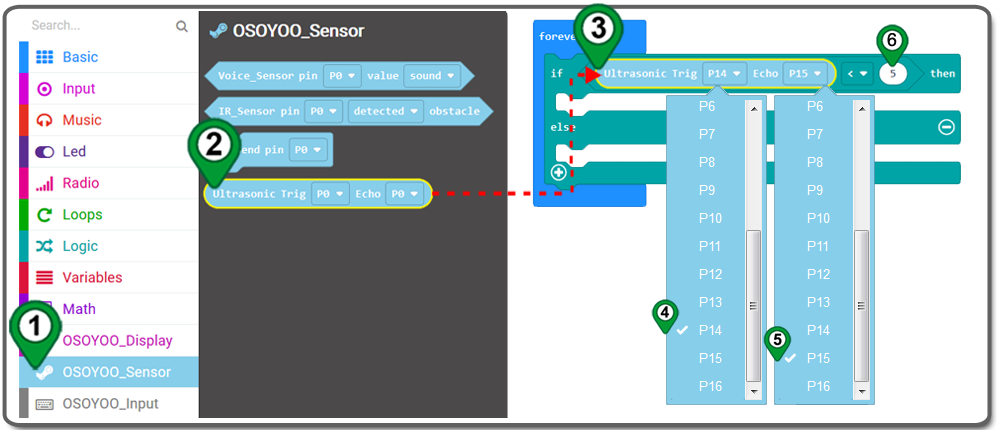
Step 6.Click on the OSOYOO_Sensor category and drag and drop the Ultrasonic block and place it on the first placeholder of the Comparison block and change Trig P0 to P14, Echo P0 to P15. Also, change the second placeholder of the Comparison block to 5 as following picture:
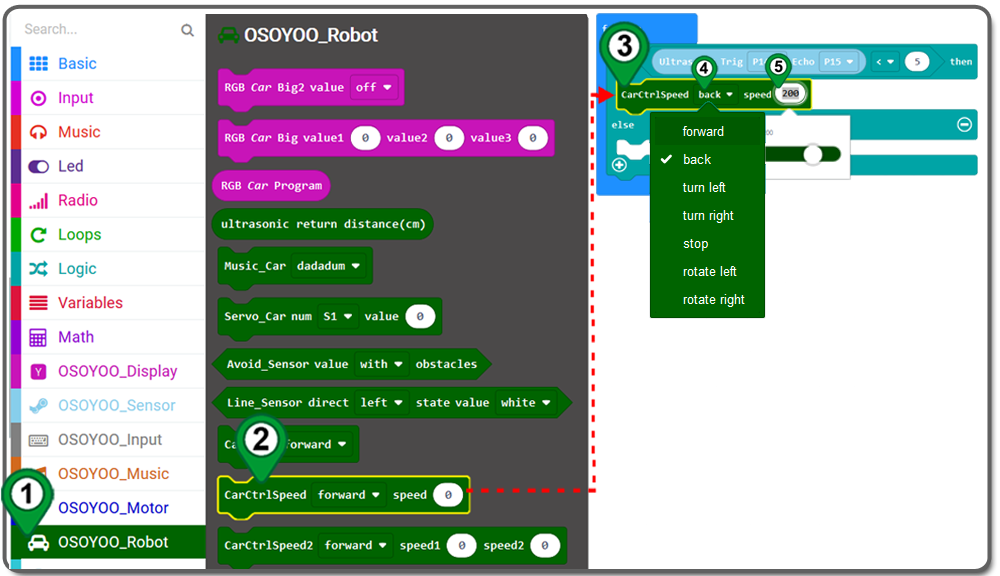
Step 7. Drag and drop a CarCtrlSpeed block over and place it inside the “then” section of the if-then-else block, and change the direction to back and speed to 200.
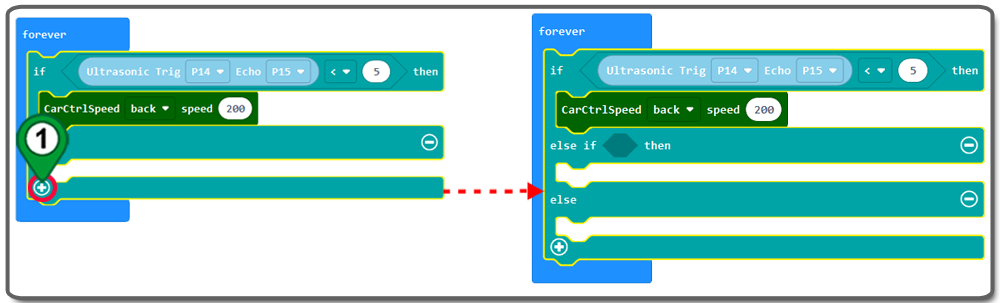
Step 8. Click “+” to add an else section as following
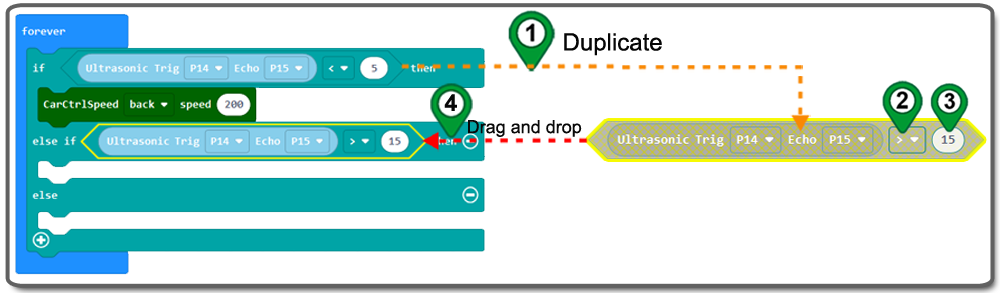
Step 9. Duplicate aComparison section block and drag and drop it over and place it inside the “else if” section of the if-then-else block, and change “<” to “>” and number to 15 as following:
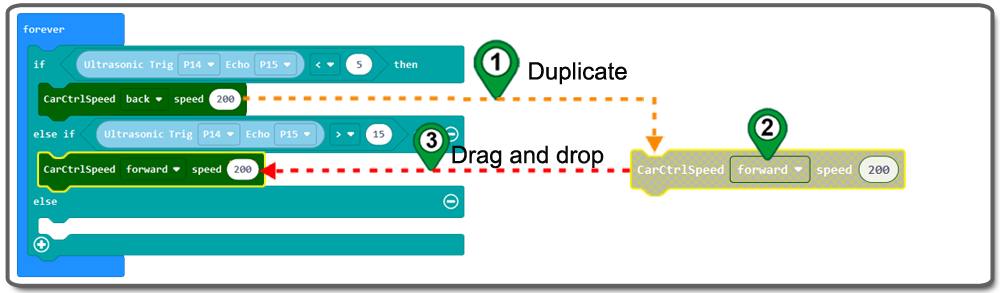
Step 10. Drag and drop a CarCtrlSpeed block over and place it inside the second “then” section of the if-then-else block, and change the direction to forward.
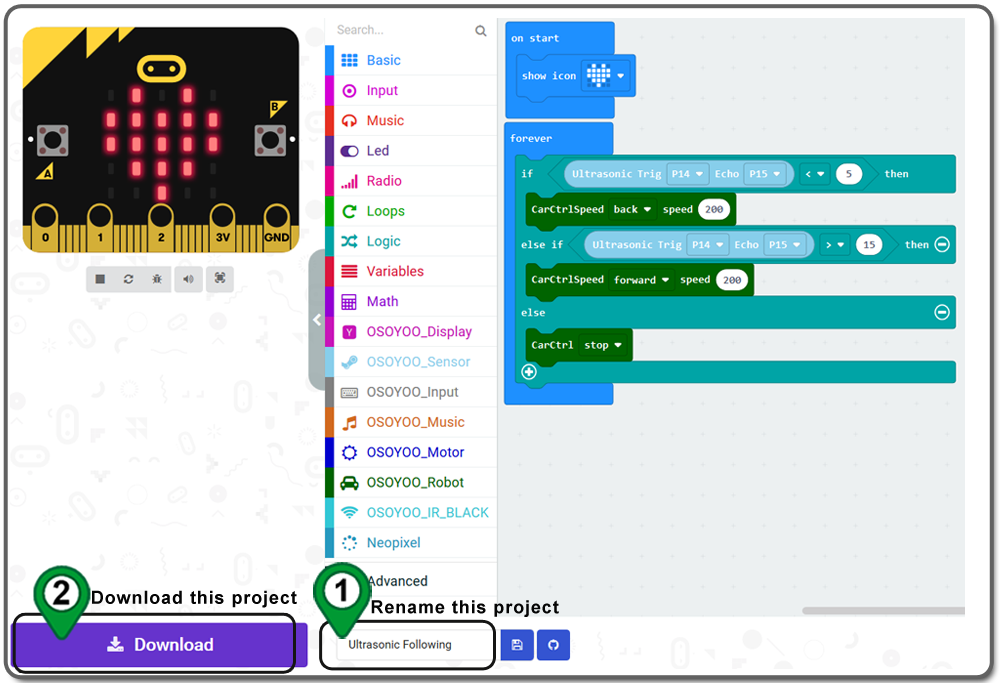
Step 11. Drag and drop a CarCtrl block over and place it inside the third “then” section of the if-then-else block, and change the direction to stop.
Step 12. Rename this project and download the hex file as following
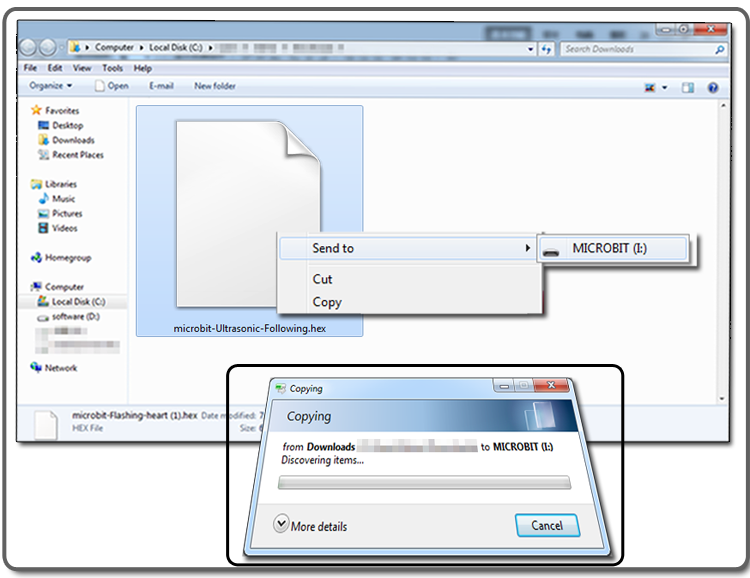
Step A)Connect the micro:bit with the computer through USB cable, and the computer will pop up a U disk and send the download file(.hex)to your micro:bit.
Step B)Insert the micro:bit main board and ultrasonic sensor into the robot (please make sure the “eyes” of ultrasonic sensor face to front), and install a 9v battery into the battery box.
Step C)Turn the POWER switch ON.
Turn the POWER switch ON. Move a object before the car, the robot car will go advance and go back according to the distance of the object


 Turn the POWER switch ON. Move a object before the car, the robot car will go advance and go back according to the distance of the object