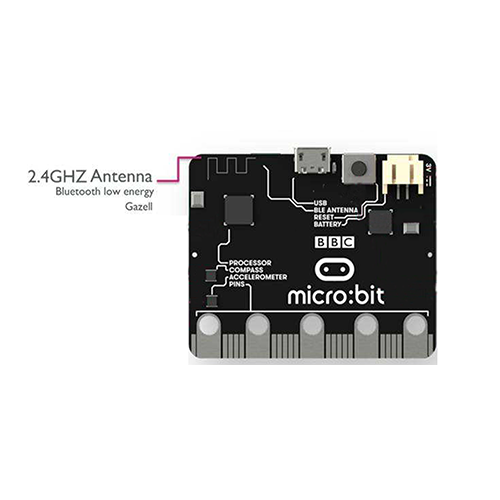
Micro:bit mainboard comes with Bluetooth, it can communicate with the mobile phone wirelessly. In this lesson, we mainly introduce how to control Micro:bit programming through mobile APP.Pair your micro:bit with the app.
Pair your micro:bit with the app
Connect your micro:bit to your phone or tablet – this is called pairing. The app searches for a signal from the micro:bit and then they swap a code to make sure the right micro:bit is paired with your app.
1 X USB cable
1 X computer
1 X micro:bit robot
Connect the micro:bit with the computer through USB cable, and the computer will pop up a U disk .
If you’re using batteries to power your micro:bit, make sure they are fresh. Even if the micro:bit seems to be working, it may not have enough power for the Bluetooth radio function to work.
MakeCode apps
IOS APP Control
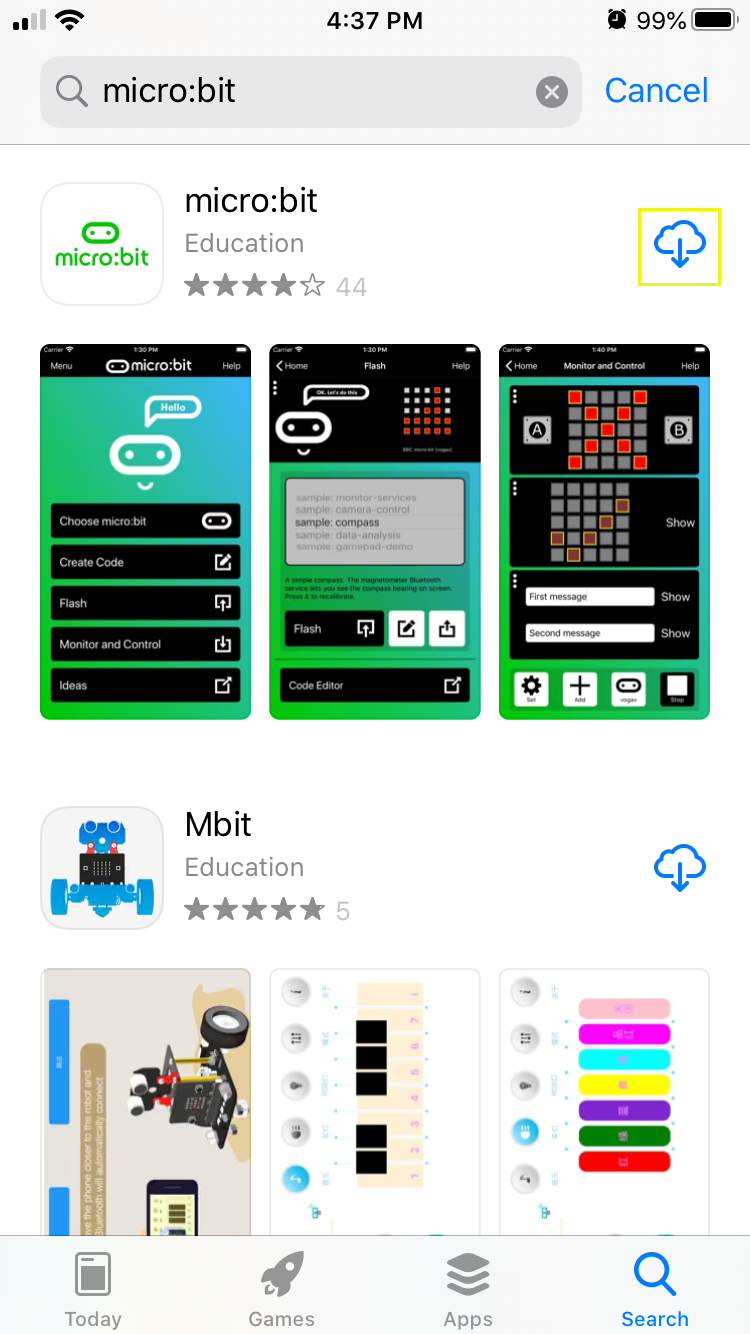
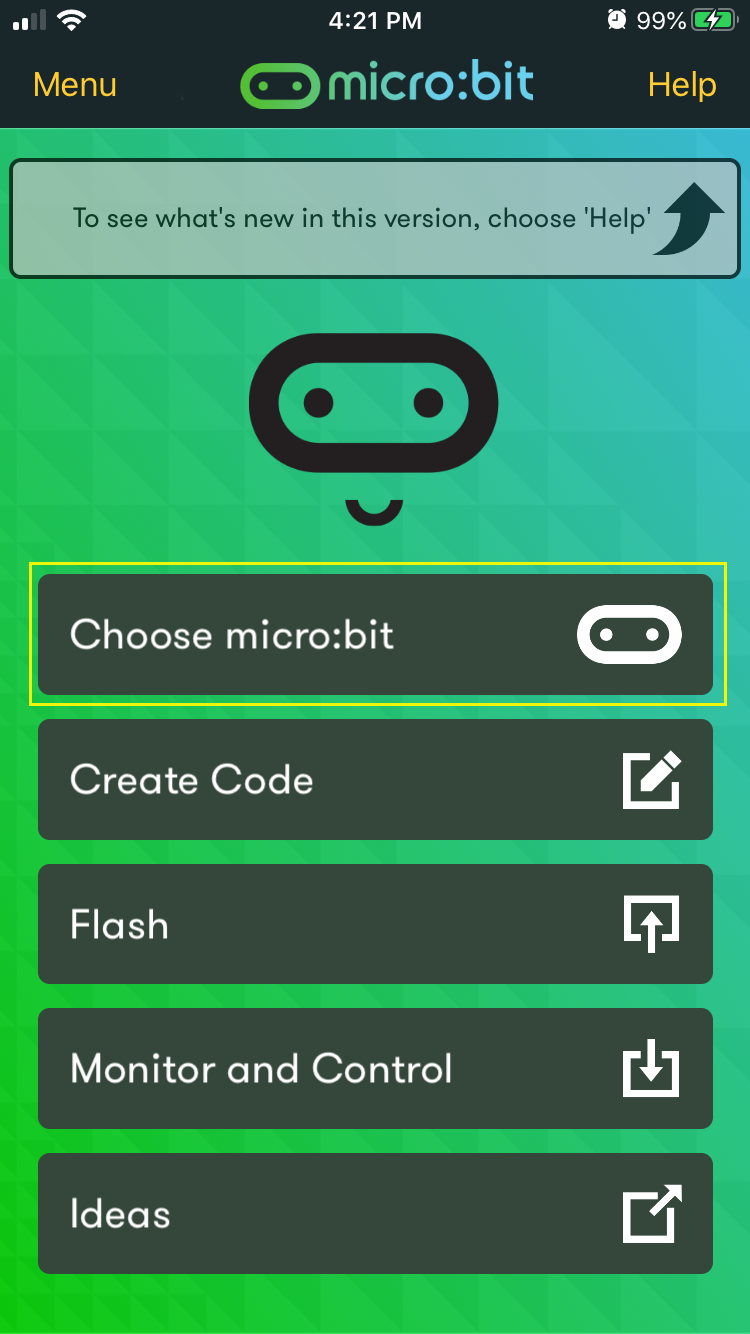
Step1)Search the Micro:bit app in App store ,then download it .
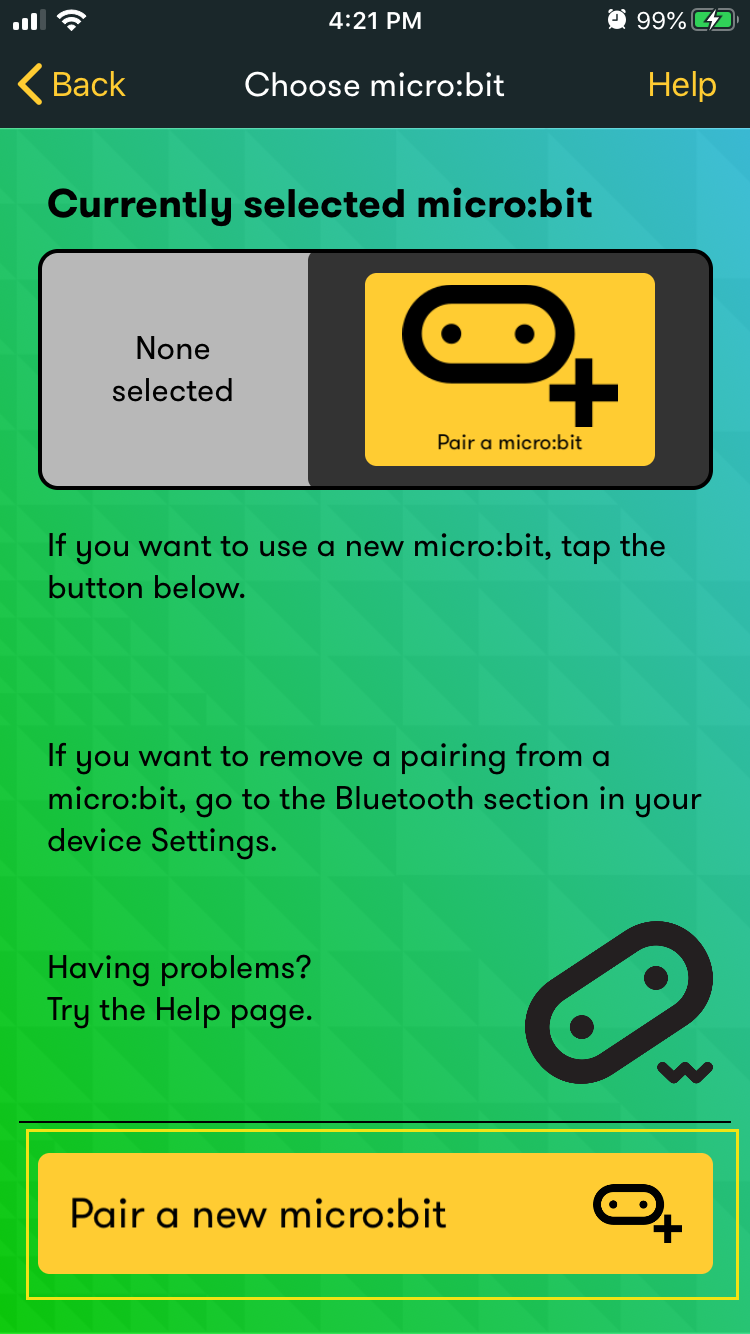
Step2)Open the App, click “Choose micro:bit”, then click “Pair a new micro:bit “as following figure:
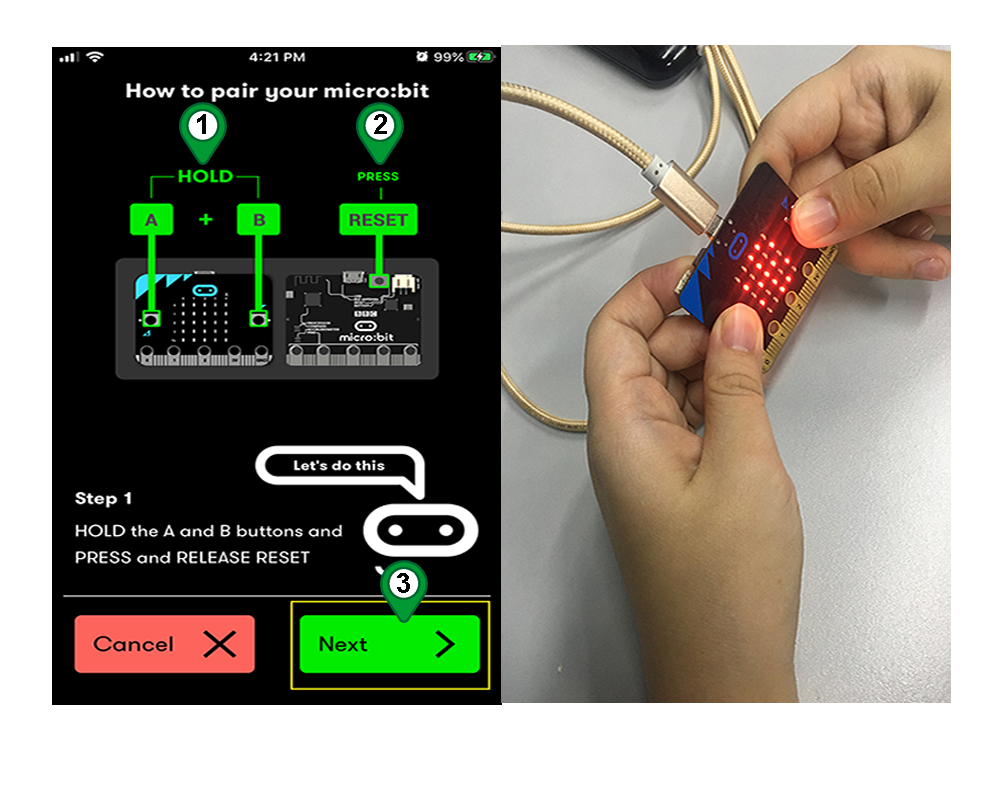
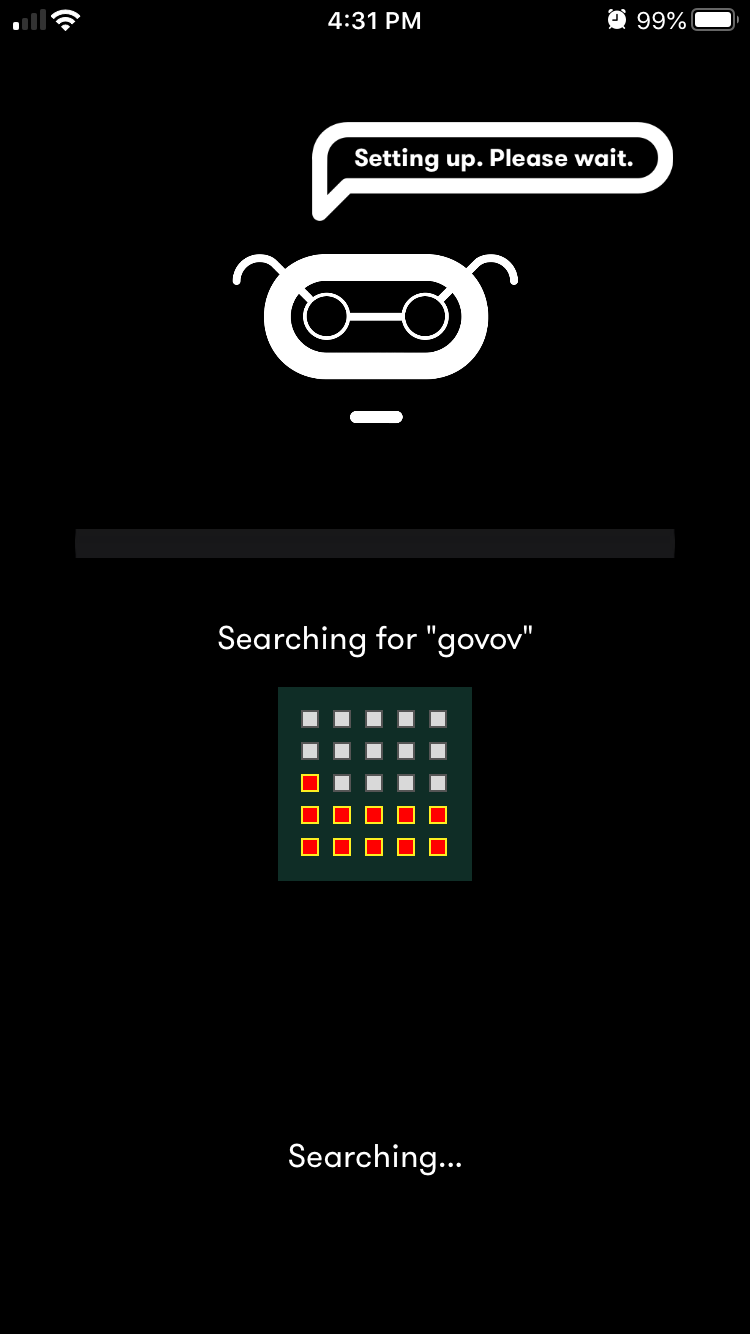
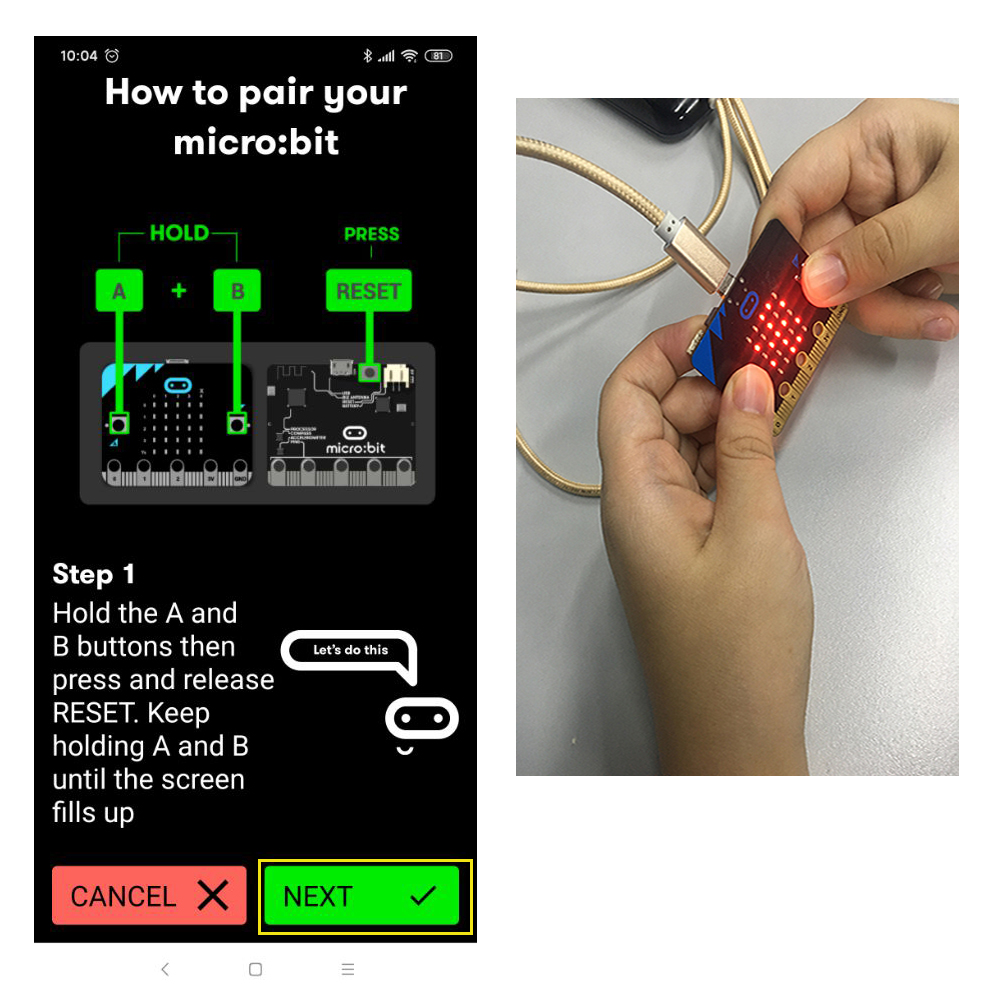
Step3) Hold the A + B buttons long enough for all the LEDs on the display to light up,then Press and hold the RESET key at the same time as following figure,then click the”Next”. It will enter the pairing page.
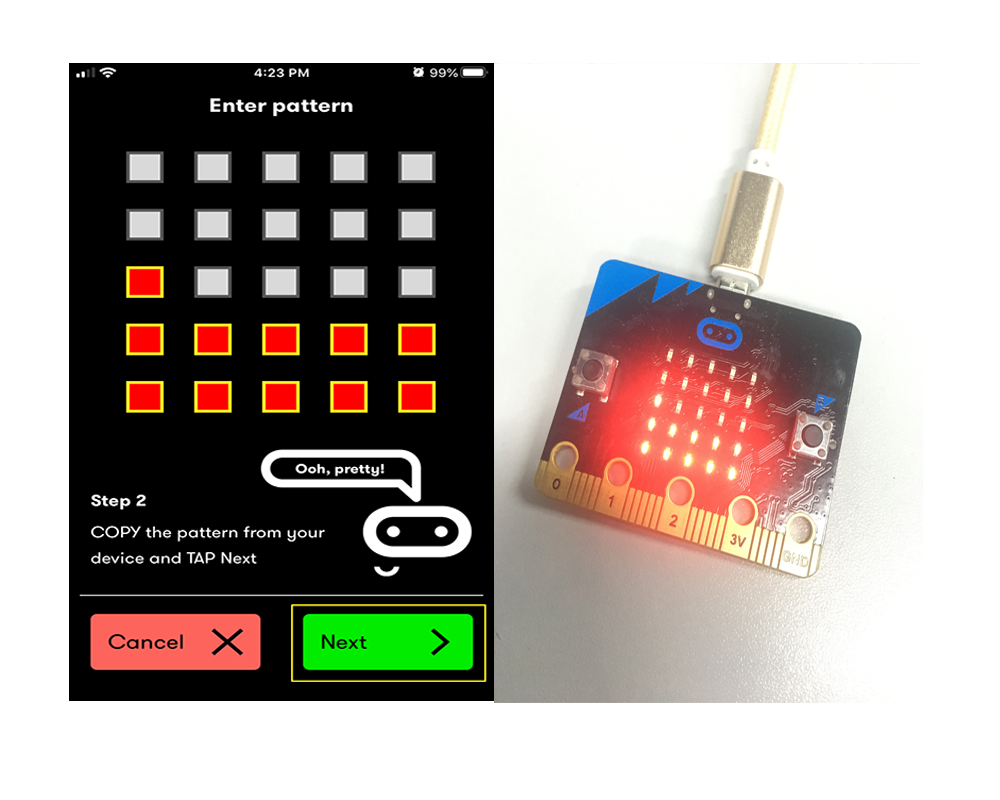
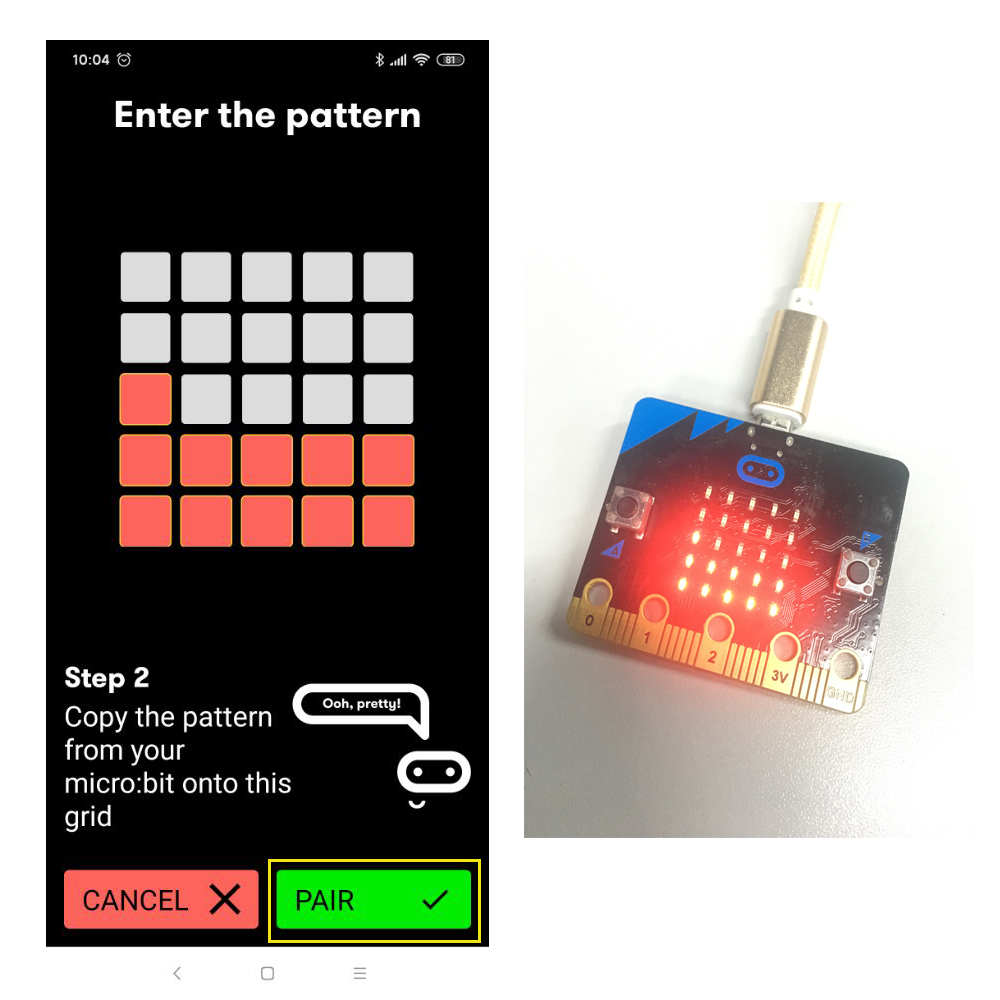
Step4) The mainboard will show A 5*5 matrix identical. Light up the matrixin the app , and then click “Next”as following figure.
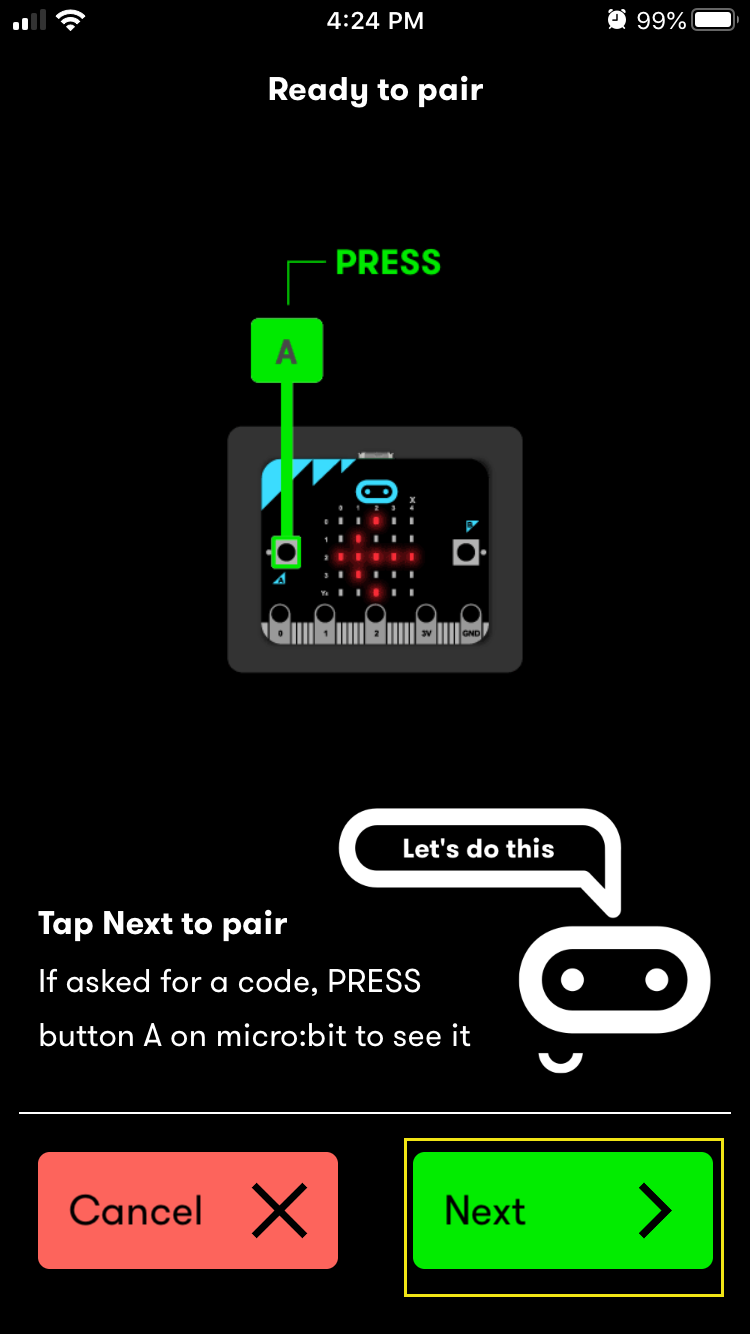
Step5)According to the display on the app,press the” A” button in the mainboard .Then click “Next”.
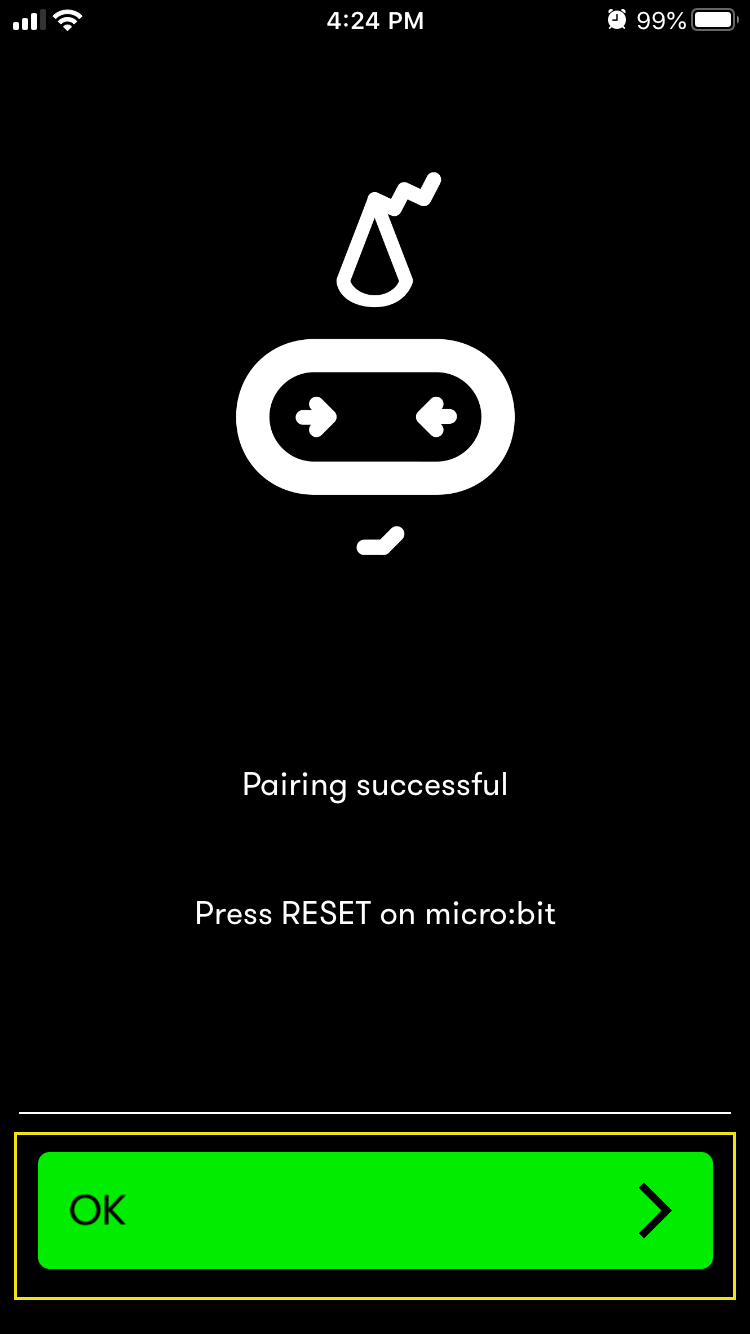
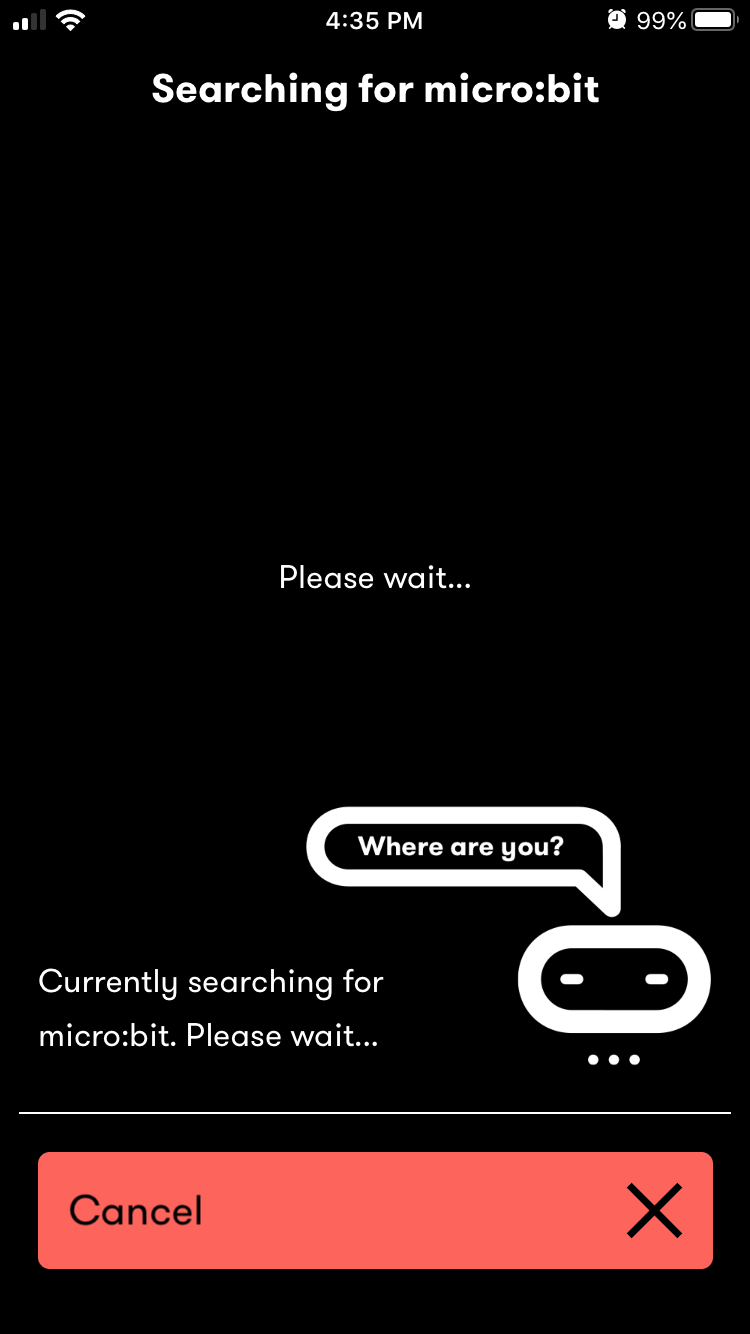
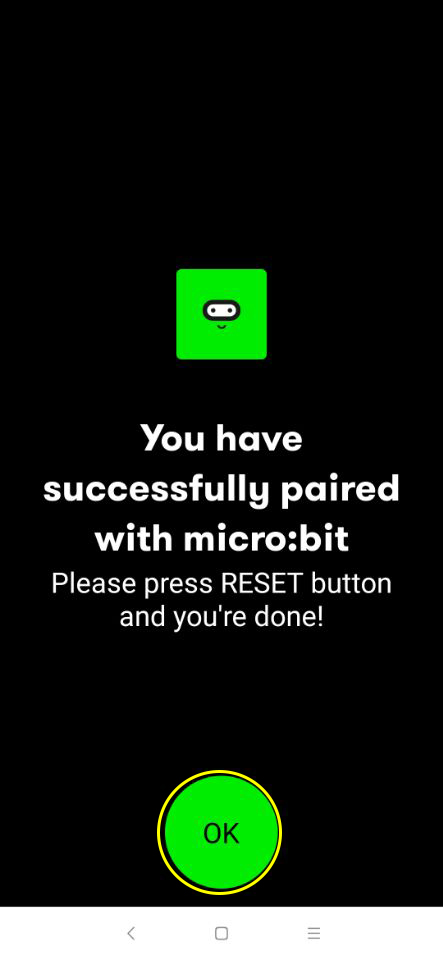
Step6)The APP starts to search for the motherboard ,if the Bluetooth pairing prompt pops up,please click pair. the APP displays OK, and the motherboard displays √, it means the pairing is successful.
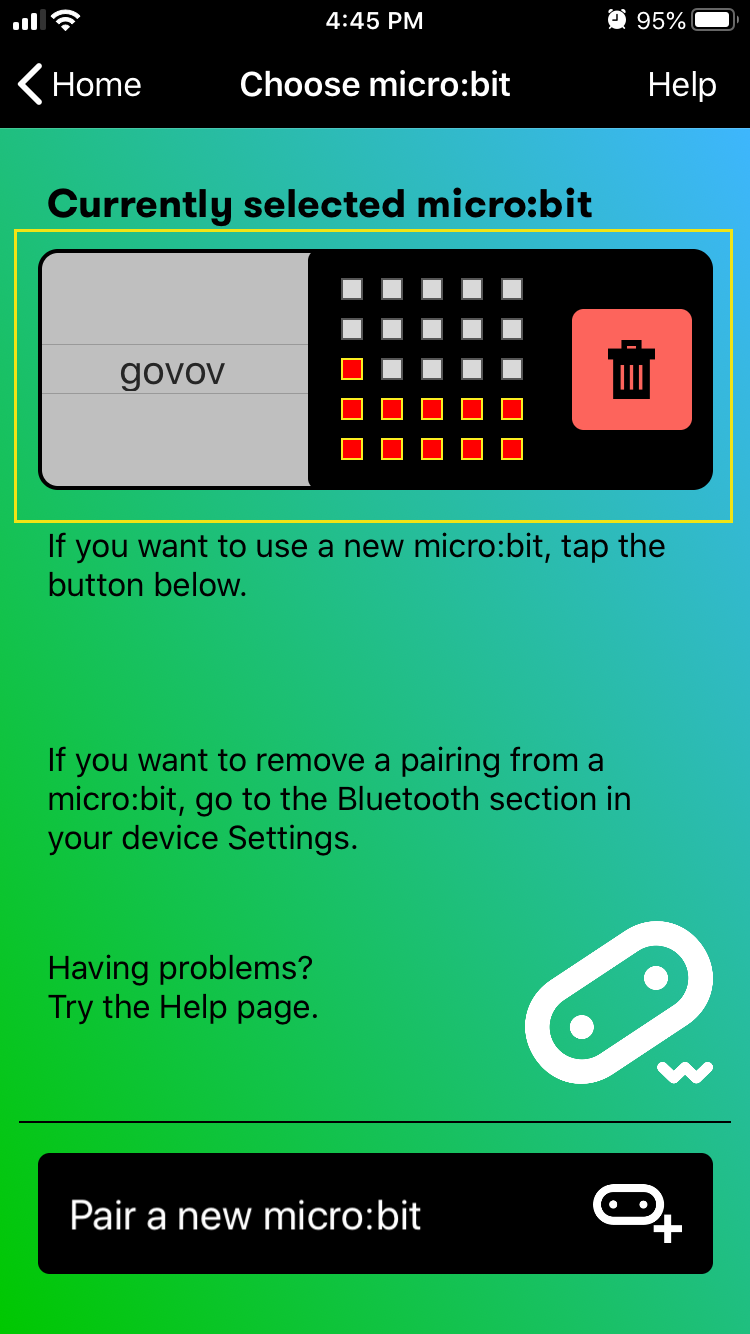
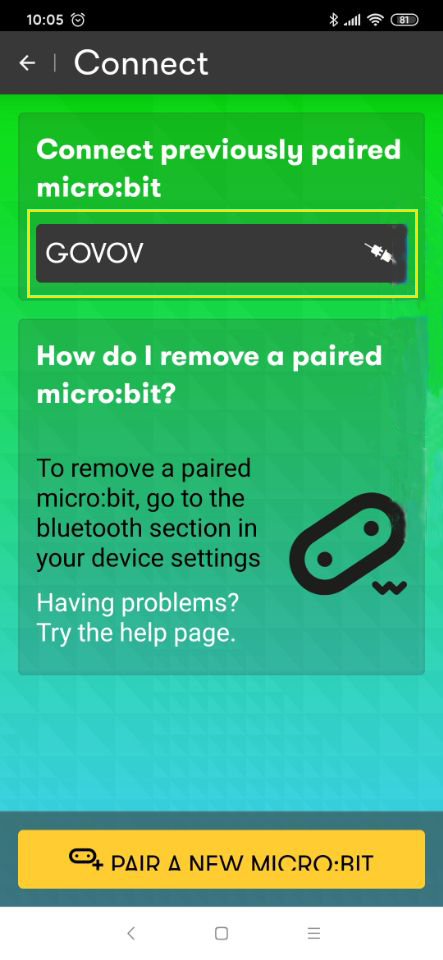
After the pairing is successful, you can see the connected microbit motherboard on the APP interfaceas following figure.
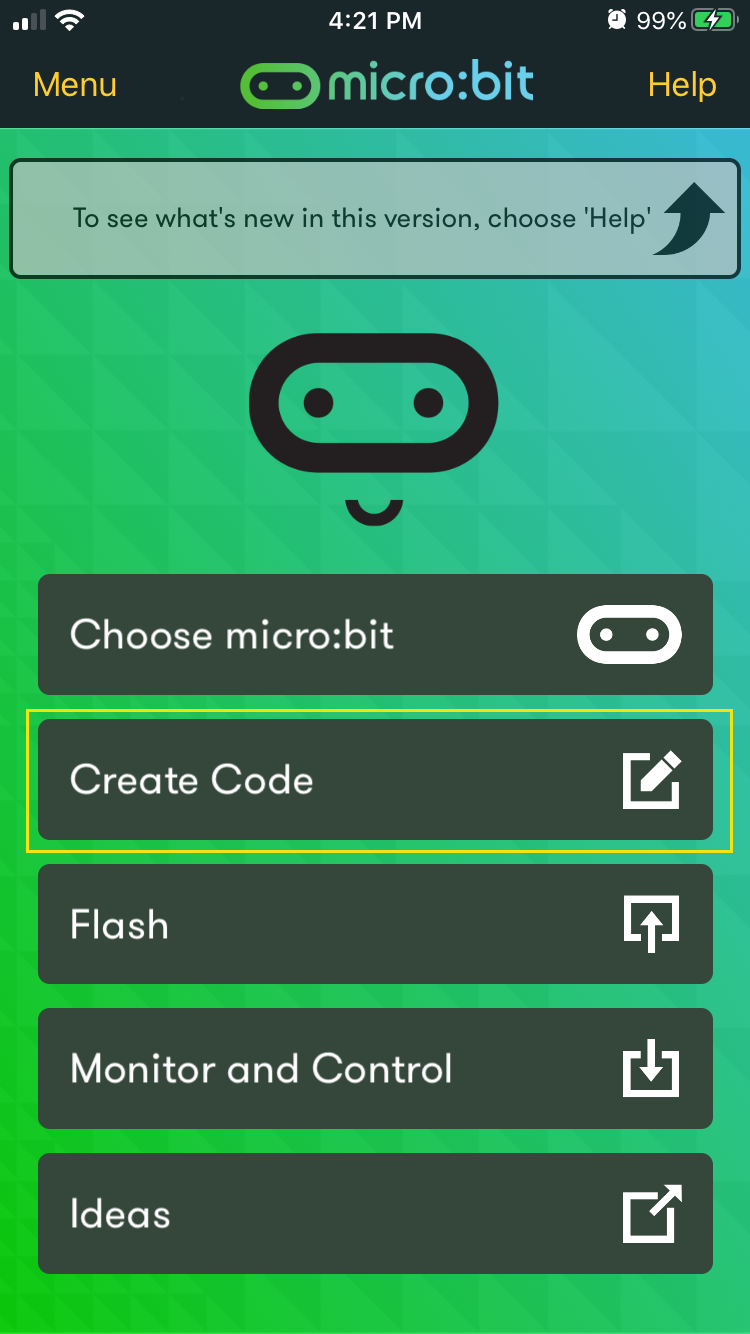
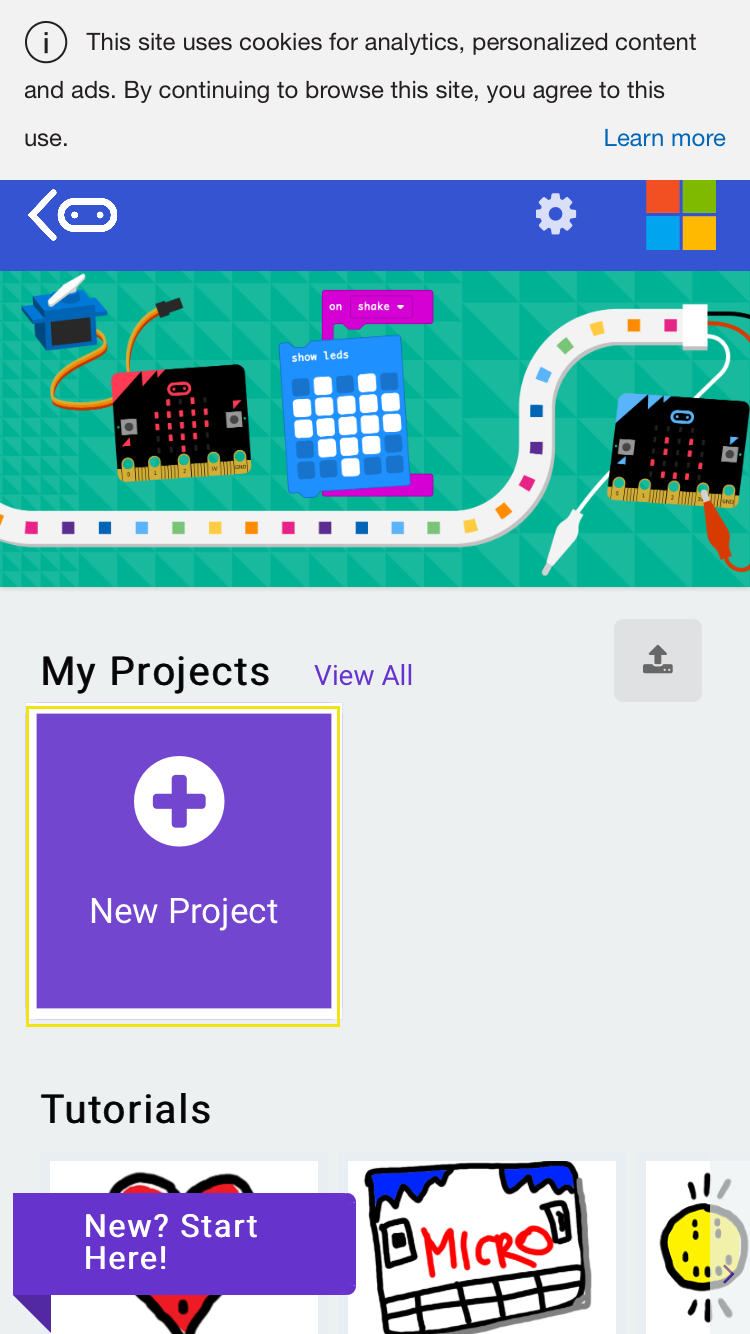
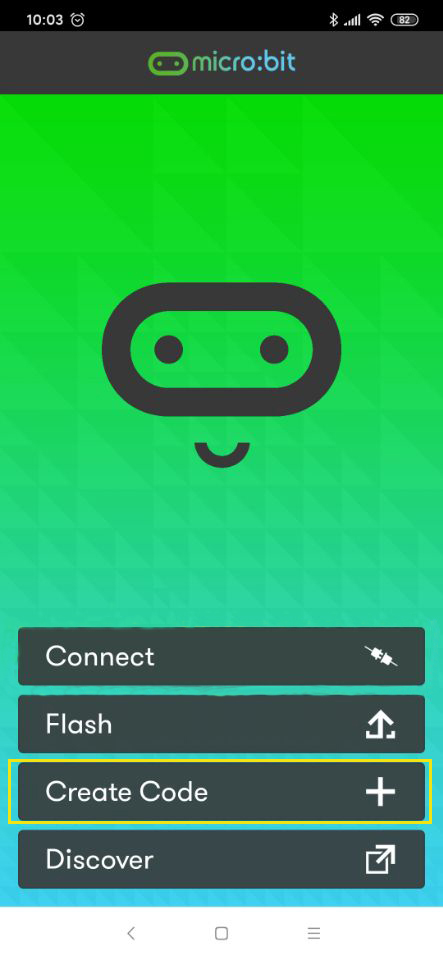
Step7) Return to Menu page,choose “Creat code”,enter the programming page.
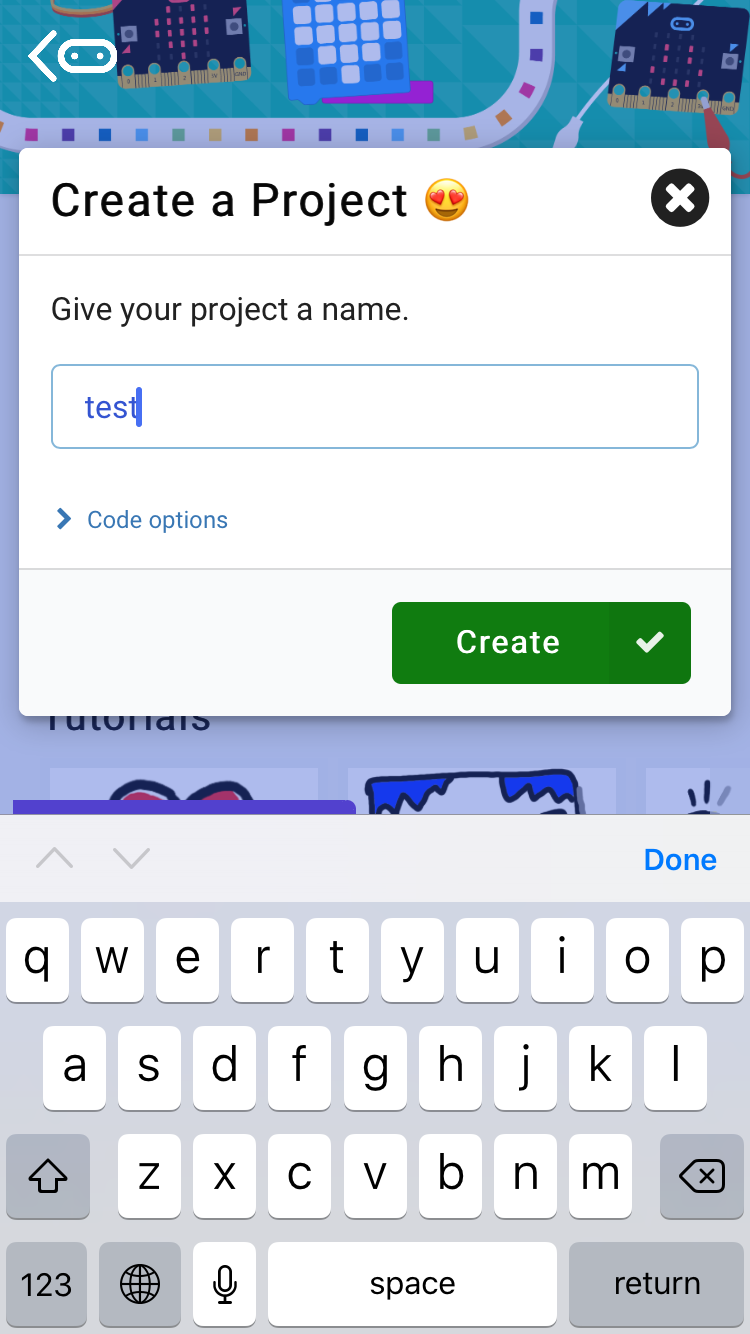
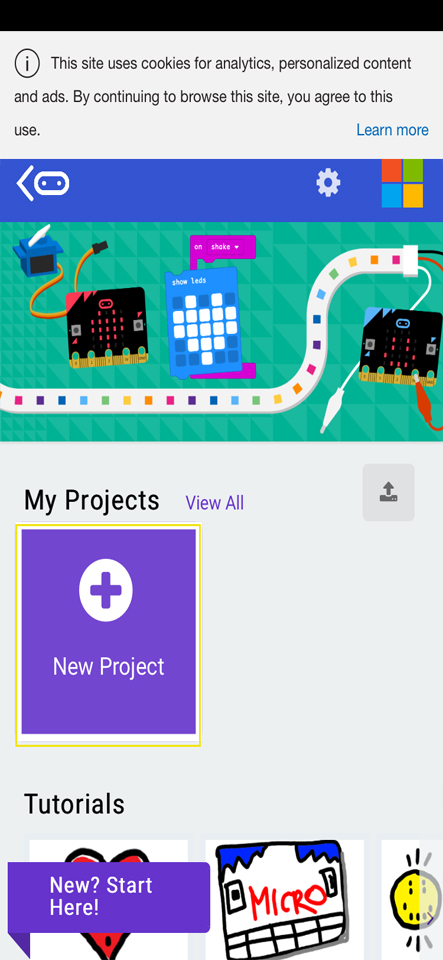
Step8) Click”New Project”,write a name by yourself .Then click “Create”as following figure.
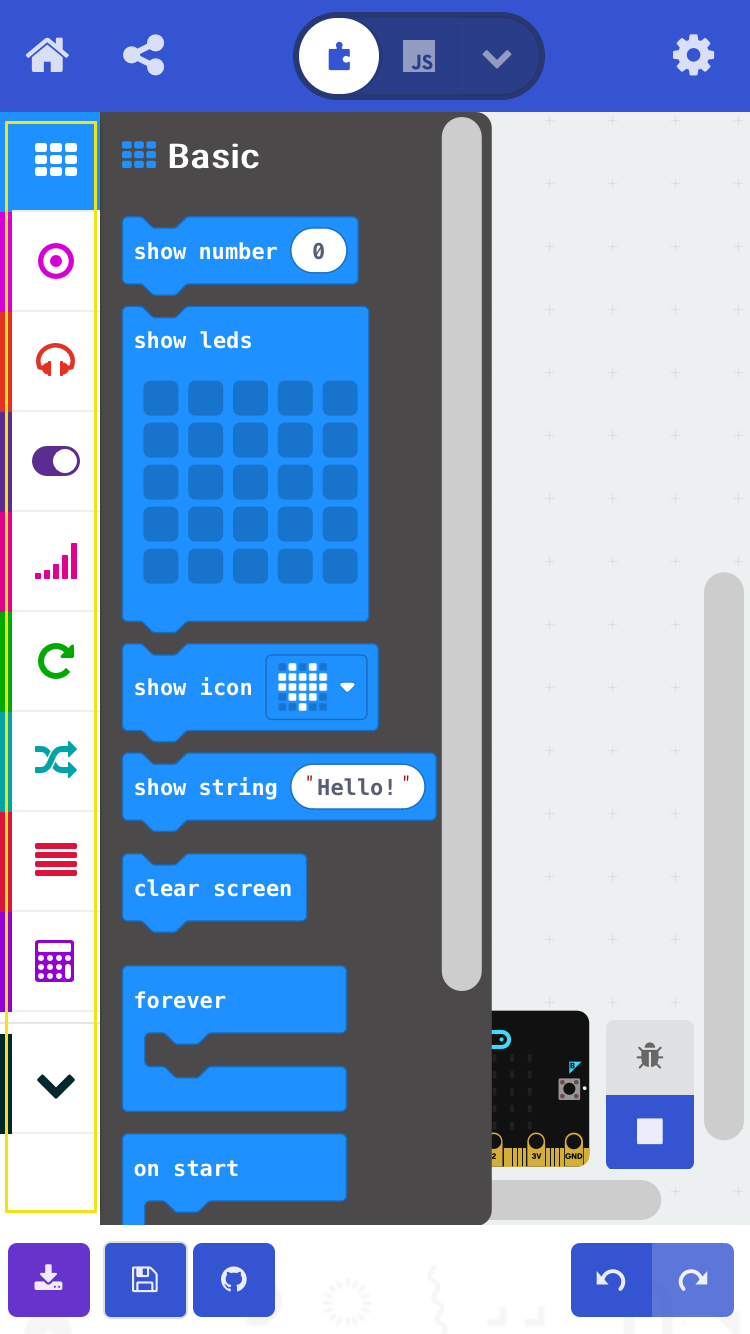
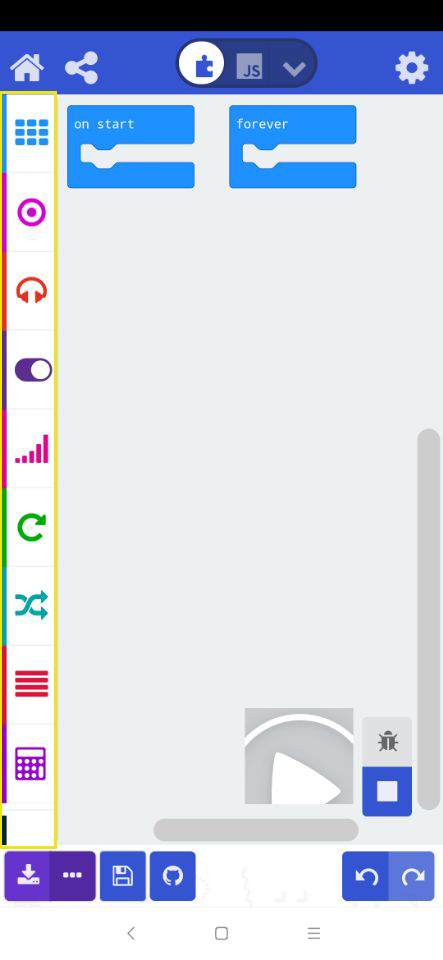
Step9) In app page ,you can see the toolbox.More block In the left border.You can create your own code by dragging and dropping.The detailed operation of our Photon Robot can be seen in the separate explanation of each lesson.
How to add expansion packs
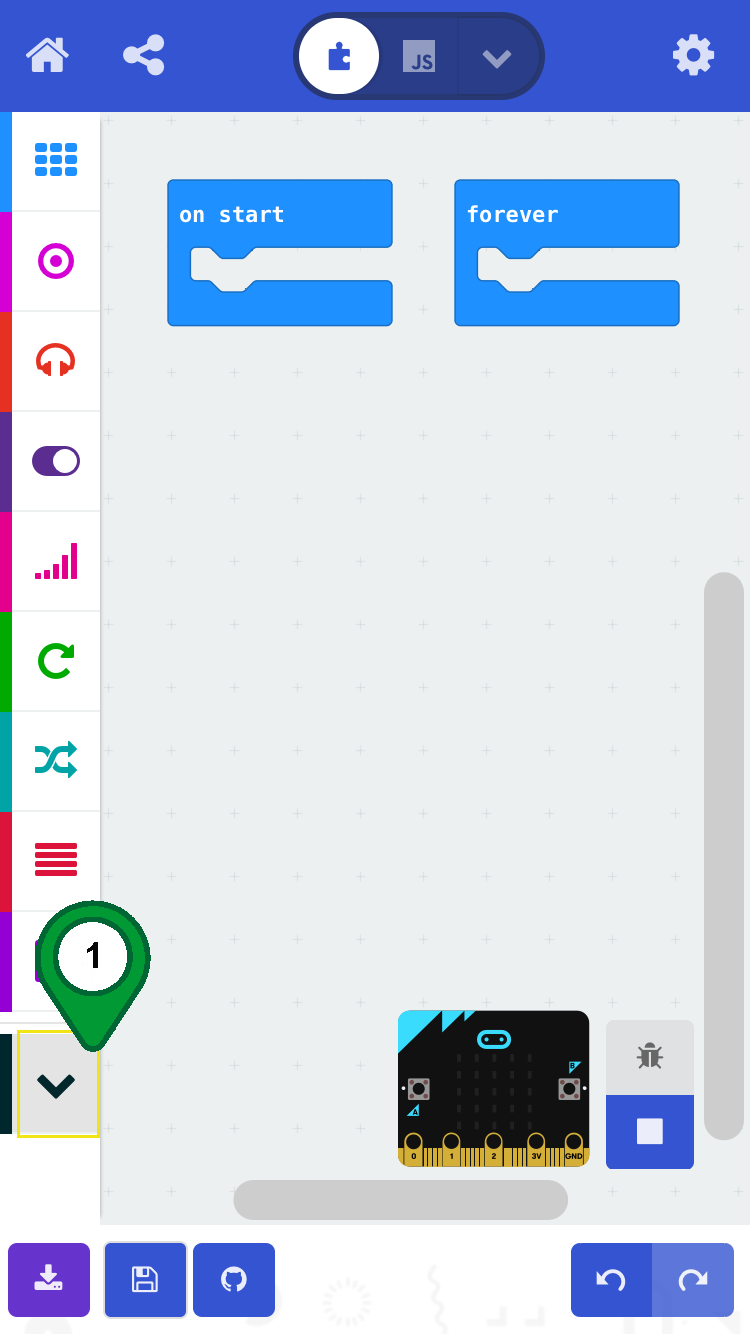
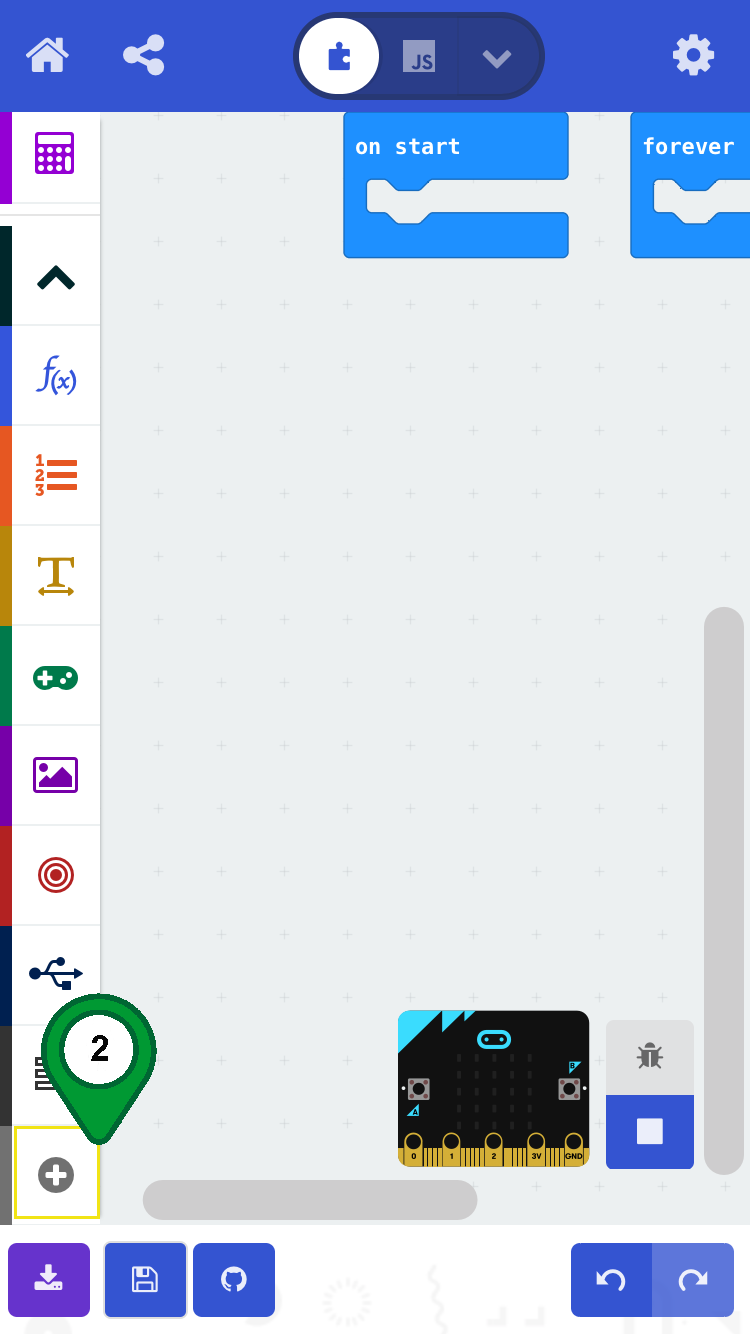
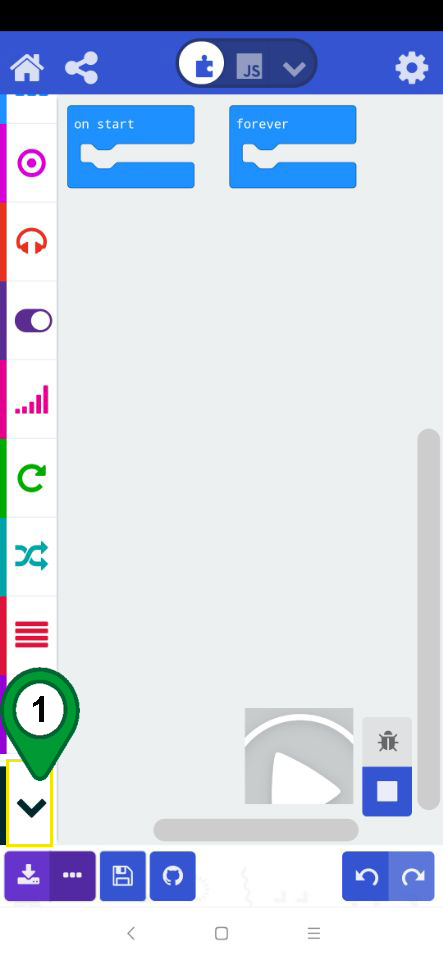
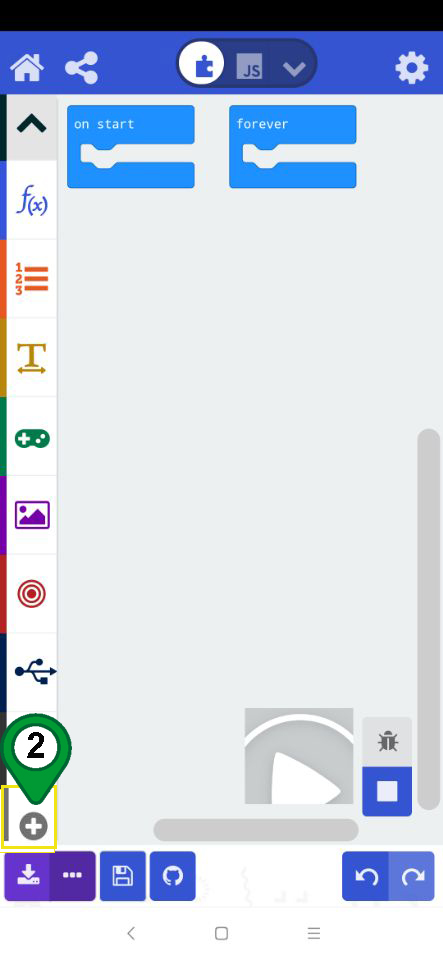
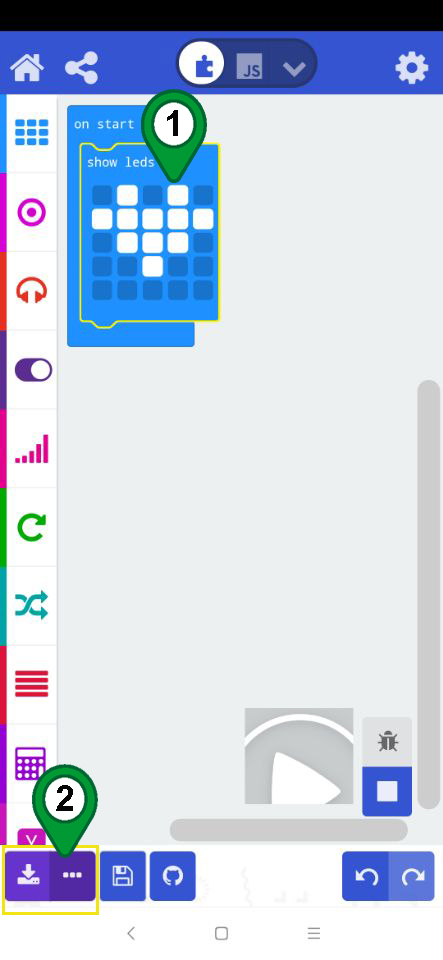
Step1) Open the “Create code “page .click “Down arrow” in the left toolbar,then click “+” as following figure.
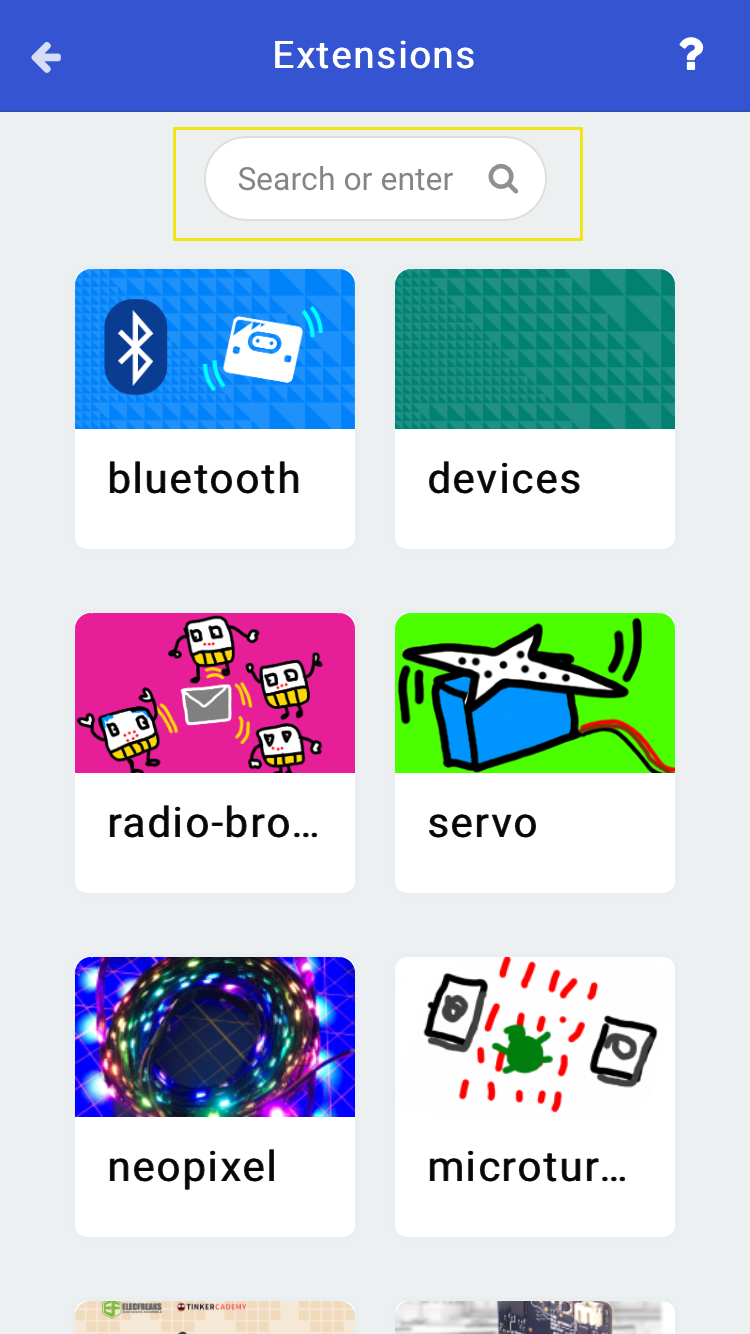
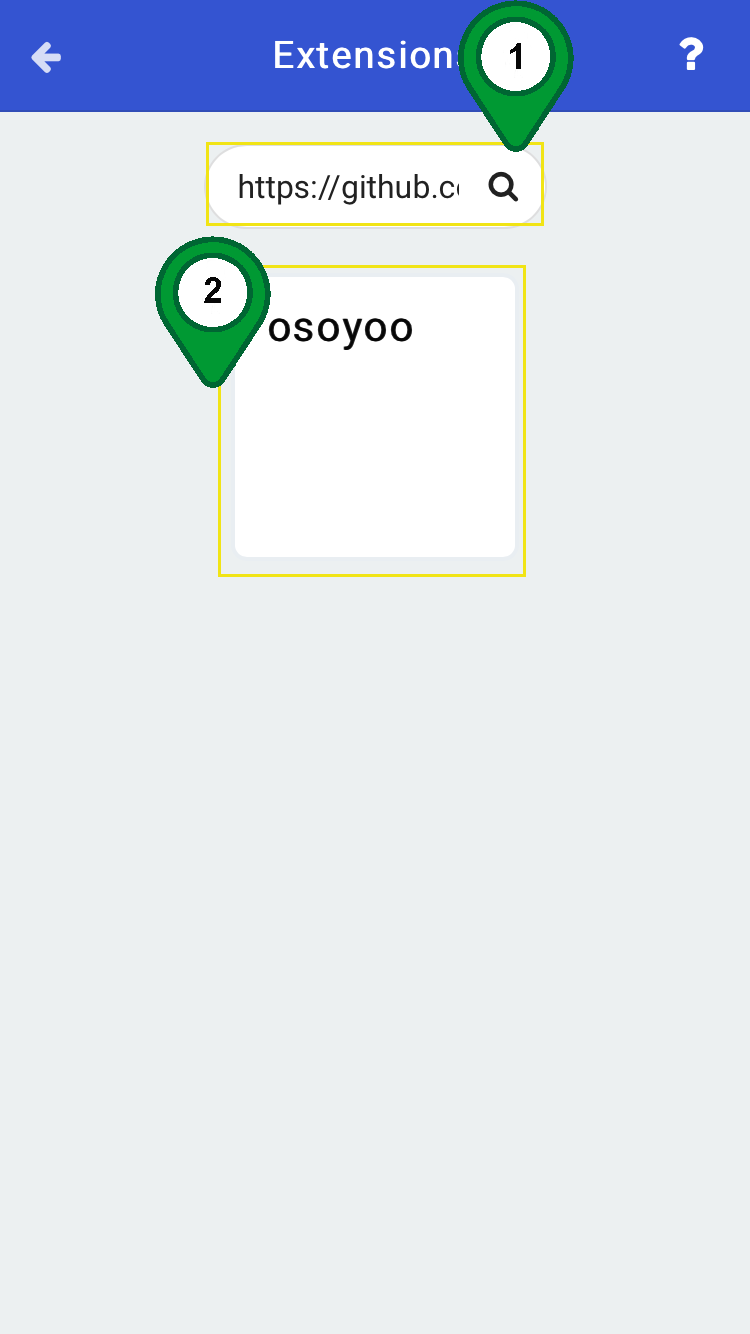
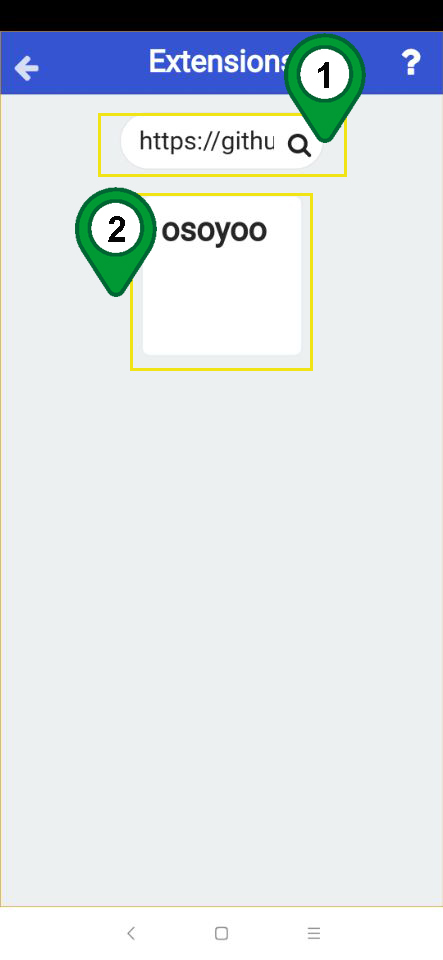
Step2) Enter the connection or name of the expansion pack,we write this URL https://github.com/osoyoo/OSOYOO-MICRO-BIT-CAR on now .Click “osoyoo”as following figure.
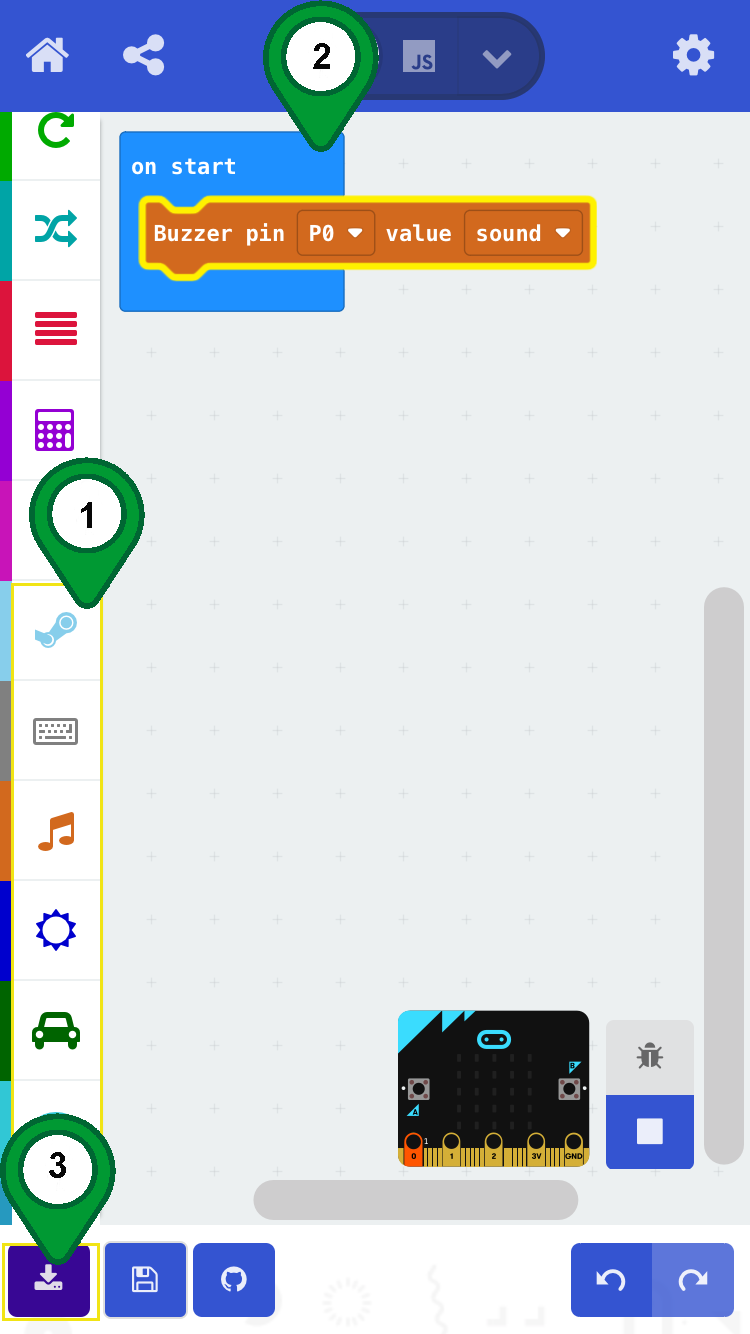
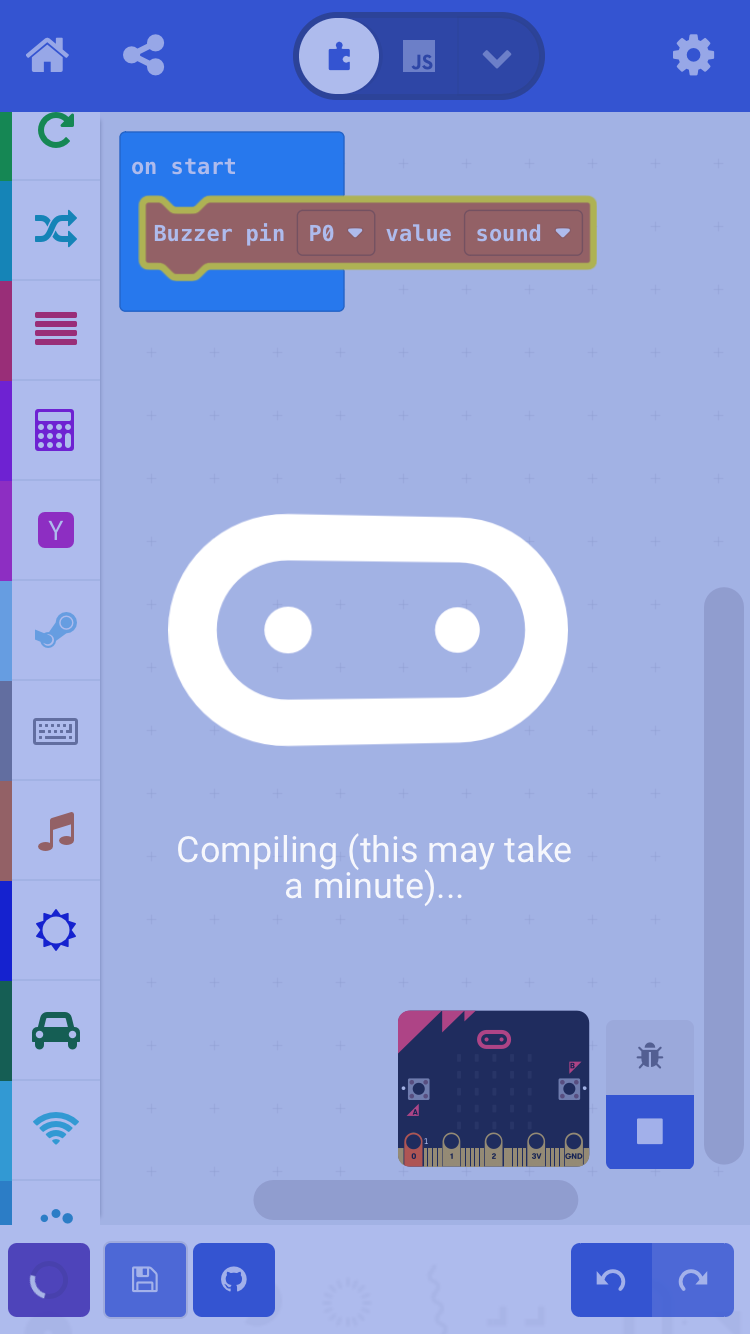
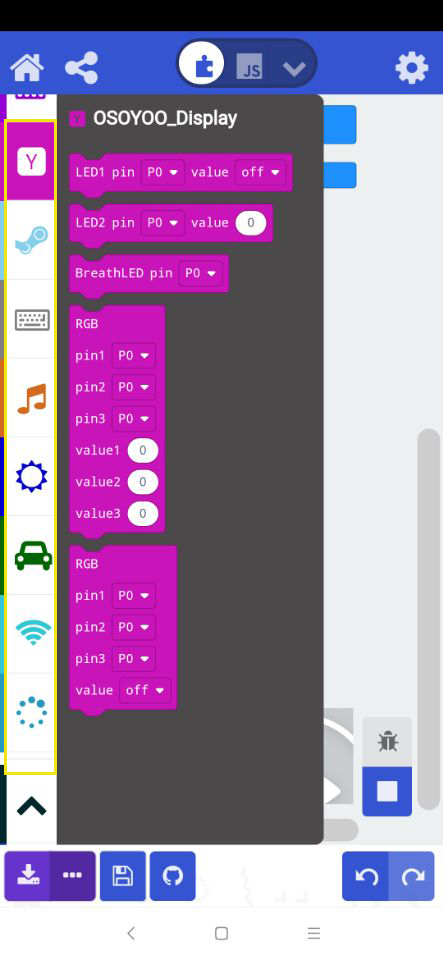
Step3)On now ,we will find 5 blocks in the left toolbar.You can create your own code by dragging and dropping .Then cilck download as following figure.
Before download the code ,make sure you pair your micro:bit and mobile device you transfer a MakeCode program.
If you’re using batteries to power your micro:bit, make sure they are fresh. Even if the micro:bit seems to be working, it may not have enough power for the Bluetooth function to work.
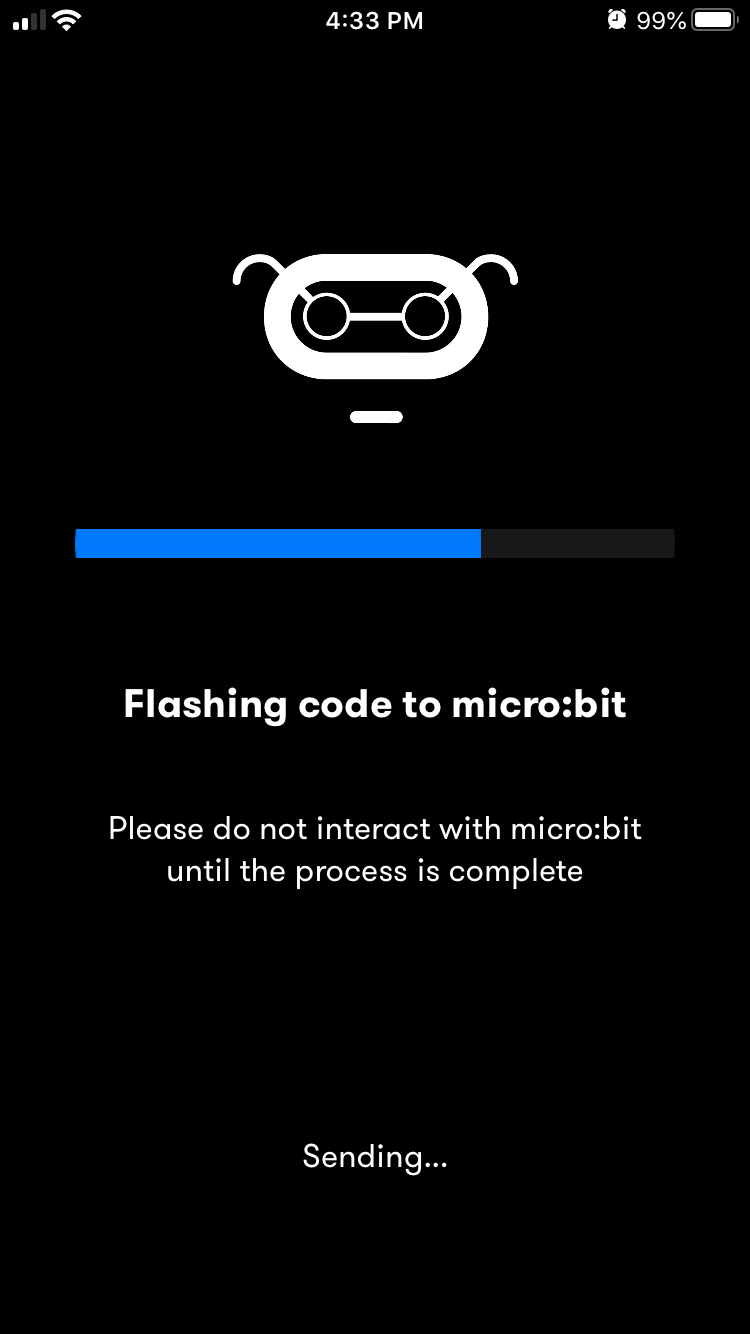
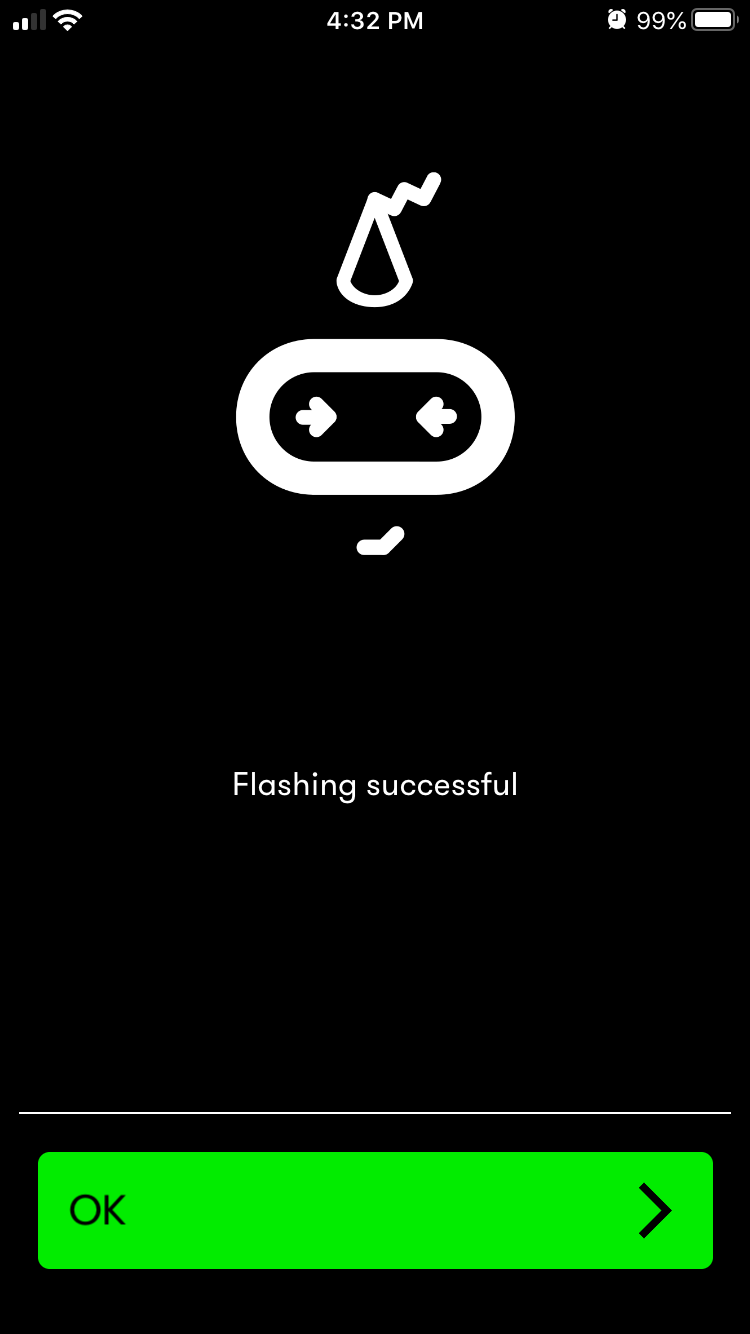
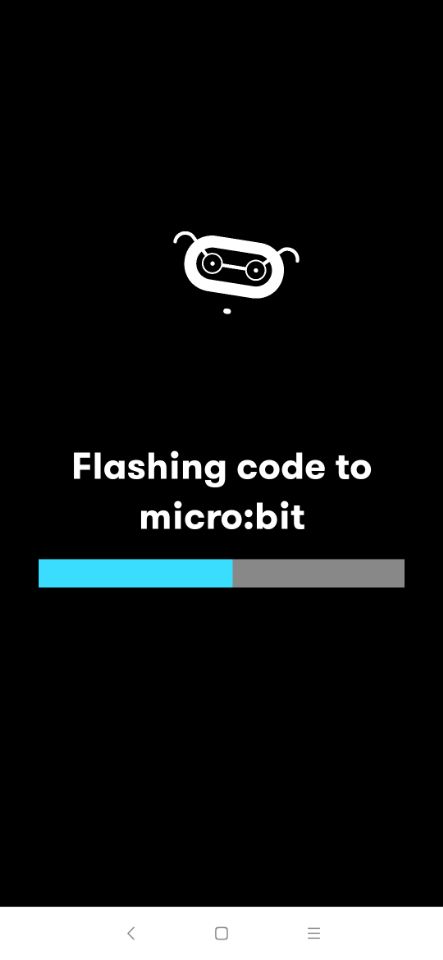
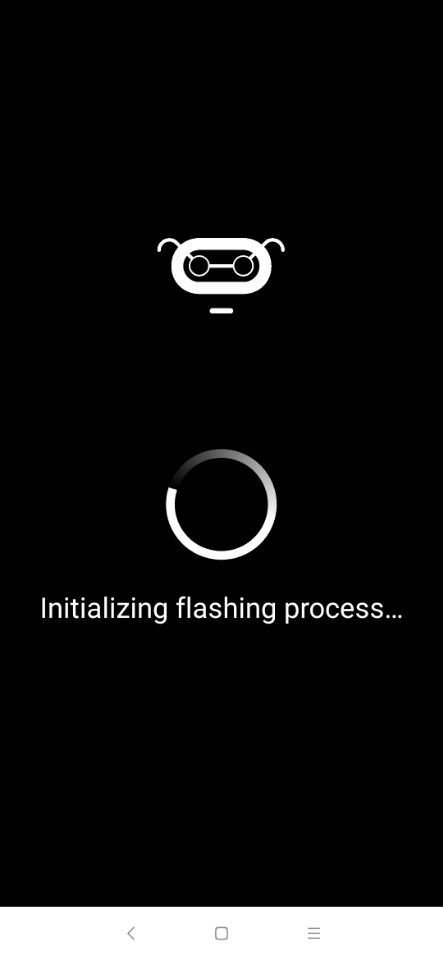
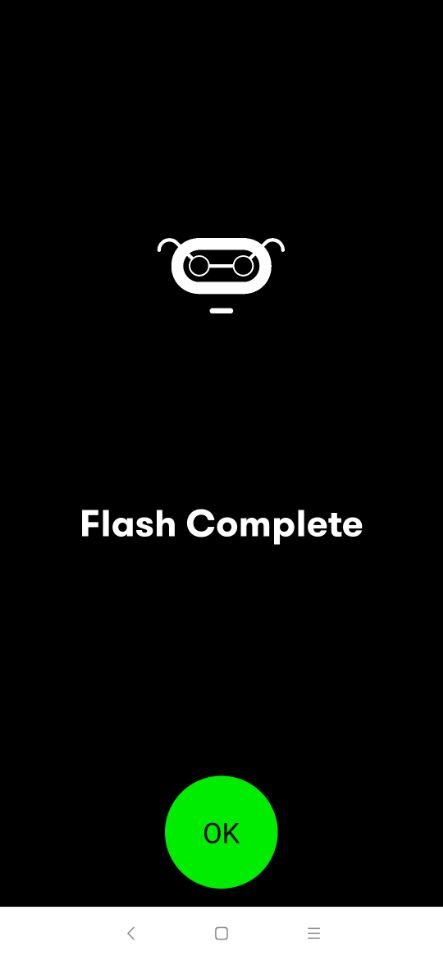
In the app page ,you can see it showed “Flashing code to micro:bit “.after flashed ,it will showed flashing successful as following figure.
Android APP Control
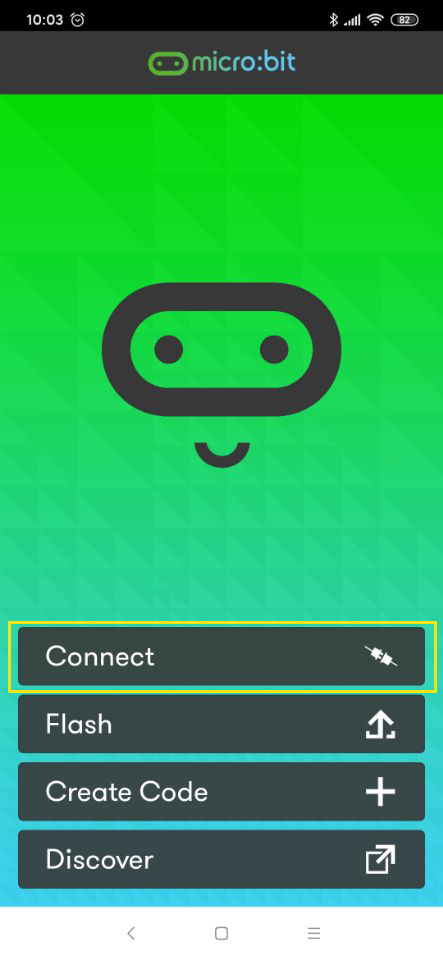
Step1 ) Download the Micro:bit app from Google Play, open it .Then cilck “Connect”.
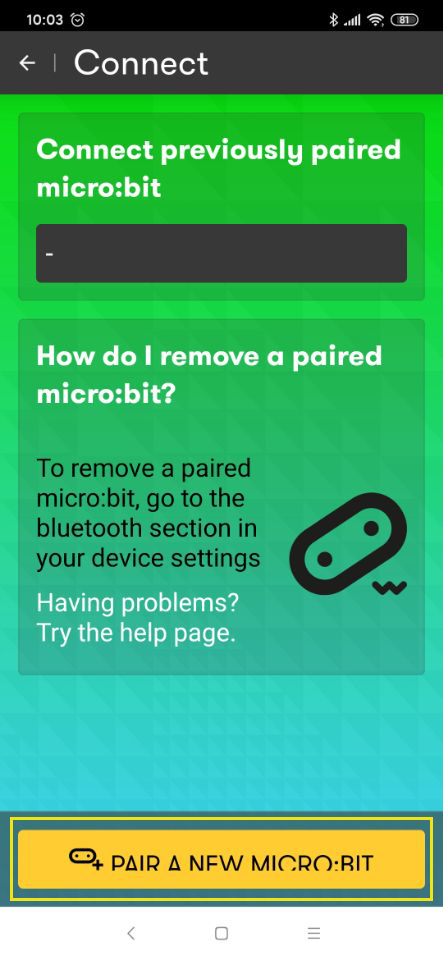
Step2)Click “Pair a new micro:bit “as following figure:
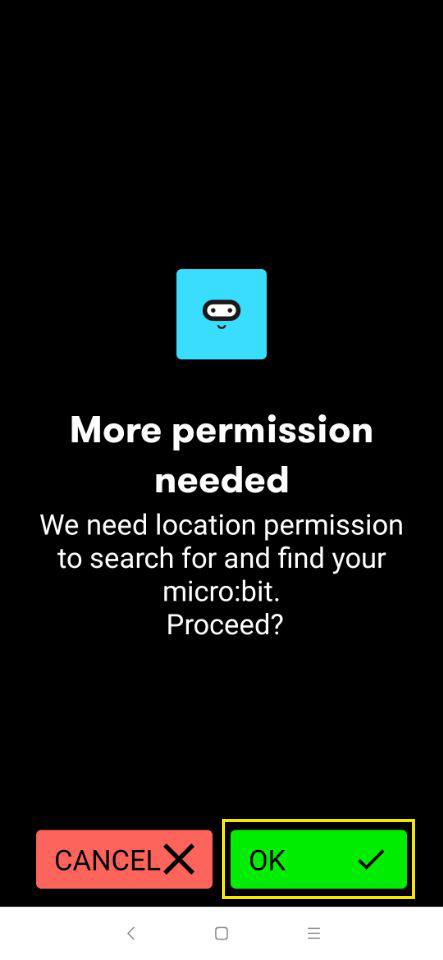
Step3)According to the app’s prompt, allow it to find a match.
Step4) Hold down the A + B buttons long enough for all the LEDs on the display to light up,then Press and hold the RESET key at the same time as following figure.It will enter the pairing page.
Step5)In the pairing page,A 5*5 matrix identical to that on the motherboard will appear on the APP.Light up the matrix as shown on the motherboard, and then click “PAIR”as following figure.
Step6)The APP starts to search for the motherboard and pair , the APP displays OK, and the motherboard displays √, it means the pairing is successful.
After the pairing is successful, you can see the connected microbit motherboard on the APP interfaceas following figure.
Step7) Return to Menu page,choose “Creat code”,enter the programming page.
Step8) Click”New Project”,write a name by yourself .Then click “Create”as following figure.
Step9) In app page ,you can see the toolbox.More block In the left border.You can create your own code by dragging and dropping.The detailed operation of our Photon Robot can be seen in the separate explanation of each lesson.
How to add expansion packs
Step1) Open the “Create code “page .click “Down arrow” in the left toolbar,then click “+” as following figure.
Step2) Enter the connection or name of the expansion pack,we write this URL https://github.com/osoyoo/OSOYOO-MICRO-BIT-CAR on now .Click “osoyoo”as following figure.
Step3)On now ,we will find 8 blocks in the left toolbar.You can create your own code by dragging and dropping .Then cilck download as following figure.
Before download the code ,make sure you pair your micro:bit and mobile device you transfer a MakeCode program.
If you’re using batteries to power your micro:bit, make sure they are fresh. Even if the micro:bit seems to be working, it may not have enough power for the Bluetooth radio function to work.
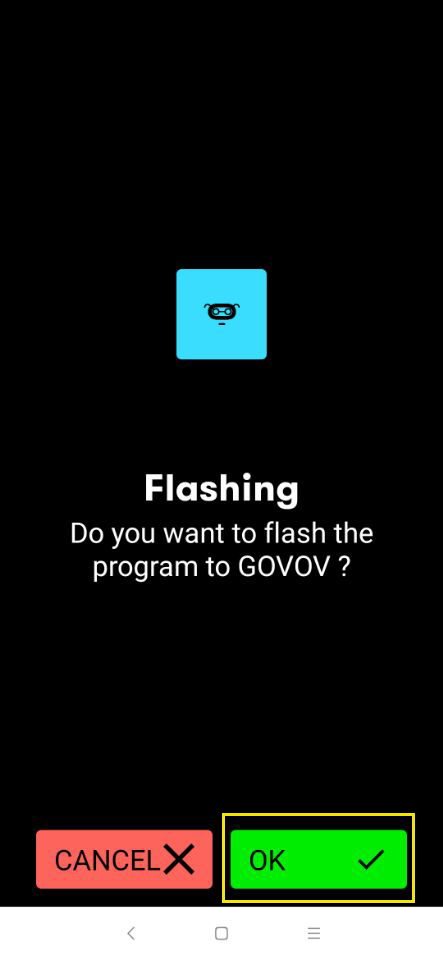
Step4)Follow the prompts to determine the motherboard that needs to upload the code,then cilck “ok”.
In the app page ,you can see it showed “Flashing code to micro:bit “.after flashed ,it will showed flashing successful as following figure.


 Micro:bit mainboard comes with Bluetooth, it can communicate with the mobile phone wirelessly. In this lesson, we mainly introduce how to control Micro:bit programming through mobile APP.Pair your micro:bit with the app.