| Buy from UK |
Buy from DE |
Buy from IT |
Buy from FR |
Buy from ES |
 |
 |
 |
 |
 |
Content
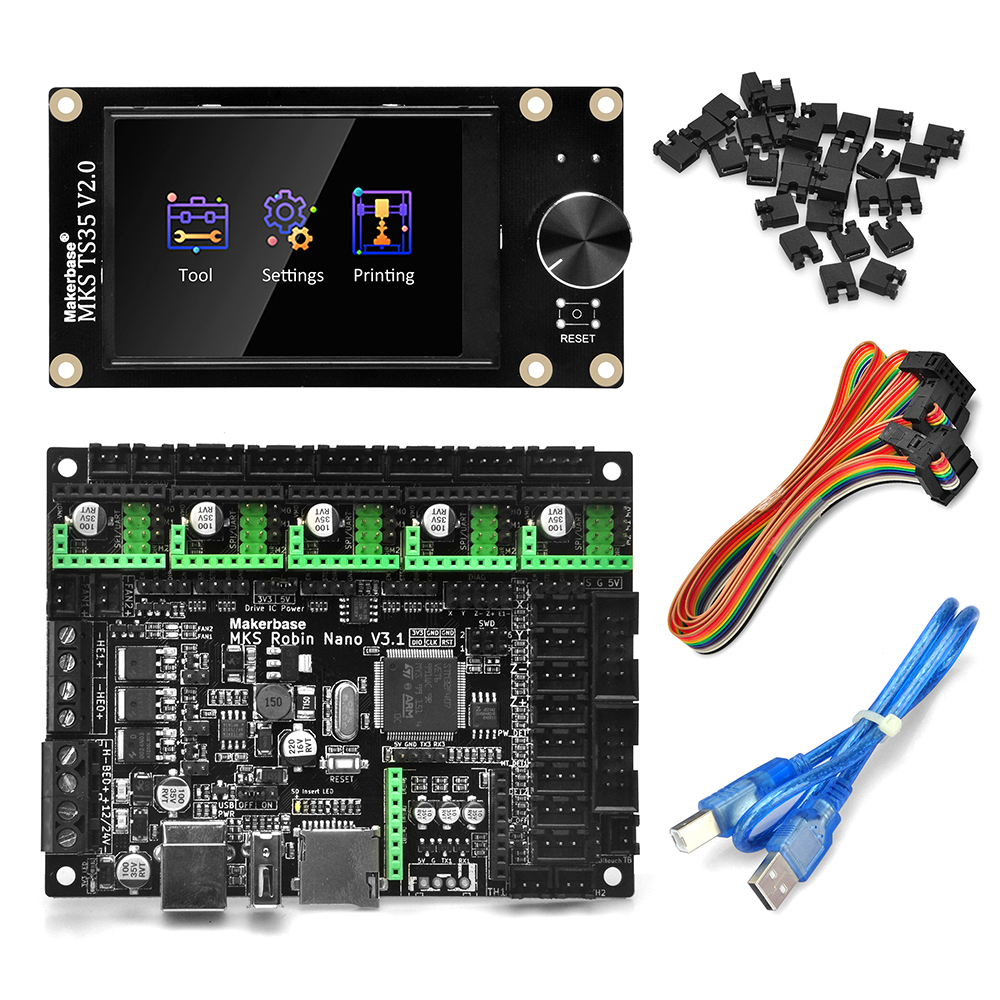
Package Contents
-
1x MKS Robin Nano V3.1 main board
-
1x MKS TS35 3.5″ color touch screen
-
1x Two flat ribbon cables (for EXP1 and EXP2)
-
Some jumpers caps
Important: Make sure all items are included and undamaged before starting.
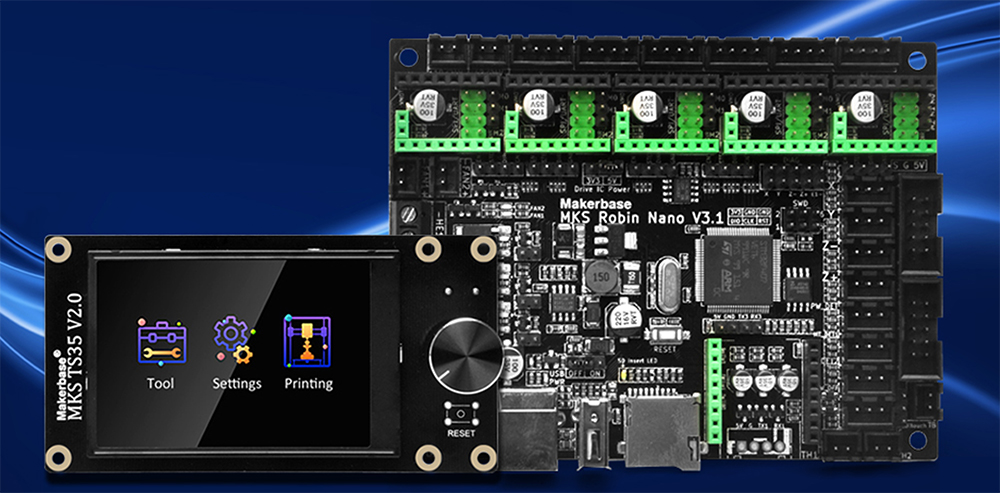
Introduction of OSOYOO MKS Robin Nano V3.1 Mainboard
The MKS Robin Nano V3.1 is a 32-bit STM32F407-based 3D printer controller board with support for up to five stepper driver sockets (X, Y, Z, E0, E1) and dual-Z configurations. It works with popular firmware such as Marlin, Klipper, and Reprap, and supports MKS touchscreens like TS35. Its flexible I/O interfaces, stable power design, and rich expandability make it suitable for DIY and modified printers requiring reliable motion control and advanced features.

Specifications of OSOYOO MKS Robin Nano V3.1 Mainboard
| ITEMS |
Robin Nano V3.1 |
| MCU |
STM32F407VET6(168MHz) |
| FLASH/RAM |
512KB FLASH/192KB RAM |
| USB Disk |
Support |
| TF card |
Support(SPI3) |
| WIFI connect |
USART1+SPI2 |
| Virtural USB Device |
Support |
| Motor interface |
6 axis (Two Z axis share the same driver) |
| PWM FAN(s) |
2 channels |
| PWM TTL |
Support |
| Independent serial port |
Support(UART3) |
| Power TVS protect |
Yes |
| Expansion SD slot |
Not support |
| MAX31855 interface |
Not support |
| EEPROM |
4KB AT24C32DM |
| SPI Flash |
8M W25Q64JVSIQ |
| LCD support |
MKS TS35/MKS H43/LCD12864/LCD2004 |
| MOS drive circuit |
Resistor protection + Schottky protection |
| TH1, TH2, TB temperature sensing circuits |
Resistor protection + Schottky protection |
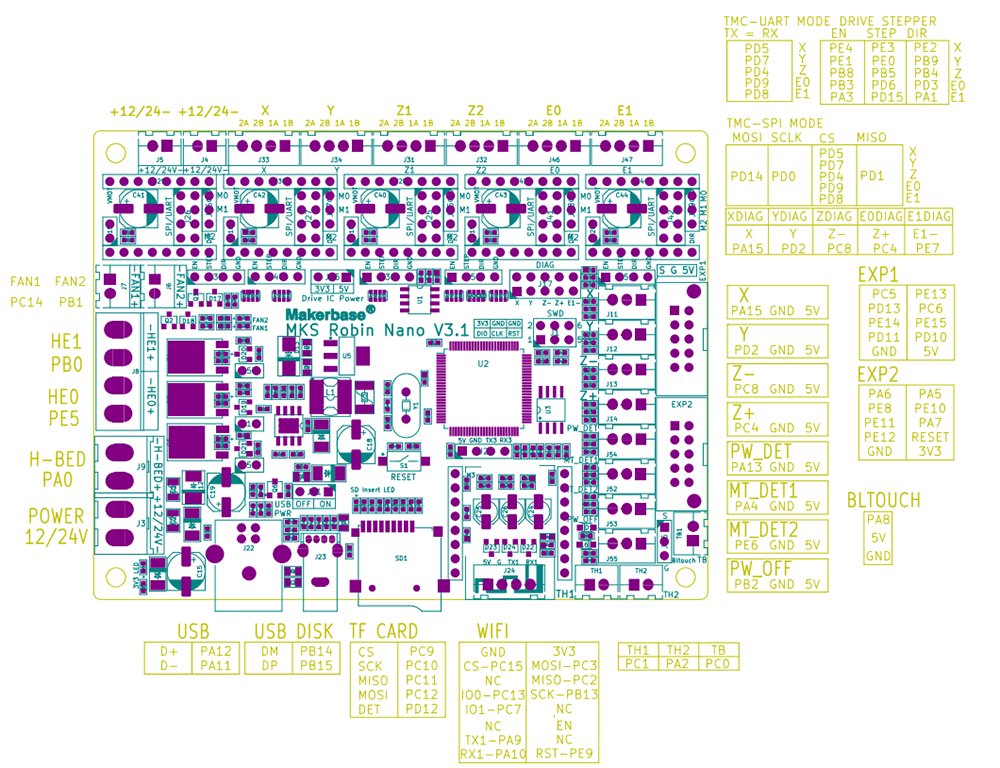
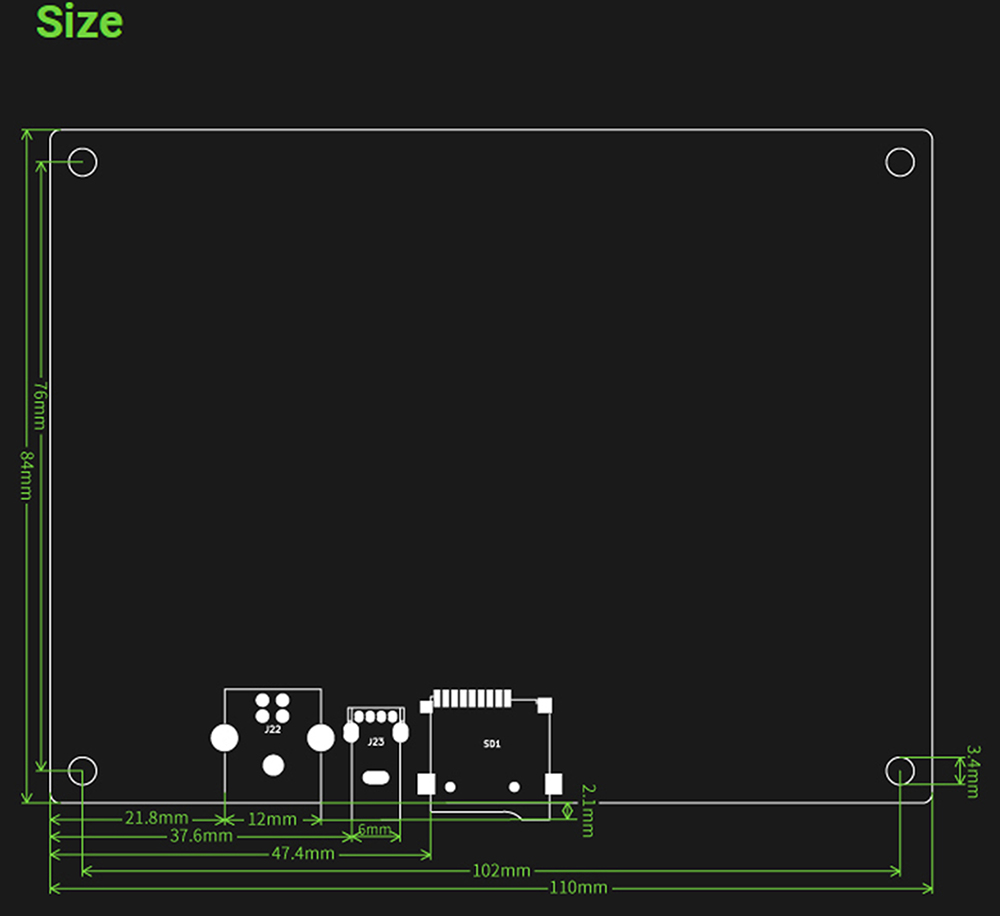
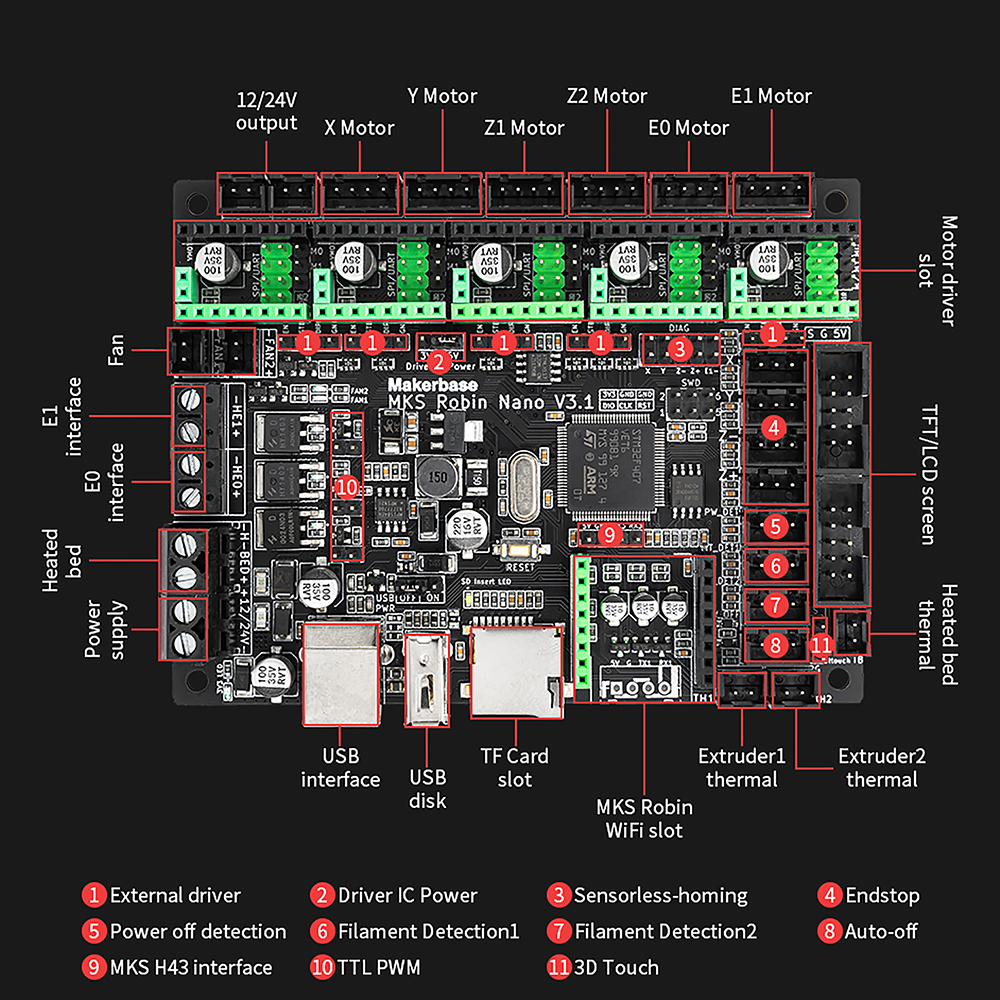
Pinout and size of OSOYOO MKS Robin Nano V3.1 Mainboard
Wiring OSOYOO MKS Robin Nano V3.1 Mainboard
Before You Begin
Power requirements: Use a DC 12–24 V power supply Always ensure the positive (+) and negative (–) polarity is correct before powering up to avoid board damage.
OSOYOO MKS Robin Nano V3.1 supports:
- Up to 6 stepper motor outputs(e.g. X, Y, Z1, Z2, E0, E1)
- Heated bed interface
- Two extruder heater outputs
- Three thermistor (NTC100K) sensor inputs
- Two PWM fans
Flashing Marlin firmware
Step 1. Install Visual Studio Code
- Before starting to edit Marlin, we recommend that you install a good code editor – Visual Studio Code. You can even compile Marlin directly from it.
- Visual Studio Code can be freely downloaded, after you have edited Marlin and the necessary parameters,you can compile it and upload your new firmware to the printer.
- How to install Visual Studio Code and PlatformIO,edit and compile marlin,you can find from marlinfw.org
Step 2. Download Marlin
After install VScode, you should download the Marlin source code. There are three ways to get Marlin source code.
- You can download the version of MKS from here Mks-Robin-Nano-Marlin2.0-Firmware
- You can download official marlin from here Marlin 2.x.x, we usually download the firmware LATEST RELEASE, just below the word DOWNLOAD. There, click on the 2.0.x.zip link.
Step 3. Configure and compile
 platformio.ini:

default_envs = mks_robin_nano_v3_usb_flash_drive_msc
 Configuration.h:

#define MOTHERBOARD BOARD_MKS_ROBIN_NANO_V3

#define SERIAL_PORT -1 // for communication with USB

#define TFT_LVGL_UI // for MKS TS35 display

#define TOUCH_SCREEN // for MKS TS35 touch
 Configuation_adv.h:

After 2021.6.7, you can use the multi-volume function.

Use the TF card and USB disk together:

#define USB_FLASH_DRIVE_SUPPORT

Only use TF card:

// #define USB_FLASH_DRIVE_SUPPORT
Step 4. Update marlin firmware
- After compile marlin firmware, copy “Robin_nano_v3.bin” file and assets folder to root directory of TF card or usb-disk[from: Marlin -> .pio – > build -> mks_robin_nano_v3_usb_flash_drive_msc]
- Reset or repower on update firmware
Using with TS35 Touch Screen
Introduction of TS35 Touch Screen
Your screen shows the main menu: Print, Settings, Tools etc.
Use the touchscreen icons (or rotary encoder if present) to navigate menus.
The touchscreen supports pause, resume, preheat, move axis, and more.
If filament runout sensors are configured in firmware, the screen will pause prints accordingly.
Use TS35 Touch Screen with MKS Robin Nano V3.1
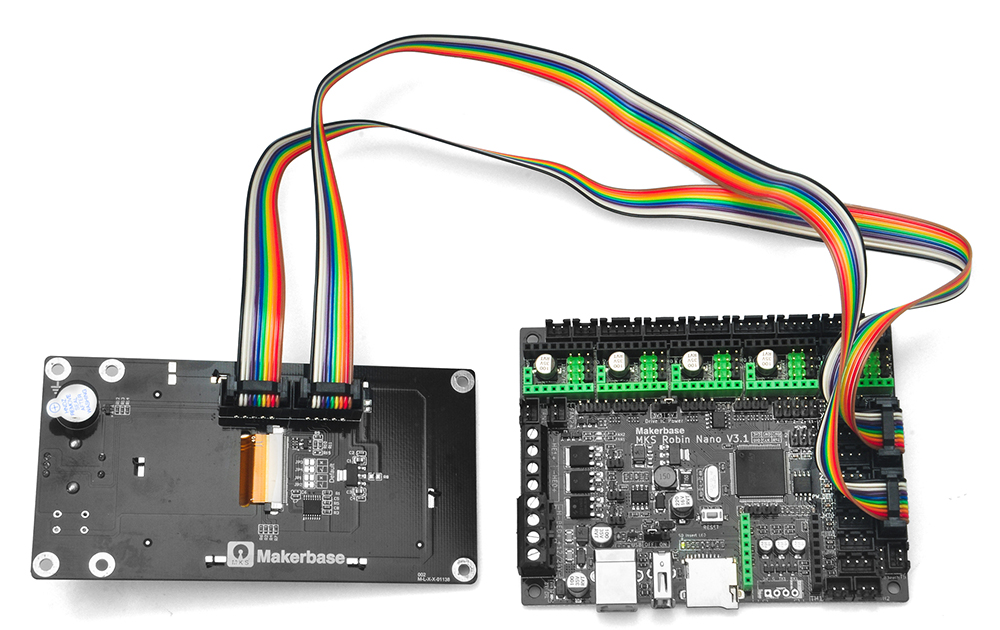
The TS35 connects to the mainboard via EXP1 and EXP2 connectors:
-
Turn off the power.
-
Connect EXP1 on the TS35 to EXP1 on the Robin Nano V3.1 board using one flat cable.
-
Connect EXP2 on the TS35 to EXP2 on the board with the second ribbon cable.
-
Secure the screen in place (e.g., printer frame or enclosure).
-
Power on your printer — the screen should initialize with the user interface.
Safety & Best Practices
Always power down before connecting/disconnecting cables.
Double-check polarity before applying power.
Use recommended firmware only, and keep backups of config files.
Reference
RepRap Firmware for MKS Boards: https://github.com/makerbase-mks/RepRapFirmware-for-MKS-Boards
Klipper for MKS boards: https://github.com/makerbase-mks/Klipper-for-MKS-Boards/tree/main/MKS%20Robin%20Nano%20V3.x


