1) Objective:
In this project , we will use 2 pcs Arduino and 2 pcs NRF24L01 modules to make wireless communication. One NRF24L01 send wireless message and another one moudle receive and print message to Arduino serial terminal.

2) Parts and devices:
2 x Arduino UNO
2 x USB cable
2 x NRF24L01 Module
1 x breadboard
1 x 10 Kohm Potentiometer
1 x JoyStick Shield (optional)
3) Circuit graph
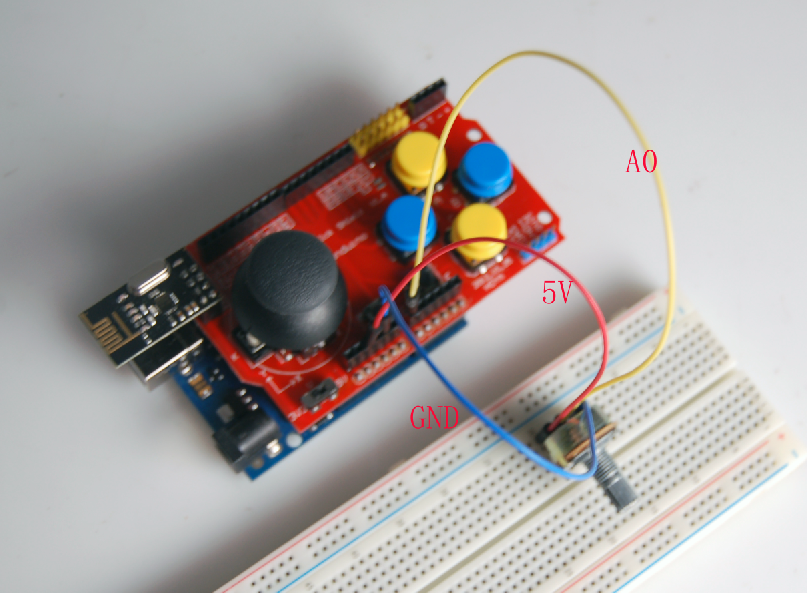
A: Message Sending Device
Connect Joystick shield to Arduino UNO(see https://osoyoo.com/2016/11/17/arduino_keyboard/), then connect NRF24L01 module to NRF24L01 port in the Joystick shield.
See following picture:

B)Message Receiving Device
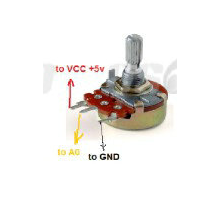
Potentiometer Pin connection:
If you don’t have JoyStick Shield, plese connect NRF24L01 module connect Arduino UNO as per following graph:
Sending Device:
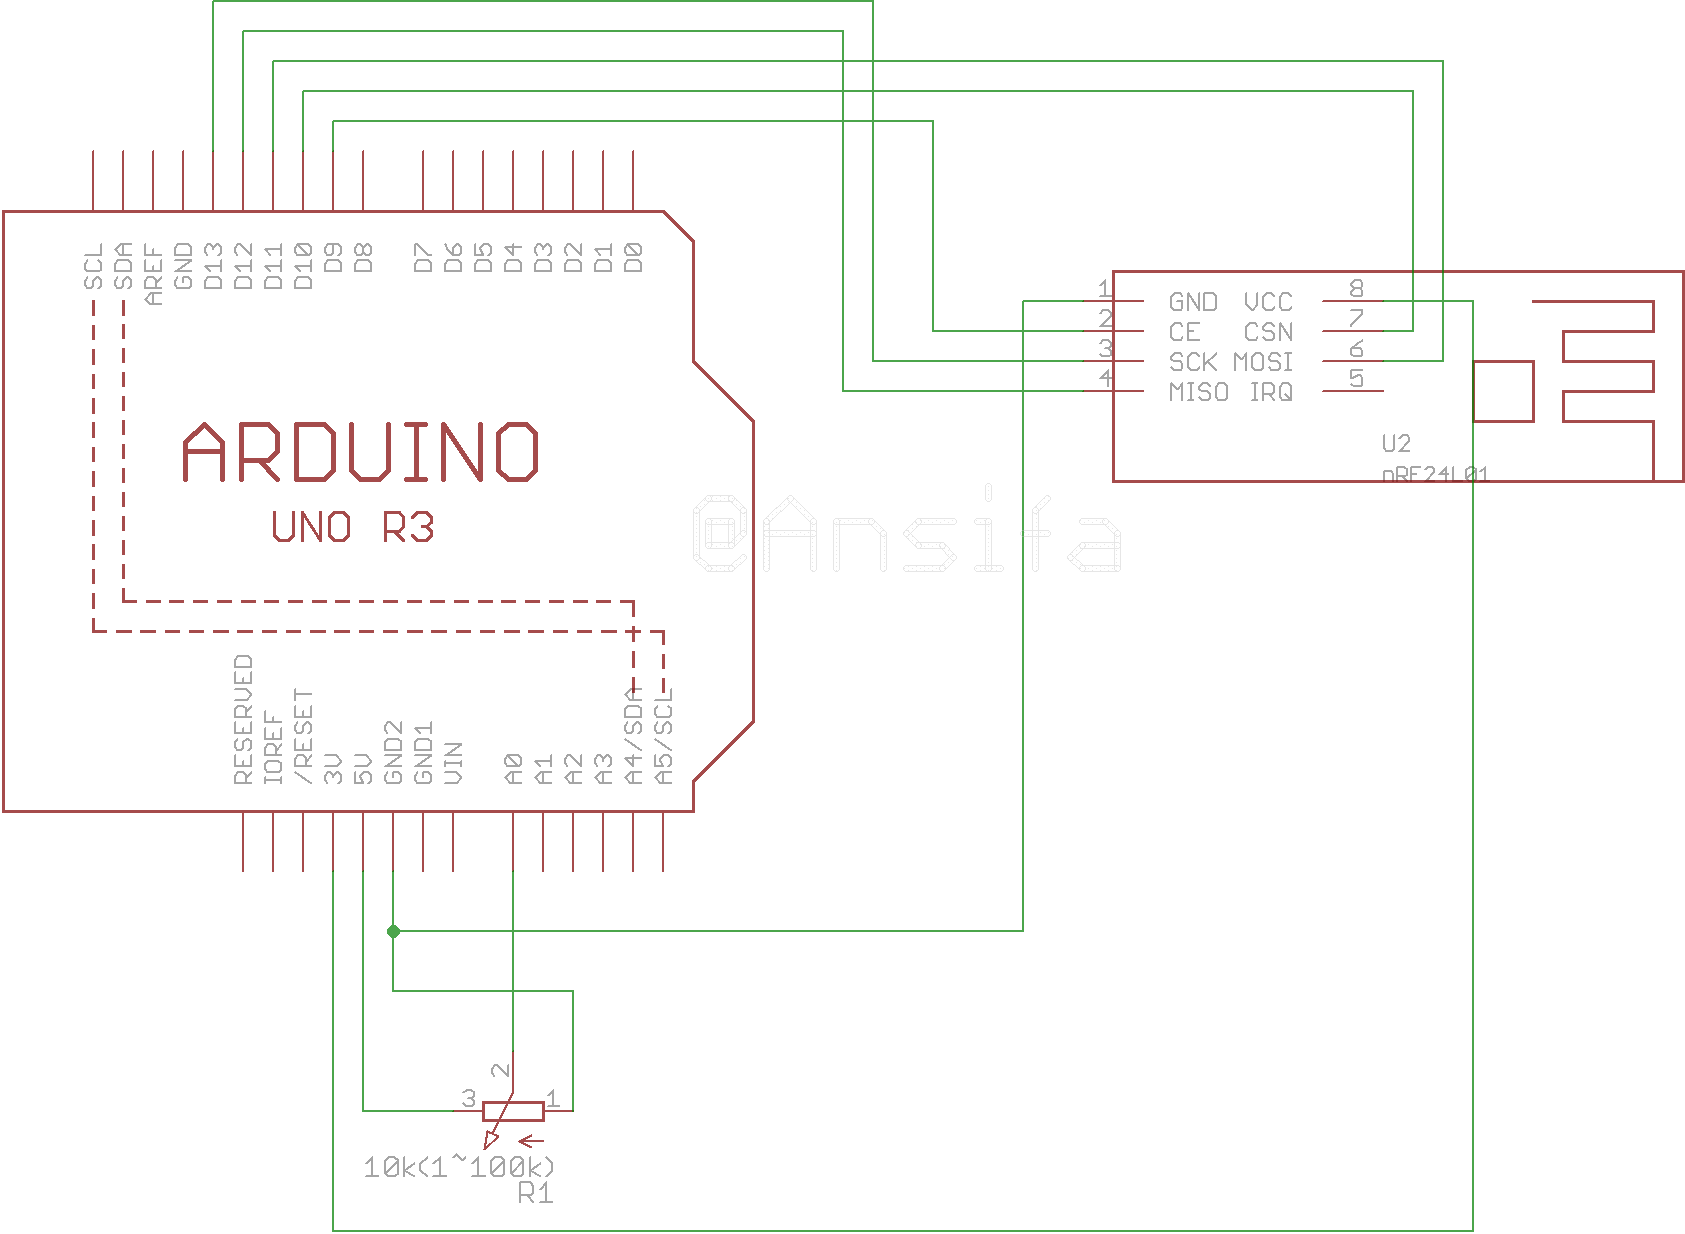
R1 : Potentiometer
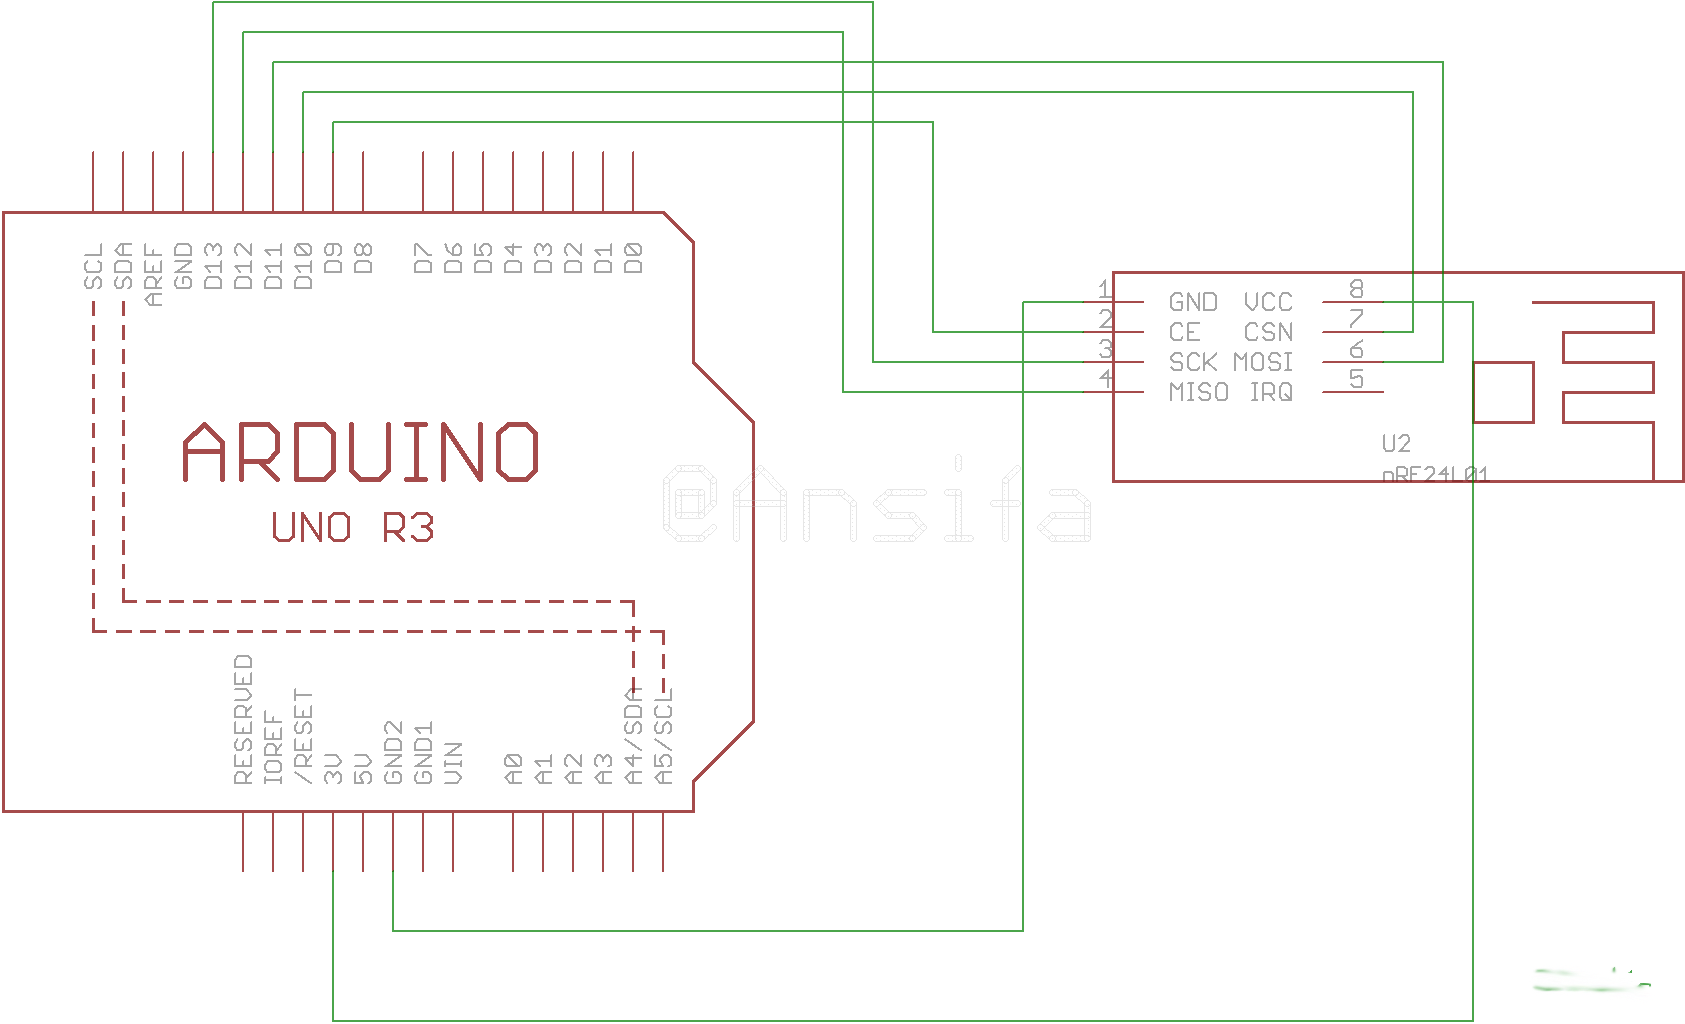
Receiving Device
4)Install Mirf libary
Download install Mirf Library from https://osoyoo.com/wp-content/uploads/2016/11/Mirf.rar, then unzip the file, and move it to Arduino IDE library folder.
5)Download sample code from following link
Download Sender.ino Sketch file, load it into Arduino.
Download Receiver.ino Sketch file, load it into Arduino.
5) Result:
Connect Receiver Arduino to PC with USB cable, open serial terminal in Arduino IDE . Then change Potentiometer value, you will see Receiver PC serial terminal show the votage values from Sender device.


