Objective
In this project, we will connect an Infrared remote control receiver to Raspberry Pi. After an IR remote controller key is pushed, Raspberry Pi will decode the signal and display the key code on the terminal.
This project used a IR receiver library called LIRC. We also have a simple programming tutorial which does not require LIRC library. Here is the link: https://osoyoo.com/2021/05/26/use-basic-gpio-library-to-get-ir-remote-code-no-need-lirc/
Parts:
| 1 pc |
Raspberry Pi 2/3/zero x 1 |
 |
| 1 pc |
8GB MicroSD memory card x 1preinstalled Raspbian OS. |
 |
| 1 pc |
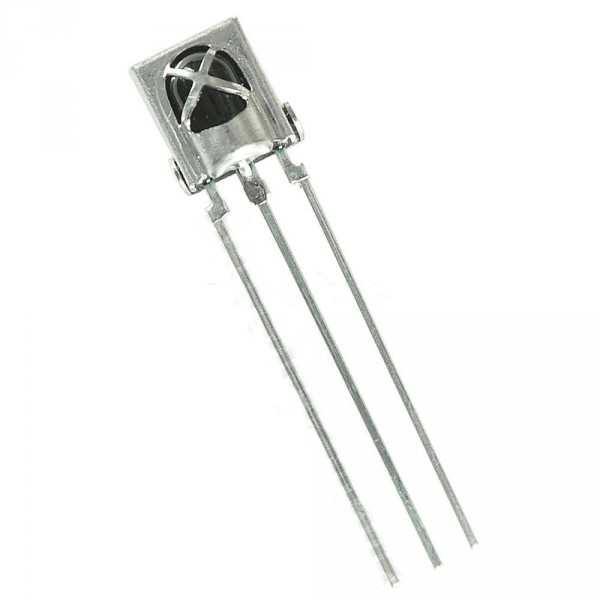
VS1838B x 1 |
 |
| 1 pc |
Infrared Remote Controller x 1 |
 |
| 1 pc |
breadboard x 1 |
 |
| 1 pc |
GPIO breakout kit(optional) |
 |
| some |
Jumper Wires |
 |
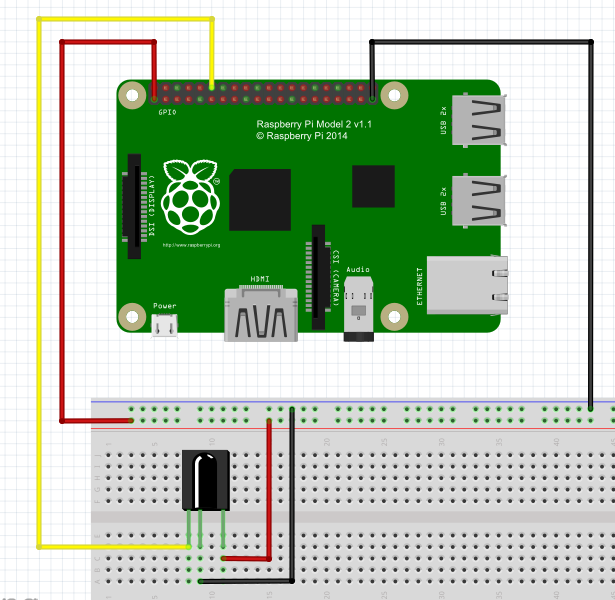
Circuit Connection Graph

Install lirc library
LIRC (Linux Infrared remote control)is an open source library which allow linux to decode IR signal
sudo apt-get install lirc
change configuration with nano command
sudo nano /etc/lirc/hardware.conf
amend following contents in /etc/lirc/hardware.conf file
LIRCD_ATGS=“”
DRIVER=“default”
DEVICE=“/dev/lirc0”
MODULES=“lirc-rpi
Edit module file with nano
sudo nano /etc/modules
add following 2 lines in the end of /etc/modules添加完两行后按ctrl+o 保存修改,按ctrl+x退出
lirc-dev
lirc-rpi gpio_in_pin_18 gpio_out_pin_17
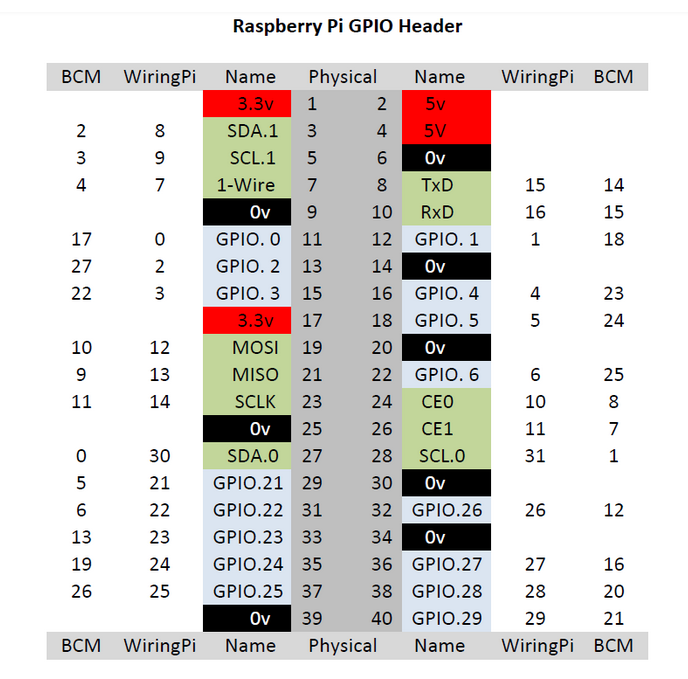
GPIO 18 pin will get input data from IR receiver
Raspberry Pi GPIO pin graph:
Restart the raspberry pi to enable configuration:
reboot
restart lirc by running followingcommand
sudo /etc/init.d/lirc restart
Test IR receiver
1)Stop lirc by running:
sudo /etc/init.d/lirc stop
2)run following code
mode2 –d /dev/lirc0
After running above command, terminal might show following errors:
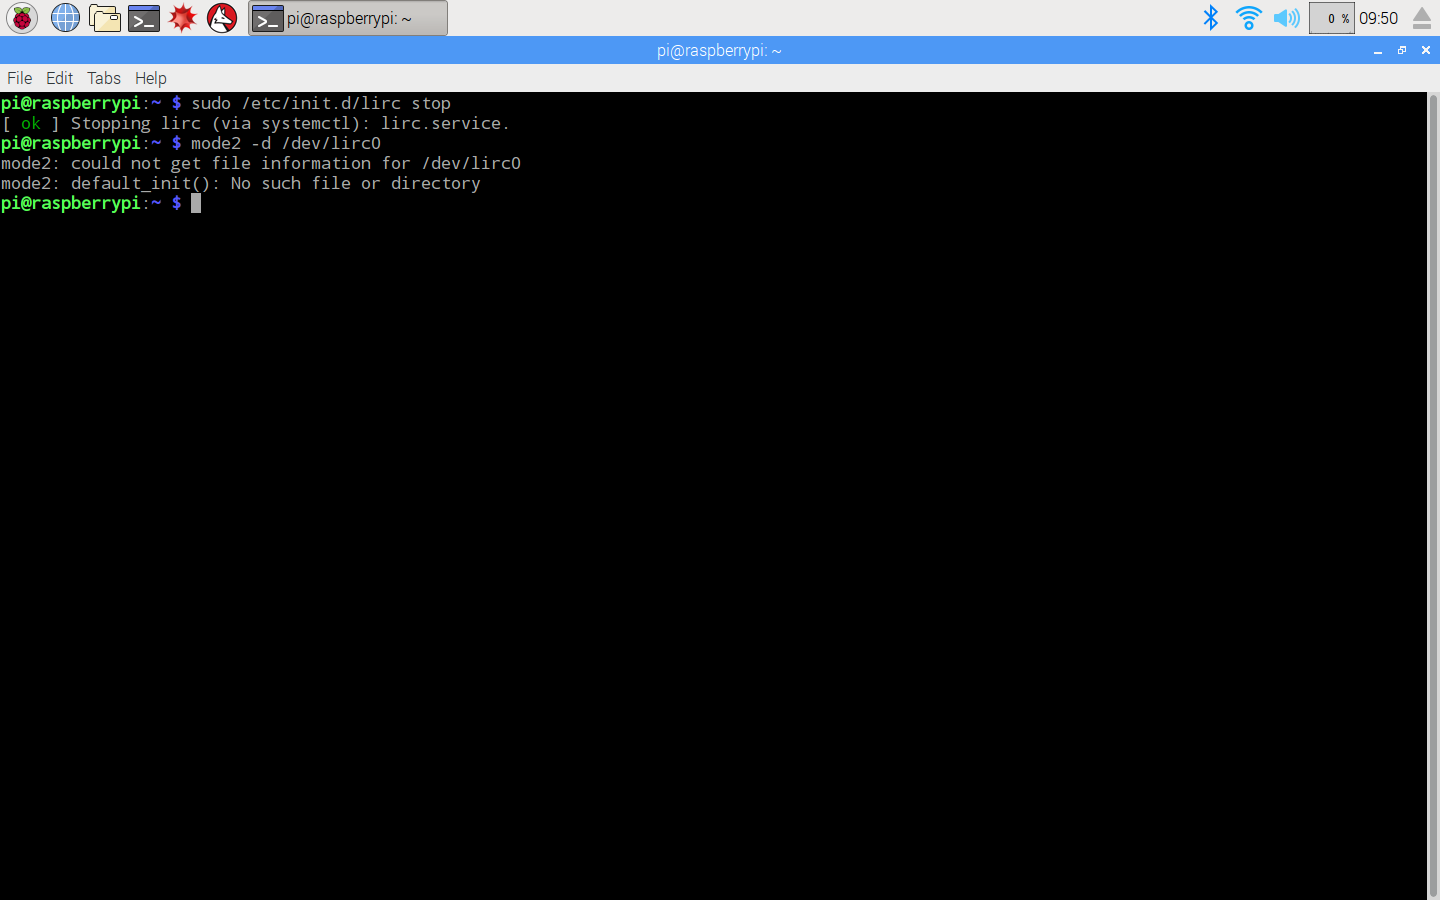
This means /lirco module has not be installed under /dev diretory .
To fix it, you need uncomment “#dtoverlay=lirc-rpi” in /boot/config.txt file
sudo nano /boot/config.txt
find #dtoverlay=lirc-rpi and remove the “#” sign, press ctrl-x to save and exit.
Reboot and test again with following two commands:
reboot
mode2 -d /dev/lirc0
If no error shows up after running above commands, you can press keys in the IR remoter control. You will see following result:
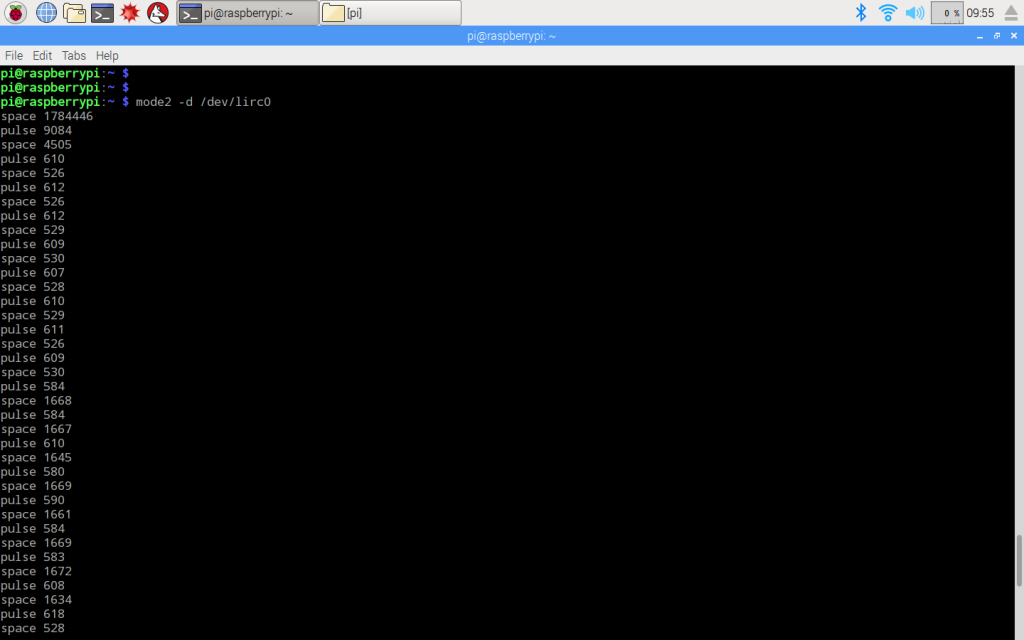
press ctrl-c to exit
Record IR code by running following two commands:
sudo /etc/init.d/lirc stop
irrecord –list–namespace
write down the key names as following:
KEY_CHANNELDOWN
KEY_CHANNELUP
KEY_CHANNEL
KEY_PREVIOUS
KEY_NEXT KEY_PLAY
KEY_VOLUMEDOWN
KEY_VOLUMEUP
KEY_EQUAL
KEY_NUMERIC_0 ~ KEY_NUMERIC_9
Run IR code record command:
irrecord -d /dev/lirc0 ~/lircd.conf
keep press RETURN key until you see “Press RETURN now to start recording.”.
Press RETURN AGAIN ,then press each key quickly as per the instruction in the screen. Each press will show up a dot sign in the screen. After the dots fill two lines, screen will prompt: “Please enter the name for the next button (press to finish recording)”, then press the key you want to record..
Example : enter KEY_PLAY and return, screen prompt “Now hold down button “KEY_PLAY“, press and hold PLAY key in your IR controller, PI will record the key code and prompt “Please enter the name for the next button (press to finish recording)”… repeat the procedure until all your keys are recorded, save the config file to lircd.conf
Finally replace /etc/lirc/lircd.conf file with your lircd.conf file :
sudo cp ~/lircd.conf /etc/lirc/lircd.conf
restart lirc and test IR keys with following 2 commands:
sudo /etc/init.d/lirc start
irw
After you press keys in the IR controller, Pi will display key codes as following:
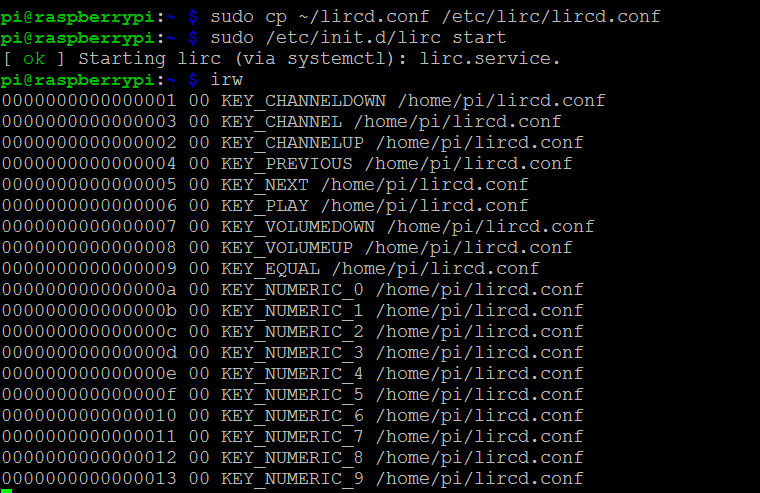
You might feel that LIRC library installation and configuration is a little bit complicated. If you don’t want to use LIRC library, we have another simple solution to program IR receiver with basic GPIO functions. Here is the link: https://osoyoo.com/2021/05/26/use-basic-gpio-library-to-get-ir-remote-code-no-need-lirc/


