In this project, we will go over how to build a smoke sensor circuit with the micro bit. This is a sensor that is not only sensitive to smoke, but also to flammable gas.
The smoke sensor reports smoke by the voltage level that it outputs. The more smoke there is, the greater the voltage that it outputs. Conversely, the less smoke that it is exposed to, the less voltage it outputs.
Parts Needed You will need the following parts:
1x micro:bit
1x Micro B USB Cable
1x micro:bit Breakout (with Headers)
1x Breadboard
5x Jumper Wires
1x Smoke Sensor
1x Active Buzzer
About Smoke Sensor
The OSOYOO smoke sensor is sensitive to smoke and to the following flammable gases:
LPG
Butane
Propane
Methane
Alcohol
Hydrogen
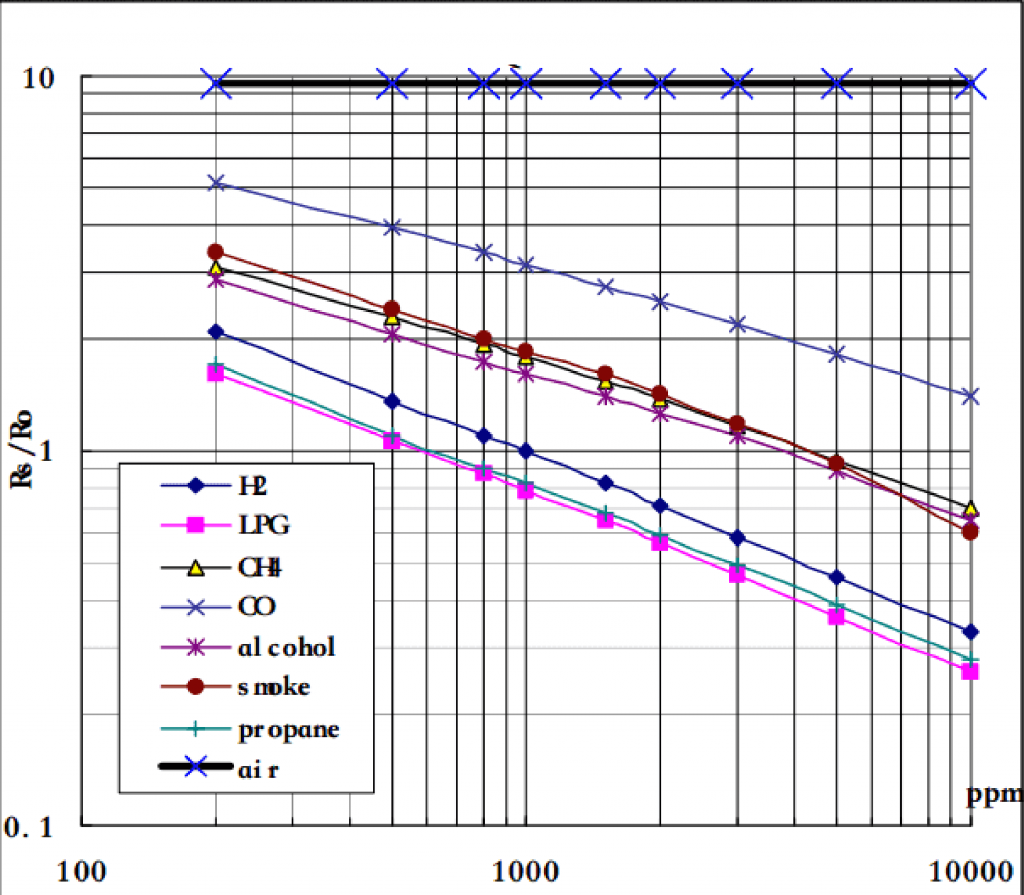
The resistance of the sensor is different depending on the type of the gas.
The smoke sensor has a built-in potentiometer that allows you to adjust the sensor sensitivity according to how accurate you want to detect gas.
Features
1. Wide detecting scope 2. High sensitivity and fast response 3. Long life and stable 4. Simple drive circuit Due to its fast response time and high sensitivity, measurements can be taken as soon as possible. The sensor sensitivity can be adjusted by using the potentiometer.
Standard Working Condition
Symbol
Parameter Name
Technical Condition
Remarks
VC
Circuit voltage
5V±0.1
AC or DC
VH
Heating voltage
5V±0.1
AC or DC
RL
Load resistance
adjustable
RH
Heater resistance
33Kohm±5%
Room temperature
PH
Heating consumption
Less than 800mW
Environment Condition
Symbol
Parameter Name
Technical Condition
Remarks
TO
Operating Temp.
-20°C-50°C
TS
Storage Temp.
-20°C-70°C
RH
Relative Humidity
<95%
O2
Oxygen Concentration
21%(standard condition) Oxygen concentration can affect sensitivity
This module has an electrochemical sensor, which changes its resistance for different concentrations of varied gasses. The sensor is connected in series with a variable resistor to form a voltage divider circuit , and the variable resistor is used to change sensitivity. When one of the above gaseous elements comes in contact with the sensor after heating, the sensor’s resistance change. The change in the resistance changes the voltage across the sensor, and this voltage can be read by a microcontroller. The voltage value can be used to find the resistance of the sensor by knowing the reference voltage and the other resistor’s resistance. The sensor has different sensitivity for different types of gasses. The sensitivity characteristic curve is shown below for the different type of gasses.
The voltage that the sensor outputs changes accordingly to the smoke/gas level that exists in the atmosphere. The sensor outputs a voltage that is proportional to the concentration of smoke/gas.
In other words, the relationship between voltage and gas concentration is the following:
The greaterthe gas concentration,the greaterthe output voltage
The lowerthe gas concentration,the lowerthe output voltage
Working Mechanism
The output can be an analog signal (A0) that can be read with an analog input of the Arduino or a digital output (D0) that can be read with a digital input of the Arduino.
Note
The sensor value only reflects the approximated trend of gas concentration in a permissible error range, it DOES NOT represent the exact gas concentration. The detection of certain components in the air usually requires a more precise and costly instrument, which cannot be done with a single gas sensor. If your project is aimed at obtaining the gas concentration at a very precise level, then we don’t recommend this gas sensor.
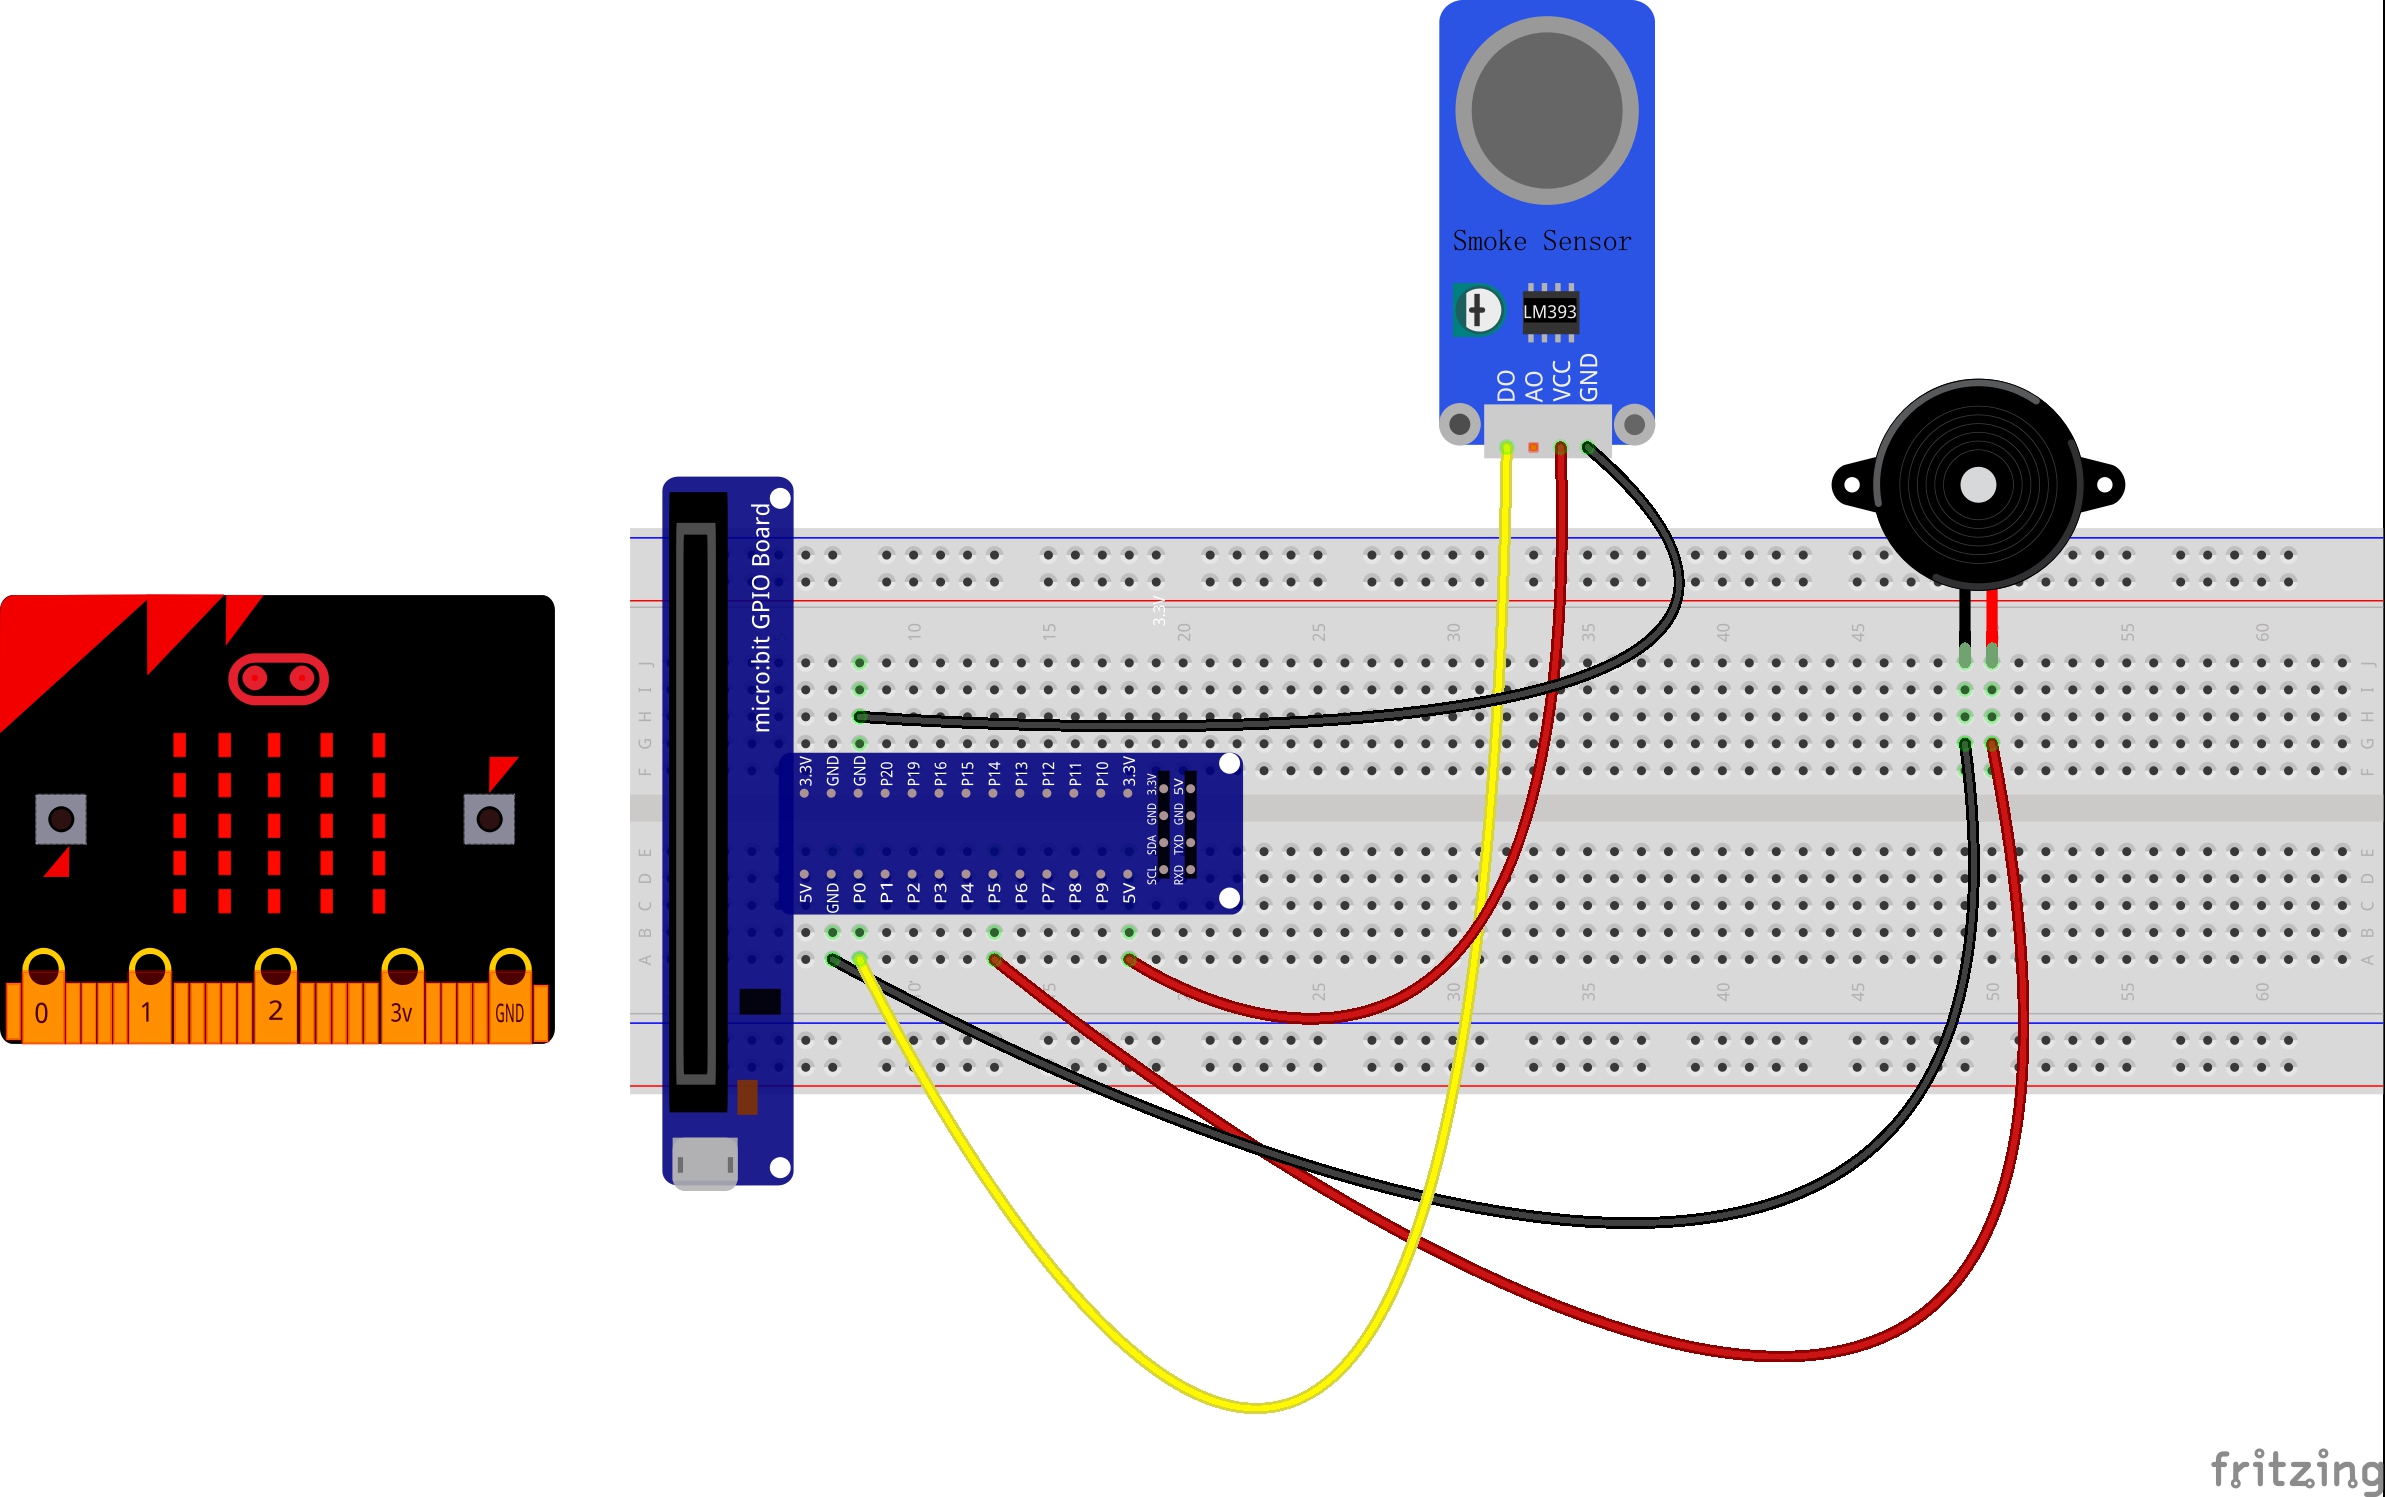
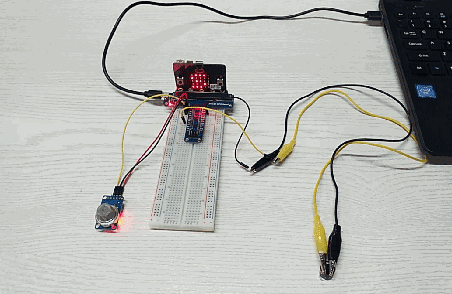
Wiring
Connect the smoke sensor to micro bit as below:
Smoke sensor
Micro bit
VCC
+5V
GND
GND
D0
P0
Connect the active buzzer with micro bit as below:
Active Buzzer
Micro bit
+
P5
GND
GND
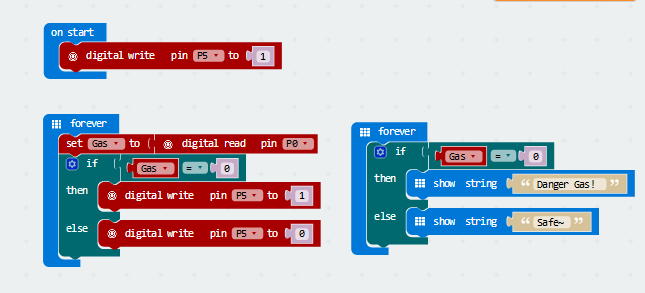
Run Your Script
If you are not familiar to make code, don’t worry. At first, you can enter this link: https://makecode.microbit.org/reference to get the reference of microbit block.
Either copy and paste, or re-create the following code into your own MakeCode editor by clicking the open icon in the upper right-hand corner of the editor window. You can also just download this example by clicking the download button in the lower right-hand corner of the code window.
MICROPYTHON
TESTING RESULT
If smoke sensor detects the smoke nearby, the active buzzer beeps; or else, it will not sound.