we use an infrared obstacle detector module and motor driving circuit on theOSOYOO Robot to build an infrared obstacle avoiding car.
● 1 X USB cable
● 1 X micro:bit robot
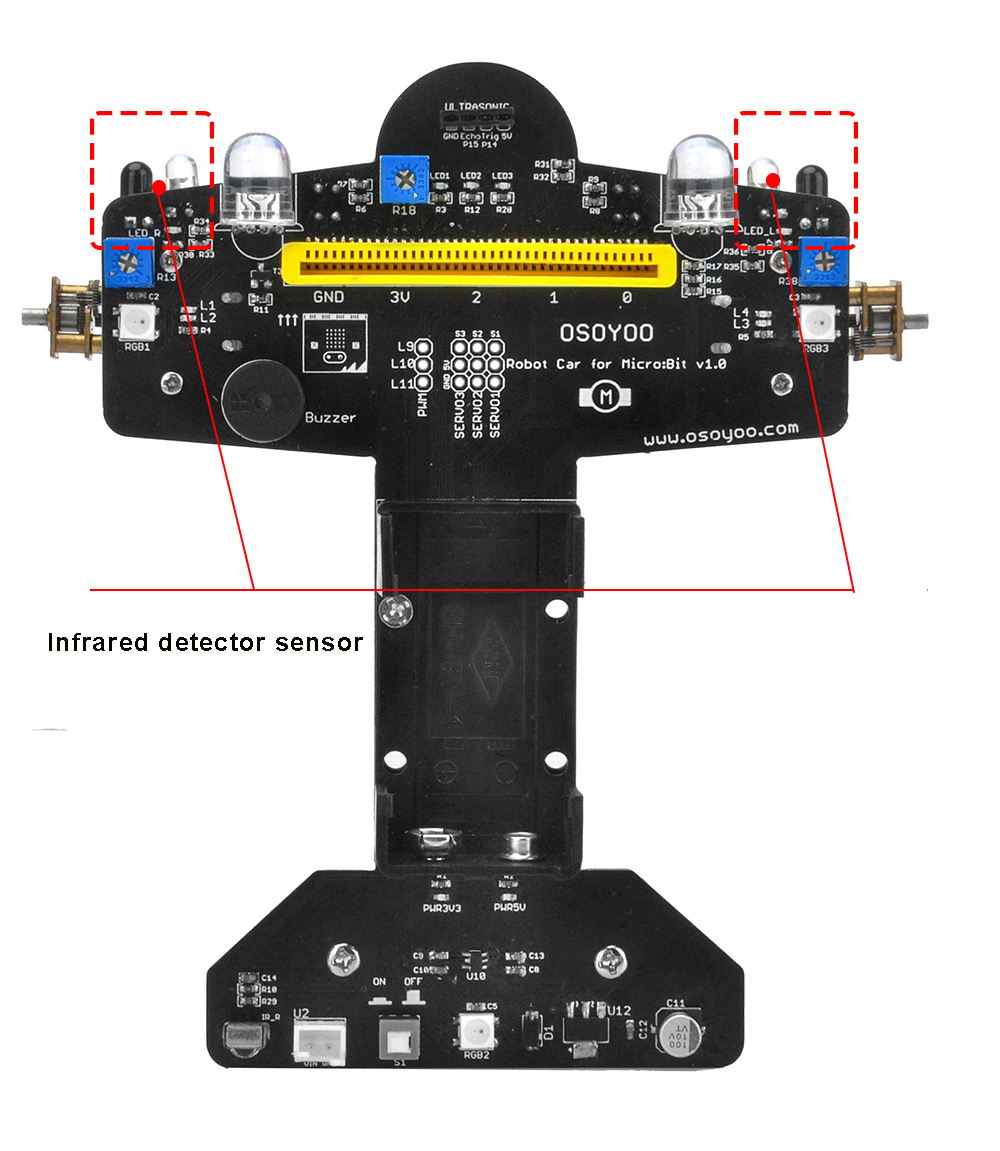
The OSOYOO Robot Car for Micro Bit comes with two infrared obstacle detector sensors. It is actually designed for infrared obstacle avoidance robot.
The infrared obstacle detector sensor has a pair of infrared transmitting and receiving tubes.The transmitter emits an infrared rays of a certain frequency. When the detection direction encounters an obstacle (reflecting surface), the infrared rays are reflected back, and receiving tube will receive it.At this time, the indicator (LED_L/LED_R) lights up. After processed by the circuit, the signal output terminal will output Digital signal.You can rotate the potentiometer on the shield to adjust the detection distance. It is better to adjust the potentiometer to make the LED_L/LED_R in a state between on and off. The detection distance is the best, almost 30cm.We have introduced the principle of infrared obstacle detector module before. We can make use of two infrared obstacle detector modules integrated on the car shield to detect whether have obstacles on the both sides of micro:bit car. Thus control the car’s running state according to the testing interface.
Block
Analyse
Examples
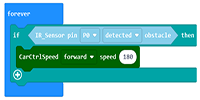
IR sensor pin obstacle block;
this meaning when the IR sensor from Pin detected the obstacle
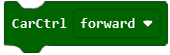
CarCtrl block;
this meaning setting a running direction for robot car
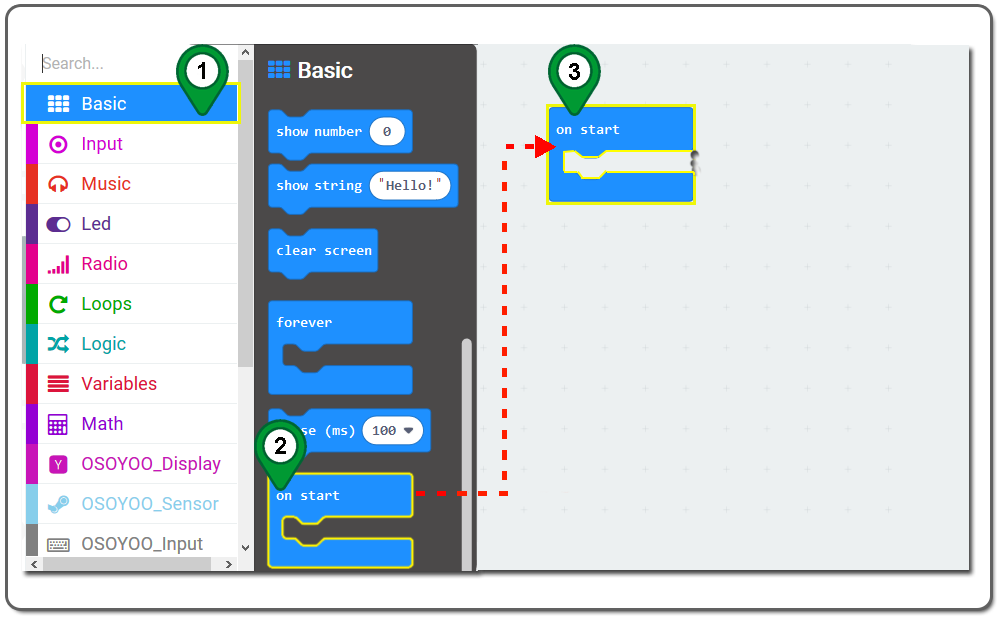
Step 1.In the Toolbox, click on the Basic category and then click the on start block , and then Drag as following figure:
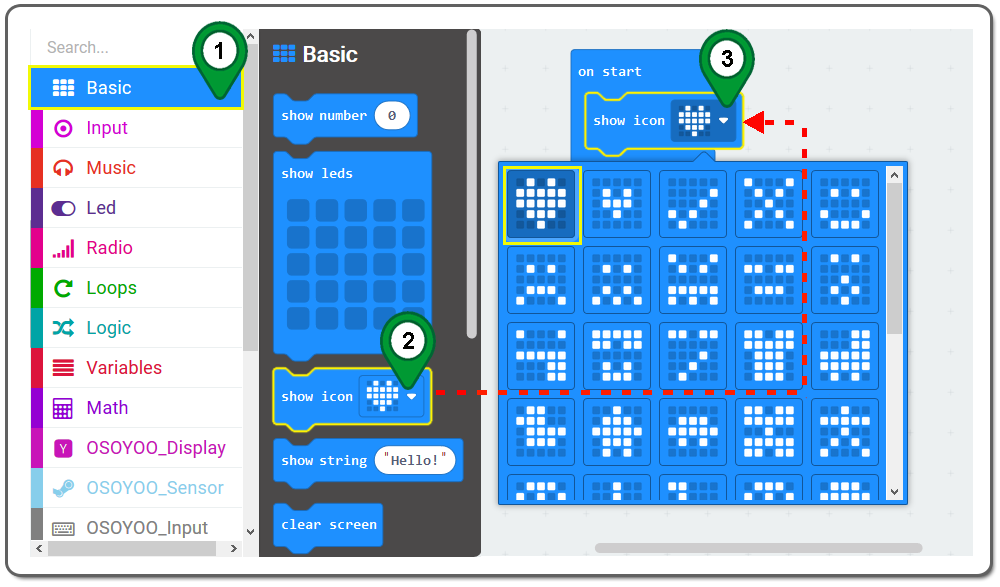
Step 2. Click on the Basic category again. Then drag the show icon block and drop it inside the on start block ,and choose the icon from the drop-down menu as following figure.
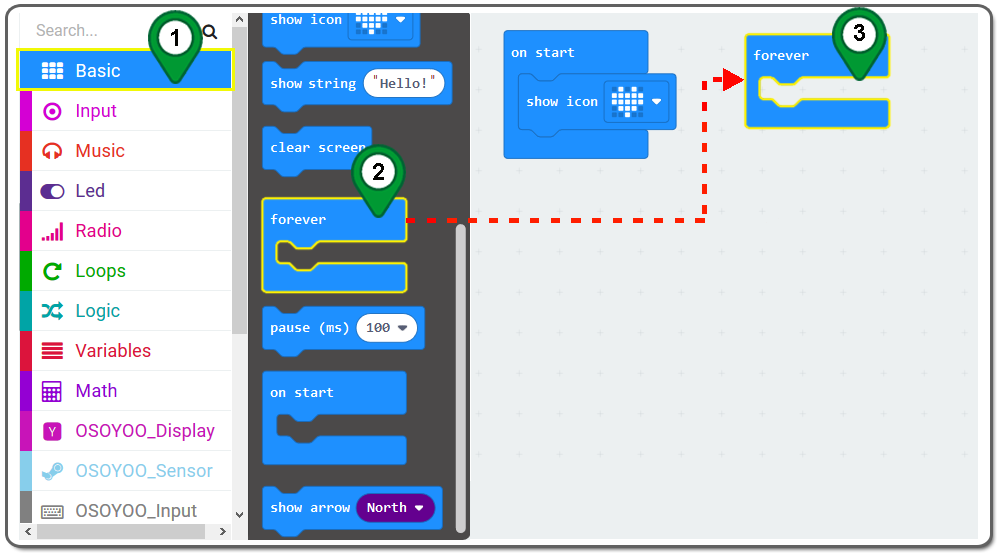
Step 3. Click on the Basic category and then click the forever button, and then Drag as following figure:
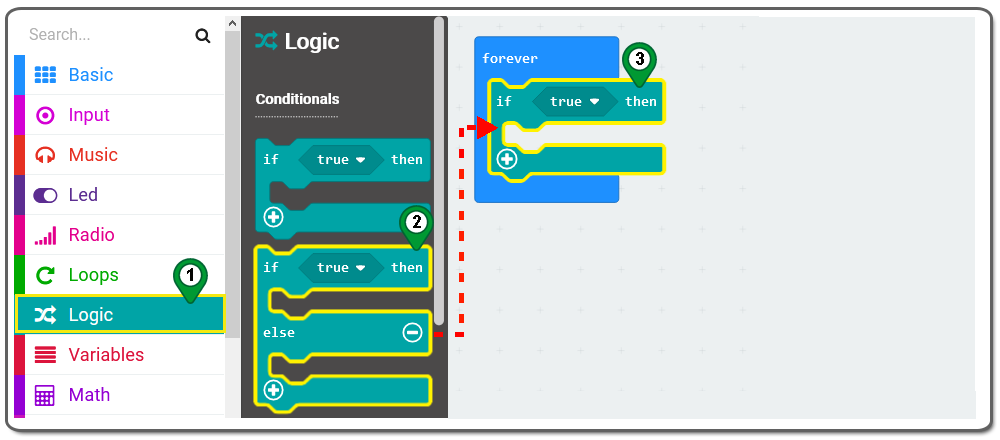
Step 4.Click on the Logic category . Then drag the if then else block and place it inside the forever block as following figure:
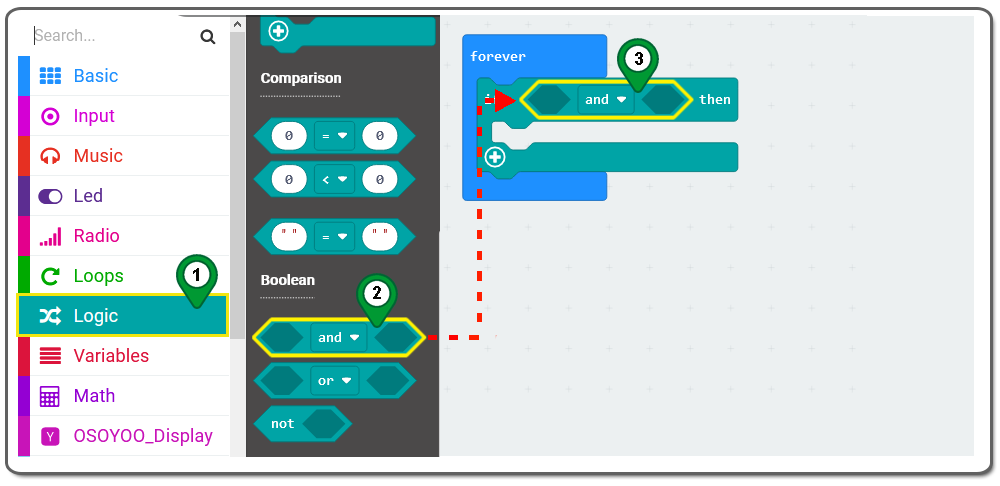
Step 5.Drag and drop a andblock,and place it if then blockas following figure:
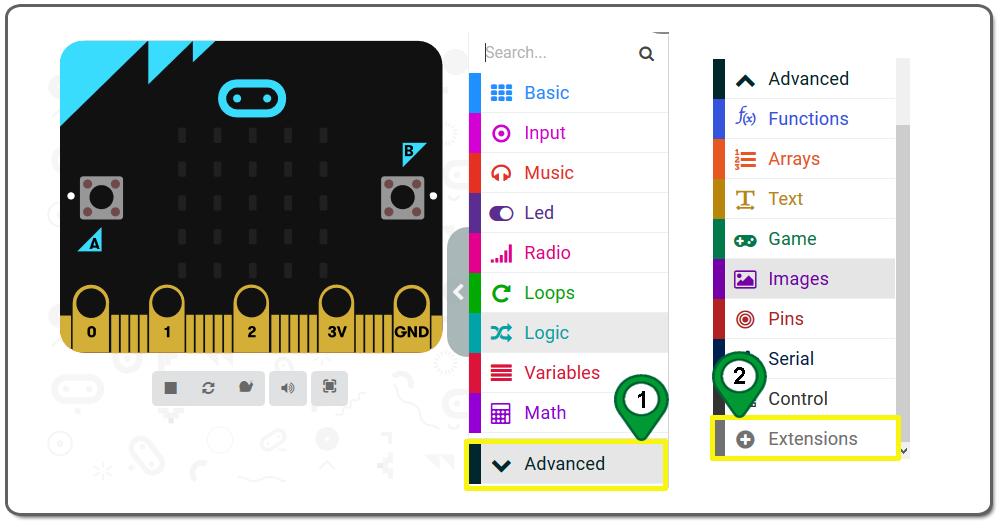
Step 6.In the Editor controls, click on the Advanced button and then Extensions as following figure.
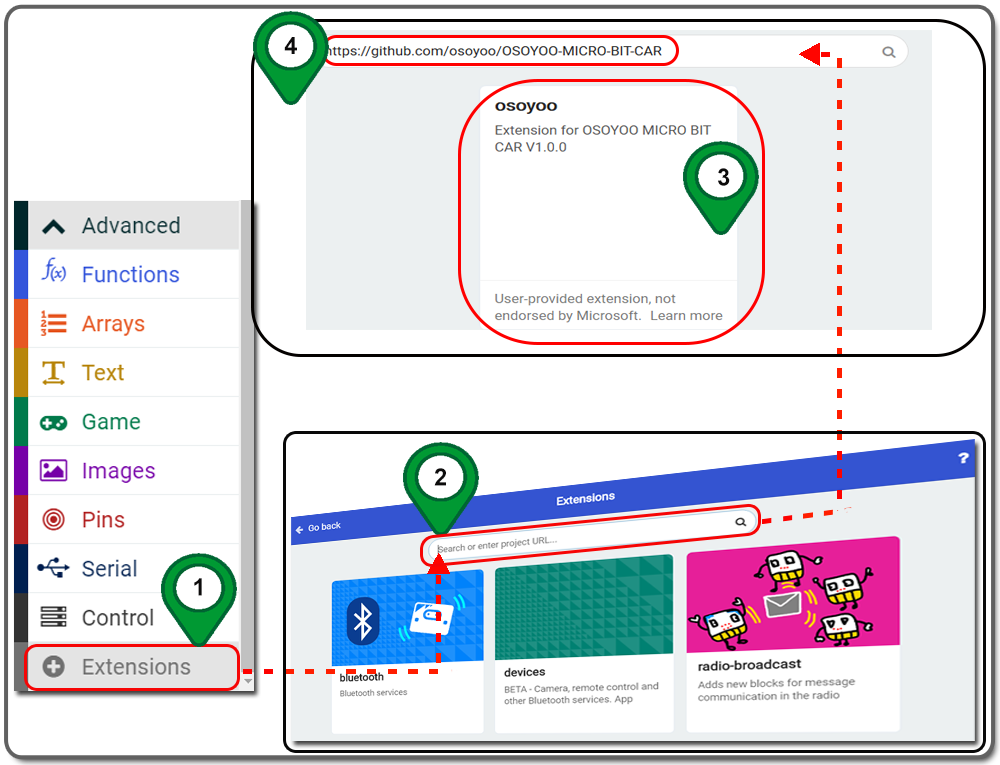
Step 7. In the Extensions page , enter project URL “https://github.com/osoyoo/OSOYOO-MICRO-BIT-CAR ” in the Search textbox and click on the Search button. The page will show you all the matching extensions based on your search string. Now, click on OSOYOO to add it into your project .
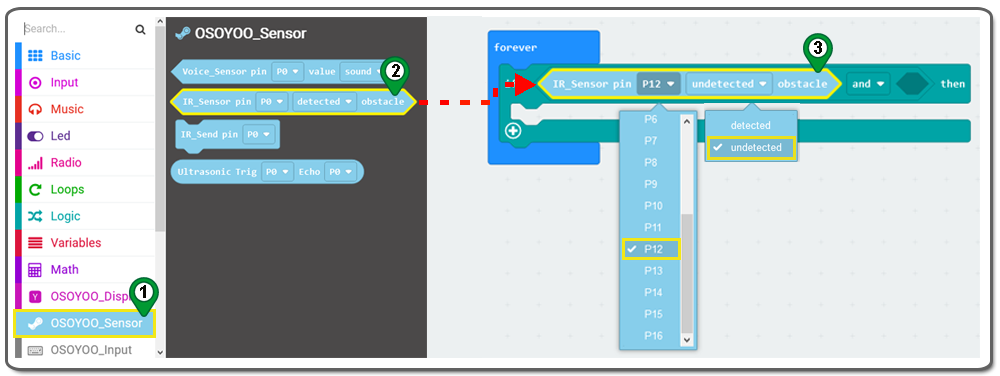
Step 8.Click on the OSOYOO Sensor category . Then drag the IR sensor pin obstacle block and place it inside the and block ,choose P12 and undetectedas following figure:
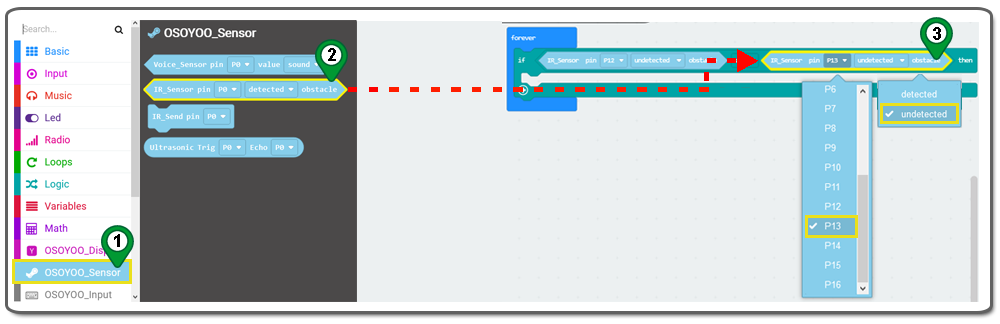
Step 9. Drag the IR sensor pin obstacle block again , place it inside the and block .choose P13 and detectedas following figure:
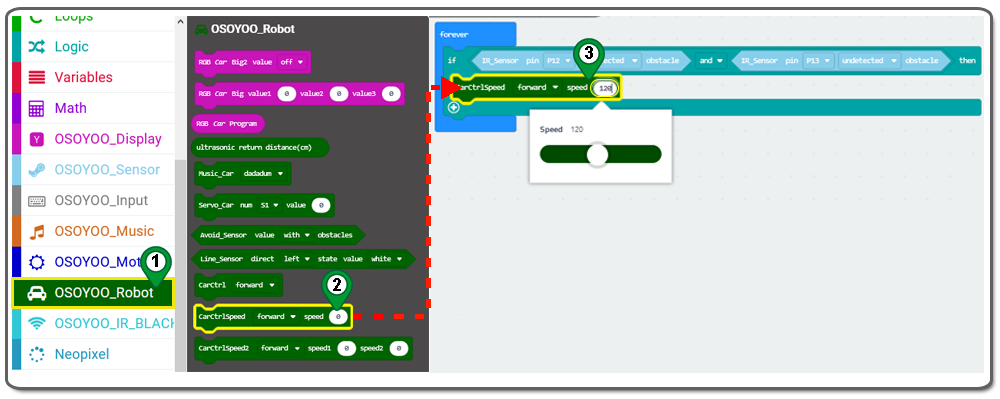
Step 10.Click on the OSOYOO_Robot category under Advanced. Drag CarctrlSpeed block and place it inside the then block,and write 180 as following figure:
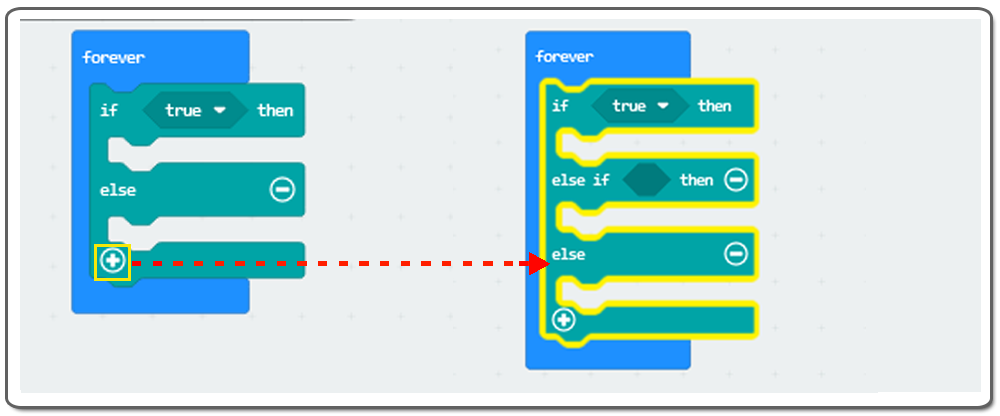
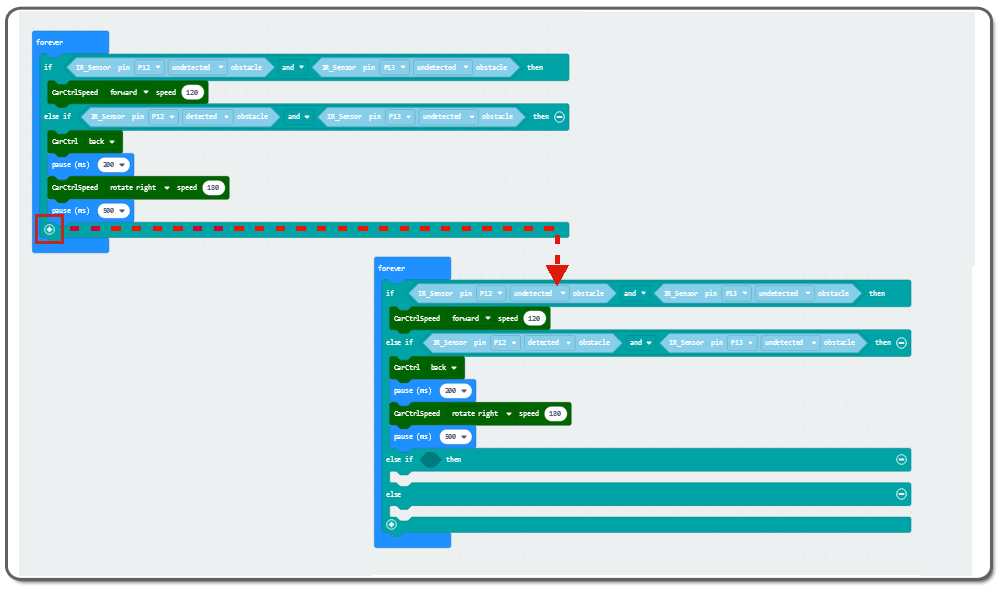
Step 11.Click the ““,add the if else then as following figure:
Step 12.Duplicate aComparison section block and drag and drop it over and place it inside the “else if” section of the if-then-else block, and change “undetected” to “detected” as following
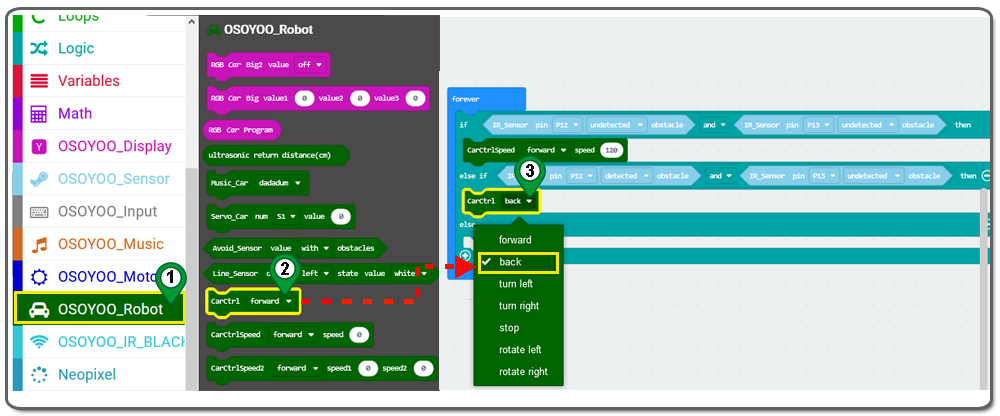
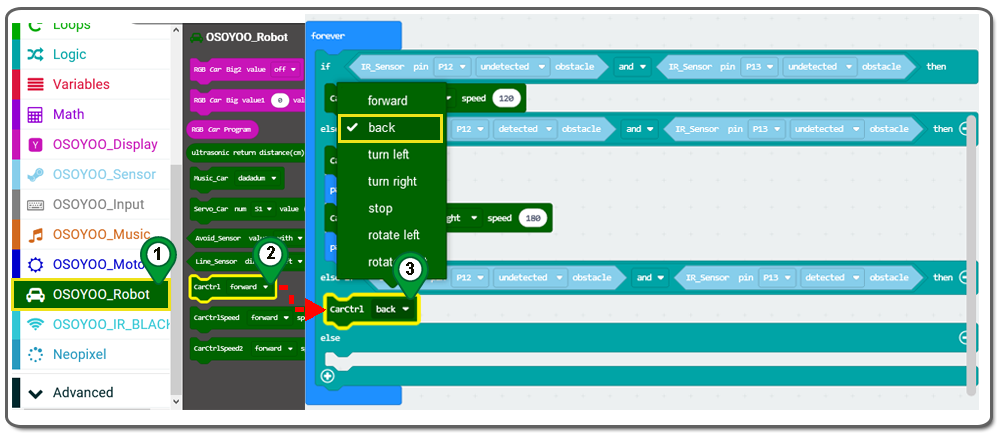
Step 13.Click on the OSOYOO_Robot category again. Drag Carctrl block and place it inside the then block,and choose back as following figure:
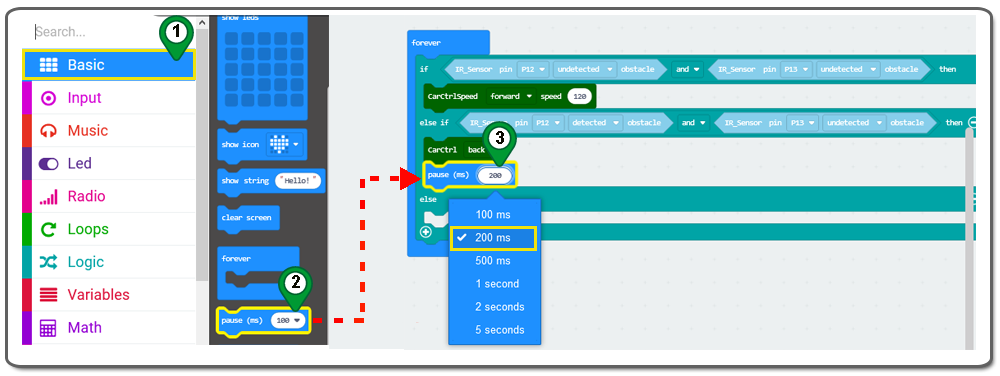
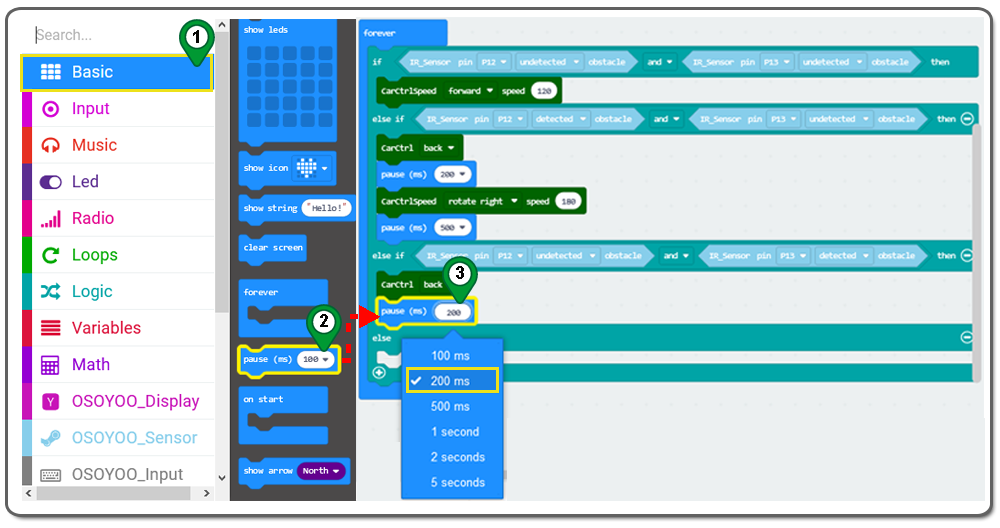
Step 14. Click on the Basic category and then click the pause button, then Drag and choose 200ms as following figure:
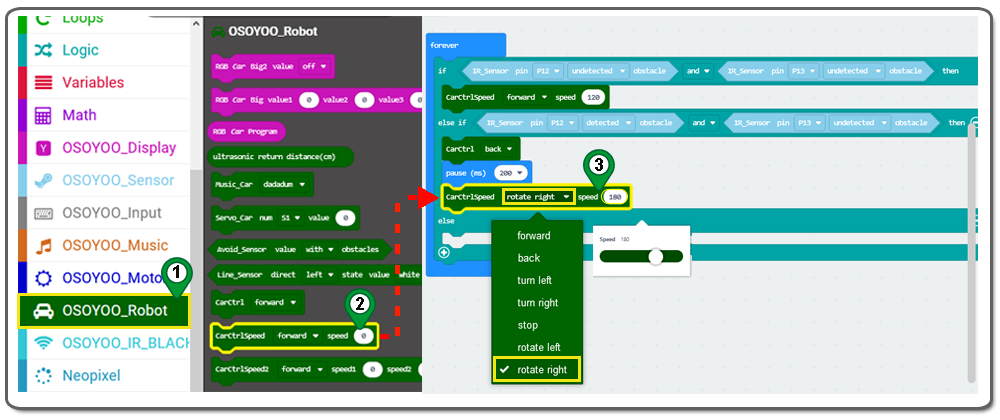
Step 15.Click on the OSOYOO_Robot category again. Drag CarctrlSpeed block and place it under the pause200 ms block,choose rotate right and write 180 as following figure:
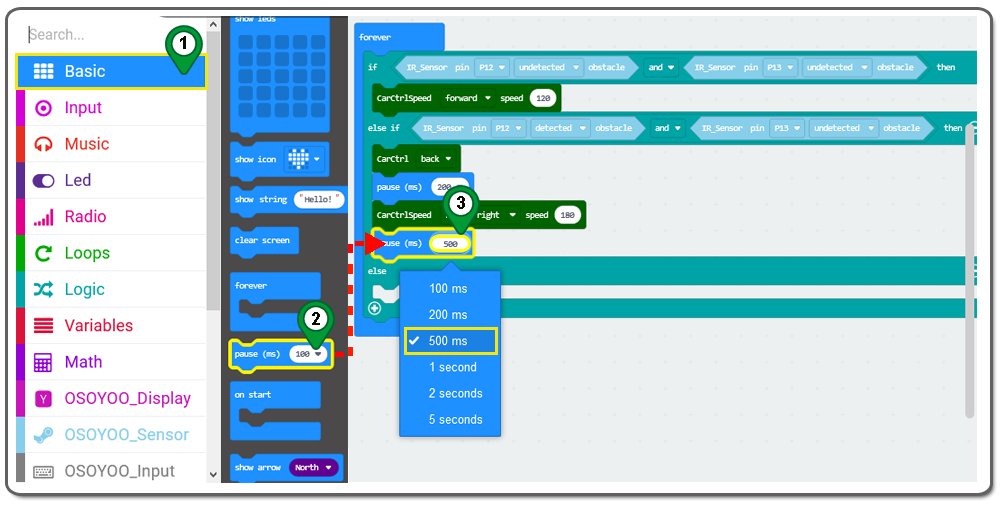
Step 16. Repeat step 16 ,Click on the Basic category and then click the pause button, then Drag and choose 500ms as following figure:
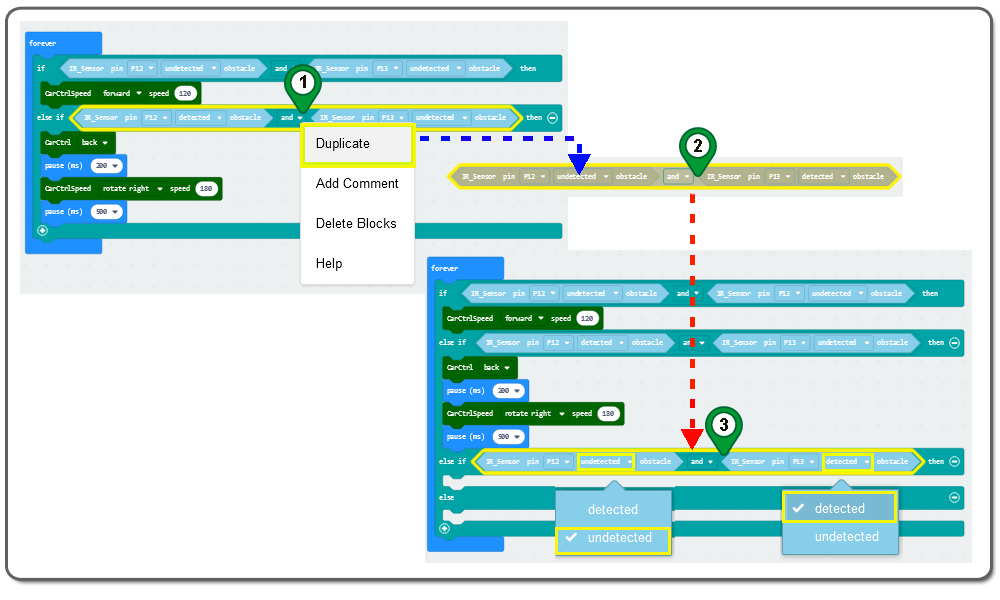
Step 17.Click “+” to add an else section as following
Step 18. Duplicate aComparison section block and drag and drop it over and place it inside the “else if” section of the if-then-else block, and choose “undetected” to “detected” as following:
Step 19.Click on the OSOYOO_Robot category again. Drag Carctrl block and place it in then block,choose backas following figure:
Step 20. Click on the Basic category and then click the pause button, then Drag and choose 200ms as following figure:
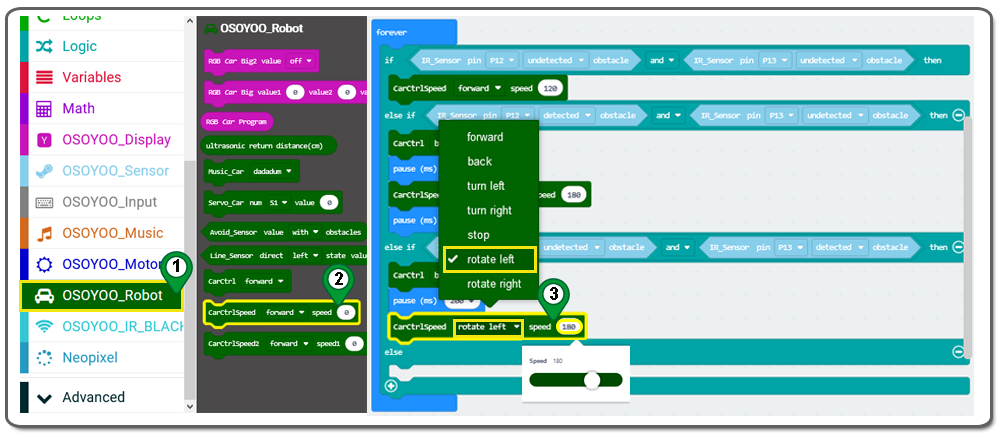
Step 21. Click on the OSOYOO_Robot category . Drag CarctrlSpeed block and place it under the pause200 ms block,choose rotate left and write 180 as following figure:
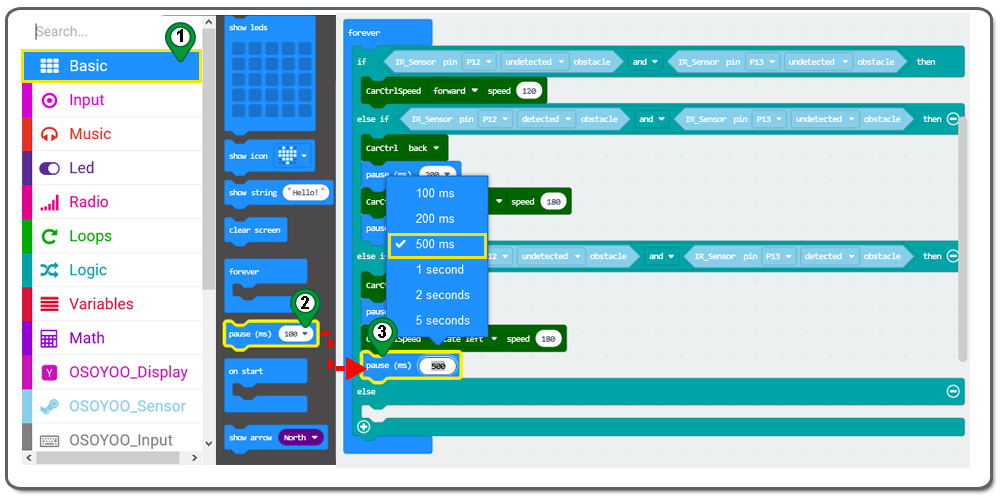
Step 22. Repeat step 16 ,Click on the Basic category and then click the pause button, then Drag and choose 500ms as following figure:
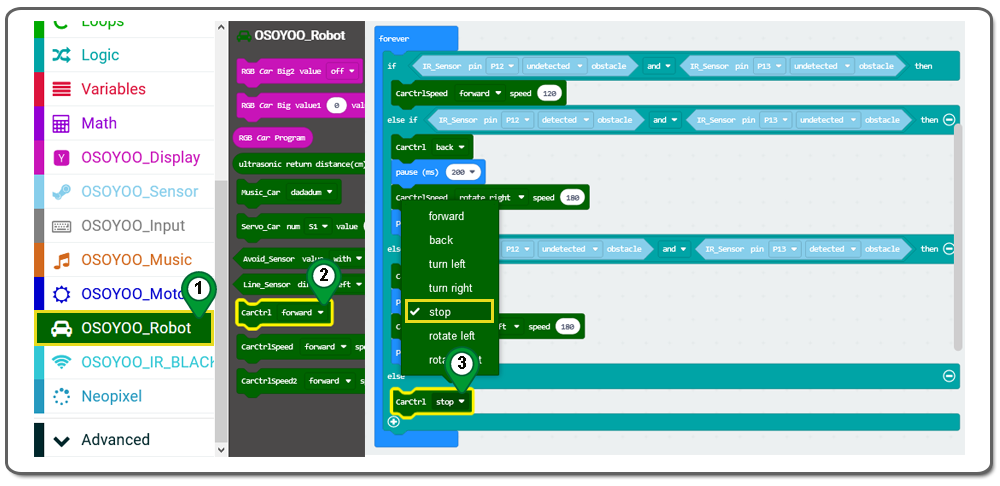
Step 23.Repeat step 22 , Click on the OSOYOO_Robot category again. Drag Carctrl block and place it in then block,choose stop as following figure:
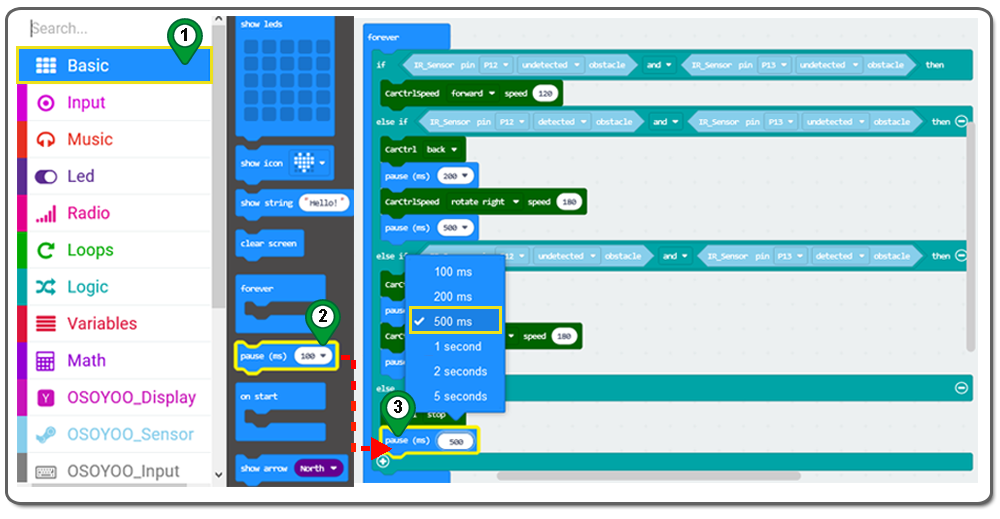
Step 24. Click on the Basic category and then click the pause button, then Drag and choose 500ms as following figure:
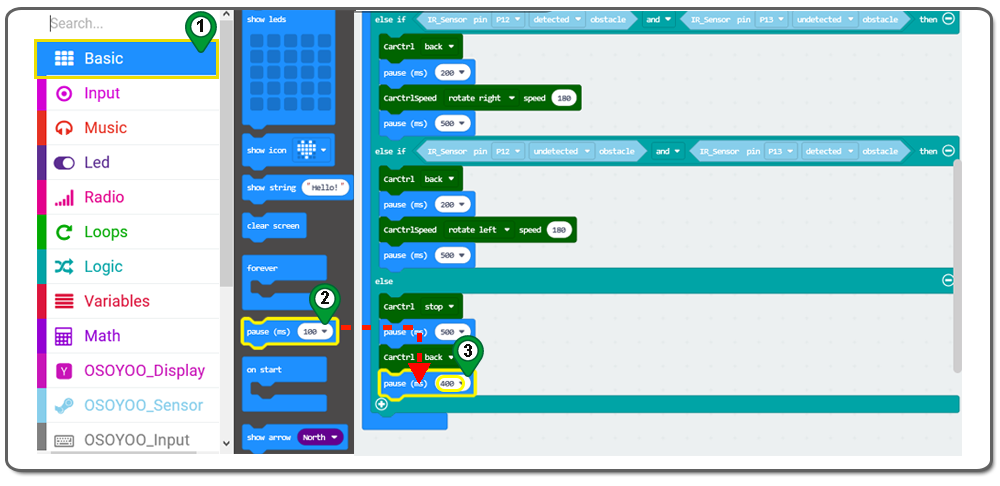
Step 25.Click on the OSOYOO_Robot category again. Drag Carctrl block and under pause 500ms block,choose back as following figure:
Step 26. Click on the Basic category and then click the pause button, then Drag and write 400ms as following figure:
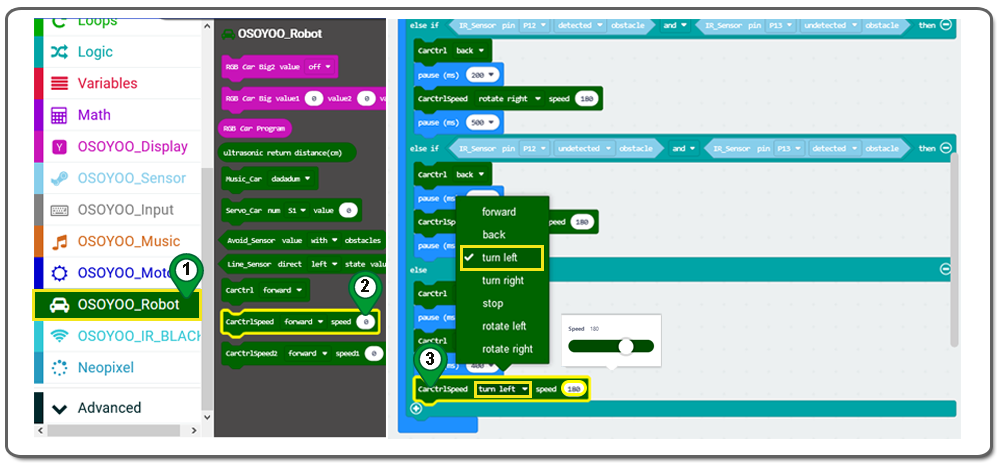
Step 27. Click on the OSOYOO_Robot category . Drag CarctrlSpeed block and place it under the pause400 ms block,choose turn left and write 180 as following figure:
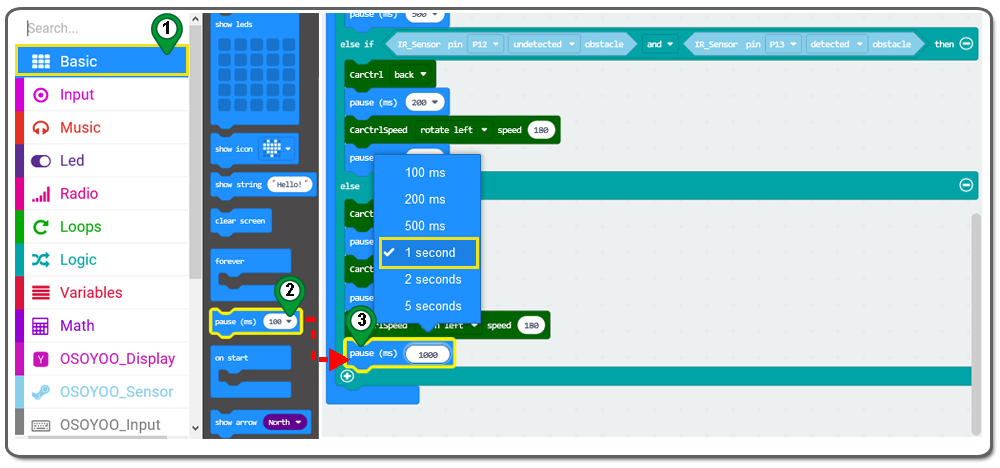
Step 28. Click on the Basic category and then click the pause button, then Drag and write 1000ms as following figure:
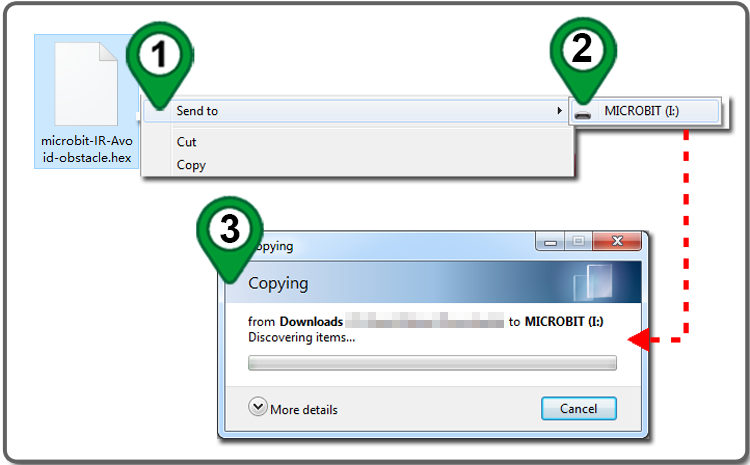
Step 29. Download this “.hex” file and save it to your MICROBIT disk Driver as following figure.
Step A)Connect the micro:bit with the computer through USB cable, and the computer will pop up a U disk and send the download file(.hex)to your micro:bit.
Step B)Insert the micro:bit main board into the robot, and connect a 9v battery into the battery box.
Step C)Turn the POWER switch ON.
RUNNING RESULT
If both of them detect no obstacle, the car will go forward.
The left infrared sensor on the robot detects an obstacle, the car will go back a distance and turn right at a certain angle, then go forward.
The right infrared sensor on the car shield detects an obstacle, the car will will go back a distance and turn left at a certain angle, then go forward.
If both of them detect obstacles, the car will stop, then go backward, turn left at a certain angle and then go forward.
Note:
This experiment must be carried out indoors to reduce interference from sunlight to infrared receiver.
If the robot tracking is not normal, you can adjust its speed and running time through makecode, and you can also change the sensitivity of the infrared obstacle avoidance sensor by adjusting the potentiometer.