VIDEO
正規のオンライン小売業者:
紹介
このレッスンでは、Raspberry Piを使用してDHT11温湿度センサーモジュールからデータを取得する方法を紹介します。
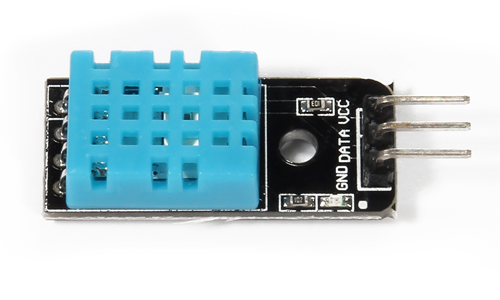
ハードウェアの準備
ソフトウェアの準備
実験原理
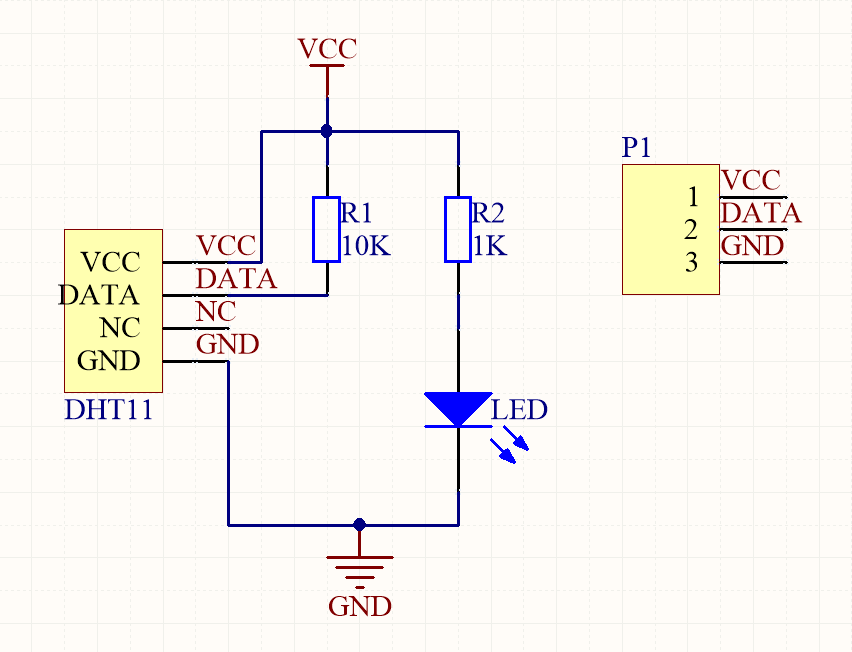
DHT11の回路図
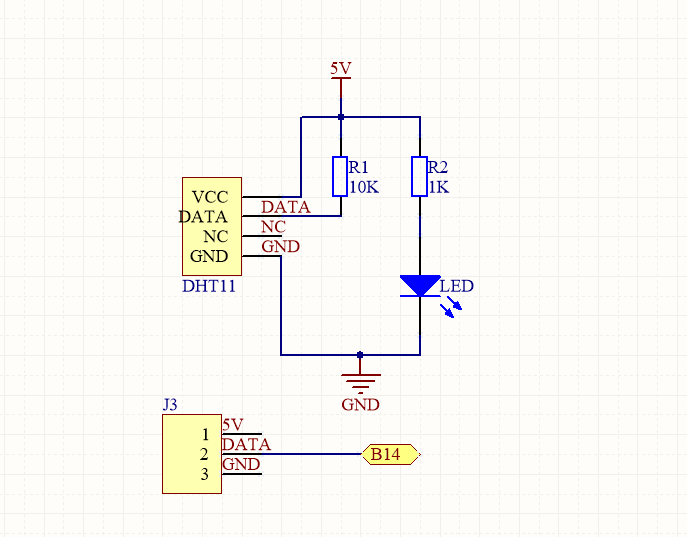
Raspberry PiとのDHT11の回路図
上記のグラフのB14はBCM GPIO#14(TXD)またはPhysical pin#8またはwiringPi#15を表します。 注:BはBCM(Broadcomピン番号)を意味します。BCMピン番号、Physical pin番号、wiringPi番号とは何かわからない場合は、レッスン3:Raspberry Pi GPIOの概要 をご覧ください。Raspberry PiのGPIOについて詳しく学ぶには、レッスン2:Raspberry Pi GPIOの概要 をご覧ください。
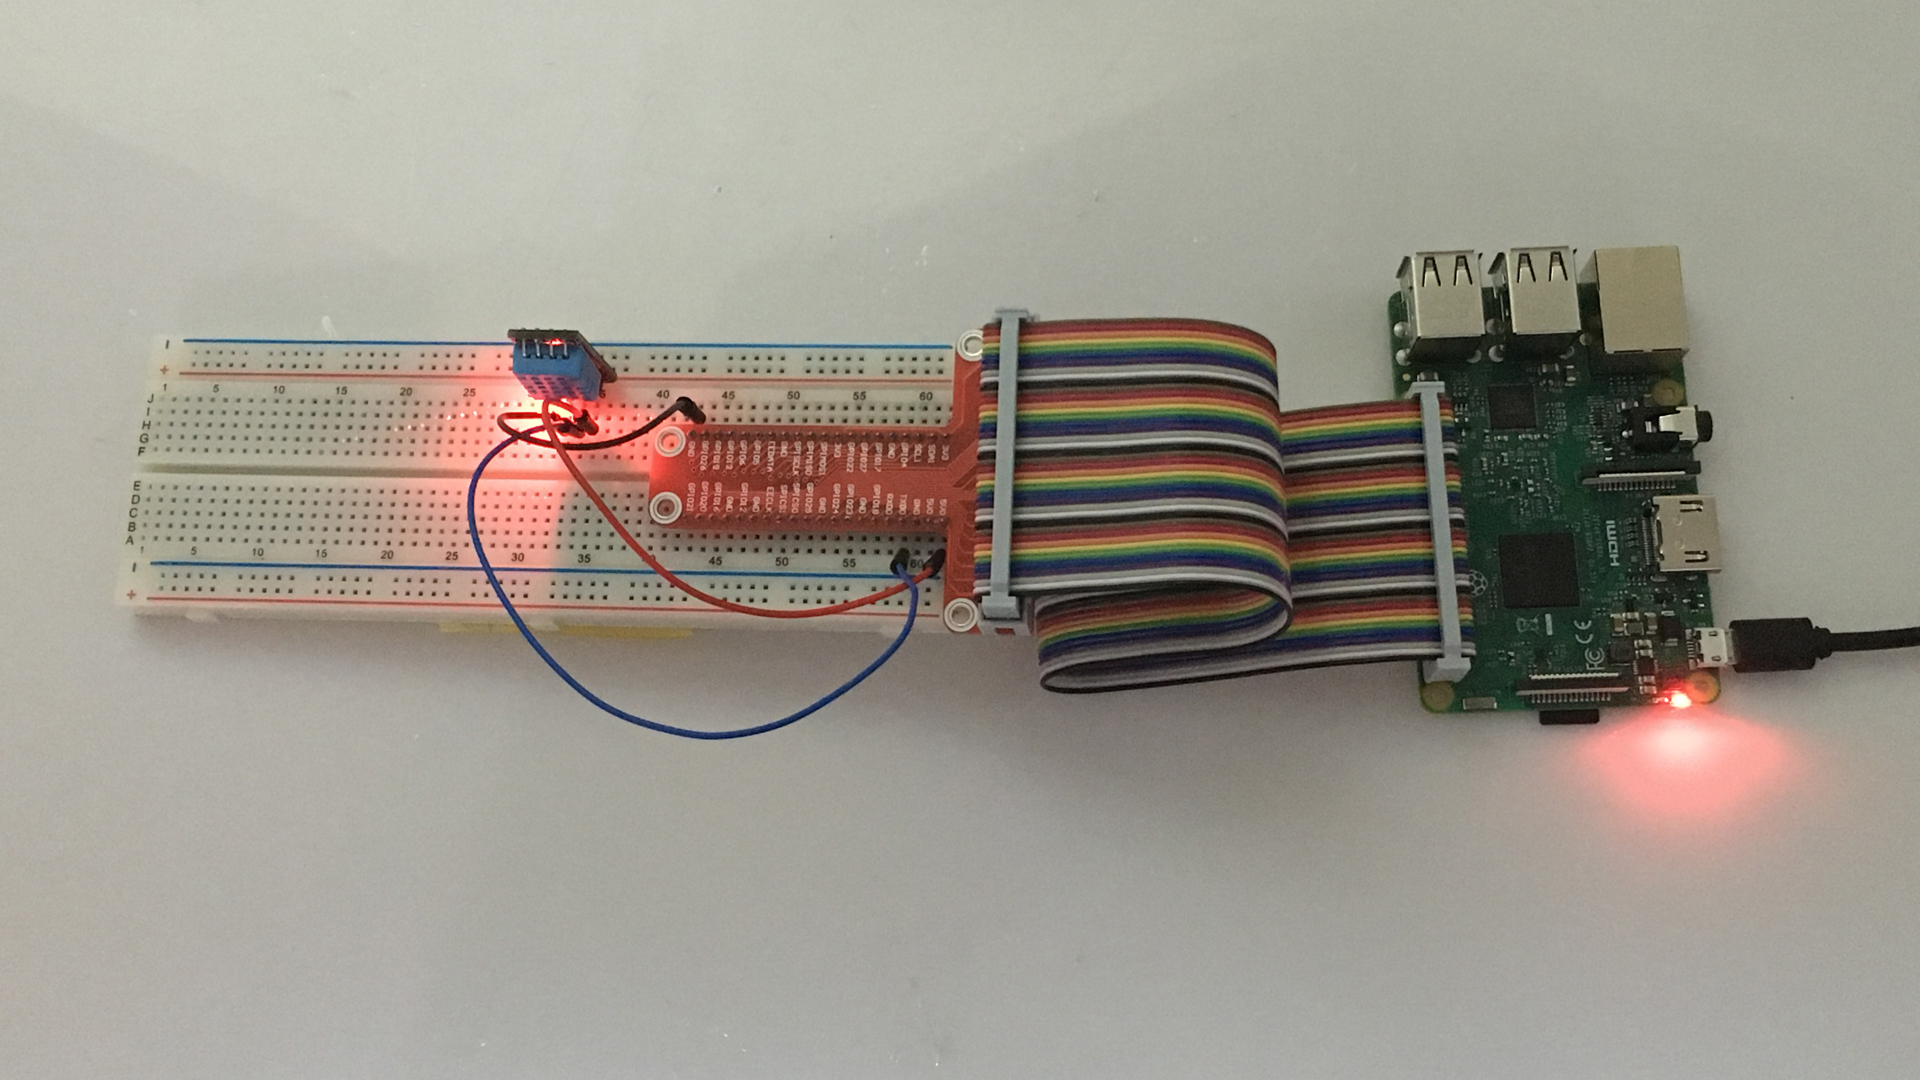
接続グラフ
ソフトウェア
C言語ユーザーとPython言語ユーザー向けに2種類のコードを提供します。
注意:wiringpiライブラリをインストールしていることを確認してください。here をクリックすると、wiringpiのインストールについて詳しく学べます。
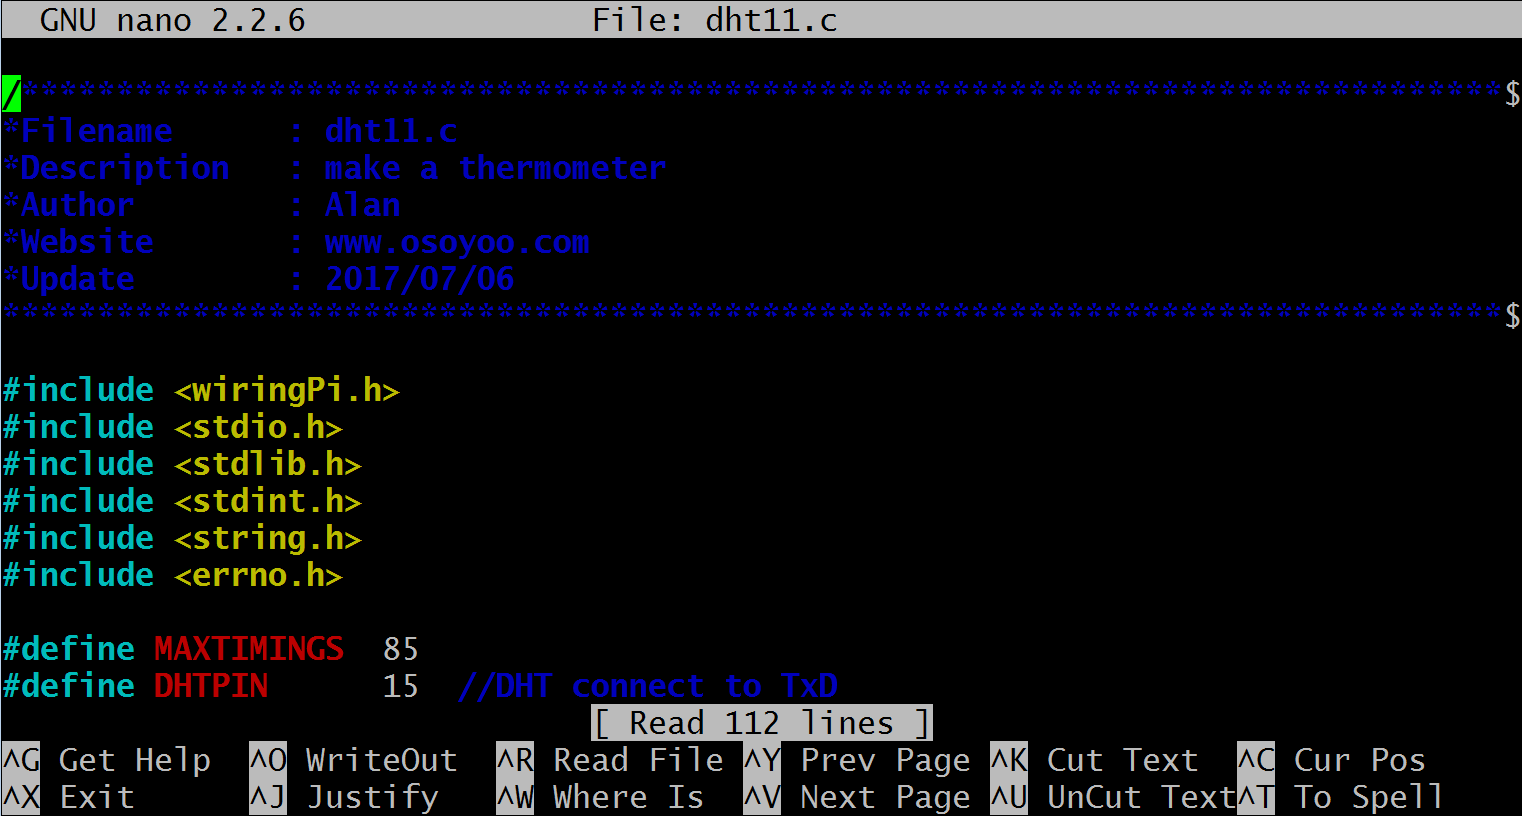
ステップ1) ターミナルに以下のコマンドを入力して、osoyoo.comからサンプルコードdht11.cをダウンロードしてください。
cd ~
wget http://osoyoo.com/driver/pi3_start_learning_kit_lesson_17/dht11.c
注:sudo nano dht11.c
3) コードをコンパイルする
gcc -Wall -o dht11 dht11.c -lwiringPi
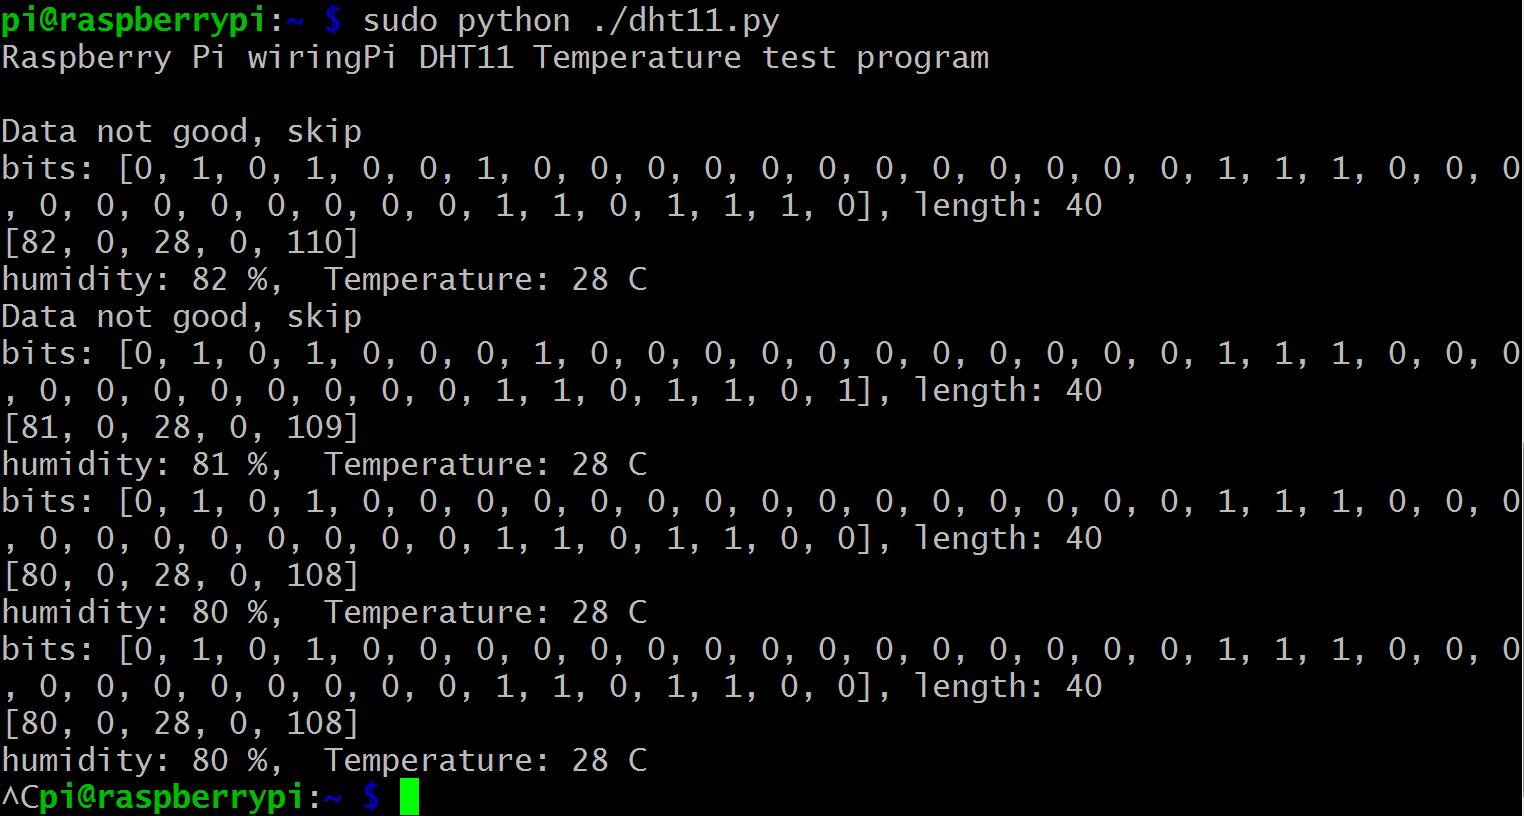
4) プログラムを実行する
sudo ./dht11
5) プログラムの結果
プログラムが実行されると、ターミナルに実際の温度と湿度が繰り返し表示されます。
 #include
#include
#include
#include
#include
#include

#define MAXTIMINGS  85
#define DHTPIN      15  //DHT connect to TxD
int dht11_dat[5] ={0,0,0,0,0};//store DHT11 data

void read_dht11_dat()
{
    uint8_t laststate = HIGH;
    uint8_t counter = 0;
    uint8_t j = 0,i;
    float f;//fahrenheit

    dht11_dat[0] = dht11_dat[1] = dht11_dat[2] = dht11_dat[3] = dht11_dat[4] = 0;

    //pull pin down to send start signal
    pinMode( DHTPIN, OUTPUT );
    digitalWrite( DHTPIN, LOW );
    delay( 18 );
    //pull pin up and wait for sensor response
    digitalWrite( DHTPIN, HIGH );
    delayMicroseconds( 40 );
    //prepare to read the pin
    pinMode( DHTPIN, INPUT );

    //detect change and read data
    for ( i = 0; i < MAXTIMINGS; i++ ) { counter = 0; while ( digitalRead( DHTPIN ) == laststate ) { counter++; delayMicroseconds( 1 ); if ( counter == 255 ) { break; } } laststate = digitalRead( DHTPIN ); if ( counter == 255 ) break; //ignore first 3 transitions if ( (i >= 4) && (i % 2 == 0) )
        {
            //shove each bit into the storage bytes
            dht11_dat[j / 8] <<= 1; if ( counter > 16 )
                dht11_dat[j / 8] |= 1;
            j++;
        }
    }
    //check we read 40 bits(8bit x 5) +verify checksum in the last byte
    //print it out if data is good
    if ( (j >= 40) &&
         (dht11_dat[4] == ( (dht11_dat[0] + dht11_dat[1] + dht11_dat[2] + dht11_dat[3]) & 0xFF) ) )
    {
        f = dht11_dat[2] * 9. / 5. + 32;
        printf( "Humidity = %d.%d %% Temperature = %d.%d C (%.1f F)\n",
            dht11_dat[0], dht11_dat[1], dht11_dat[2], dht11_dat[3], f );
    }
    else
    {
        printf( "Data not good, skip\n" );
    }
}


void print_info()
{
    printf("\n");
    printf("|***************************|\n");
    printf("|           DHT11 test      |\n");
    printf("| --------------------------|\n");
    printf("| DHT11 connect to GPIO14   |\n");
    printf("| --------------------------|\n");
    printf("|                     OSOYOO|\n");
    printf("|***************************|\n");
    printf("Program is running...\n");
    printf("Press Ctrl+C to end the program\n");
}


int main( void )
{
    if ( wiringPiSetup() == -1 )
    {
        fprintf(stderr,"Can't init wiringPi: %s\n",strerror(errno));
        exit(EXIT_FAILURE);
    }
    print_info();
    while ( 1 )
    {
        read_dht11_dat();
        delay(1000);//wait ls to refresh
    }

    return(0);
}
Pythonユーザー向け
Python言語でプログラミングする場合、通常、Rasbian Jessie OSに付属するGPIOライブラリであるRPi.GPIOを使用します。こちら をクリックすると、RPI.GPIOとPythonについて詳しく学べます。
1) ターミナルコマンドに従って、サンプルのPythonコードを/home/piにダウンロードしてください。
cd ~
wget http://osoyoo.com/driver/pi3_start_learning_kit_lesson_17/dht11.py
注:
sudo nano dht11.py
3) プログラムを実行する
sudo python ./dht11.py
4) プログラムの結果
プログラムが実行されると、ターミナルに実際の温度と湿度が繰り返し表示されます。
import RPi.GPIO as GPIO
import time

#DHT11 connect to BCM_GPIO14
DHTPIN = 14

GPIO.setmode(GPIO.BCM)

MAX_UNCHANGE_COUNT = 100

STATE_INIT_PULL_DOWN = 1
STATE_INIT_PULL_UP = 2
STATE_DATA_FIRST_PULL_DOWN = 3
STATE_DATA_PULL_UP = 4
STATE_DATA_PULL_DOWN = 5

def read_dht11_dat():
    GPIO.setup(DHTPIN, GPIO.OUT)
    GPIO.output(DHTPIN, GPIO.HIGH)
    time.sleep(0.05)
    GPIO.output(DHTPIN, GPIO.LOW)
    time.sleep(0.02)
    GPIO.setup(DHTPIN, GPIO.IN, GPIO.PUD_UP)

    unchanged_count = 0
    last = -1
    data = []
    while True:
        current = GPIO.input(DHTPIN)
        data.append(current)
        if last != current:
            unchanged_count = 0
            last = current
        else:
            unchanged_count += 1
            if unchanged_count > MAX_UNCHANGE_COUNT:
                break

    state = STATE_INIT_PULL_DOWN

    lengths = []
    current_length = 0

    for current in data:
        current_length += 1

        if state == STATE_INIT_PULL_DOWN:
            if current == GPIO.LOW:
                state = STATE_INIT_PULL_UP
            else:
                continue
        if state == STATE_INIT_PULL_UP:
            if current == GPIO.HIGH:
                state = STATE_DATA_FIRST_PULL_DOWN
            else:
                continue
        if state == STATE_DATA_FIRST_PULL_DOWN:
            if current == GPIO.LOW:
                state = STATE_DATA_PULL_UP
            else:
                continue
        if state == STATE_DATA_PULL_UP:
            if current == GPIO.HIGH:
                current_length = 0
                state = STATE_DATA_PULL_DOWN
            else:
                continue
        if state == STATE_DATA_PULL_DOWN:
            if current == GPIO.LOW:
                lengths.append(current_length)
                state = STATE_DATA_PULL_UP
            else:
                continue
    if len(lengths) != 40:
        print "Data not good, skip"
        return False

    shortest_pull_up = min(lengths)
    longest_pull_up = max(lengths)
    halfway = (longest_pull_up + shortest_pull_up) / 2
    bits = []
    the_bytes = []
    byte = 0

    for length in lengths:
        bit = 0
        if length > halfway:
            bit = 1
        bits.append(bit)
    print "bits: %s, length: %d" % (bits, len(bits))
    for i in range(0, len(bits)):
        byte = byte << 1 if (bits[i]): byte = byte | 1 else: byte = byte | 0 if ((i + 1) % 8 == 0): the_bytes.append(byte) byte = 0 print the_bytes checksum = (the_bytes[0] + the_bytes[1] + the_bytes[2] + the_bytes[3]) & 0xFF if the_bytes[4] != checksum: print "Data not good, skip" return False return the_bytes[0], the_bytes[2] def main(): print "Raspberry Pi wiringPi DHT11 Temperature test program\n" while True: result = read_dht11_dat() if result: humidity, temperature = result print "humidity: %s %%, Temperature: %s C" % (humidity, temperature) time.sleep(1) def destroy(): GPIO.cleanup() if __name__ == '__main__': try: main() except KeyboardInterrupt: destroy()


Any suggestions on how to make this sensor on Scratch on Raspberry Pi? Scratch documentation only covers the DS18B20 sensor.
https://www.raspberrypi.org/documentation/usage/scratch/gpio/
Do you mean you want know how to connect the DHT11 sensor to Raspberry pi? or how to connect DS18B20 sensor to raspberry Pi?
Do you use raspberry Pi 2 or Pi 3?
If you want to learn more about GPIO port with raspberry Pi 3 and T type adapter, Please review our lessone 2: https://osoyoo.com/2017/06/26/introduction-of-raspberry-pi-gpio/.
Use DHT11 sensor with Raspberry pi.
I would like to code in Scratch, not Python or C, since I am using it to teach kids coding. The link I sent before https://www.raspberrypi.org/documentation/usage/scratch/gpio/ is general documentation for using Scratch to code on Pi, but it doesn’t cover your sensor DHT11. I am wondering if you have/could create some sample codes for Scratch.
It is Pi 3.
Thanks.