Objective:
In this project we will connect Robot Car to WIFI and Use an APP to control a Tank car and its 3 DOF arm.
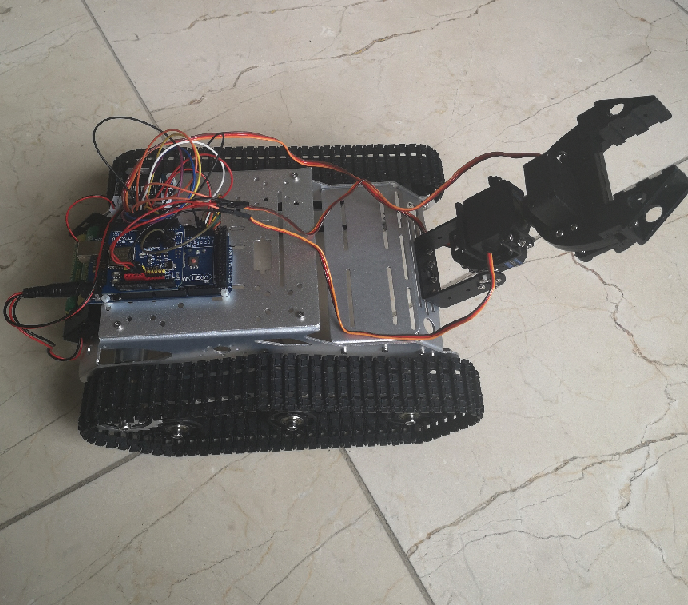
Parts and Devices:
1)Tank Car Chassis
https://www.amazon.com/gp/product/B0773GBVCZ
2)OSOYOO MEGA2560 Board or Arduino MEGA2560 Board
https://osoyoo.store/products/osoyoo-mega2560-r3-control-board-atmega2560-16au-usb-cable-compatible-with-arduino?variant=31180322078831
3)OSOYOO WIFI Shield
https://osoyoo.store/products/esp8266-wifi-shield-for-osoyoo-robot-car?_pos=1&_sid=2515d2b03&_ss=r
4)OSOYOO Model X motor driver board(L298N)
https://osoyoo.store/products/osoyoo-model-x-motor-driver-module-for-arduino-v2-0-robot-carmodel-2018000800?variant=31648878755951
5)OSOYOO 3 DOF robot arm and Servo
Hardware Installation :
Step 1: Install the smart car basic frame work as per Smart Car Lesson 1 . If you have already completed installation in Lesson 1 , please remove all wires on Osoyoo Uno R3 board
Step 2: Insert to Osoyoo WIFI Shield onto your UNO board
Step 3: Install 3-DOF Robot Arm in the front position of the tank Chassis
Step 4: Connect 3 servo motor, OSOYOO MODEL X motor driver module and OSOYOO Wifi Shield as following graph:
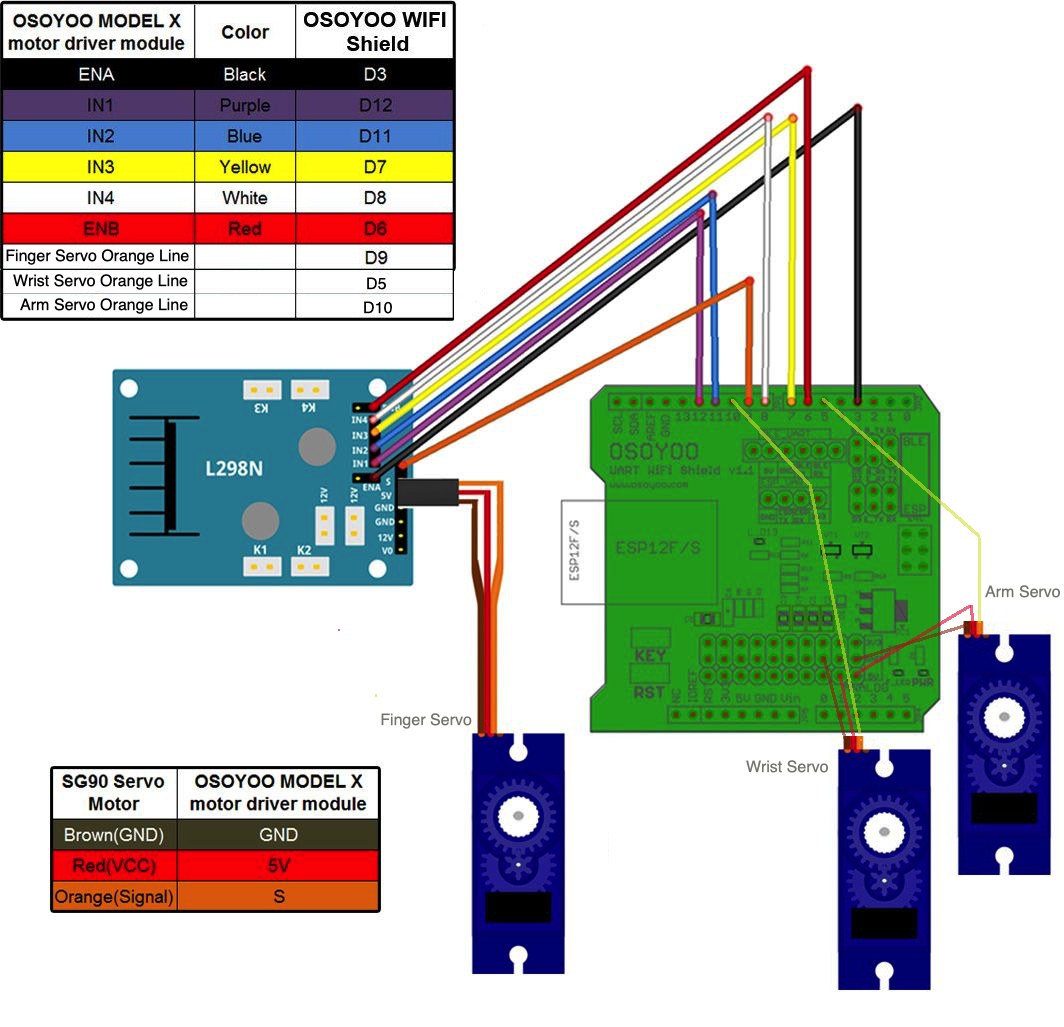
Step 4: Connect ultrasonic module, buzzer module with OSOYOO WIFI shield as below connection diagram
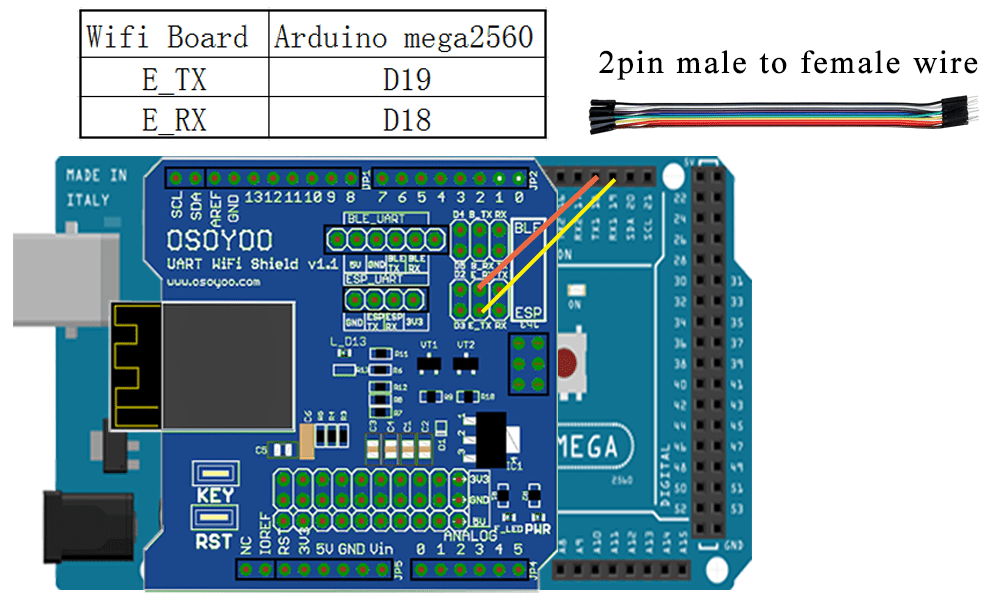
Step 6: Connect E_TX (Esp8266 TX) pin to Arduino D19(RX1) and E_RX(ESP8266_RX) pin to D18(TX1) as per following picture:
Software Installation:
Step 1) Download OSOYOO WIFI UDP Robot Car control APP
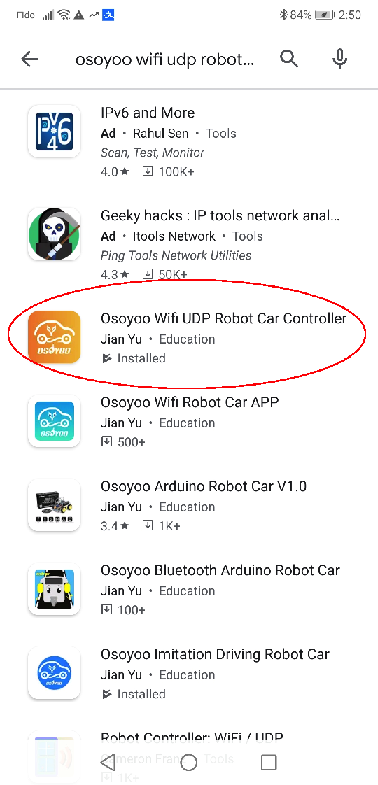
In Google Play or Apple Store, please search key words “OSOYOO WIFI UDP Robot Car”, you will find an orange icon APP as following:
You can also DOWNLOAD Android APP directly from https://osoyoo.com/driver/arduino-udp/udp-robot.apk
Step 2) Please download the library zip file from WiFiEsp-master .Open Arduino IDE ->click Sketch ->Include Library ->Add .ZIP library , then load above zip file into Arduino.

Step 3) Arduino Sketch code Installation:
Download: https://osoyoo.com/driver/robot-arm/wifi-arm.zip
Unzip above file , you will see a wifi-arm sub-folder.
1) Go to wifi-arm sub folder, Run sketch code file wifi-arm.ino

2) You need change following code in line 31,32:
char ssid[] = “***”; // replace this with your router wifi SSID
char pass[] = “***”; // replace with your wifi password
3) Upload the sketch to Arduino. Finally, click the Serial monitor window in upper right corner of Arduino IDE, you will see following result:
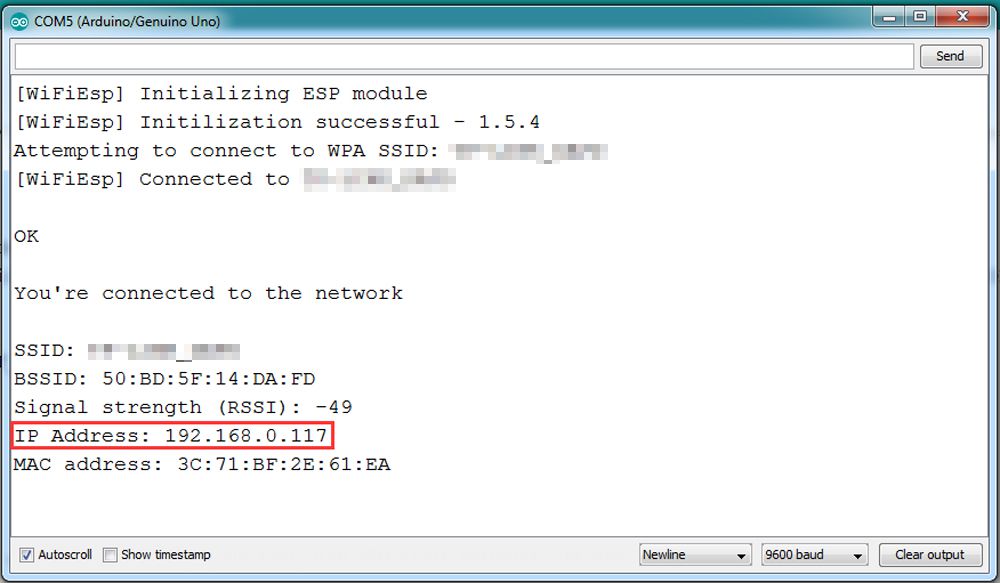
4) In this mode, your will see an IP address which is our LAN IP address assigned by my router. Please write down this IP address and click Setting to set up robot IP address and set this IP address to your APP Setting section (no need change default port 8888 in APP).
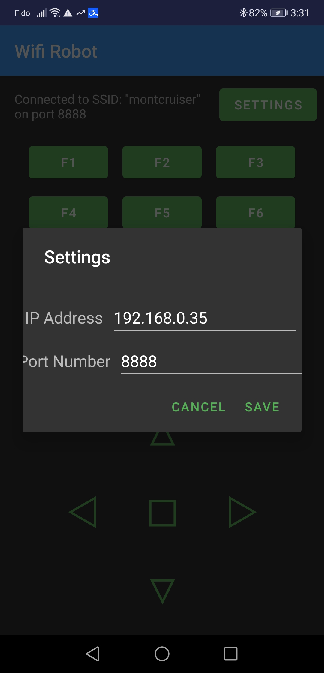
Now your Robot car is connected to your LAN, you can use Mobile phone under same LAN to control the robot car. If your APP is in WAN, you need to go to your Router Control Panel, forward Port 8888 to Robot car LAN IP address, then you can use Router IP to control the car. This feature makes our robot car A REAL INTERNET OF THING device
Now your Robot car become a WIFI Hot Spot, you can use Mobile phone control the robot car.
Final Testing:
Trun on the car. Now click Setting to set up robot IP address, use default port 8888
To control the Robot Arm movement:
| Key |
Movement |
| △ |
Go Forward |
| ▽ |
Go Backward |
| ▷ |
Right turn |
| ◃ |
Left Turn |
| ▢ |
Stop |
| F1 |
open finger |
| F4 |
close finger |
| F2 |
arm down |
| F5 |
arm up |
| F3 |
rotate finger clockwise |
| F6 |
rotate finger counter clockwise |
Note: F1~F6 are further development functions in the future.
FAQ about the WIFI UDP APP and sketch Code:
Q 1)What happened when you press buttons in OSOYOO WiFi UDP Robot Car APP ?
A: When you press a button of the APP, APP will send a single-letter message through UDP protocol to target device (in this example, our Arduino Wifi Shield)
| Button |
UDP message |
| F1 |
F |
| F2 |
G |
| F3 |
H |
| F4 |
I |
| F5 |
J |
| F6 |
K |
| △ |
A |
| ▽ |
B |
| ▷ |
R |
| ◃ |
L |
| ▢ |
E |
| obstacle |
O |
| tracking |
T |
Q2)How does Arduino handle the UDP command?
Line 166 to line 202 in wifi-arn.ino file are the codes which react to Cell phone command. For example, when ▲ is pressed, according to Q1 table, a letter “A” command was sent from Cell phone to Arduino. case ‘A’ …. statement will make the car make car moving forward.
        char c=packetBuffer[0];
            switch (c)    //serial control instructions
            {

               case 'A':go_advance(SPEED,SPEED);break;
               case 'L':turn_left(SPEED,SPEED);break;
               case 'R':turn_right(SPEED,SPEED);break;
               case 'B':go_back(SPEED,SPEED);break;
               case 'E':stop_Stop();break;

               case 'F':finger.write(0);break;  //open finger
               case 'G':
                  arm_position+=5;
                  if(arm_position>180) arm_position=180;
                  arm.write(arm_position);
                  ;break;  //open finger
               case 'H':
                  wrist_position+=5;
                  if(wrist_position>180) wrist_position=180;
                   wrist.write(wrist_position);
                  ;break;  //open finger
               case 'I':finger.write(180);break; //close finger
               case 'J':
                  arm_position-=5;
                  if(arm_position<0) arm_position=0;
                   arm.write(arm_position);
                  break;
               case 'K':
                  wrist_position-=5;
                  if(wrist_position<0) wrist_position=0;
                  wrist.write(wrist_position);
                  break;

           //    case 'O':Drive_Status=AUTO_DRIVE_UO;Serial.println("go OBSTACLE");WorkMode="OBSTACLE";break;
           //    case 'T':Drive_Status=AUTO_DRIVE_LF; Serial.println("GO line follow...");WorkMode="line follow";break;
               default:break;
              } //END OF ACTION SWITCH

  }


