In Lesson 1, we use Basic board and OSOYOO ESP8266 WIFI module to make simple website and displayed “Hello World!” in your browser.
In this lesson, we will use DHT11 to grab environment temperature and humidity data and combine the data into your website. Then you can use a browser to monitor the remote temperature and humidity. This kind of application is very useful in farming, fire alarm system and environmental data collection projects.

Basic board x 1
OSOYOO ESP8266 WIFI Module x 1
DHT11 sensor Module x 1
Breadboard and Jumper wires

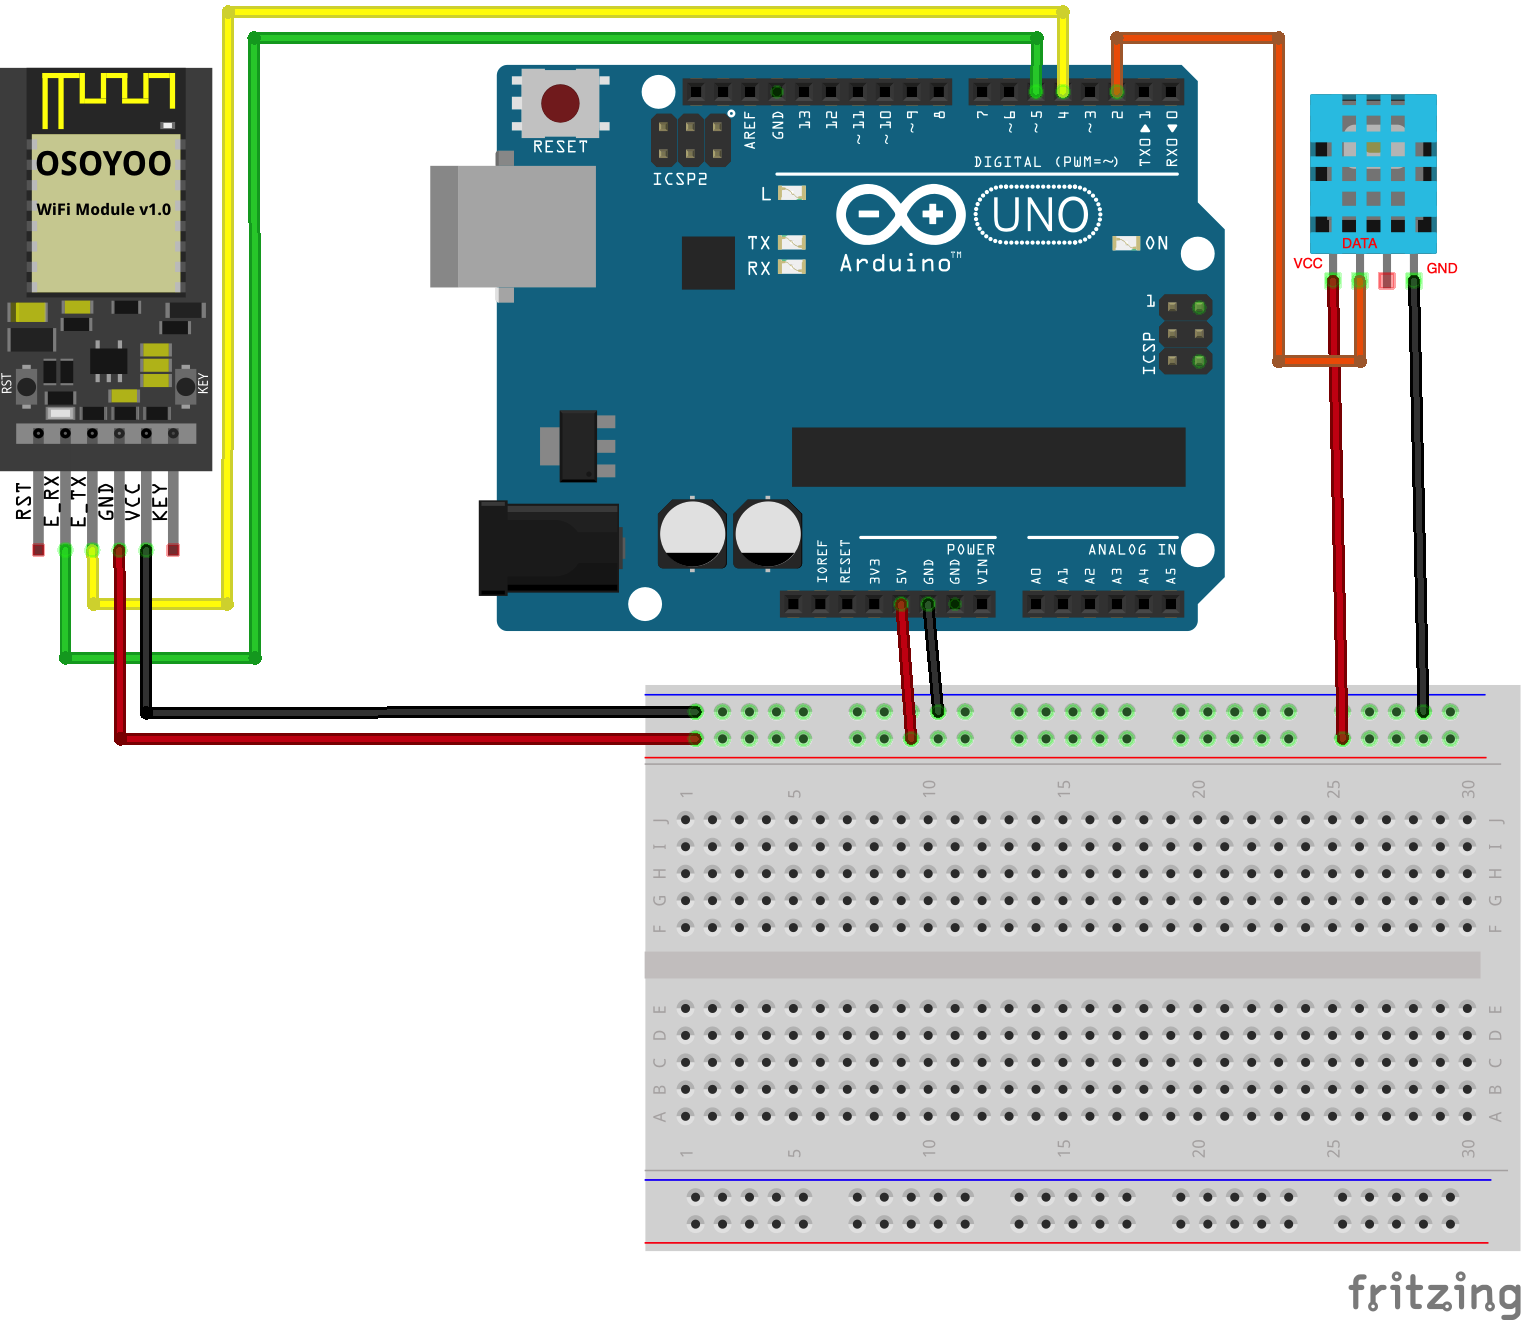
Wire Connection:
| OSOYOO WIFI Module |
Basic board |
| E_RX |
D5 |
| E_TX |
D4 |
| GND |
GND |
| VCC |
5V |
| DHT11 Module |
Basic board |
| Data |
D2 |
| GND |
GND |
| VCC |
5V |

Download the Fritzing file from https://osoyoo.com/driver/osoyoo-esp8266-module/lesson2/osoyoo-wifi-module-lesson2.fzz

Step A) Install required IDE libraries:
Before you program this project, you need install IDE and WiFiEsp-master.zip library. If you haven’t installed these software, please go to lesson 1 to install them.
You also need. to download install DHT11 library into your IDE.
Download link: https://osoyoo.com/wp-content/uploads/samplecode/DHT.zip
Step B) Download sample code from https://osoyoo.com/driver/osoyoo-esp8266-module/lesson2/esp8266-lesson2.zip, unzip the file and double click the esp8266-lesson2.ino file.
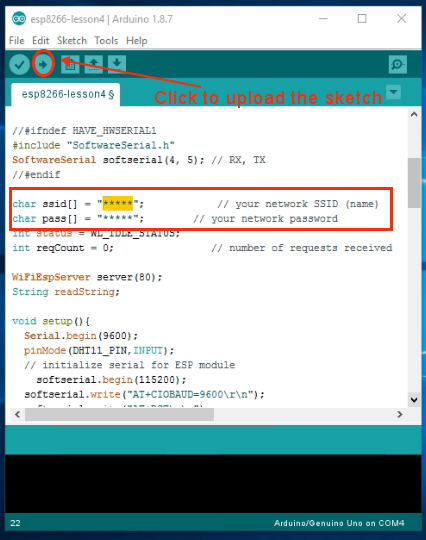
Step C) find following line in your sketch code, the replace the SSID and wifi password to match your home wifi router setting:
char ssid[] = “******”; // your network SSID (name)
char pass[] = “******”; // your network password


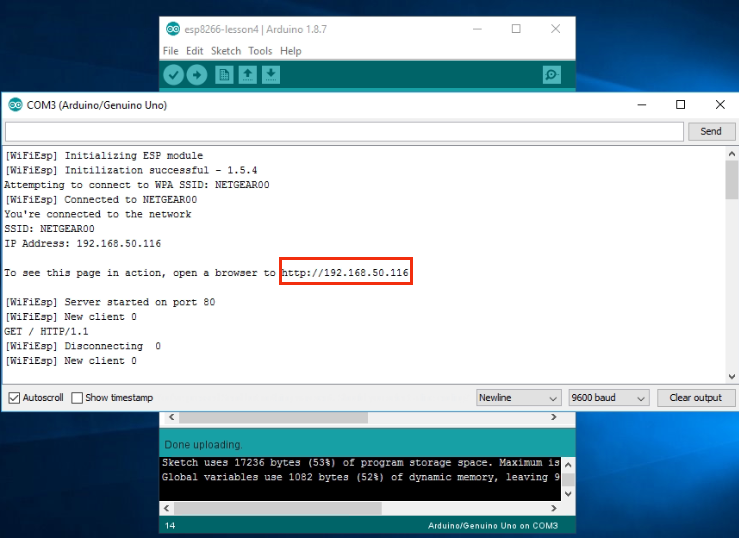
After uploading the sketch code to your Basic board, Open your Serial Monitor, you can see your router will assign an IP address to your Basic board, as following:

In above example, you can see your Basic board IP address is 192.168.50.116
Now use another computer or your cell phone’s browser to visit url : http://192.168.50.116
Your browser will show following result in your web page:
ESP8266 Module Lesson 2
Real time temperature: 26.42 C ;real time Humidity: 35.40%


