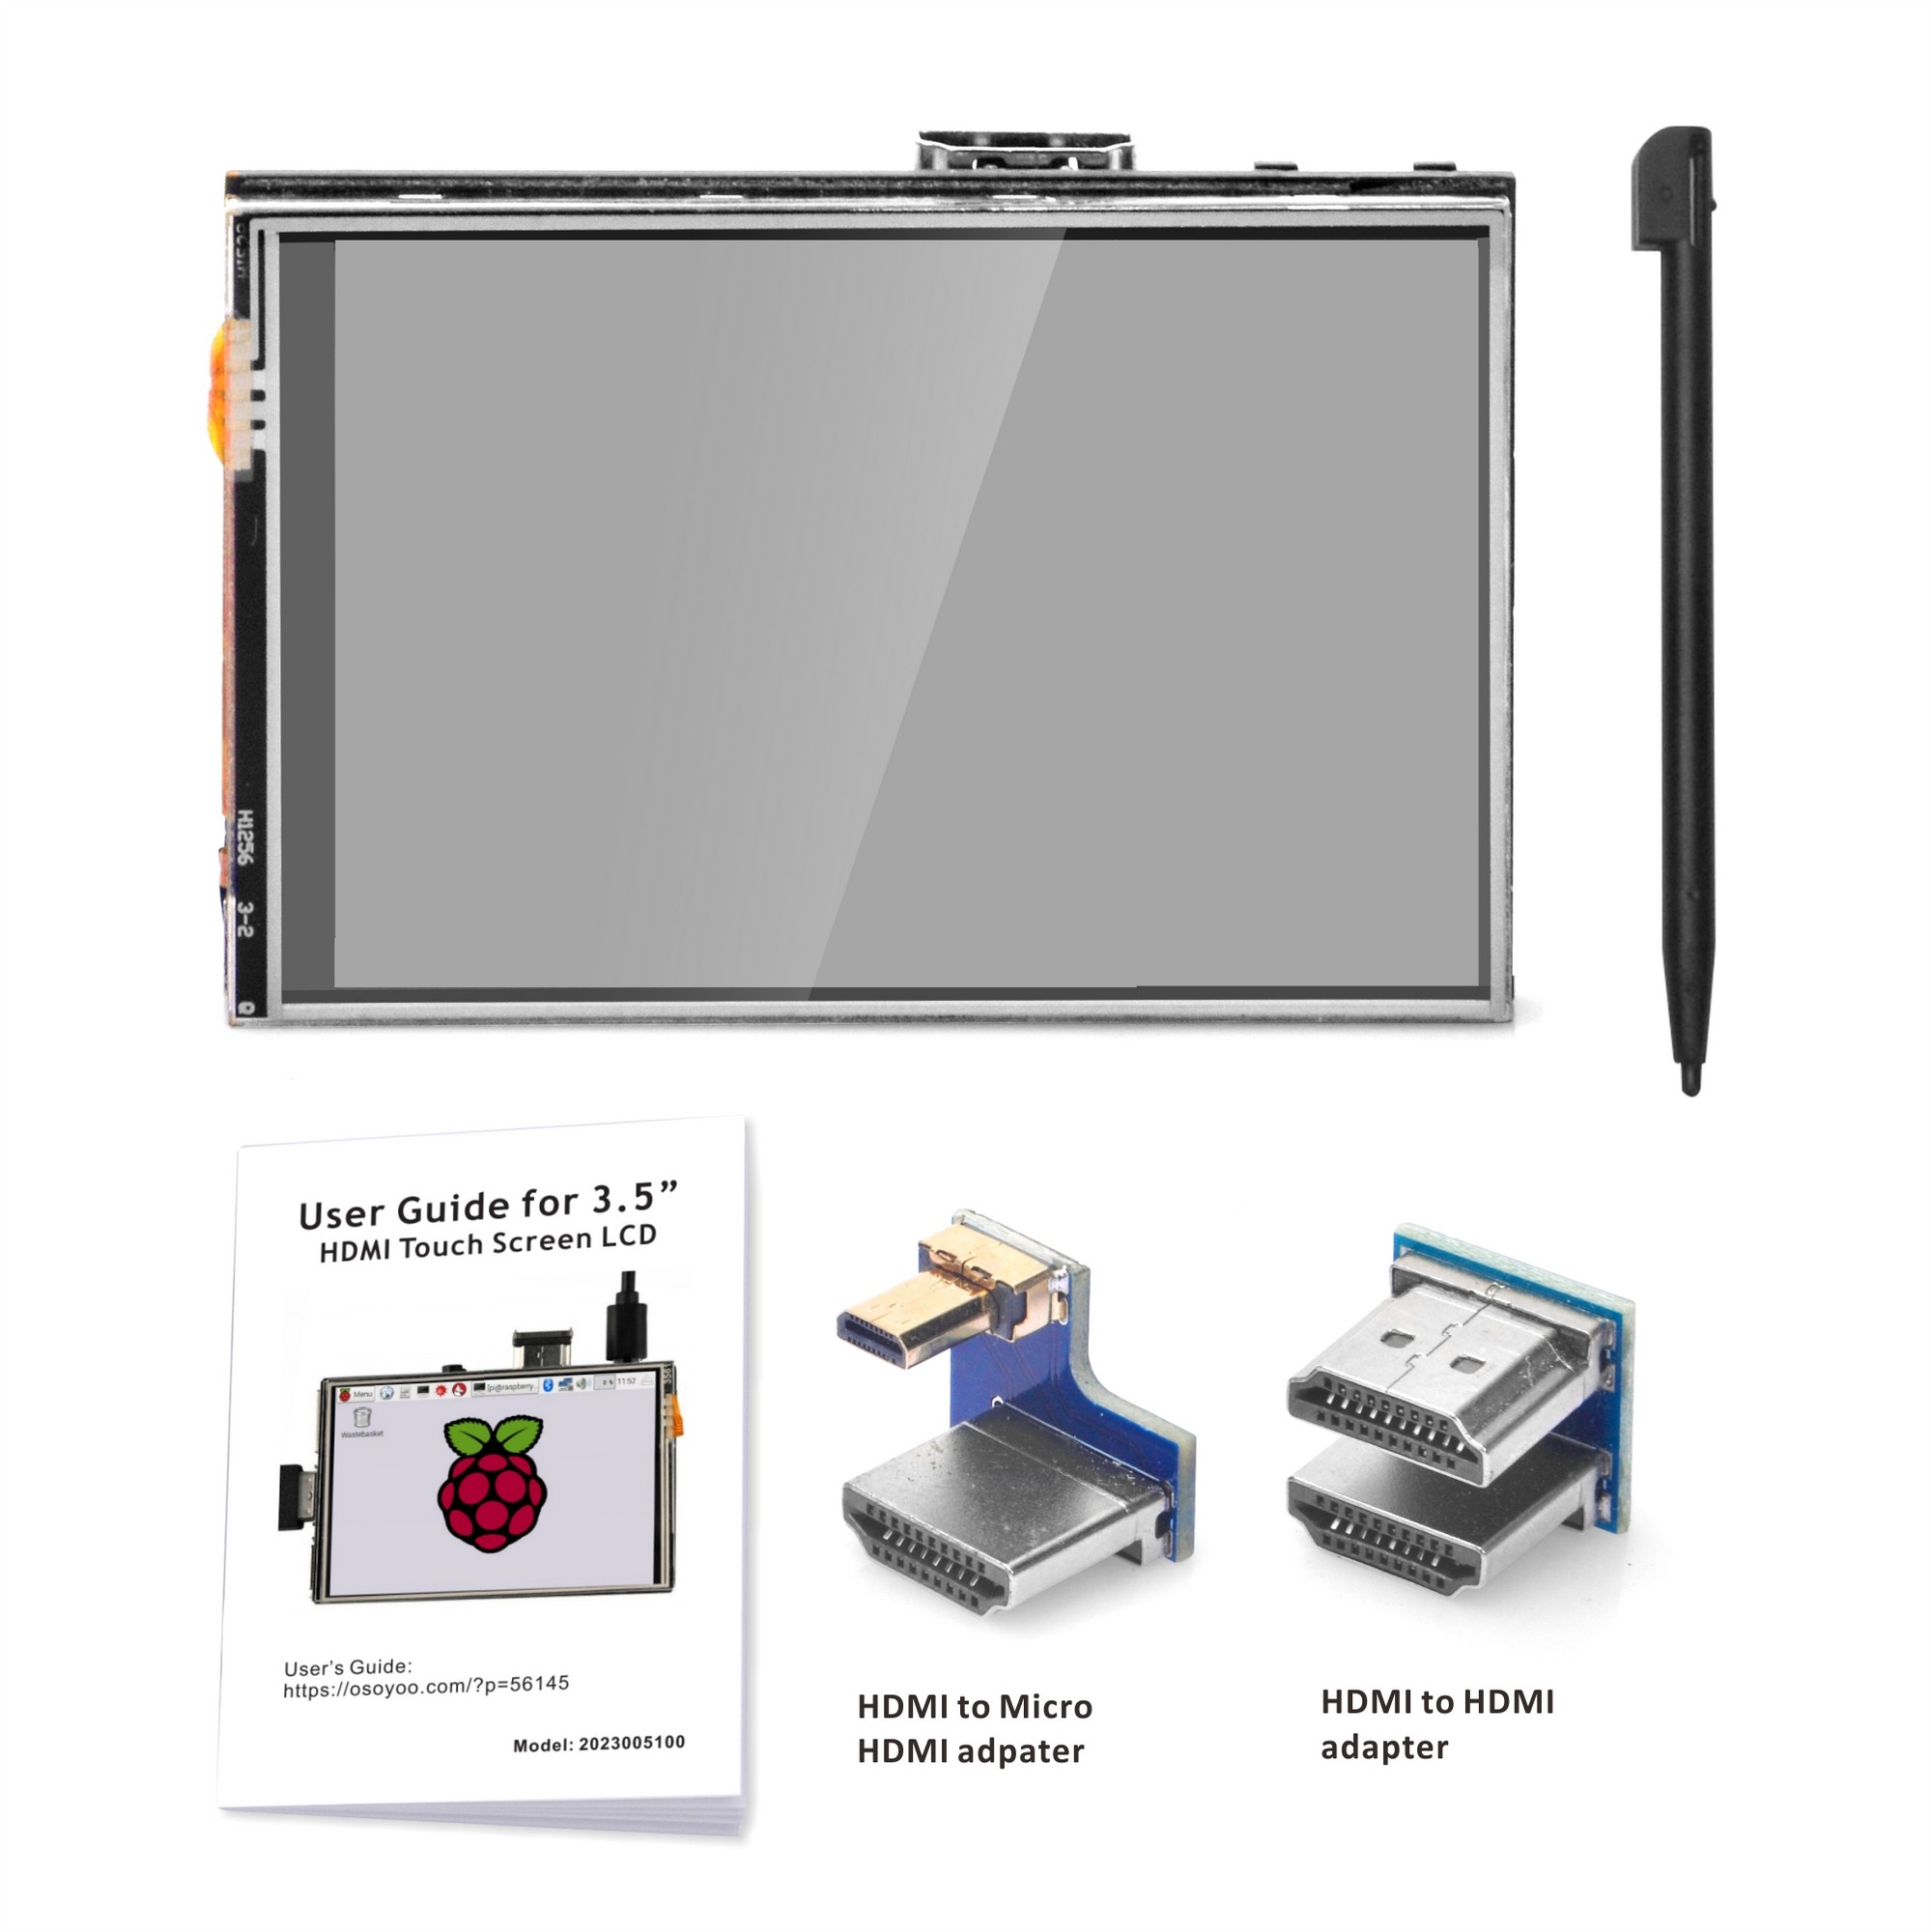
製品名: OSOYOO 3.5インチ HDMI 抵抗膜方式タッチスクリーン
対応OS: Raspberry Pi OS Buster & Bullseye
対応機種: Raspberry Pi 4, 3B+, 3B
ドライバー: HDMI-show (GitHub)
1概要
OSOYOO 3.5インチ HDMI 抵抗膜方式タッチスクリーンは、携帯性と精度の両方を必要とするRaspberry Piユーザー向けに特別に設計された、高性能でコンパクトなディスプレイソリューションです。従来のSPI専用スクリーンとは異なり、このディスプレイは高速ビデオ伝送のためにHDMIインターフェースを利用しており、よりスムーズな視覚体験と、ディスプレイ出力のための非常にシンプルな「プラグアンドプレイ」セットアップを実現しています。
このチュートリアルでは、このスクリーンをRaspberry Pi OS (Buster & Bullseye)に統合する全プロセスを案内します。携帯型ゲーム機、スマートホームコントローラー、またはポータブルLinuxワークステーションを構築している場合でも、このガイドではハードウェアの接続からタッチドライバーのインストールまで、すべてを網羅しています。
2主な特徴
- 高精細入力: 物理解像度480×320のHDMIビデオ入力をサポートし、最大1920×1080までスケーリング可能です。
- 精密な制御: 高感度な抵抗膜方式タッチパネルを搭載し、スタイラスペンや指先による正確なナビゲーションが可能です。
- シームレスな統合: 電源とタッチデータのためにRaspberry PiのGPIOヘッダーに完璧にフィットするように設計されており、外部電源ケーブルの必要性を排除しています。
- システム互換性: DebianベースのBusterおよびBullseyeディストリビューション向けに完全に最適化されており、レガシープロジェクトや現在のプロジェクトに安定した環境を提供します。
3必要なもの
- OSOYOO 3.5インチ HDMI タッチスクリーン
- Raspberry Pi (4, 3B+, または 3B)
- Raspberry Pi OS (Buster/Bullseye) がプリインストールされたMicroSDカード
- HDMIアダプター/コネクター (スクリーンに付属)
4タッチドライバーのインストール
既存のシステムに基づいて3.5インチHDMIタッチスクリーンのタッチドライバーをインストールできますが、Raspberry Pi OSのみをサポートしています。
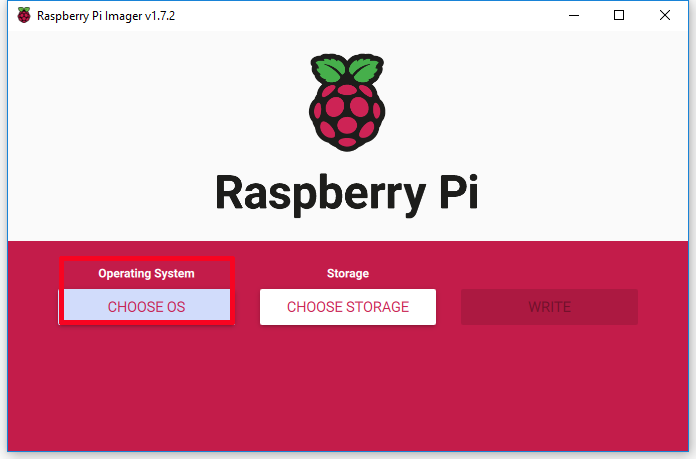
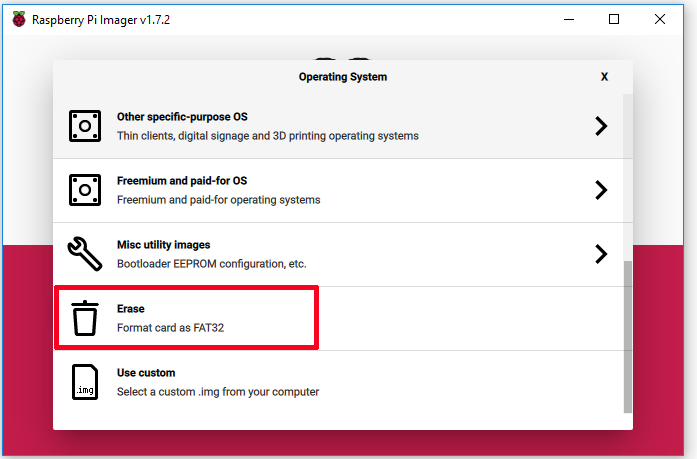
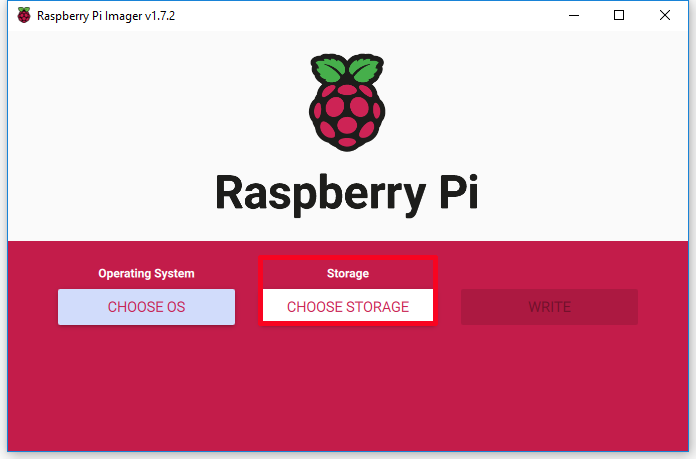
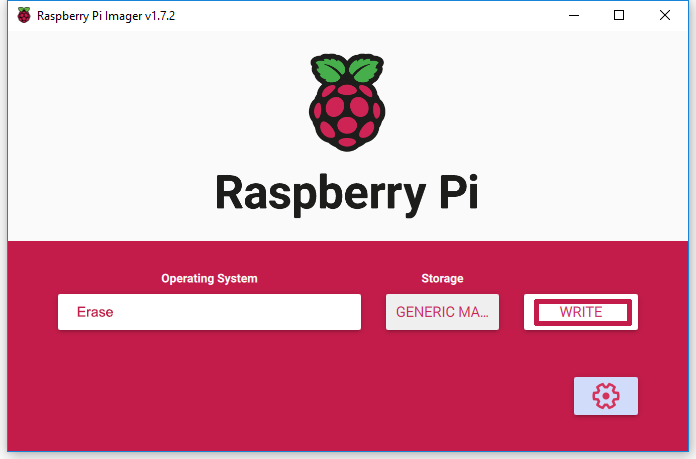
2Micro SDカードのフォーマット
USB Micro SDカードリーダーを使用して、新しくフォーマットされたMicro SDメモリカード(TFカード)を準備します。推奨サイズは16G、32Gです。Micro SDカードのフォーマット方法がわからない場合は、Raspberry Pi Imagerを実行し、「Operating System」フィールドで「Erase」を選択し、「Storage」フィールドで「お使いのMicro SDカード」を選択してから、「WRITE」をクリックしてMicro SDカードをフォーマットしてください。
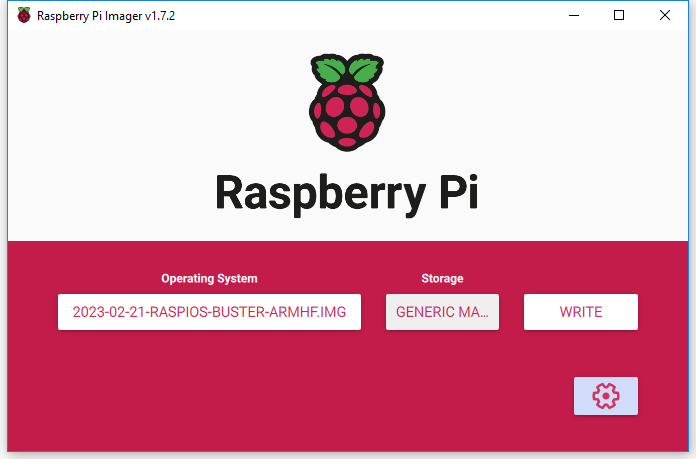
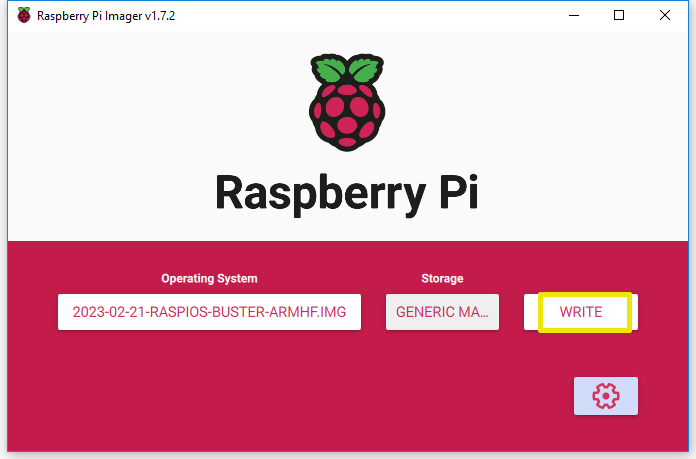
3Raspberry Pi OSをSDカードに書き込む
Raspberry Pi Imagerを実行し、「Operating System」フィールドで「Use custom」を選択してダウンロードした「Raspberry Pi OS」を参照し、「Storage」フィールドで「お使いのSDカード」を選択します。(すでにSDカードにRaspberry Pi OSを書き込んでいる場合は、ステップ3からステップ5をスキップしてください)
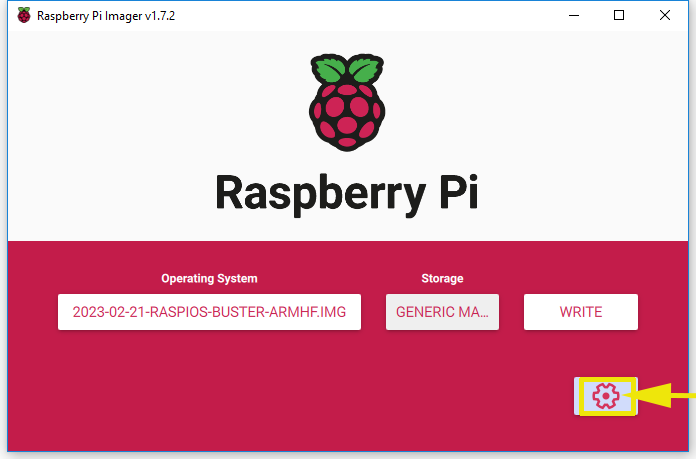
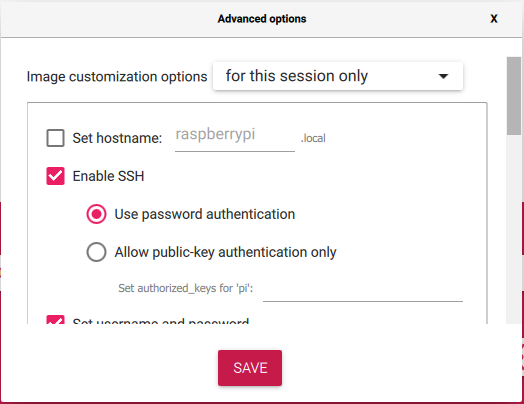
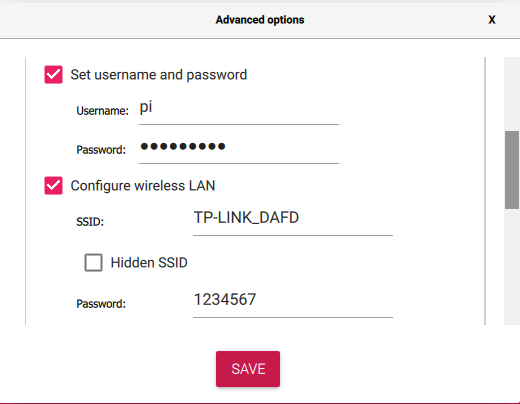
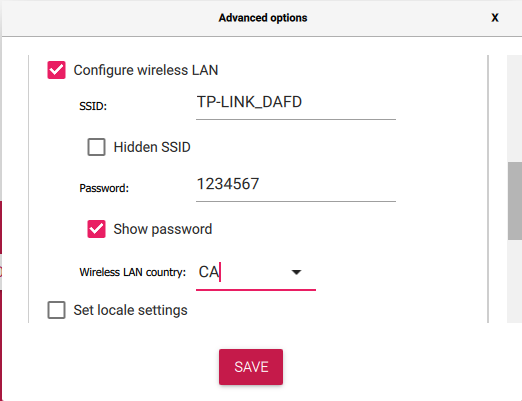
4SSHとWiFiの設定
「設定アイコン」をクリックしてSSHを有効にし、ユーザー名とパスワードを設定し(ここではユーザー名をpi、パスワードをraspberryとします)、無線LANを設定します。その後、「SAVE」をクリックします。
5OSをSDカードに書き込む
「WRITE」をクリックして、Micro SDカードにOSシステム(Raspberry Pi OS)を書き込みます。
6HDMI LCDをRaspberry Piに接続する
HDMI LCDをRaspberry Piに接続します:
- HDMI to HDMIアダプターを使用してRaspberry Pi 2/3にスクリーンを取り付ける
- HDMI to mini HDMIアダプターを使用してRaspberry Pi 4にスクリーンを取り付ける
7Raspberry Piの電源を入れる
このカードをRaspberry Piに挿入し、Raspberry Piの電源を入れます。
注意: Raspberry Piがネットワークに接続されていることを確認してください。
注:
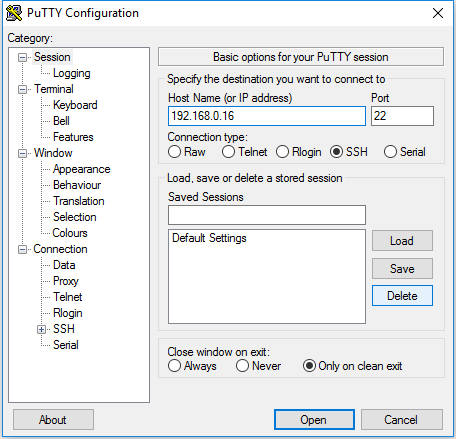
- デフォルトでは解像度が高すぎるため、SSH、VNC、またはその他のリモートデスクトップツールを介してRaspberry Piをリモート制御することをお勧めします。(ここではWindowsユーザー向けにPuTTYを使用します。Raspberry Piのリモート制御の詳細については、こちらをご覧ください:https://osoyoo.com/ja/?p=56660)
- 以下のすべての手順は、OS:
2023-02-21-raspios-buster-armhf.img でテストされています。他のOSでは多少の違いがある場合があります。
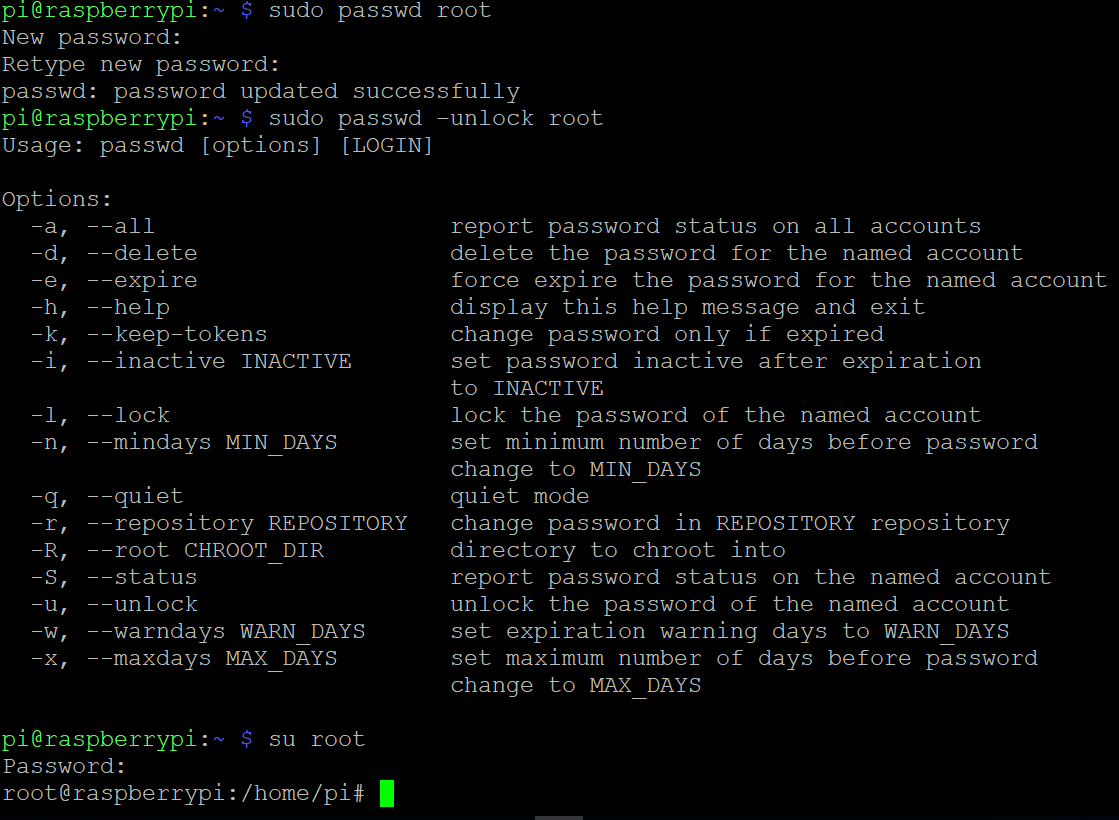
8Root ユーザーに切り替える
SSHツールを使用してRaspberry Piにリモートログインします。ターミナルで以下のコマンドを実行して、ユーザー権限を管理者に切り替えます:
注: 新しいパスワードを入力する際、ウィンドウには何も表示されませんが、実際には入力されています。入力したパスワードを書き留めておき、正しく入力することに集中して Enter を押してください。
sudo passwd root
sudo passwd –unlock root
su root
9ドライバーのダウンロード
ターミナルで以下のコマンドを実行して、ドライバーをダウンロードします:
sudo git clone https://github.com/osoyoo/HDMI-show.git
10フォルダ権限の変更
ターミナルで以下のコマンドを実行して、フォルダの実行権限を変更します:
sudo chmod -R 777 HDMI-show
11ドライバーフォルダに移動
ターミナルで以下のコマンドを実行して、フォルダに移動します:
cd HDMI-show/
12インストールスクリプトの実行
以下のコマンドを実行します:
sudo ./hdmi480320
13Raspberry Piの再起動
以下のコマンドを実行して、Raspberry Piを再起動します:
reboot
画面がオンになるまで約1分待ちます。タッチドライバーがインストールされ、リセットされます。
成功! これで3.5インチHDMIタッチスクリーンのタッチドライバーのインストールが完了しました。
5テクニカルサポート
サポートが必要な場合やフィードバックがある場合は、チケットを送信してください。当チームが1~2営業日以内に返信いたします。
営業時間: 午前9時 ~ 午後6時 GMT+8 (月曜日 ~ 金曜日)
お問い合わせ: [email protected]