Overview
In this lesson, we’ll show how to control SG90 servo using Raspberry Pi.
Hardware Preparation
1 * Raspberry Pi
1 * Breadboard
1 * SG90 servo motor
Jumper wires
1 * T-Extension Board
1 * 40-Pin Cable
Work Principle
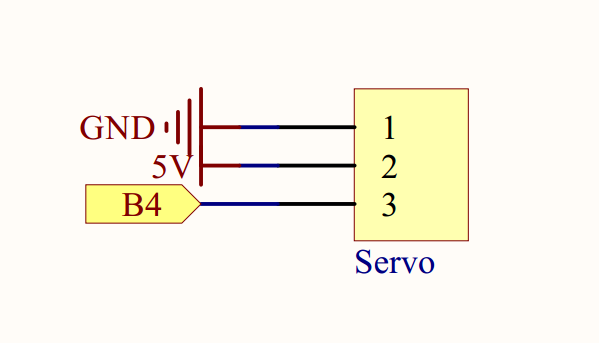
A SG90 is a servo which can rotate approximately 180 degrees. It consists of a DC-motor, position system and gears. there are three wires: the red wire is connected to power, the brown wire is connected to Ground, the yellow wire is connected to PWM Signal. The rotate angle is determined by the equation:
DutyCycle=PulseWidth/Period
Period=1/Frequency
so
DutyCycle=PulseWidth/(1/Frequency)=PulseWidth*Frequency
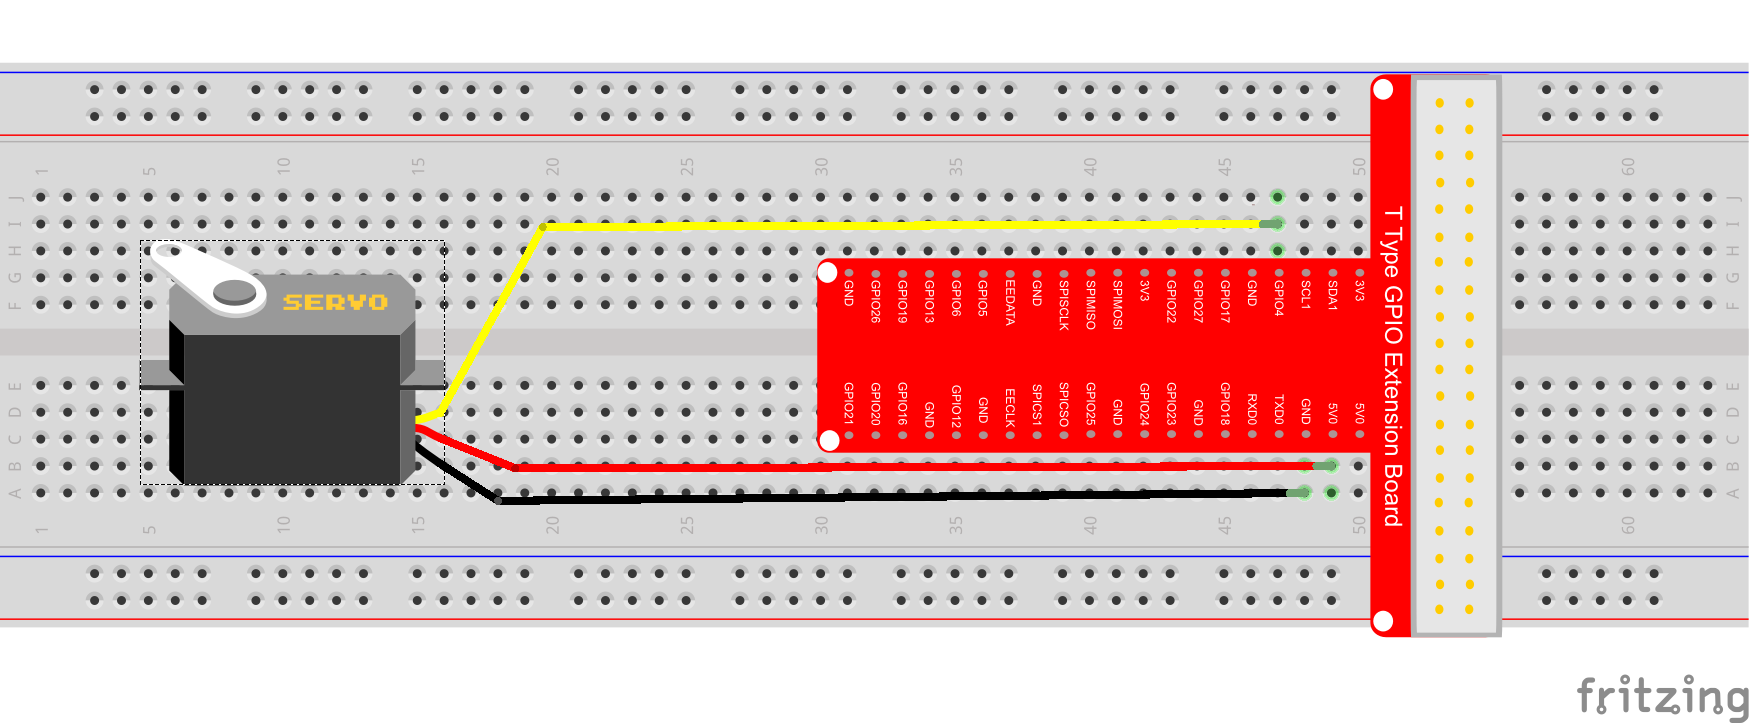
Circuit Graph:

Sample code
For C language user, please take steps as following:
For Raspbian OS, there is a software module called Servoblaster which provides an interface to drive multiple servos via the GPIO pins. In additional ,it can send PWM Signal. In this project we’ll use ServoBlaster to drive SG90 servo. learn more about ServoBlaster, please visit here.
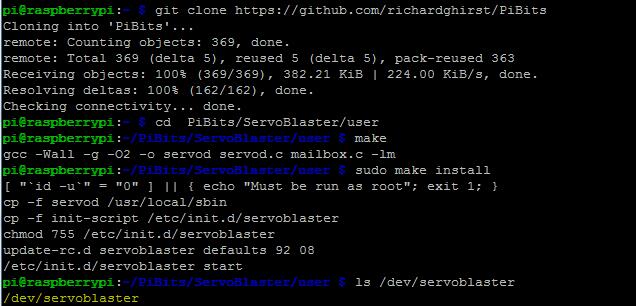
1) We need install the ServoBlaster module firstly,
cd ~
git clone https://github.com/richardghirst/PiBits
cd PiBits/ServoBlaster/user
make
sudo make install
Note: If display error message”servod:cannot parse the hardware name string”, please open file /PiBits/ServoBlaster/user/servod.c, then find code line960, change the code”else if (strstr(modelstr, “BCM2709″)” to
else if (strstr(modelstr, “BCM2709”) || strstr(modelstr, “BCM2835”)), then repeat above steps.
Check the ServoBlaster is installed succesfully by typing following command:
ls /dev/servoblaster
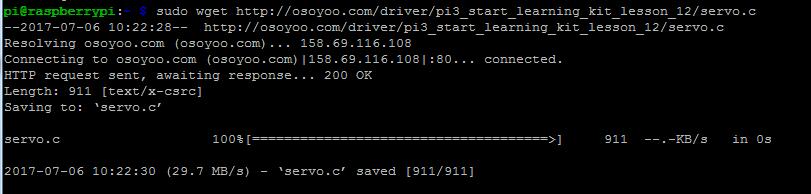
2) Download sample C code to /home/pi by typing following terminal command:
cd ~
sudo wget https://osoyoo.com/driver/pi3_start_learning_kit_lesson_12/servo.c
Note:
If you want to customize the sample code file , you can use nano editor to edit source code by typing following command in terminal:
sudo nano servo.c
2) Compile Code
gcc -Wall -o servo servo.c
4) Run program
sudo ./servo
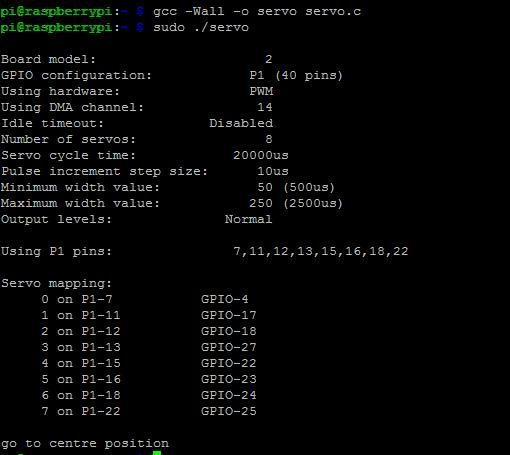
5) Running result
Once run the program, the servo motor will go to centre position, that is 90 degree.
C Sample Code Analysis:
#include < stdio.h >
#include < stdlib.h >
#include < unistd.h >

int main()
{
   // run servo program
    system("sudo /home/pi/PiBits/ServoBlaster/user/servod --pcm");
    printf("\n");
   while(1)
    {
    printf("\n");
    printf("--------------------------------------->\n");
    system("echo 0=50 > /dev/servoblaster");//go to 0 degree
    printf("0                                           degree\n");
    sleep(1);

    system("echo 0=150 > /dev/servoblaster");//go to 90 degree
    printf("                 90                         degree\n");
    sleep(1);

    system("echo 0=250 > /dev/servoblaster");//go to 180 degree
    printf("                                     180    degree\n");
    sleep(1);
    }
    return 0;
}
However it would be better to control servo by using shell script. for more information about shell script, please visit Here. Next we’ll present a shell script example:
1) Download sample code servo.sh from osoyoo.com by typing following commands in terminal:
cd ~
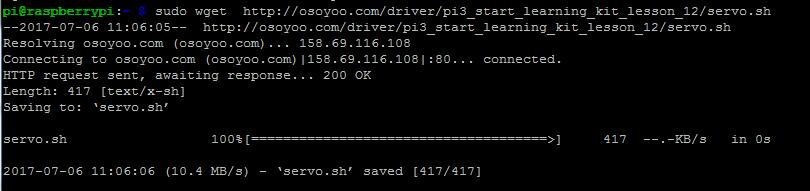
sudo wget http://osoyoo.com/driver/pi3_start_learning_kit_lesson_12/servo.sh
If you want to customize the sample code file , you can use nano editor to edit source code by typing following command in terminal:
nano servo.sh
3) Change shell script permissions
sudo chmod 777 servo.sh
4)Run shell script by typing following terminal command:
./servo.sh
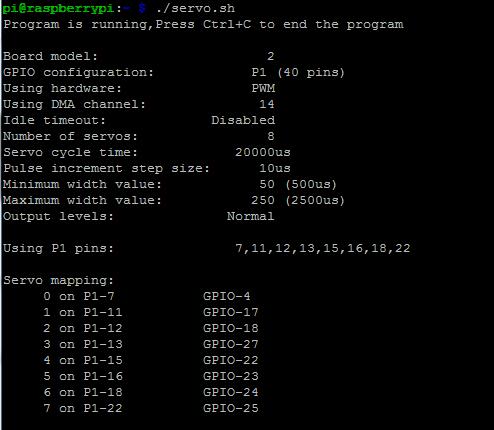 5) Running result
Once run the program, the servo will go to 90 degree position fistly, then go to 0 degree position, then from 0 go to 180 degree position, and finnally go to 90 degree position.
Shell script example Analysis:
 #!/bin/bash
 echo 'Program is running,Press Ctrl+C to end the program'
 i=50
 #run servod program
 sudo ~/PiBits/ServoBlaster/user/servod --pcm
 #go to centre position
 echo 0=150 > /dev/servoblaster
 #delay 1s
 sleep 1
 #hile loop
 while [ $i -ne 250 ]
 do
    #go to $i position
    echo 0=$i > /dev/servoblaster
    sleep 0.1
    #i+2
    i=$(($i + 2))
done
#finally go to centre position
echo 0=150 > /dev/servoblaster
For python user, please take steps as followed:
1) Download the sample python code from osoyoo by typing folloing terminal command:
cd ~
sudo wget http://osoyoo.com/driver/pi3_start_learning_kit_lesson_12/servo.py

2)Run the program
sudo python servo.py

3) Running result
Once run the program, the terminal will show print message as code firstly. the servo will go to to 90 degree position firstly, then it will go around among 0, 90, 180 degree position.
Python code Analysis
import os
import time

#run servod program
os.system('sudo /home/pi/PiBits/ServoBlaster/user/servod --pcm')

#print message at the beginning ---custom function
def print_message():
    print ('|**********************************|')
    print ('|           Servo test             |')
    print ('|  ----------------------------    |')
    print ('|    Servo Connect to GPIO 7       |')
    print ('|  ----------------------------    |')
    print ('|                                  |')
    print ('|                            OSOYOO|')
    print ('|**********************************|\n')
    print ('Program is running...')
    print ('Please press Ctrl+C to end the program...')
    pass
def main():
    #print info
    print_message()
    while True:
    #go to 0 degree(left position)
        os.system("echo 0=50 > /dev/servoblaster")
    print('\n')
        print('------------------------------------->')
        print('0                                       degree')
        time.sleep(0.5)
    #go to 90 degree(middle position)
        os.system("echo 0=150 > /dev/servoblaster")
    print('               90                       degree')
        time.sleep(0.5)
    #go to 180 degree(right position)
    os.system("echo 0=250 > /dev/servoblaster")
    print('                                 180    degree')
        time.sleep(0.5)


# if run this script directly ,do:
if __name__ == '__main__':
    try:
            main()
    #when 'Ctrl+C' is pressed,child program destroy() will be executed.
    except KeyboardInterrupt:

        pass


hi can you help me I have checked and dont see any /dev/servoblaster in my file
hi can you help me I have checked and don’t see any “/dev/servoblaster” in my file