The OSOYOO Magic I/O Shield for Arduino is a powerful board for the beginners. With this Magic board, we can easily connect various sensors and actuators much easier than before.
In this experiment, we will again bridge the gap between the digital world and the analog world. We’ll be using a piezo buzzer that makes a small “click” when you apply voltage to it (try it!). By itself that isn’t terribly exciting, but if you turn the voltage on and off hundreds of times a second, the passive buzzer will produce a tone. And if you string a bunch of tones together, you’ve got music! This circuit and set of code blocks will create a simple sound machine.
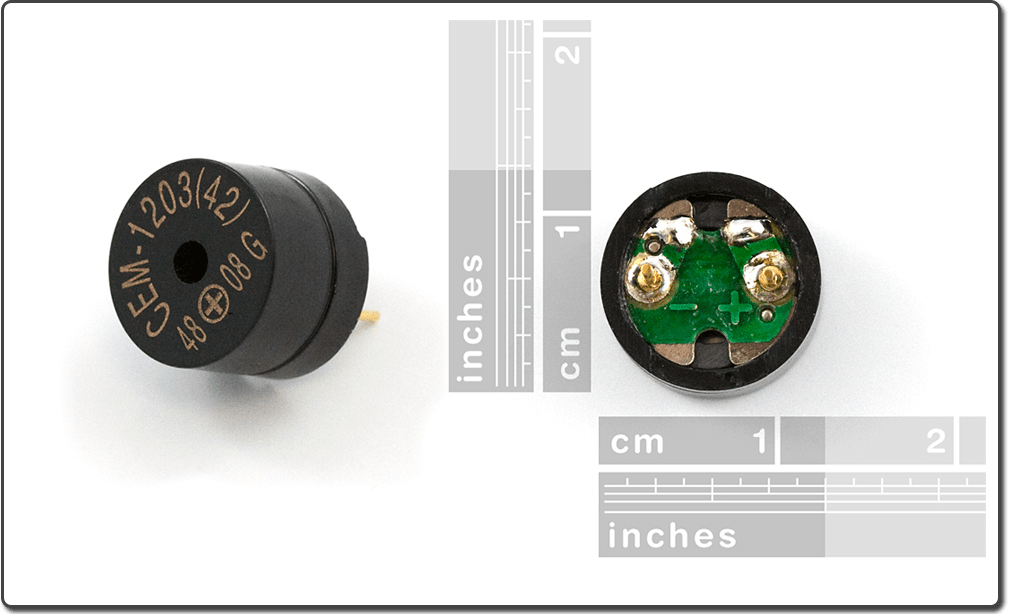
The buzzer is a small component with a piece of metal in it that moves when you apply a voltage across it. This motion causes a small sound, or “click.”
If you turn the voltage on and off fast enough, you get different beeps, squeals, chirps and buzzes. You will use PWM to control the speed of turning the piezo on and off — and, in turn, the audio frequency coming out of the buzzer. Adjusting the PWM enables you to get legitimate notes out of the buzzer.
If you flip the buzzer over and look at the bottom, you will see that one pin has a (+) next to it. That pin gets connected to a signal from the P0 pin. The other pin should be connected to ground.
Note: We use the buzzer module in this project.
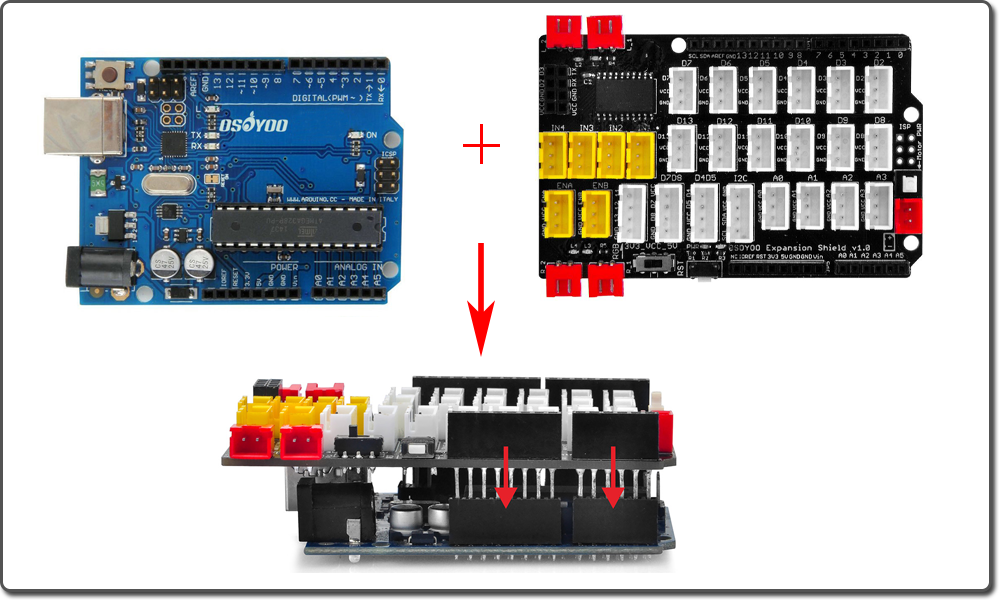
OSOYOO Basic Board for Arduino (Fully compatible with Arduino UNO rev.3) x 1
OSOYOO Magic I/O Shield for Arduino x 1
OSOYOO Passive Buzzer x 1
OSOYOO 3-Pin PNP Cable x 1
USB Cable x 1
PC x 1
Ready to start hooking everything up? Check out the wiring diagram below to see how everything is connected.
First, please plug Osoyoo Magic I/O shield into UNO board:
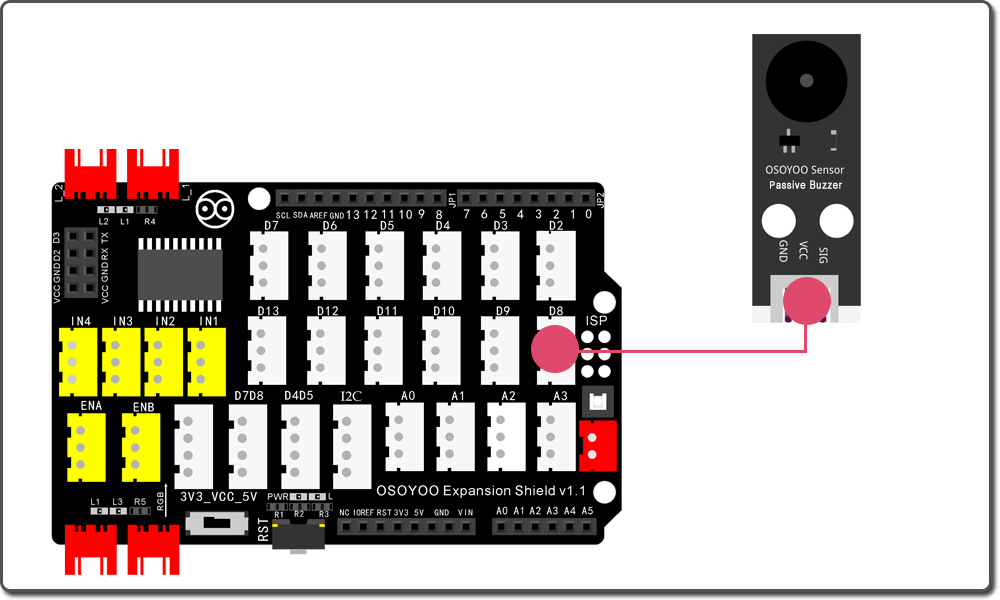
Then connect the Passive Buzzer module to the D8 port of the Magic I/O shield with a 3-pin PNP cable as below:
After above operations are completed, connect the OSOYOO Basic Board for Arduino to your computer using the USB cable. The green power LED (labelled PWR) should go on.
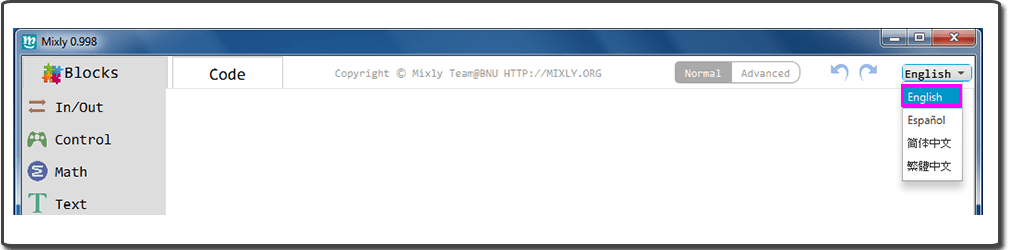
Open the Graphical Programming softwareMixly, if Mixly is not English, you should change the language first:
You can download the code directly, then click “Open” in Mixly to choose the code you download:
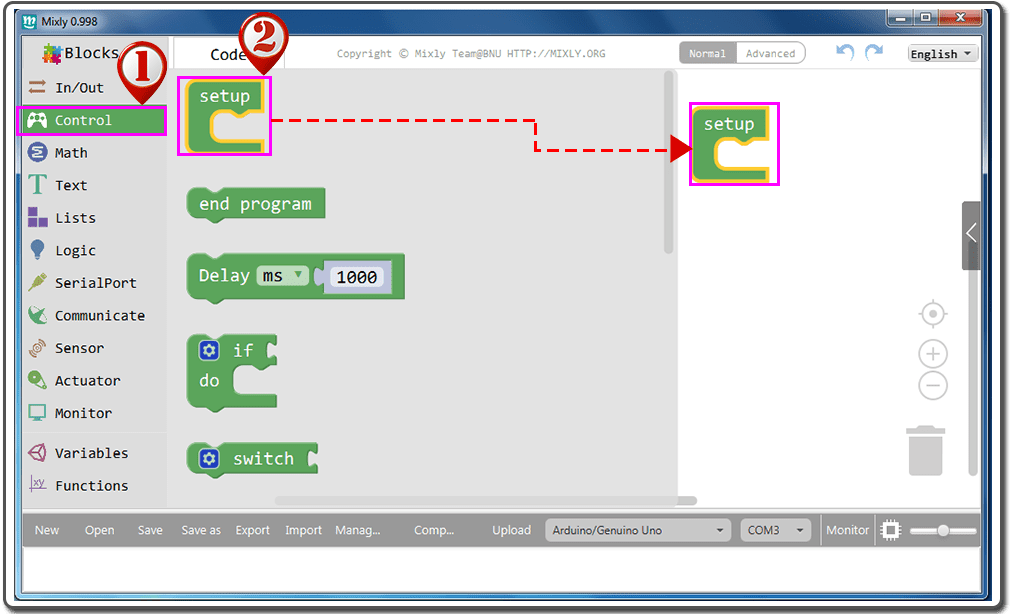
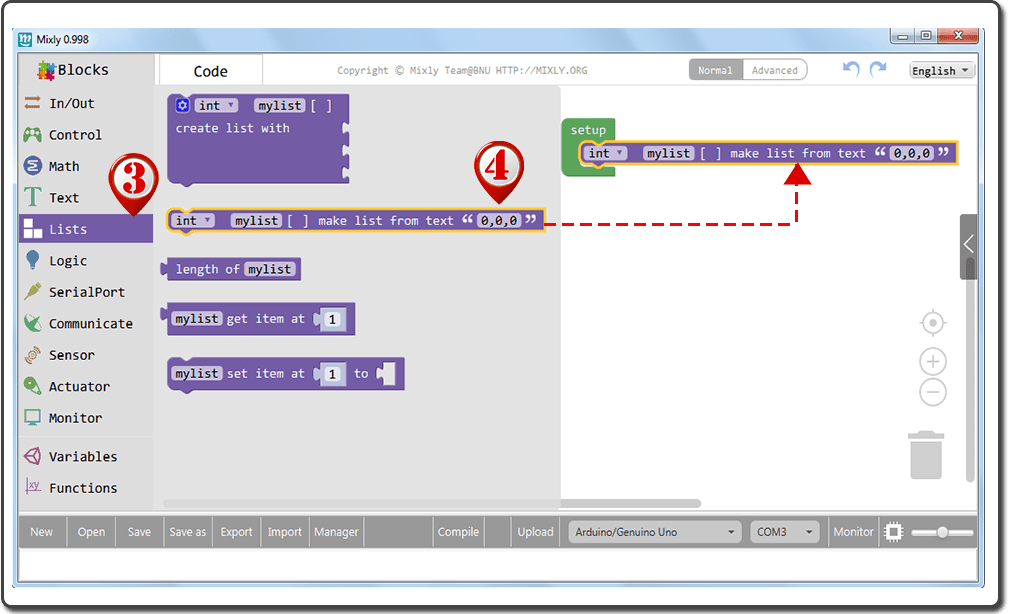
Drag the “int” under “Setup” block, fit the two blocks.
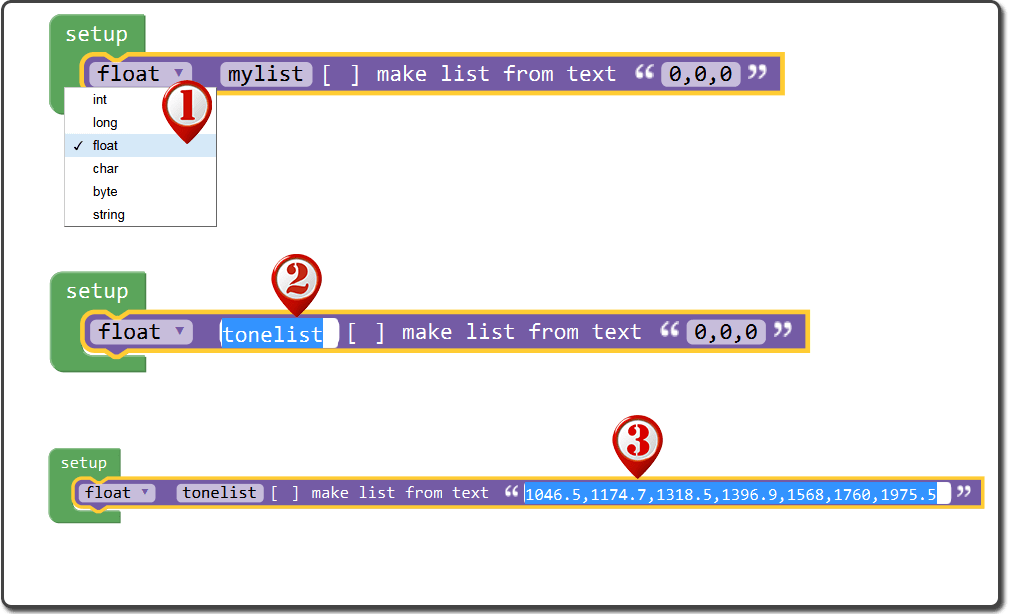
Change “int” to “float“;
Edit “mylist” to “tonelist“;
Edit text “0,0,0” to “1046.5,1174.7,1318.5,1396.9,1568,1760,1975.5“.
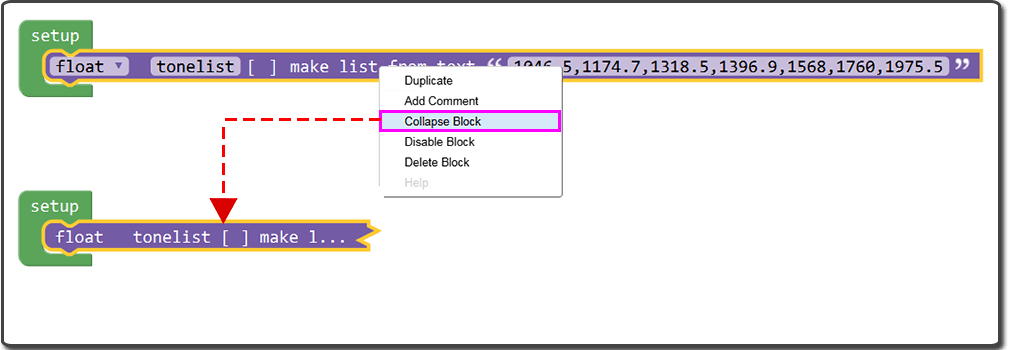
If you realize the block is too long, you can right click to choose “Collapse Block” to shorten it.
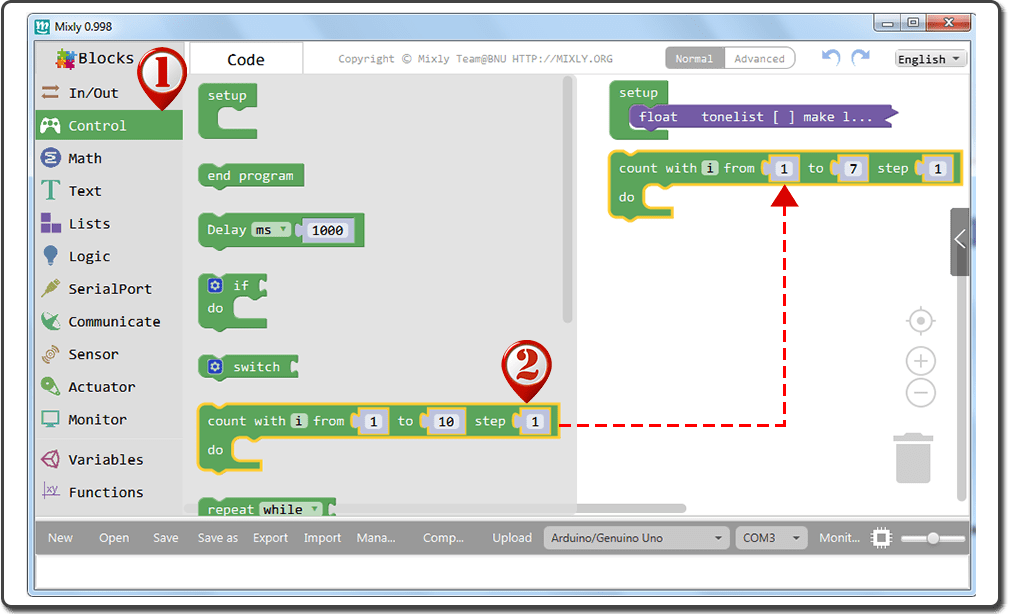
Click “Control” block;
Drag the “count with” block to the blank space, and edit the parameter to“count with i from 1 to 7 step 1”.
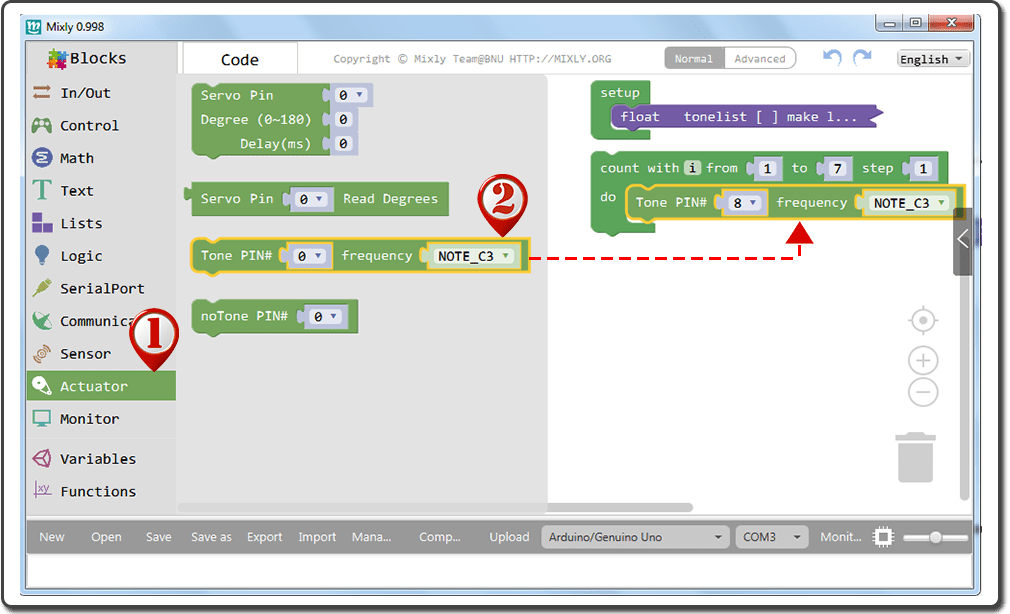
Click “Actuator” block;
Drag the “Tone Pin#” inside “count with” block, fit the two blocks, and edit the parameter to“Tone Pin# 8“;
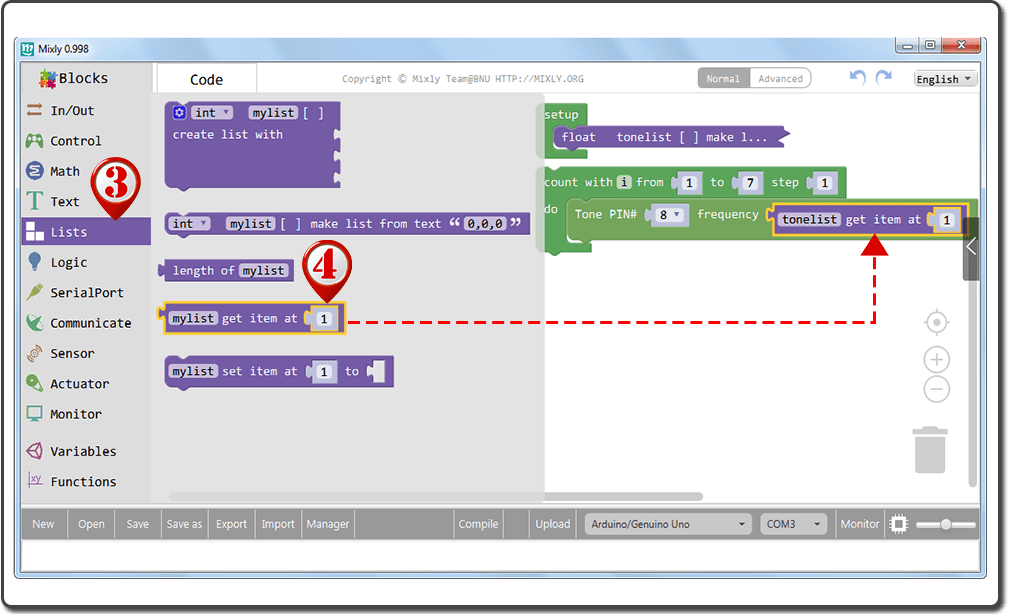
Click “Lists” block;
Drag the first “my list” to fit the “Tone Pin#” block, and change “mylist” to “tonelist“;
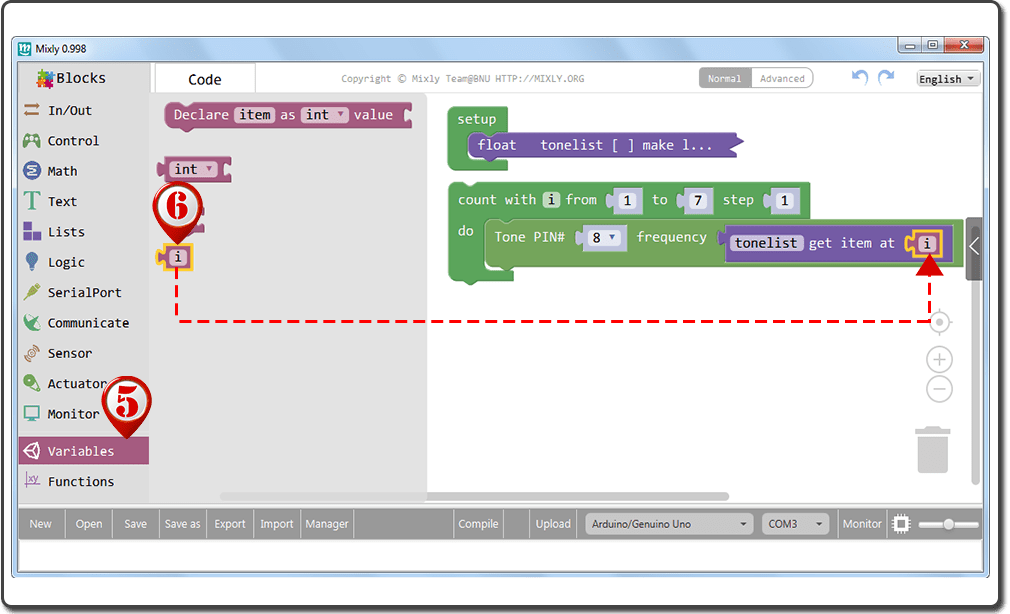
Click “Variables” block;
Drag the “i” block to fit the “tonelist get item at” block.
Click “Control” block;
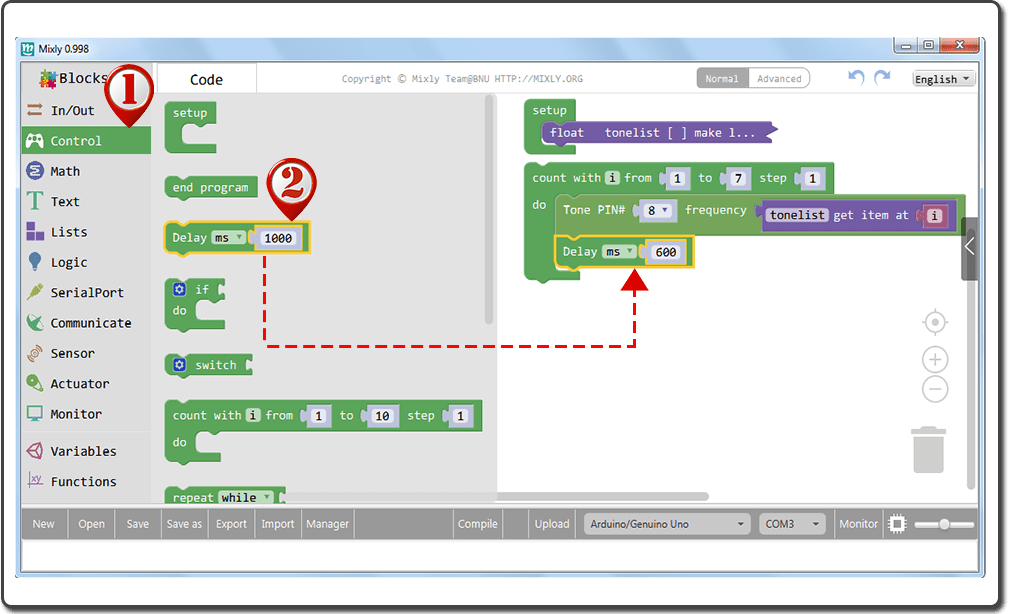
Drag “Delay” to fit “Tone Pin#” block, and edit the parameter to“Delay ms 600“;
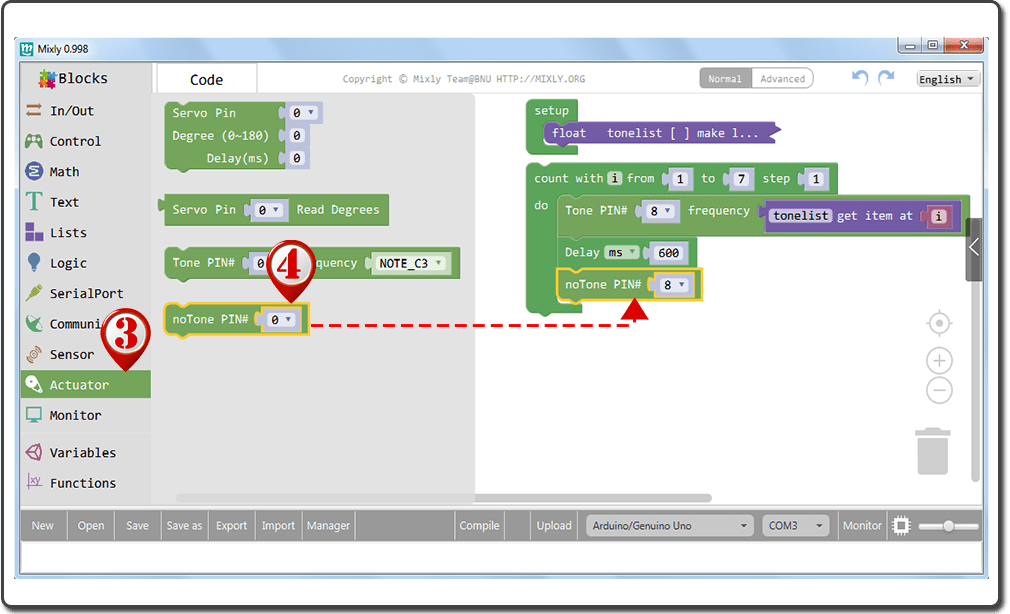
Click “Actuator” block;
Drag the “noTone Pin#” under “Delay” block, fit the two blocks, and edit the parameter to “noTone Pin# 8“;
Click “Control” block;
Drag “Delay” to fit “noTone Pin#” block, and edit the parameter to“Delay ms 600“.
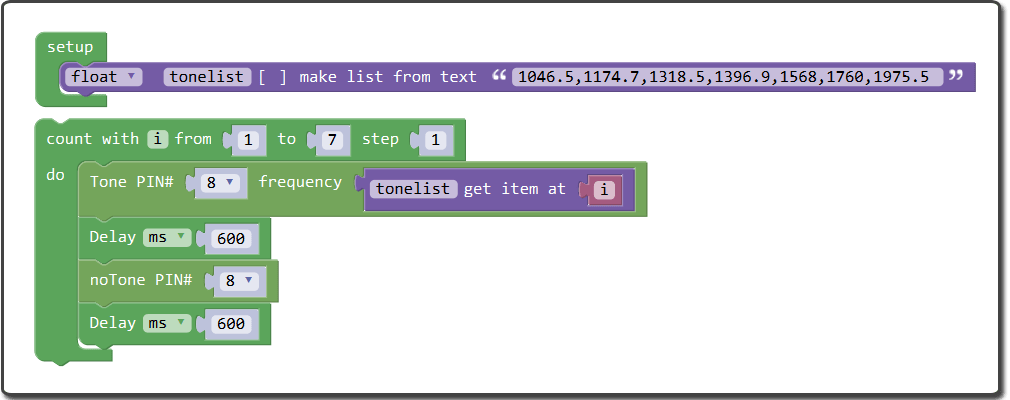
The whole program blocks are as following:
Or you can Click here to download the code, please known that you should open Mixly first, and then click “open” in the software to choose the code you download, otherwise it may cause error.
After above operations are completed, do as follows:
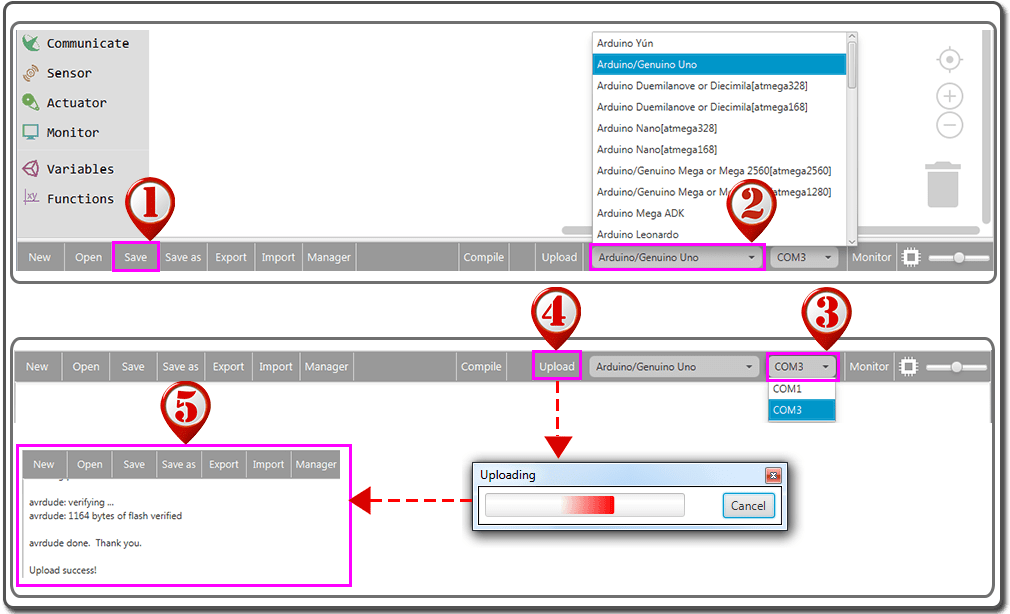
Click Save after programming is done.
Select the board type and serial port before uploading. In this lesson, we use an UNO board, so just select Arduino/Genuino Uno( if you use a Mega2560, select Arduino/Genuino Mega or Mega2560).
Select the serial device of the OSOYOO Basic Board for Arduino from the COM menu. This is likely to be COM3 or higher (COM1 and COM2 are usually reserved for hardware serial ports). To find out, you can disconnect your OSOYOO Basic Board for Arduino and re-open the menu; the entry that disappears should be the OSOYOO Basic Board for Arduino. Reconnect the board and select that serial port.
Next,upload the code. If the uploading fails, check connection and code according to the prompts.
Finally, the status will change to ‘Upload success!’.
A few seconds after the upload finishes, you will hear the buzzer beep.