INTRODUCTION
ESP8266 is an affordable and powerful Chip to connect Arduino Board to WiFi Internet. Actually ESP8266 can be more than a bridge between Arduino board and WIFI router, it can work as an Arduino board itself.
In this project, we will show how to make ESP8266 working as Arduino board, then you can use Arduino IDE to program ESP8266 directly with Arduino C++ language.
In order to communicate between ESP8266 and PC(Arduino IDE), we need a USB TTL device which can connect PC USB port to ESP8266 Serial Port (TX/RX pins).
There are many USB TTL/RS232 converter in the market. But actually you no need buy any of such converter. An Arduino UNO board can be a perfect USB TTL tool. So in this project, we will use Arduino UNO board as a bridge between PC and ESP8266.
Remember one thing, UNO board is just a USB TTL tool in this project, codes are sent from PC to ESP8266, NOT to UNO board. This is very important but also very confusing.
Hardware Preparations:
- OSOYOO ESP8266 WiFi Shield x 1
- Arduino UNO board x 1
- PC with Windows OS
- Some Jumper wires
Software Preparations:
Wire CONNECTION
- Remove WIFI Shield from Arduino UNO board, Keep them separated in whole procedure
- Remove any jumper caps in WIFI Shield
- Connect UNO to WIFI shield by jumper wires as following
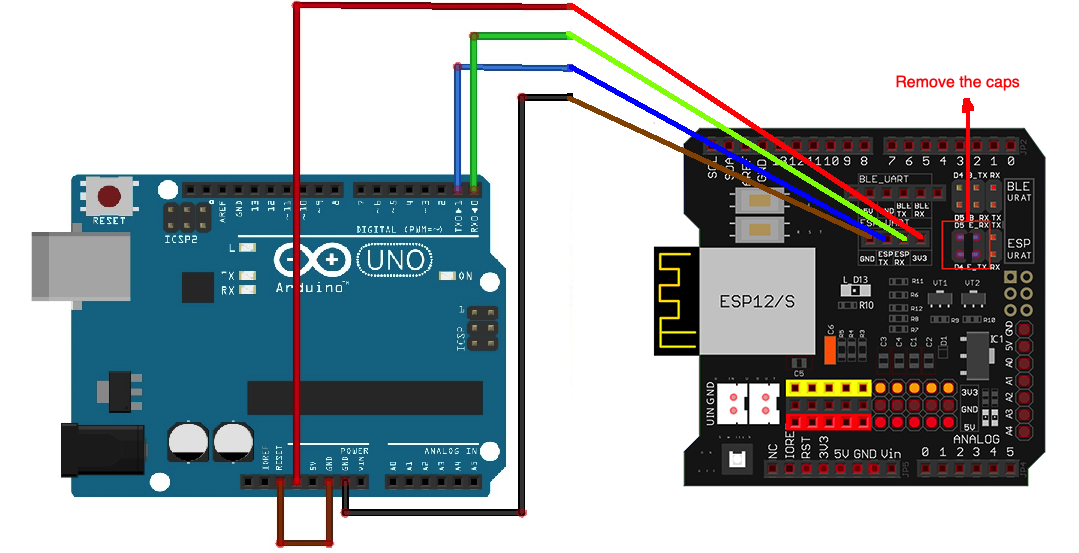
Arduino D0(RX) to WIFI shield E-RX
Arduino D1(TX) to WIFI shield E-RX
Arduino 3.3V to WIFI shield 3.3V
Arduino GND to wifi shield G
Arduino Reset to Arduino GND
Software Installation
I. Install ESP8266 as new board type in Arduino IDE
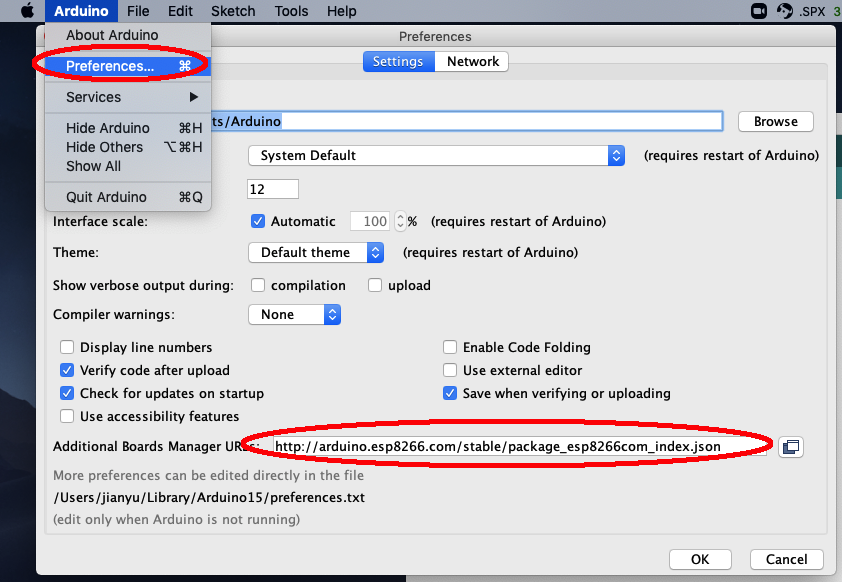
Step 1) In Arduino ->Preferences ->Additional Boards Manger URL field, add following link:
https://arduino.esp8266.com/stable/package_esp8266com_index.json
See following picture:
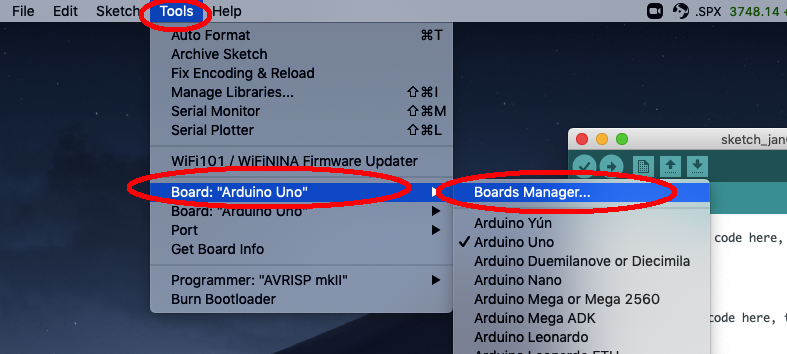
Step 2) Open Boards Manager from Tools > Board ->Boards Manager
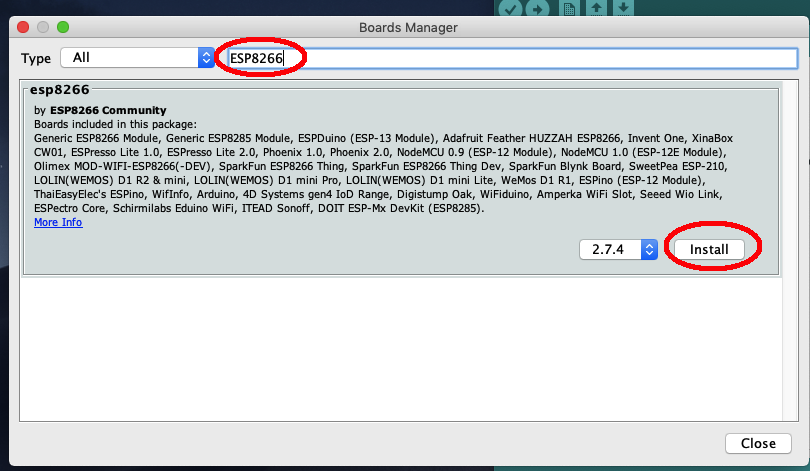
Step 3) in Board Manager, search ESP8266 and you will see esp8266 by ESP8266 Community, click install as following:
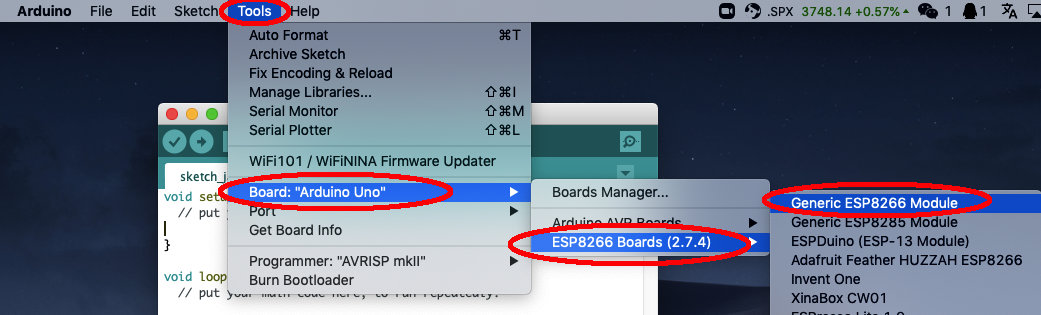
Step 4) In Tools->Board ->ESP8266 Boards menu, select Generic ESP8266 Module as following:
Step 5) in Tools -> Ports and select Arduino UNO ports. Now everything is ready to go.
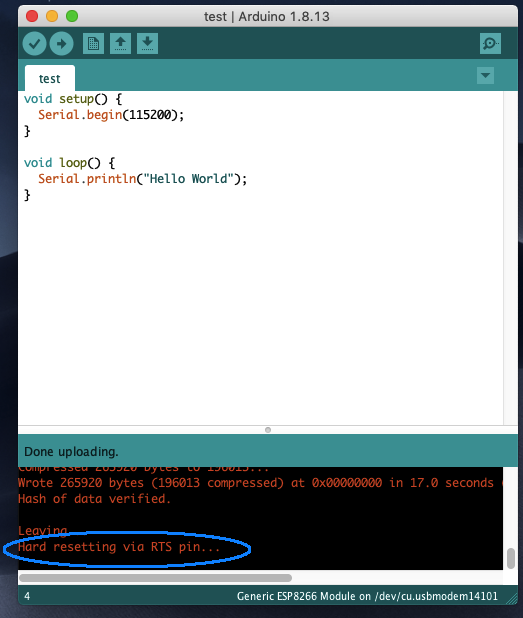
II. Run our first Hello World program in ESP8266
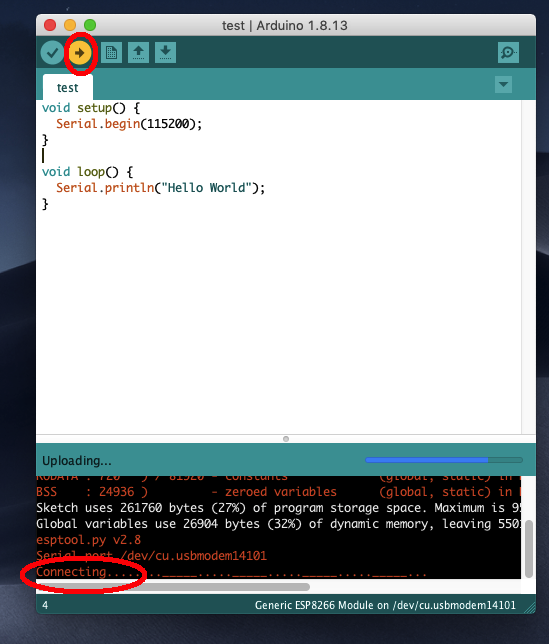
In Arduino IDE, copy following codes into your programming window
void setup() {
Serial.begin(115200);
}
void loop() {
Serial.println("Hello World");
}
Now click arrow ► button in Arduino IDE to compile and upload code. After compiling finishes, the IDE will show Connecting… in the bottom, this means PC is ready to send code to ESP8266.
In order to accept code, we need press
- Hold the “Key” button down in the OSOYOO ESP8266 WIFI Shield
- Press the “RST” button for once
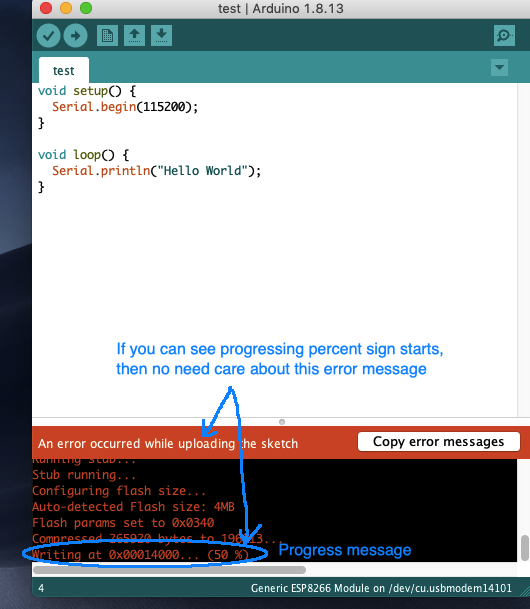
- Release the “Key” button, now you will see there is a progress bar extending in the bottom of IDE as following.
Then you will see progress percentage sign as following:
Once the progress message shows 100% , it means your codes have been successfully uploaded into ESP8266. You will see following message in the bottom of IDE:
Hard resetting via RST pin.
This remind you to press RST pin in ESP8266 WIFI Board to start the program you just uploaded.
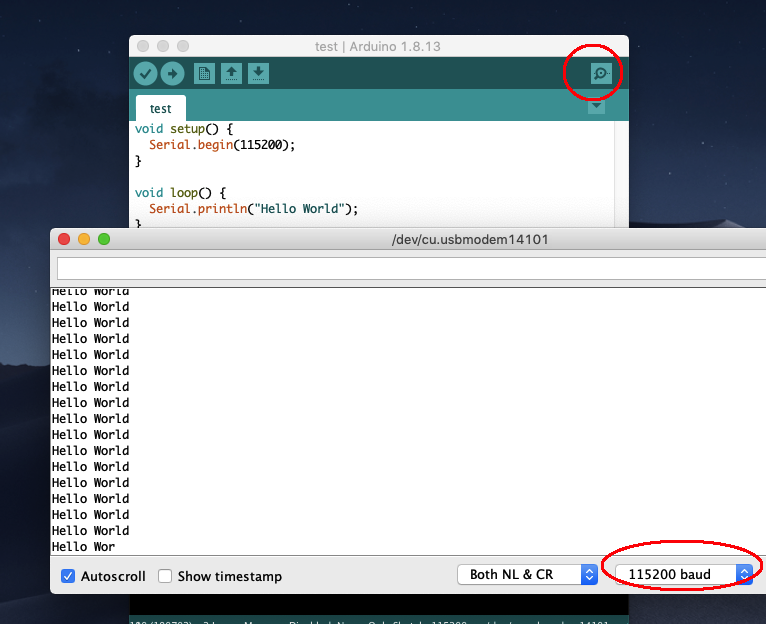
After you press RST button, please open your Serial monitor by clicking icon in the upper right corner of your IDE, then set baud rate to 115200 , you will see Hello World as following picture: