I.Objective
II.Parts and Devices
III.Hardware Installation
IV.Circuit Connection
V.Software Installation
VI.How to play

Mecanum Wheel Robot Car Full Package (with 18650 batteries)
| Buy from US |
Buy from UK |
Buy from DE |
Buy from IT |
Buy from FR |
Buy from ES |
ここでご購入を! |
 |
 |
 |
 |
 |
 |
 |
The above robot cars are controlled by Arduino. If you have Raspberry Pi board, actually the robot car can also be controlled by Raspberry Pi. You can visit the following link to learn basic movement with Raspberry Pi.
Tutorial link- https://osoyoo.com/?p=31428

In this lesson, you must complete lesson 1 before you continue on with this lesson. We use two IR obstacle sensors to detect front objects. Once sensors find object, the car will move to the direction of object.

OSOYOO Mecanum Wheels Robotic Car Chassis x 1 (2xleft-wheels/2xright-wheels and Motor x 4)
OSOYOO Mega2560 board, fully compatible with Arduino x 1
OSOYOO Wi-Fi shield x 1
OSOYOO Model Y motor driver x 1
OSOYOO MG90 servo motor x 1
OSOYOO IR Obstacle Sensor x 2
OSOYOO Battery box x 1
OSOYOO 3pin female to female jumper wire x1
OSOYOO 6pin male to female jumper wire x2
OSOYOO 2 pin XH.25 female to female x1
OSOYOO 10 pin jumper wire male to female x1
18650 Batteries(3.7V) x 2

You must complete lesson 1 (assembling the car) before you continue on with this lesson.In this lesson3, we will add a mg90 servo motor and to the robotic car built in Lesson 1.
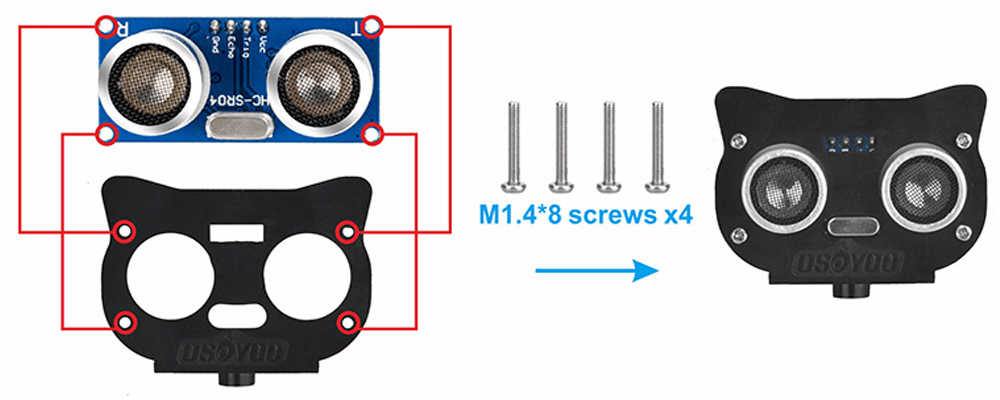
Step1: Install Ultrasonic Module to mount holder with 4pcs M1.4*8 screw and M1.4 nuts
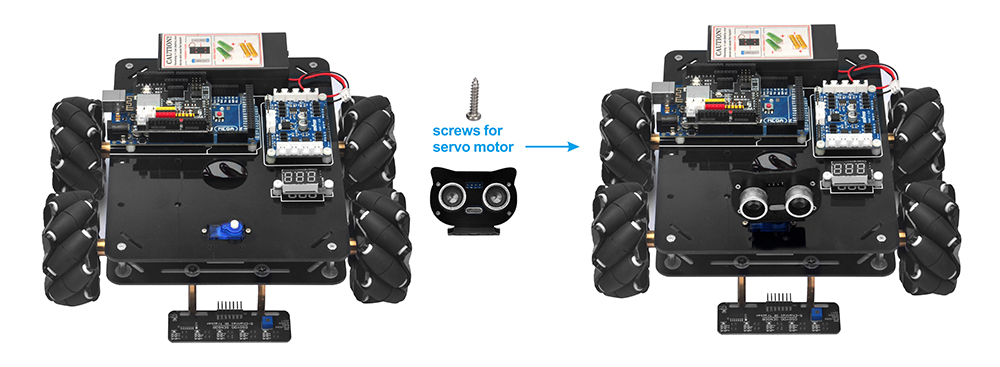
Step 2: Install mount holder for ultrasonic module on servo motor with M2*4 Self Tapping screw.

You must complete lesson 1 (assembling the car) circuit connection. No need to change anything, just keep the hardware wire connection as it is.
Step3:Please keep all lesson 1 connections same as it is.Before connecting wires, make sure that you have connect SG90 servo motor to model Y board and OSOYOO Uart Wi-Fi shield as follows.
Once you connects Lesson 1 wires, please connect two IR obstacle sensors as following:
Le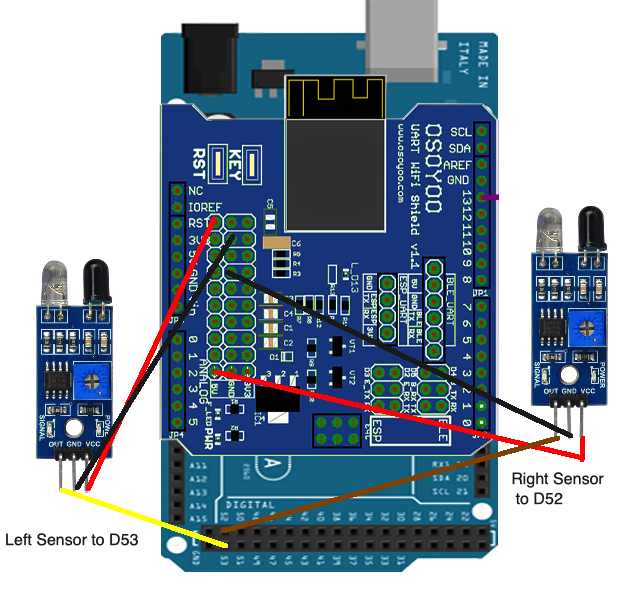

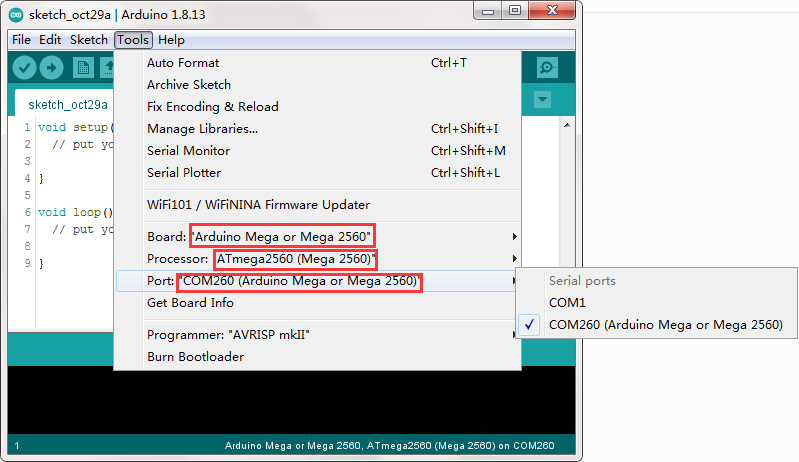
Step 1: Install latest Arduino IDE (If you have Arduino IDE version after 1.1.16, please skip this step). Download Arduino IDE from https://www.arduino.cc/en/Main/Software?setlang=en, then install the software.
Step 2: Download https://osoyoo.com/driver/mecanum_metal_chassis_m2/followme.zip, unzip the download zip file m2-lesson2.zip, you will see a folder called followme.)
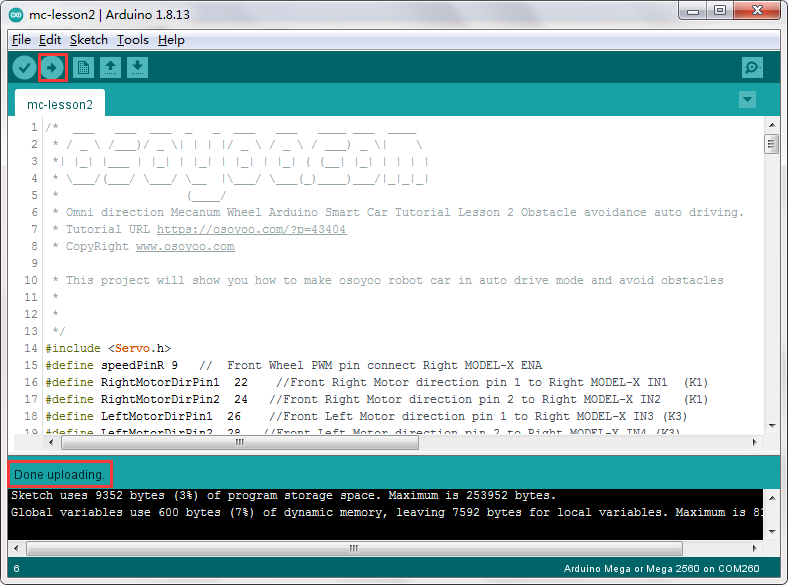
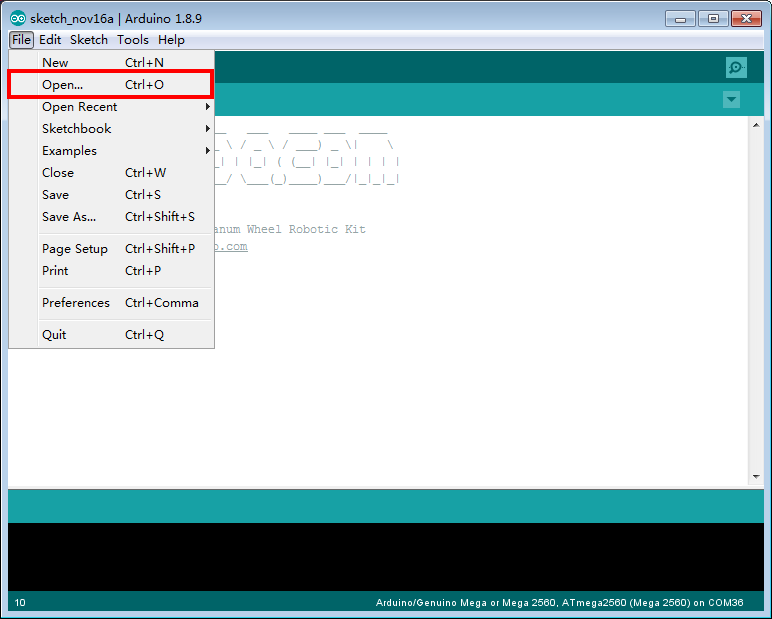
Step 3: Connect Mega2560 board to PC with USB cable, Open Arduino IDE → click file → click Open → choose code “followme” in folder, load the code into Arduino as following.
Step 4: Choose corresponding board/port for your project, upload the sketch to the board.