Osoyoo 3.5″ HDMI Touchscreen – Bookworm & Trixie Setup Guide
Product: Osoyoo 3.5″ HDMI Resistive Touchscreen
Applicable OS: Raspberry Pi OS Bookworm & Trixie (2025-05-13 and later)
Compatible: Raspberry Pi 5, 4, 3B+, 3, 2, Zero
Calibration Method: evtest + config.txt
Buy 3.5″ HDMI Screen with Case:
1Introduction
This tutorial guides you through setting up the OSOYOO 3.5″ HDMI Resistive Touchscreen on Raspberry Pi with the latest Bookworm and Trixie operating systems. This method uses the evtest calibration approach for precise touch alignment.
Key Features
- Resolution: 480×320 physical, supports up to 1920×1080 input
- Touch Type: XPT2046 Resistive touch panel
- Interface: HDMI for display, GPIO for touch data
- Compatibility: Raspberry Pi 5, 4, 3B+, 3, 2, Zero series
What’s New: This tutorial uses the swapxy=1 parameter in config.txt for simplified calibration, and the evtest tool for measuring precise touch boundaries.
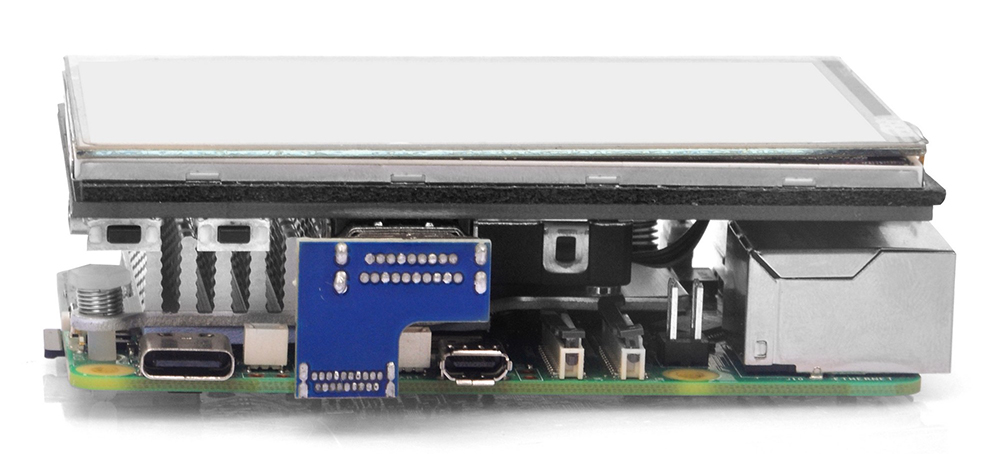
2Hardware Connection
1. Connect the GPIO interface
Raspberry Pi leads out 40 GPIO pins, while the screen leads out 12 pins. When connecting, pay attention to the corresponding pins and Raspberry Pi pins.
2. Connect the HDMI connector
Connect the HDMI connector to the HDMI port of the screen and the Pi.
Note: Raspberry Pi Zero / Zero 2 W needs an additional HDMI cable for connection.
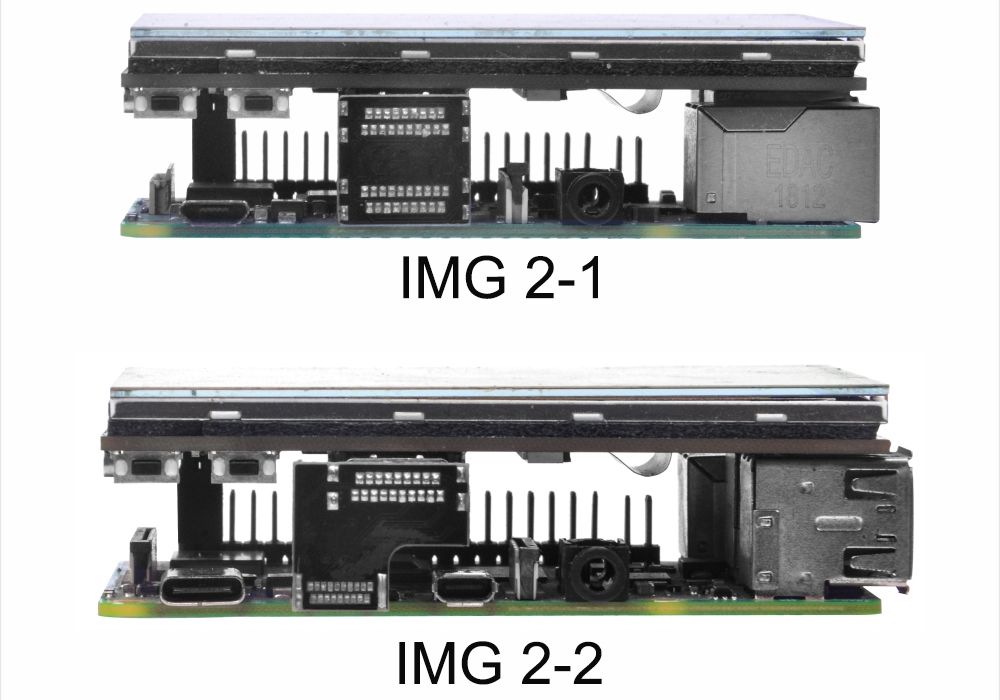
The hardware connection is as shown below (Pi3B+/Pi4/Pi5):
3Install Image & Driver
2) After the image has finished writing, open the config.txt file in the root directory of the TF card, add the following code at the end of config.txt, then save and quit the TF card safely.
hdmi_force_hotplug=1
hdmi_group=2
hdmi_mode=87
dtoverlay=bw-ads7846,penirq=25,xmin=3900,xmax=240,ymin=240,ymax=3900,speed=50000,swapxy=1
3) Download the bw-ads7846.dtbo file. Copy this file to the overlays directory (/boot/overlays/).
Or you can download bw-ads7846.dtbo via SSH after connecting your Raspberry Pi to the network:
sudo wget -O /boot/firmware/overlays/bw-ads7846.dtbo https://osoyoo.com/driver/HDMI-3.5/bw-ads7846.dtbo
4) Quit the TF card safely.
5) Insert the TF card into the Raspberry Pi, power on the Raspberry Pi, and wait for more than 10 seconds to display normally. Generally, touch functions will work normally after system restart. However, if touch inaccuracies occur, perform touch calibration following next steps.
6) Change the Screen Configuration
Click the Raspberry Pi icon → Preferences → Control Centre → Screens, in the new window, click layout → screen → HDMI → resolution → 640×480, then click Apply, and click OK in the new pop. We recommend setting the resolution to 640×480.
Note: Raspberry Pi OS Bookworm branch system, since dtoverlay=vc4-kms-v3d is loaded by default, it is invalid to modify the resolution in /boot/config.txt.
4Touch Calibration
If you find that your touch cursor does not align with your finger, you need to calibrate the limits in your config.txt. Since we use swapxy=1, the standard X and Y definitions are transposed. Use this guide to ensure perfect alignment.
Measuring Your Hardware
Every touch panel has slight manufacturing variances. We use the evtest tool to capture the Raw Absolute Values of our specific screen.
Install & Run:
sudo apt-get install evtest -y
sudo evtest
Select Device:
Choose the ID corresponding to ADS7846 Touchscreen. (The serial number displayed on different users’ Raspberry Pi’s may not be the same, depending on the user’s actual serial number)
Touch each edge and record the average value displayed:
| Physical Edge |
Record this evtest Value |
Mapping to Parameter |
| Top Edge |
ABS_Y value at the top |
→ xmin |
| Bottom Edge |
ABS_Y value at the bottom |
→ xmax |
| Left Edge |
ABS_X value at the left |
→ ymin |
| Right Edge |
ABS_X value at the right |
→ ymax |
Config.txt Template
In your /boot/firmware/config.txt, use this base line:
dtoverlay=bw-ads7846,penirq=25,xmin=[ABS_Ymax],xmax=[ABS_Ymin],ymin=[ABS_Xmin],ymax=[ABS_Xmax],speed=50000,swapxy=1
Example Calibration
If our measured values are:
- ABS_Xmin = 280
- ABS_Xmax = 4000
- ABS_Ymin = 200
- ABS_Ymax = 3500
You need to edit the config file:
sudo nano /boot/firmware/config.txt
You can see the original setting was:
dtoverlay=bw-ads7846,penirq=25,xmin=3900,xmax=240,ymin=240,ymax=3900,speed=50000,swapxy=1
Replace the above content with:
dtoverlay=bw-ads7846,penirq=25,xmin=3500,xmax=200,ymin=280,ymax=4000,speed=50000,swapxy=1
Save and exit: Press Ctrl+O, then Enter, then Ctrl+X.
This is the more accurate touch range of the current touch device, and finally typing the following to reboot to take effect the current configuration:
sudo reboot
Troubleshooting & Fine-Tuning
After a sudo reboot, if the cursor still doesn’t reach the very edge, follow these simple rules to adjust your numbers:
| If the cursor… |
Action to take |
| Stops before the Top edge |
Increase the xmin value |
| Stops before the Bottom edge |
Decrease the xmax value |
| Stops before the Left edge |
Decrease the ymin value |
| Stops before the Right edge |
Increase the ymax value |
5Screen Orientation Settings
Click the Raspberry Pi icon → Preferences → Screen Configuration, in the new window, click layout → screen → HDMI → orientation → Select the appropriate direction, then click Apply, and click OK in the new pop.
Important: After completing the rotation, you need to recalibrate the touch as above operations.
6Tech Support
Need help or have feedback? Submit a ticket and our team will get back to you within 1-2 working days.
Working Time: 9 AM – 6 PM GMT+8 (Monday – Friday)
Contact Us: [email protected]