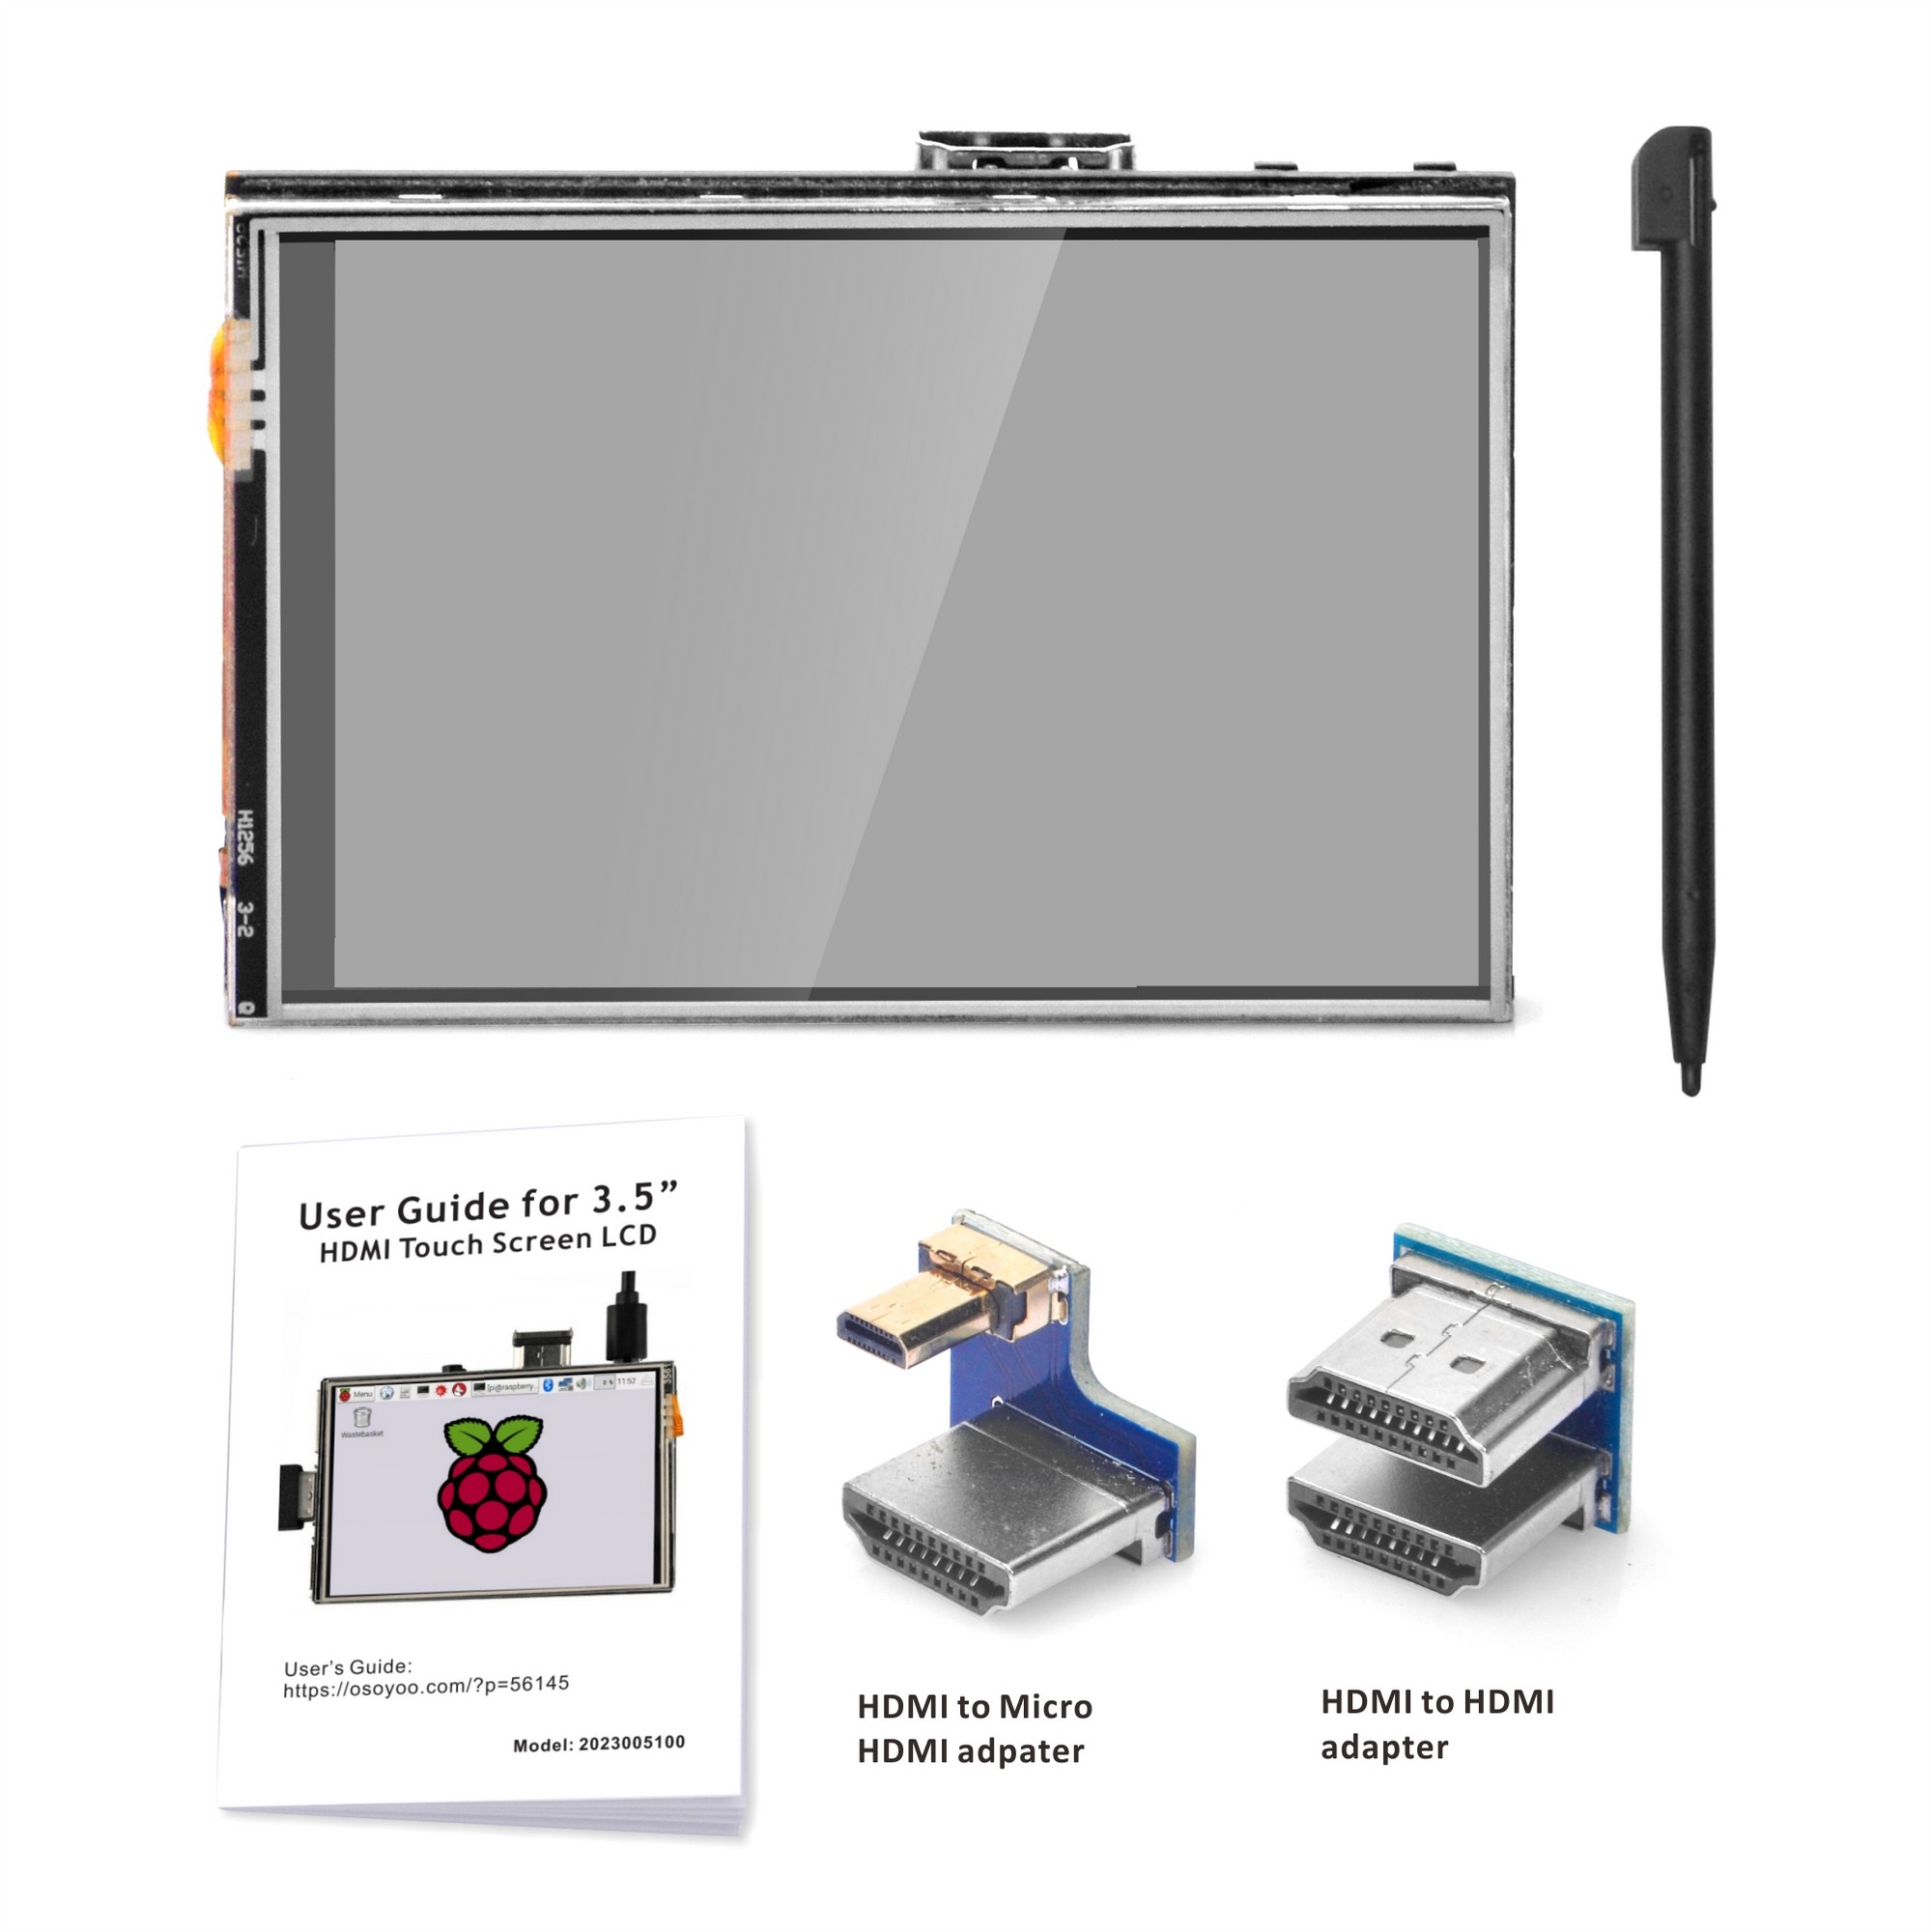
Product: Osoyoo 3.5″ HDMI Resistive Touchscreen
Applicable OS: Raspberry Pi OS Buster & Bullseye
Compatible: Raspberry Pi 4, 3B+, 3B
Driver: HDMI-show (GitHub)
1Overview
The OSOYOO 3.5″ HDMI Resistive Touchscreen is a high-performance, compact display solution designed specifically for Raspberry Pi users who require both portability and precision. Unlike traditional SPI-only screens, this display utilizes the HDMI interface for high-speed video transmission, ensuring a smoother visual experience and a much simpler “plug-and-play” setup for display output.
In this tutorial, we will guide you through the complete process of integrating this screen with Raspberry Pi OS (Buster & Bullseye). Whether you are building a handheld gaming console, a smart home controller, or a portable Linux workstation, this guide covers everything from hardware connection to touch driver installation.
2Key Features
- High-Definition Input: Supports HDMI video input with a physical resolution of 480×320, scalable up to 1920×1080.
- Precision Control: Equipped with a high-sensitivity resistive touch panel for accurate navigation via stylus or fingertip.
- Seamless Integration: Designed to fit perfectly onto the Raspberry Pi GPIO header for power and touch data, eliminating the need for external power cables.
- System Compatibility: Fully optimized for the Debian-based Buster and Bullseye distributions, providing a stable environment for legacy and current projects.
3What You Will Need
- OSOYOO 3.5″ HDMI Touchscreen
- Raspberry Pi (4, 3B+, or 3B)
- MicroSD Card with Raspberry Pi OS (Buster/Bullseye) pre-installed
- HDMI Adapter/Connector (Included with the screen)
4Installation Touch Driver
You can install the touch driver for 3.5″ HDMI touch screen based on the existing system, but it just supports Raspberry Pi OS.
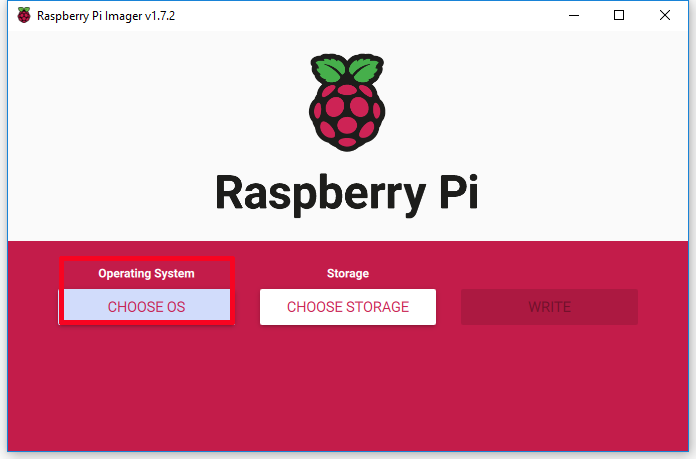
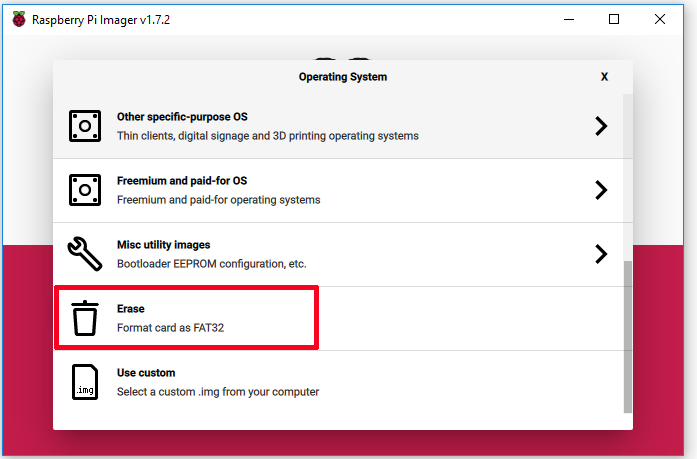
2Format Micro SD Card
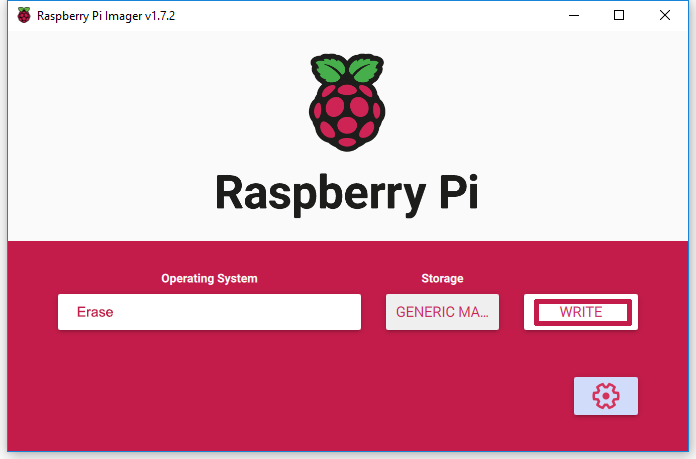
Prepare a newly formatted micro SD memory card (TF card) with USB micro SD card reader, recommend sizes are 16G, 32G. If you don’t know how to format micro SD card, please run Raspberry Pi Imager and select “Erase” in Operating System field, and “your micro SD card” in Storage field, then click “WRITE” to format micro SD card.
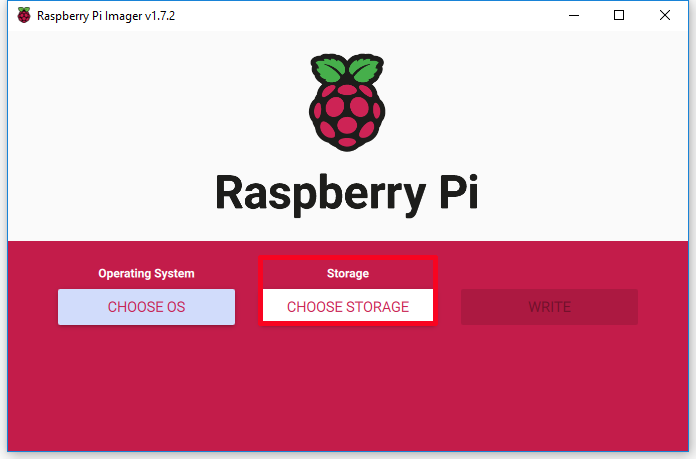
3Write Raspberry Pi OS to SD Card
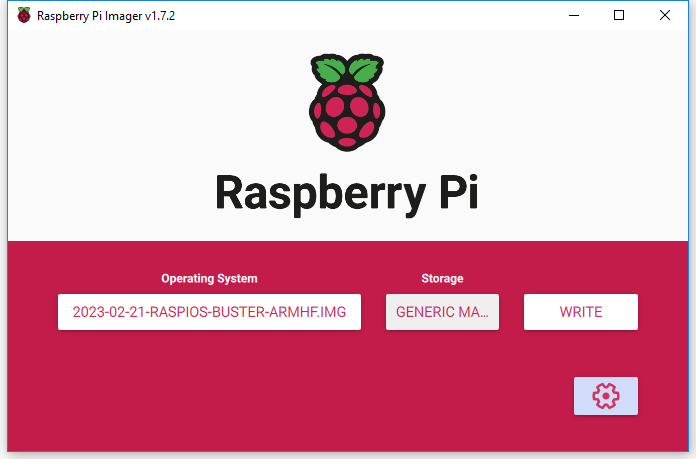
Run Raspberry Pi Imager, then select “Use custom” in Operating System field then browse “Raspberry Pi OS” you have downloaded, then select “your SD card” in Storage field. (If you have burnt Raspberry Pi OS in your SD card, please skip step 3 to step 5)
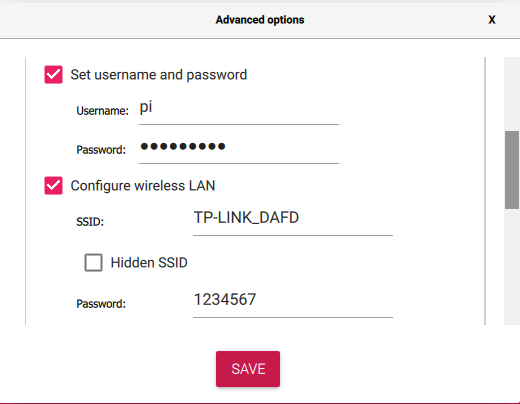
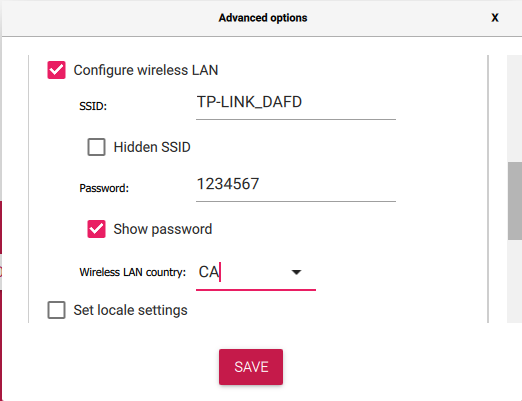
4Configure SSH and WiFi
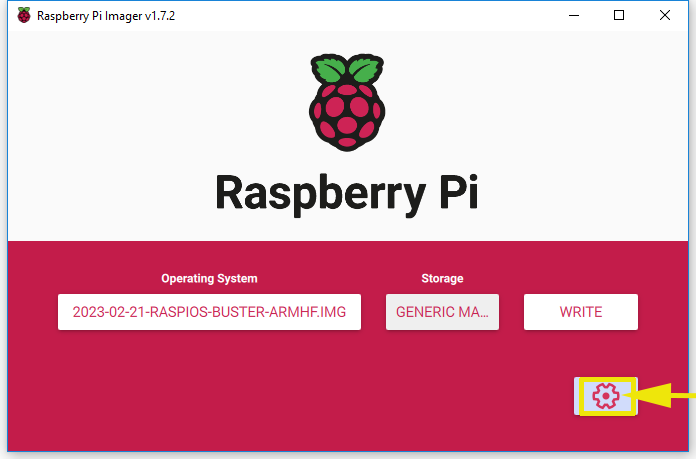
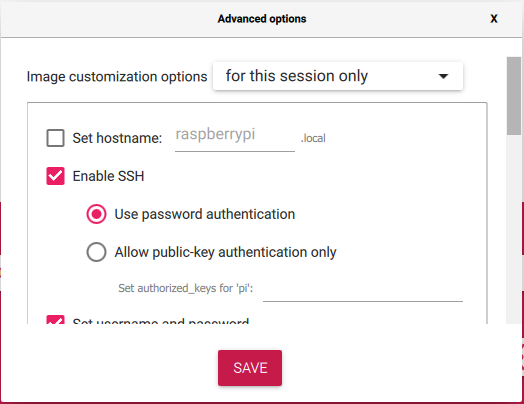
Click “setting icon” to enable SSH, set username and password (here we use pi as username and raspberry as password), and configure wireless LAN. Then click “SAVE”.
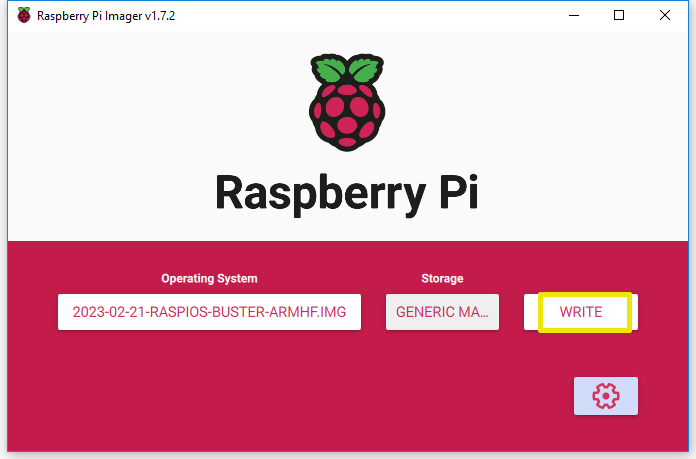
5Write OS to SD Card
Click WRITE to burn OS system (Raspberry Pi OS) in your micro SD card.
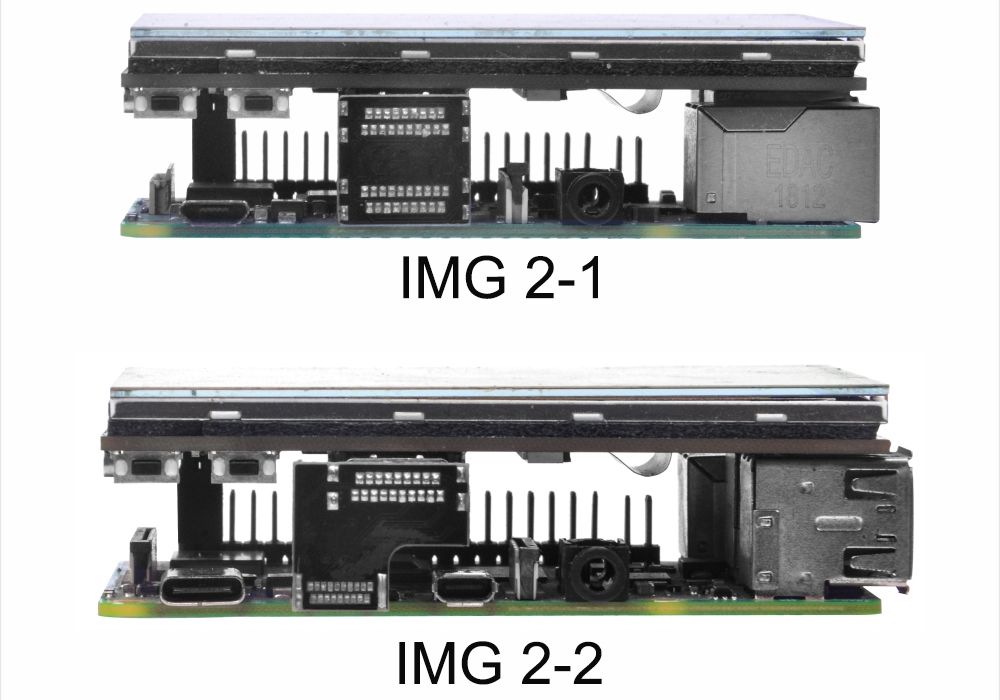
6Connect HDMI LCD to Raspberry Pi
Connecting HDMI LCD to your Raspberry Pi:
- Install screen on Raspberry Pi 2/3 with HDMI to HDMI adapter
- Install screen on Raspberry Pi 4 with HDMI to mini HDMI adapter
7Power On Raspberry Pi
Insert this card in your Raspberry Pi, and power on Raspberry Pi.
ATTENTION: Please be sure the Raspberry Pi have connected to network.
Note:
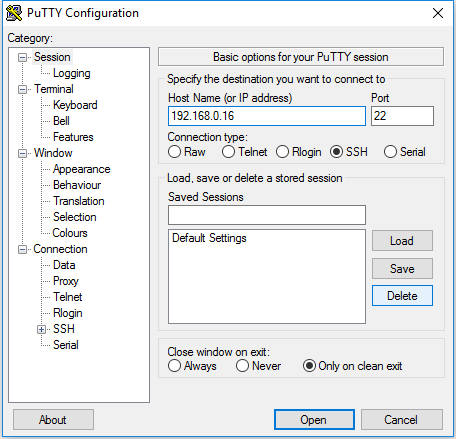
- Recommend to remotely control Raspberry Pi via SSH, VNC or other remote desktop tools, as the resolution is too high as default. (Here we use PuTTY for Windows users. You can learn more about remotely control Raspberry Pi from: https://osoyoo.com/?p=56660)
- All following steps are tested on OS:
2023-02-21-raspios-buster-armhf.img, there may be some differences with other OS.
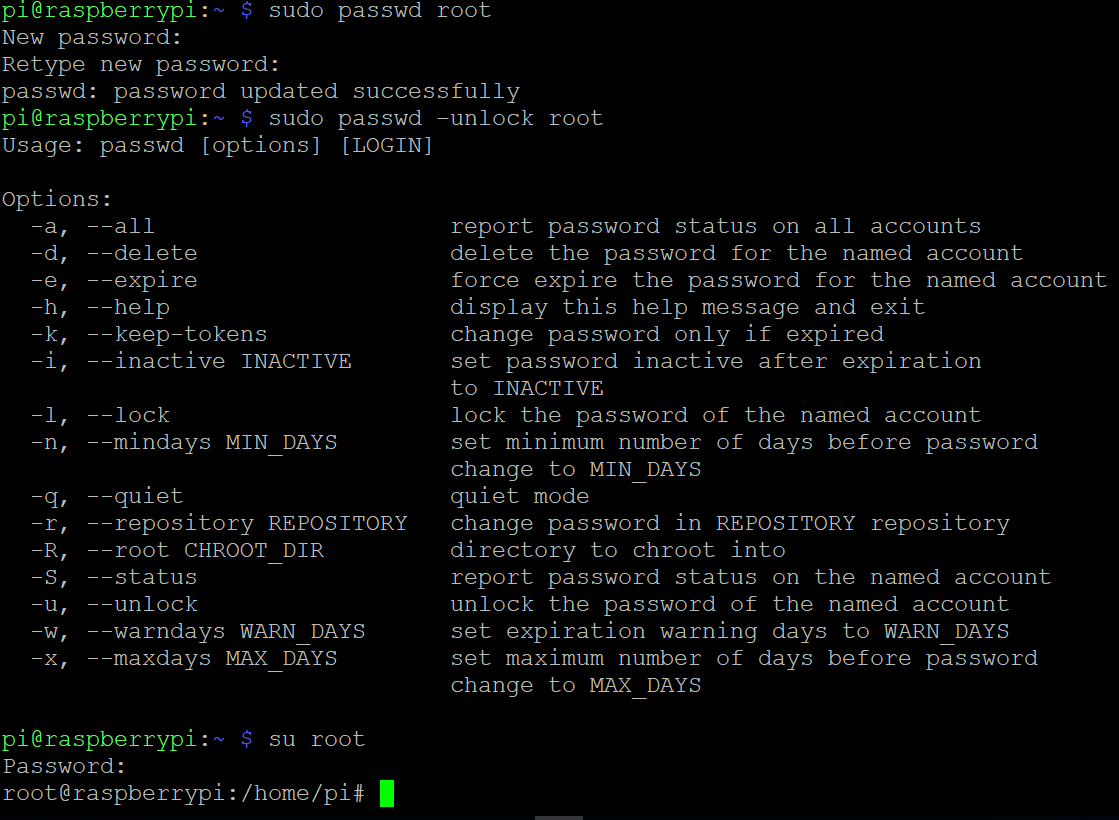
8Switch to Root User
Use a SSH tool to log into Raspberry Pi remotely. Run the following commands in terminal to switch user permission as administrator:
Note: When you’re typing new password and password in, the window shows nothing just null, but you’re in fact is typing things in. Please write down the password you enter and just focus on typing it right then press Enter.
sudo passwd root
sudo passwd –unlock root
su root
9Download the Driver
Run the following command in terminal to download the driver:
sudo git clone https://github.com/osoyoo/HDMI-show.git
10Change Folder Permissions
Run the following command in terminal to change the executable permissions of the folder:
sudo chmod -R 777 HDMI-show
11Enter the Driver Folder
Run the following command in terminal to enter the folder:
cd HDMI-show/
12Run Installation Script
Run the following command:
sudo ./hdmi480320
13Reboot Raspberry Pi
Run the following command to reboot your Raspberry Pi:
reboot
Wait for about 1 minute till the screen turn on. The touch driver would be installed and reset.
Success! Now you have completed to install the touch driver for 3.5″ HDMI touch screen.
5Tech Support
Need help or have feedback? Submit a ticket and our team will get back to you within 1-2 working days.
Working Time: 9 AM – 6 PM GMT+8 (Monday – Friday)
Contact Us: [email protected]