Objective:
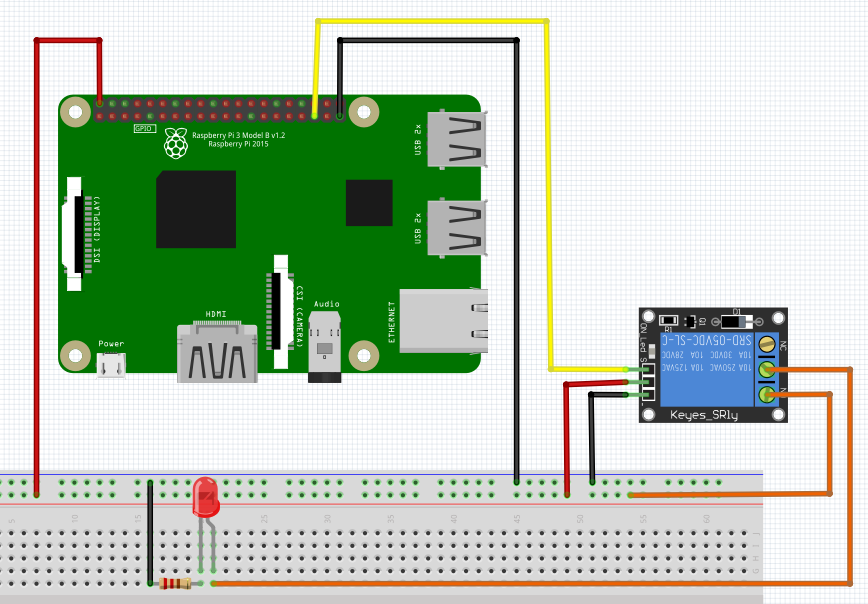
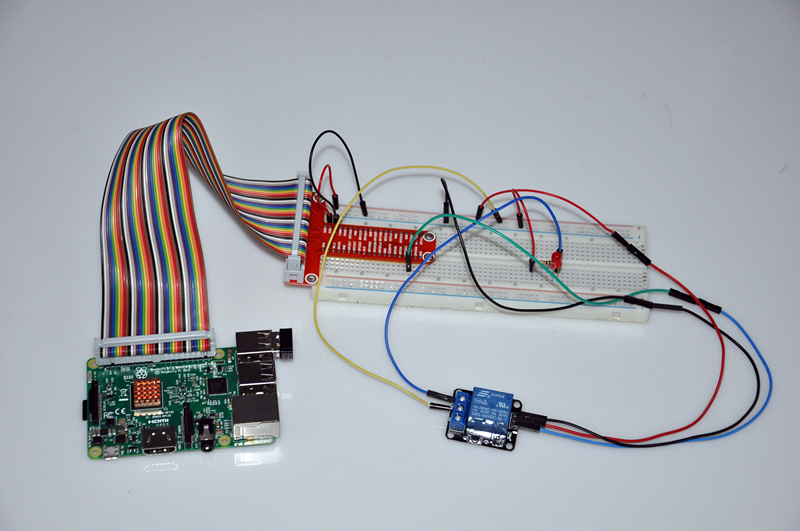
Relay is a signal-controlled switch. In this project, we will use Raspberry pi to drive relay and control the on/off of a LED light. After running the code from Pi, the LED will turn on and off LED every one second.

Parts and Devices
1 x raspberry Pi3
1 x raspberry Pi T style extension
1 x RELAY
1 x LED
USB mouse and keyboard
1 x HDMI cable and monitor(or TV)
1 x 1k ohm resistor
1 x breadboard
jump wires
Circuit Graph:
Software Installation:
1)Install git core(if you have already installed git core, please skip this step). Please run following shell command in Pi terminal:
sudo apt-get install git-core
sudo apt-get update
sudo apt-get upgrade
2)Install wiringPi libary(if you have installed wiringPi, please skip this step). Please run following command in Pi terminal:
git clone git://git.drogon.net/wiringPi
cd wiringPi
./build
3)Download/compile relay.c and run the program as following:
wget http://osoyoo.com/driver/ralay.c
Note: In relay.c file, the relay is connected to port no.24. However, connection graph shows the relay is connected to GPIO 19. This is because relay.c includes wiringPi library whose port number does not match GPIO number. port 24 is actually GPIO 19. You can use gpio readall to check gpio port mapping(result as per following graph)

compile and running the code by typing following commands:
gcc -Wall -o ralay ralay.c -lwiringPi
sudo ./ralay
you will see LED flash every one second
type “Ctrl+c “ to stop the program