In this lesson, we will learn how to let the robot car has vision to see front environment and how to control the robot car through web browser or mobile APP.
To complete this task, we need install a web server software called “mjpg-streamer” in Raspberry Pi, this software will catch video from Robot Car camera and send the video to a web page.
We also need to install another web server software called “WebIOPi” in Raspberry Pi. This software will allow user to use browser to remotely control Raspberry Pi GPIO input/output and therefore control the movement of our robot motor.
Hardware Installation
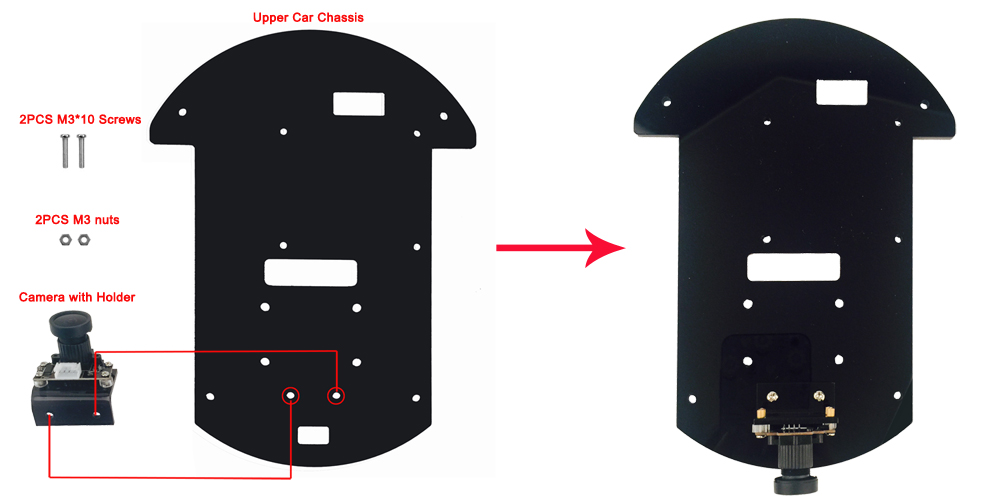
If you don’t install camera in lesson1, please install and connect camera as following pictures. If you have already installed and connected these, please skip this step.
Software Installation
In Shell Terminal, type following commands: wget http://osoyoo.com/driver/picar/pirobot.sh chmod 777 pirobot.sh sudo ./pirobot.sh
Above shell script command will automatically download installation file from remote software repository,configure and install the webiopi and mjpg-streamer server onto your Raspberry Pi.
Once the script file command finishes running, raspberry pi will restart automatically. You will see the Pop-up window “Server unexpectedly closed network connection”, click “Confirm” button.
Now you can put your car on the ground and turn on the power-switch in battery box. We need to use SSH to control the car. So you must enable SSH with raspi-config command before testing. If you are using windows, please use download Putty to ssh your Pi, if you are using MacBook, please directly use ssh command in terminal.
In shell terminal, run following command to run the webiopi and mjpg-stream server :
/home/pi/superscript
Your webiopi and web stream server will start and your can use browser or APP to control the car now!
(TIP: If you want to automatically start the server each time when you restart the pi without typing above command, please run following commands:
sudo crontab -e
you will see a menu list of editor choices, select nano as your editor, then you will see crontab file edit window.
In the bottom of the window, add a line as following: @reboot /home/pi/superscript
press Ctrl-X save and exit crontab editor.
now reboot your Raspberry Pi, your server will automatically started
)
Control the car with browser
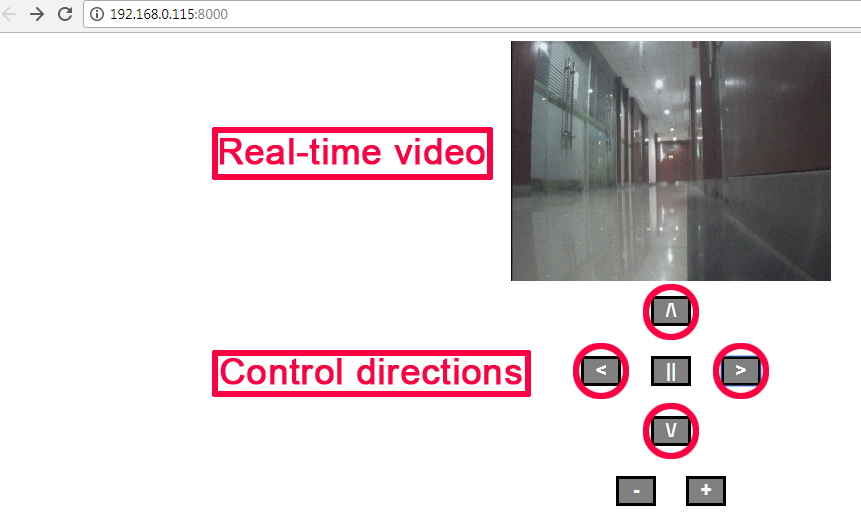
Now you can use your browse to acess Raspberry IP with port 8000(i.e, if your Pi IP address is 192.168.0.115, please visit http://192.168.0.115:8000, you will see following picture in your browser, click arrow buttons, you can make car moving to your desired directions.
User Name: webiopi Password: raspberry
Android and iOS App
You can also use our free Android App or Apple App instead of browser to control the car.
For Apple iOS user, please search Osoyoo raspberry Pi Robot Car in Apple APP store ,download and install it.
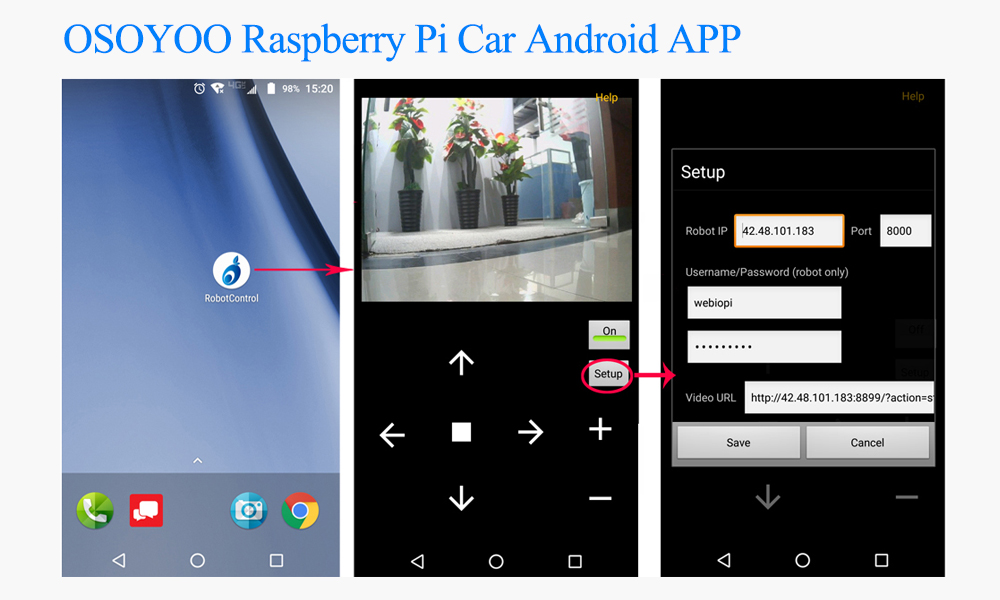
Run the App, click set up and enter config page set the fields as following:
Robot IP:
your raspberrr pi ip Port: 8000 Video URL:http://your_raspberry_pi_ip:8899/?action=stream(please use IP such as 192.168.0.16 to replace your_raspberry_pi_ip) User Name: webiopi Password: raspberry
Click Save button and exit config page
Now you can use the arrow buttons in App to control the car