|
|
|
|
|
Comprar en ES |
|
|
|
|
|
|
 |
|
-

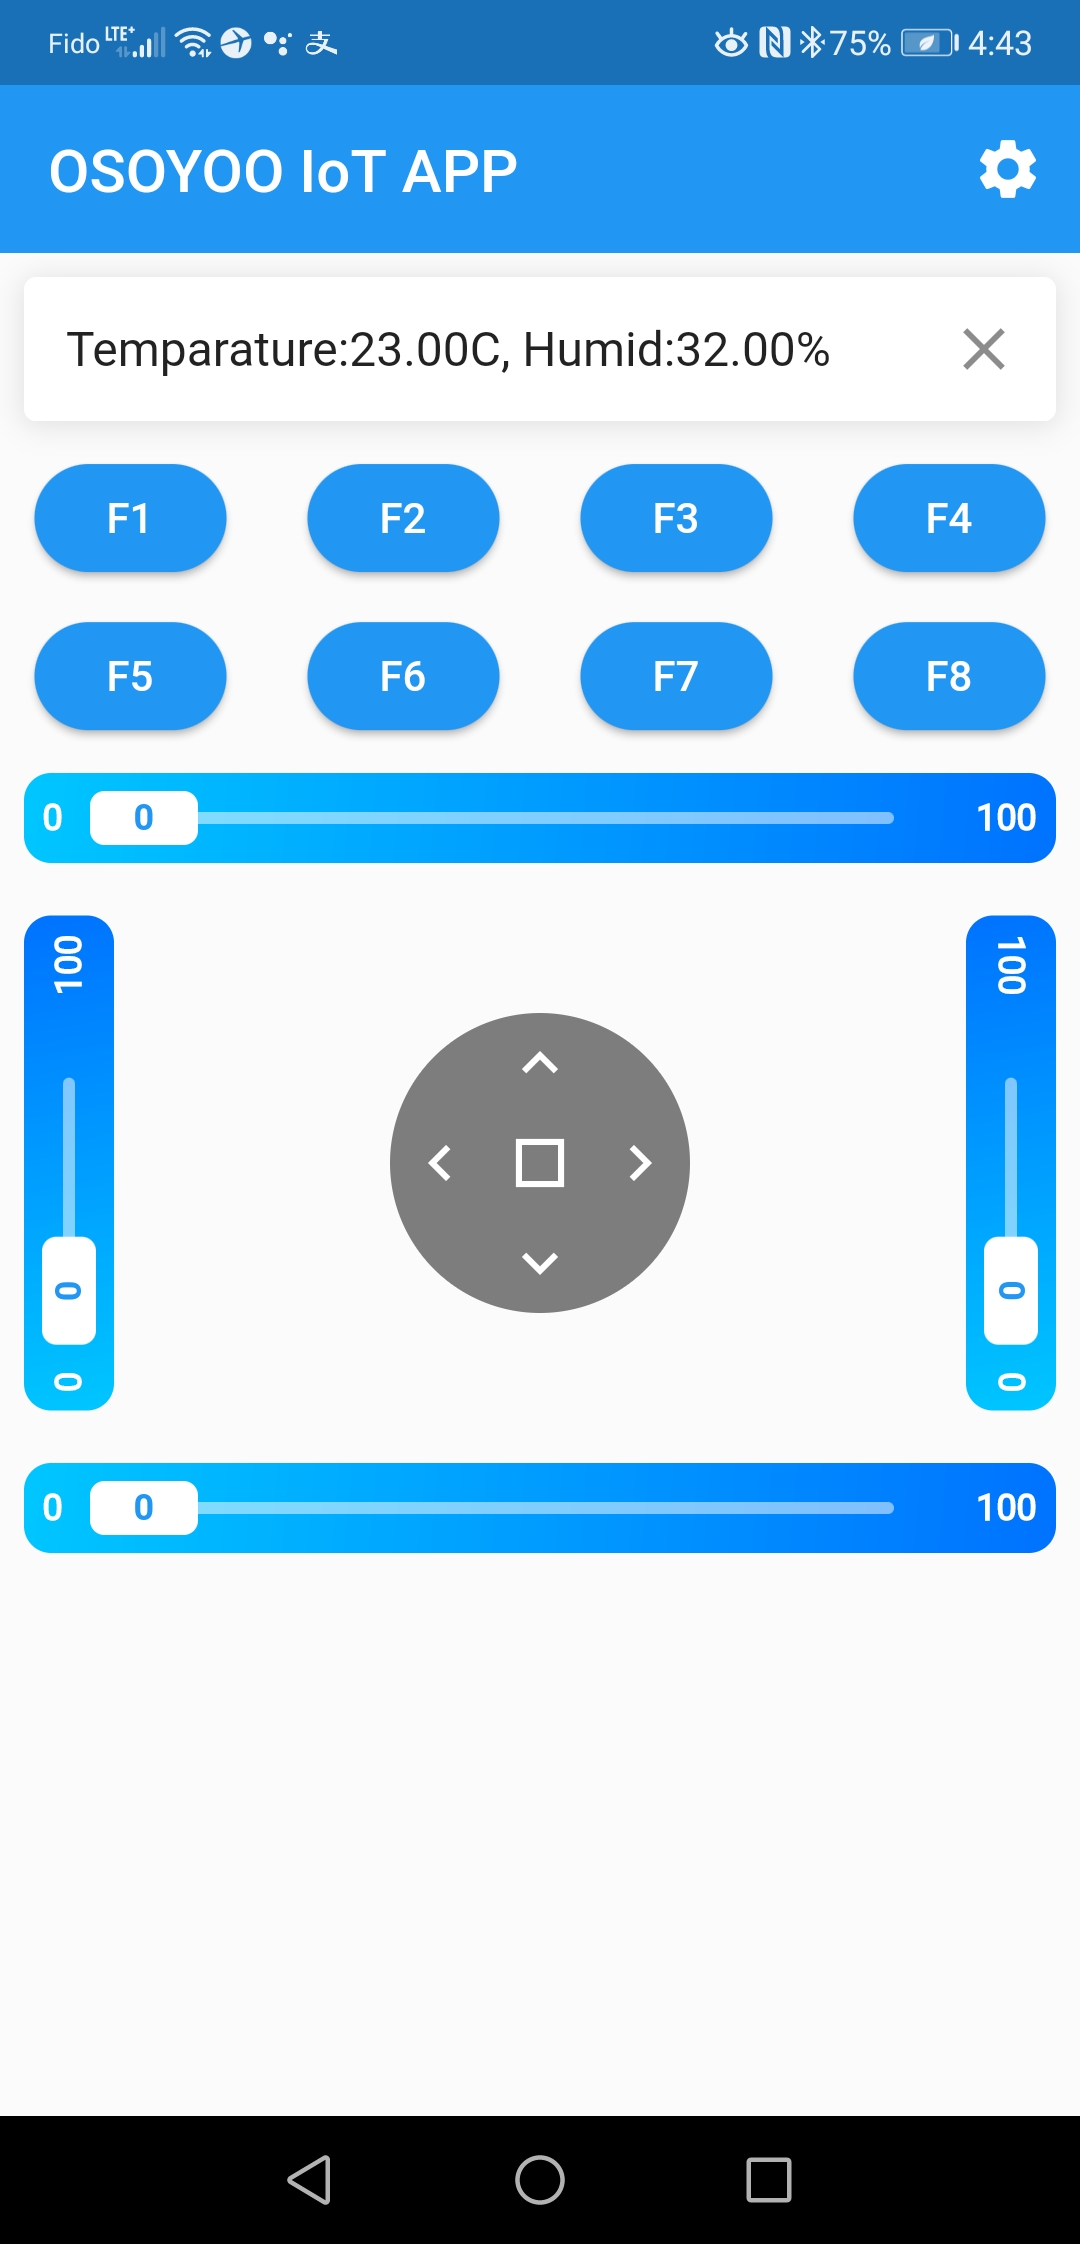
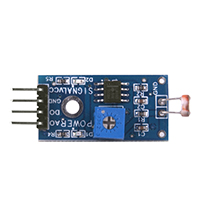
En la Lección 3, aprendimos a leer los datos del sensor fotoresistor remoto en su navegador. Como agricultor o científico agrícola, además de obtener los datos de luminosidad de su invernadero, también necesita conocer la temperatura/humedad de su campo de plantas. En esta lección, usaremos un sensor DHT11 para leer datos remotos de temperatura y humedad del ambiente a través de la APP IoT de OSOYOO.
-

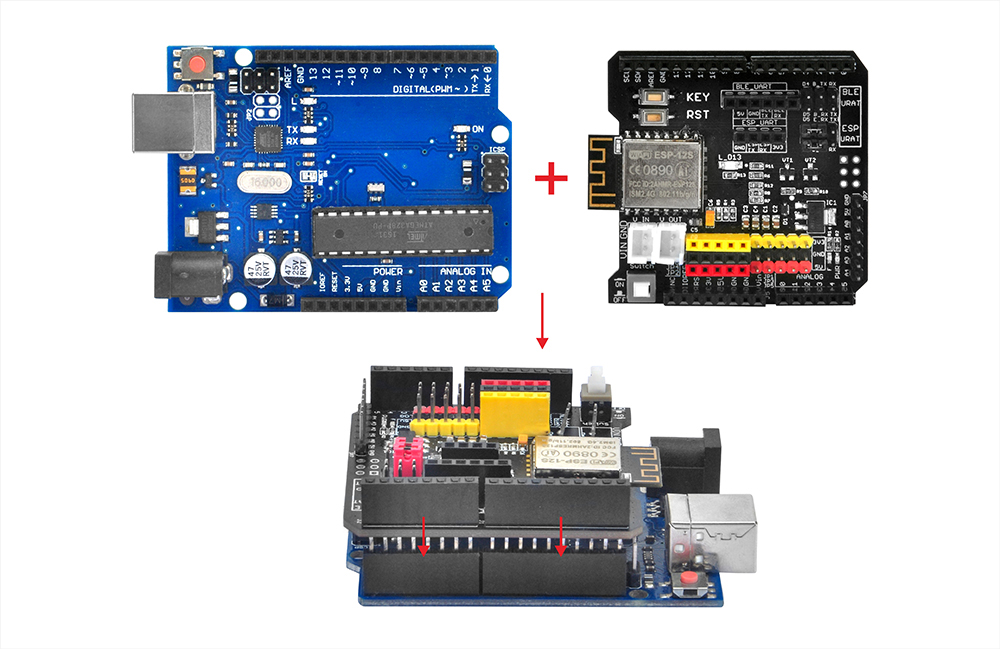
OSOYOO Placa básica x 1
OSOYOO ESP8266 WIFI Shield x 1
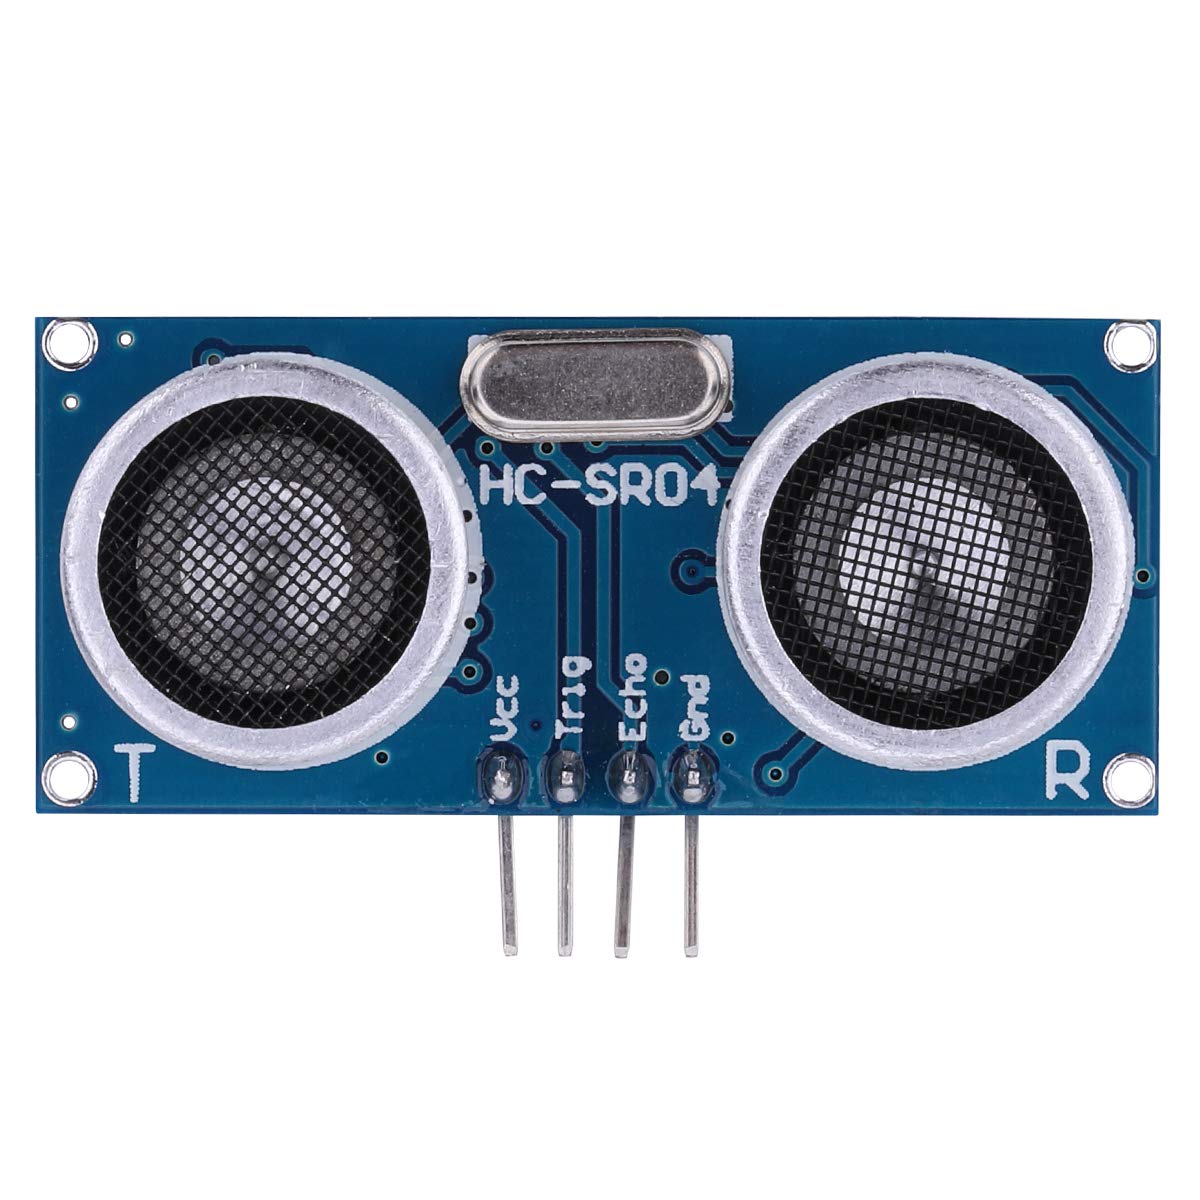
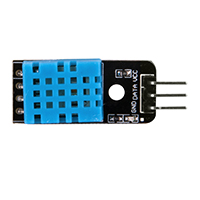
Módulo sensor DHT11 x 1
Cable USB x 1
Cables de puente varios

En primer lugar, inserte el ESP8266 Wifi Shield en su placa OSOYOO Basic
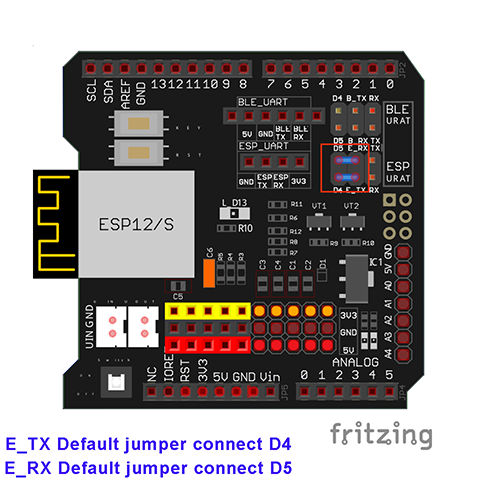
- Y asegúrese de que la tapa del puente está conectado E_TX a D4 y E_RX a D5
 Conecta tu DHT11 con la placa base como se muestra en el siguiente diagrama.

| OSOYOO Placa básica |
Módulo sensor DHT11 |
| D2 |
S |
| GND |
– |
| 5 V |
+ |
 Instalación del software
Paso A) Instale el IDE más reciente desde https://www.arduino.cc/en/Main/Software?setlang=en. Si tiene una versión de IDE posterior a la 1.1.16, omita este paso.
- Paso B) Si tiene instalada la librería DHT11, por favor sáltese este paso. Si no tiene instalada la librería DHT11, por favor descargue el archivo zip de https://osoyoo.com/wp-content/uploads/samplecode/DHT.zip.Then, en su IDE ->Sketch->Include Library->Add .ZIP Library, seleccione el archivo DHT.zip que acaba de descargar, y súbalo al IDE.
- Paso C) Conecte la placa OSOYOO Basic a la computadora mediante un cable USB.
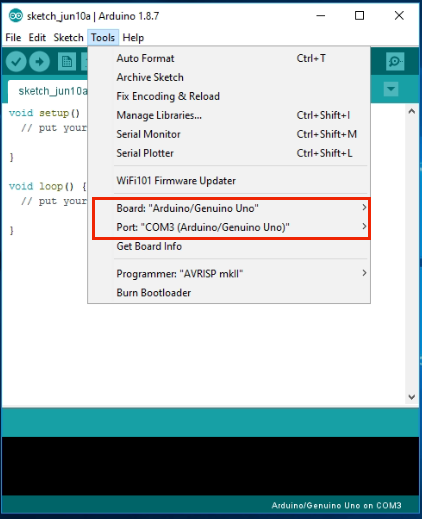
- Paso D) Abra el IDE y elija el tipo de placa y el tipo de puerto correspondientes a su proyecto.
- Board:”Arduino/Genuino UNO”
- Port: Elija su propio puerto serie para su placa base
Paso E) Descargue el código de ejemplo de https://osoyoo.com/driver/wifi-iot/lesson4/wifi-lesson4.zip, descomprima el archivo y haga doble clic en el archivo wifi-lesson4.ino.
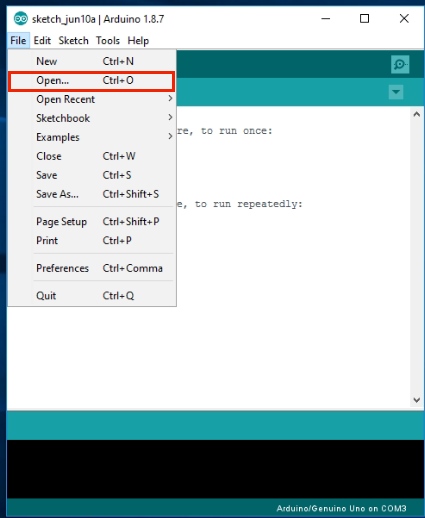
Paso F) IDE: Pulsa archivo -> pulsa Abrir -> elige código “wifi-lesson4”, carga el sketch en tu IDE.
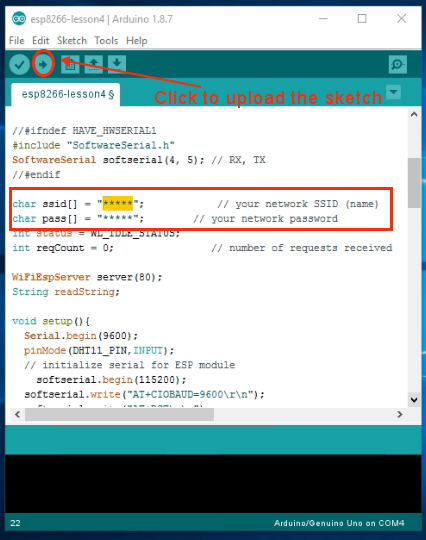
 char ssid[] = “******”; // your network SSID (name)
char pass[] = “******”; // your network password
Sustituye ****** por tu SSID y contraseña WiFi correctos; de lo contrario, tu proyecto no podrá conectarse a Internet.
- Después de cambiar las líneas anteriores, carga el sketch en el IDE.
-

Paso A) Abra su Monitor Serial. Puede ver que su router asignará una dirección IP a su IDE de la siguiente manera:
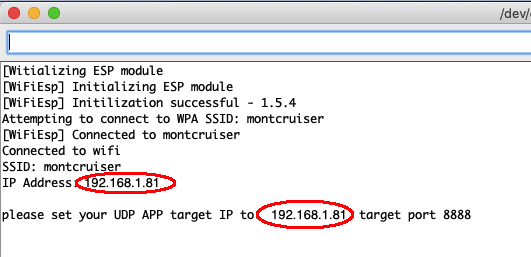
En el ejemplo anterior, 192.168.1.81 es la dirección IP de mi IDE. Necesitamos establecer esta dirección IP en nuestra APP en el siguiente paso.
- Paso B) Abra su APP OSOYOO IoT UDP Robot. Si no ha instalado esta APP, por favor lea la sección de instalación de la APP en la Lección 2.
- Paso C) Asegúrese de que su teléfono móvil está en la misma red local que su Arduino. Abra la APP, haga clic en Configuración, introduzca la dirección IP de su Arduino del Paso F, y establezca el Puerto a 8888 en la configuración.
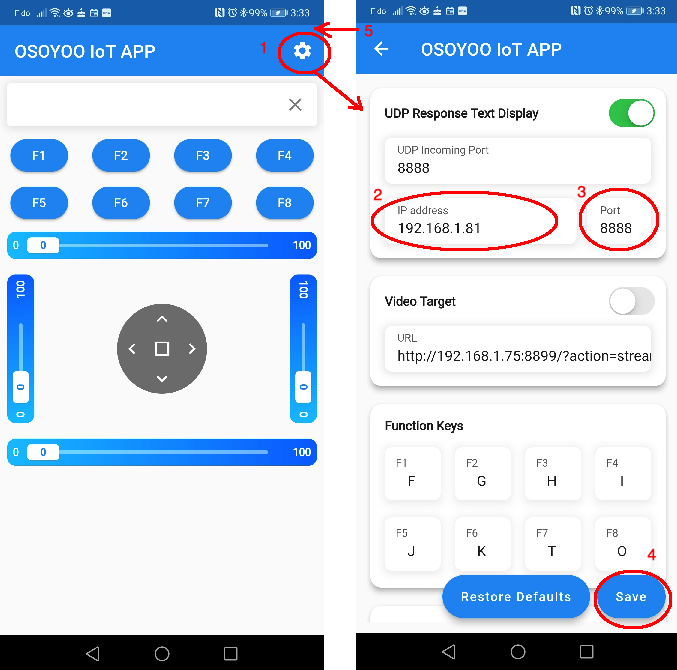
Ahora pulsa cualquier tecla de tu APP, y tu pantalla mostrará algo parecido a la siguiente imagen