At this moment, we will learn how to make this robot car cooler, let it show dazzling lights and play music while moving.
1 x BBC micro:bit board
1 x Micro USB cable
1 x 9V battery
1 x OSOYOO Robot for Micro bit
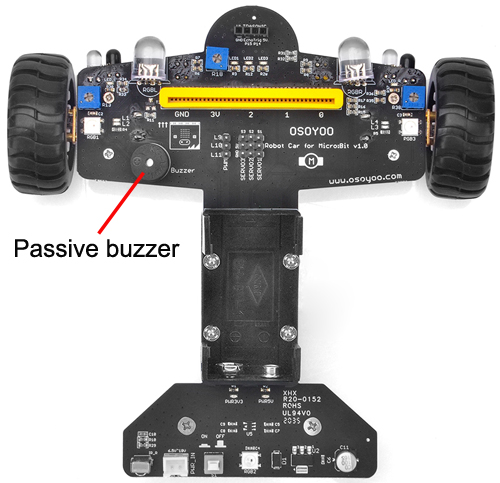
The OSOYOO Robot Car for Micro Bit comes with a passive buzzer element. The signal terminal of buzzer is connected to the P0 interface of micro:bit main board.
As a type of electronic buzzer with integrated structure, buzzers, which are supplied by DC power, are widely used in computers, printers, photocopiers, alarms, electronic toys, automotive electronic devices, telephones, timers and other electronic products for voice devices.
A passive buzzer does not have a built-in oscillating source, so it will not tweet if DC signals are used; instead, you need to use square waves whose frequency is between 2K and 5K to drive it. You can use micro:bit to code the melody of a song, quite fun and simple.
Block
Analyse
Examples
From Category Music
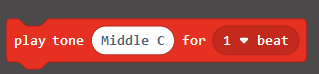
Play a musical tone through pin P0 of the micro:bit for as long as you say.
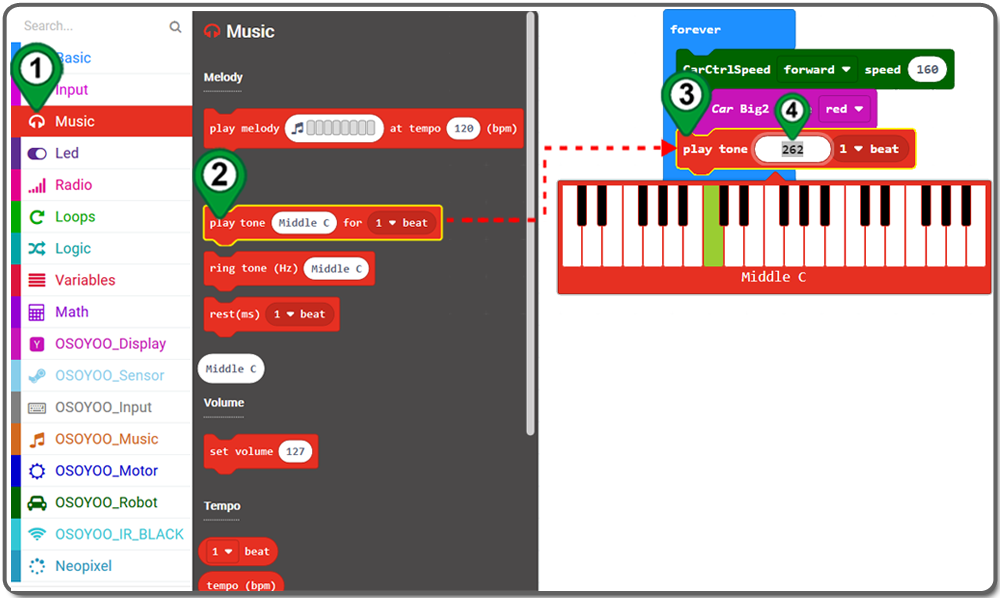
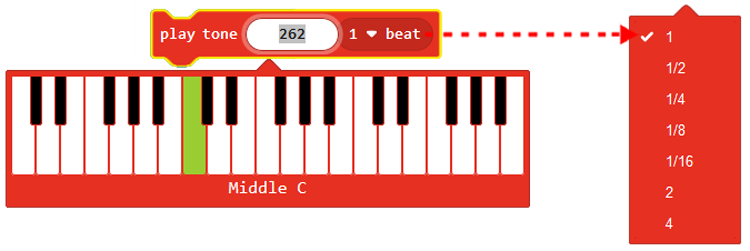
The Play tone (Hz) for beat block allows you to play a tone of specific frequency. The default frequency of the Play tone (Hz) for beat block is set to 262 Hz (tone), which is Middle C (note). When you click on the parameter box of the play tone block, a 21-key visual piano keyboard will display and allows you to choose a note.
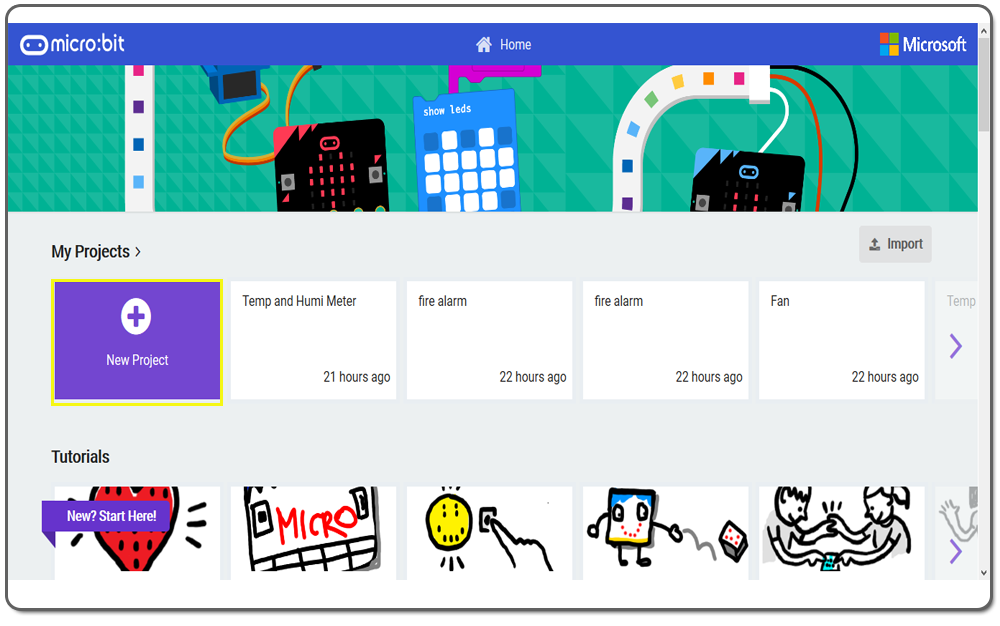
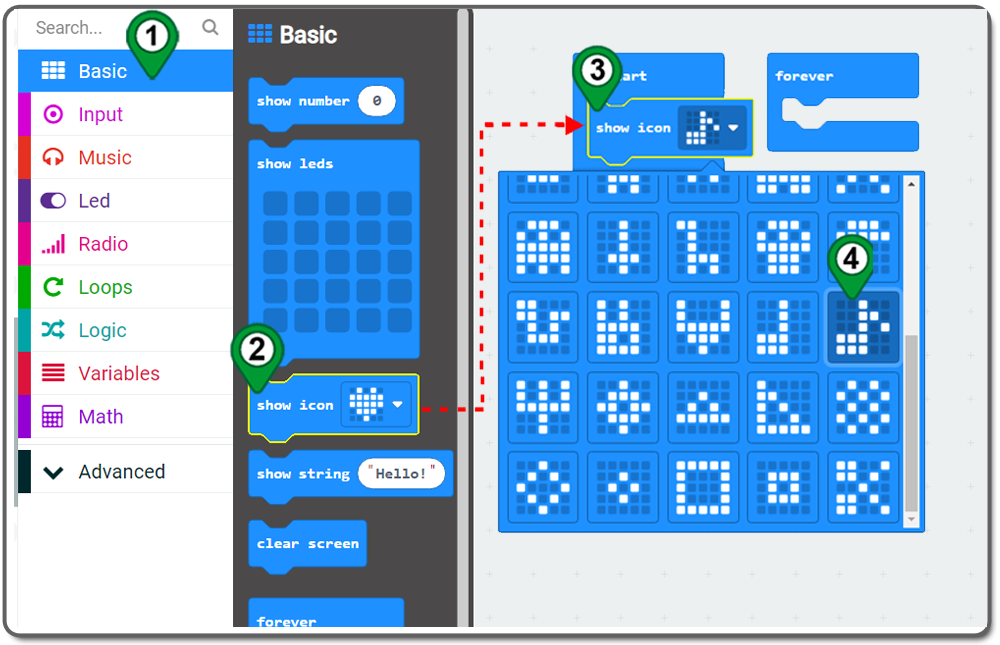
Step 1. Click on the Basic category again. Then drag the show icon block and drop it inside the on start block ,and choose the icon from the drop-down menu as following figure.
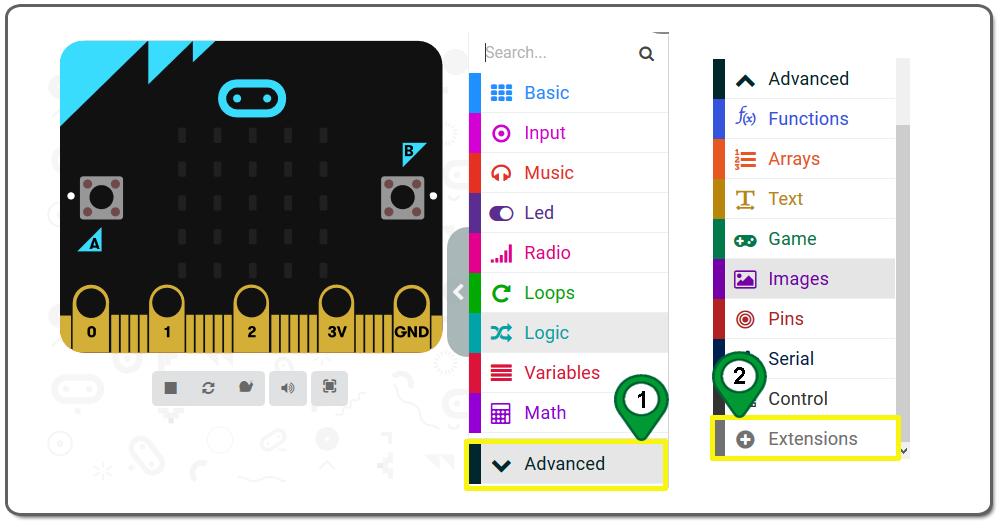
Step 2.In the Editor controls, click on the Advanced button and then Extensions as following figure.
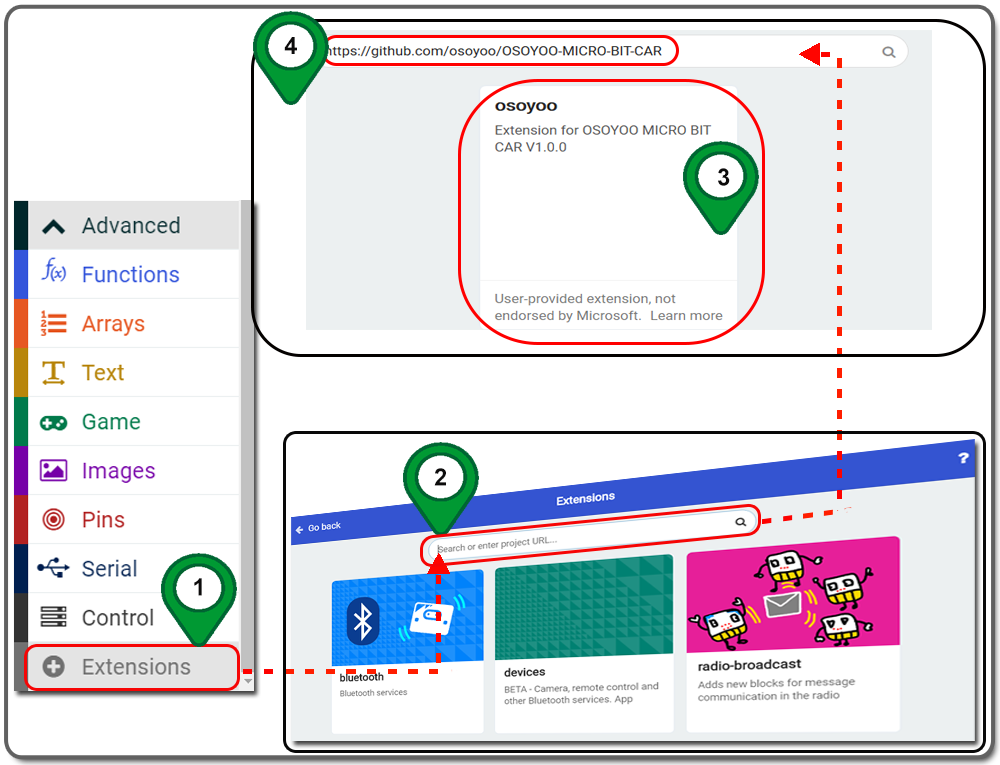
Step 3. In the Extensions page , enter project URL “https://github.com/osoyoo/OSOYOO-MICRO-BIT-CAR ” in the Search textbox and click on the Search button. The page will show you all the matching extensions based on your search string. Now, click on osoyoo to add it into your project .
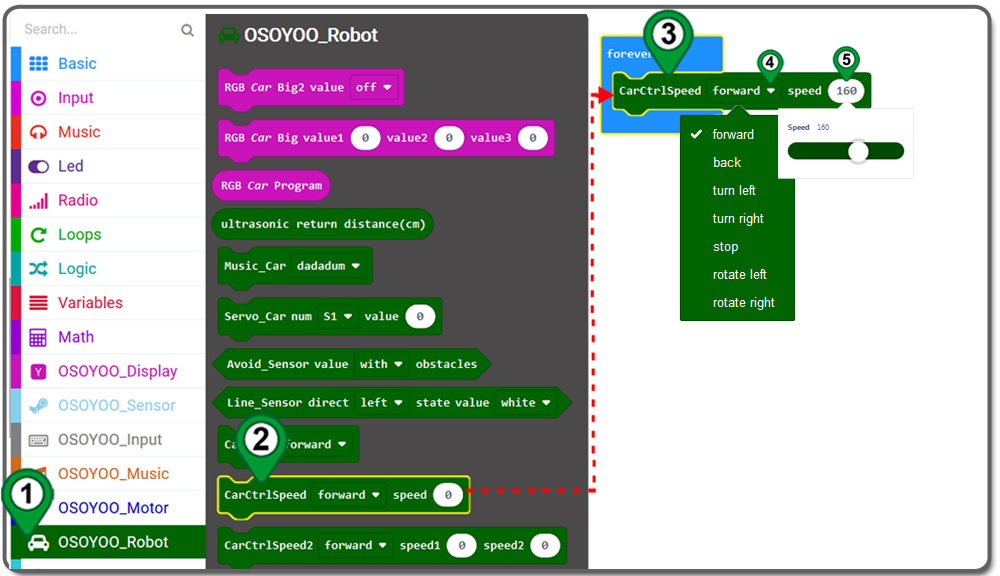
Step 4.Click on the OSOYOO_Robot category. Drag CarCtrlSpeed block and place it inside the forever block, set forward from drop-down menu and set 160 as speed.
Step 5.Click on the OSOYOO_Robot category. Drag RGB Car Big2 value off block and place it inside the forever block and under CarCtrlSpeed block,set red(as you like) from drop-down menu.
Step 6. Click on the Music category. Then drag the Play tone for beat block over, and drop it inside the forever block and under RGB Car Big2 value off block. and select Middle C as tone
Note:
1) The Play tone (Hz) for beat block allows you to play a tone of specific frequency. The default frequency of the Play tone (Hz) for beat block is set to 262 Hz (tone), which is Middle C (note). When you click on the parameter box of the play tone block, a 21-key visual piano keyboard will display and allows you to choose a note. For the beat, you can change the beat according to the 4/4, 2/4 of staff
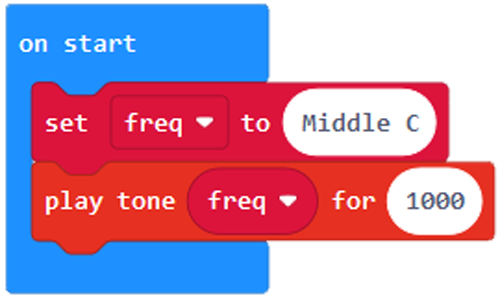
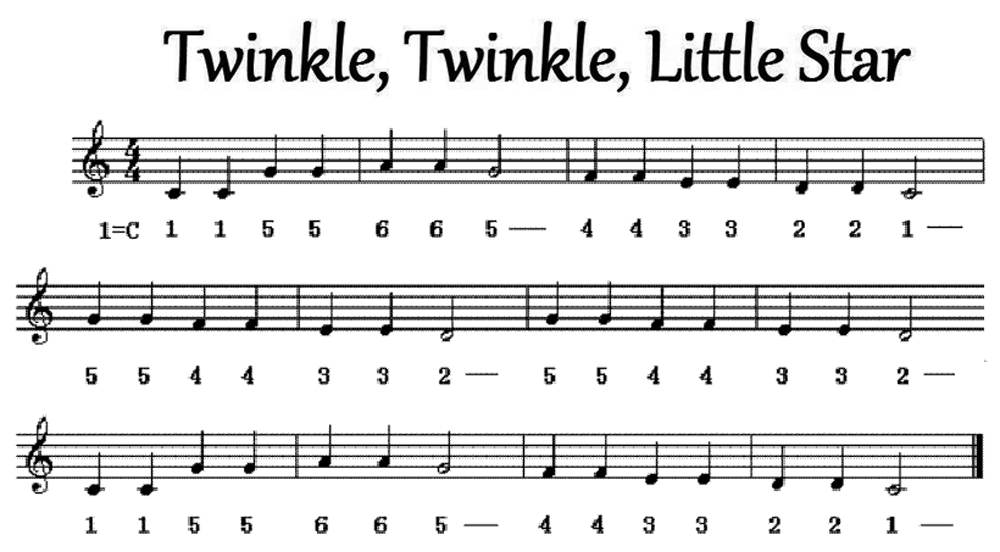
2) When you choose a note from the visual piano keyboard, the frequency of the note will display in the parameter box of the ring tone (Hz) block. If you know the frequency of the note you want to play, just type the frequency in the parameter box without choosing it from the visual piano keyboard. The precision of the frequency of a note is ± 1 Hz. As an example, for Middle C, the valid frequencies are 261, 262, and 263 Hz. Followingpicture shows the notes name in the 21-key piano keyboard and their frequencies in Hertz . 3)This project use music Twinkle, Twinkle, Little Star. The staff for Twinkle, Twinkle, Little Star as following :
Take the Line 1 of staff for Twinkle, Twinkle, Little Star as example:
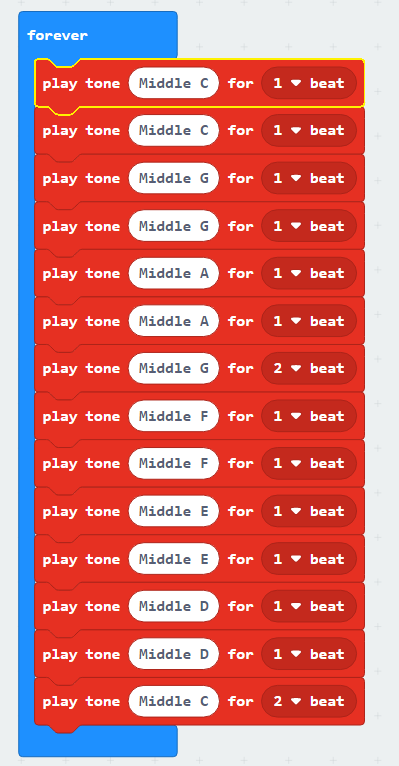
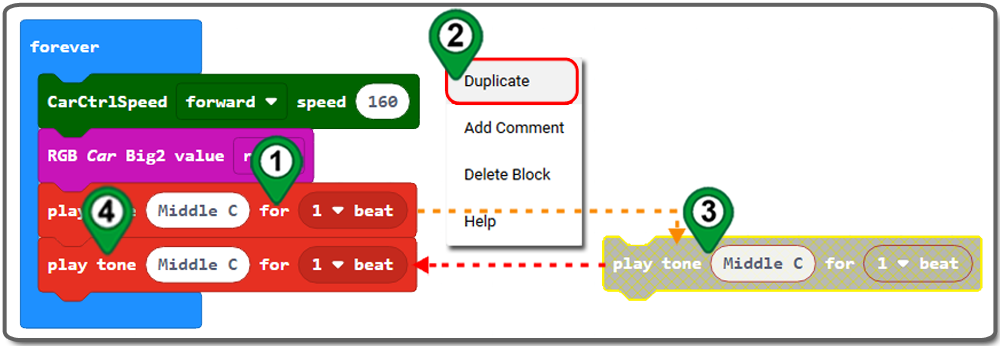
Step 7. Duplicate Play tone (Hz) for beat block, and then drag and drop under Play tone (Hz) for beat block as follwoing:
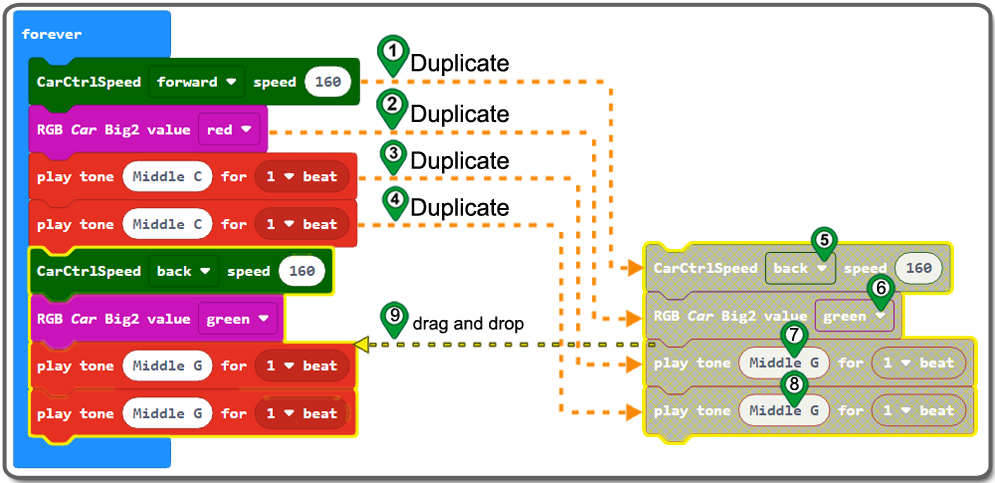
Step 8. Duplicate the last 4 blocks one by one, and then drag and drop under Play tone (Hz) for beat block, and change direction to back, RGB color to green, tone to Middle G, as follwoing:
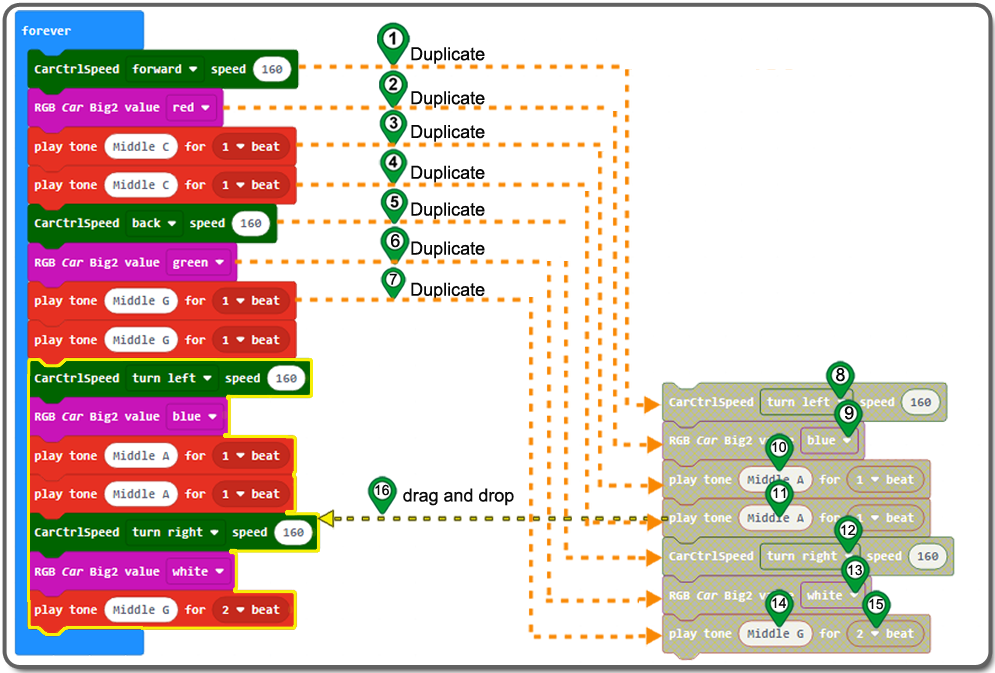
Step 9. Duplicate the last 7 blocks one by one, and then drag and drop under Play tone (Hz) for beat block, and change car direction, RGB color , tone and beat as follwoing:
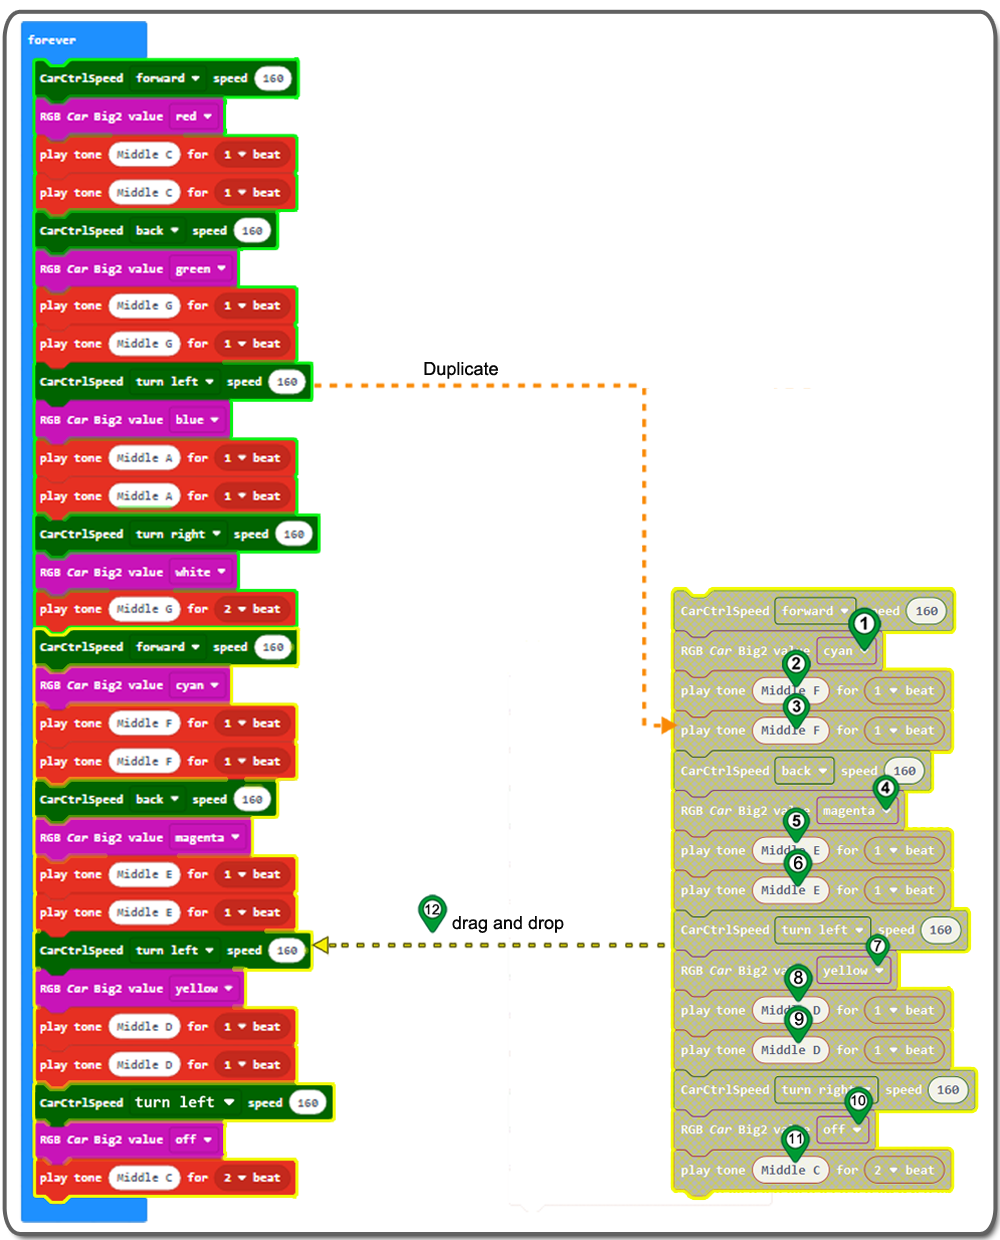
Step 10. Duplicate the last 15 blocks one by one, and then drag and drop under Play tone (Hz) for beat block, and change car direction, RGB color , tone and beat as follwoing:
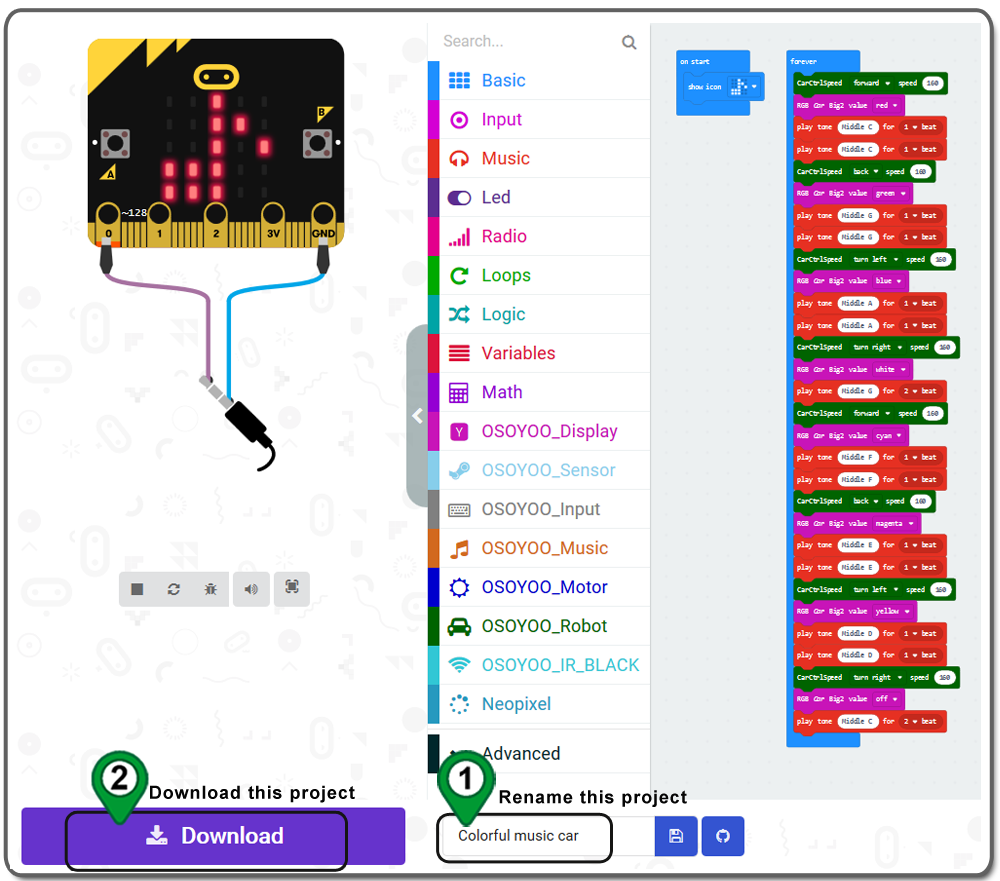
Step 11. Rename this project and download the hex file as following
The whole code for the project is as below. You can click “Edit” to download the whole project or edit the project according to your own ideas.
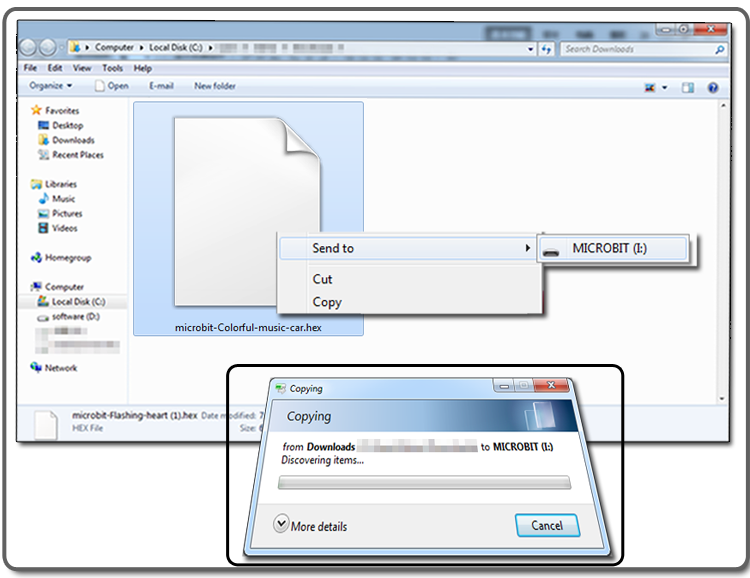
Step A)Connect the micro:bit with the computer through USB cable, and the computer will pop up a U disk and send the download file(.hex)to your micro:bit.
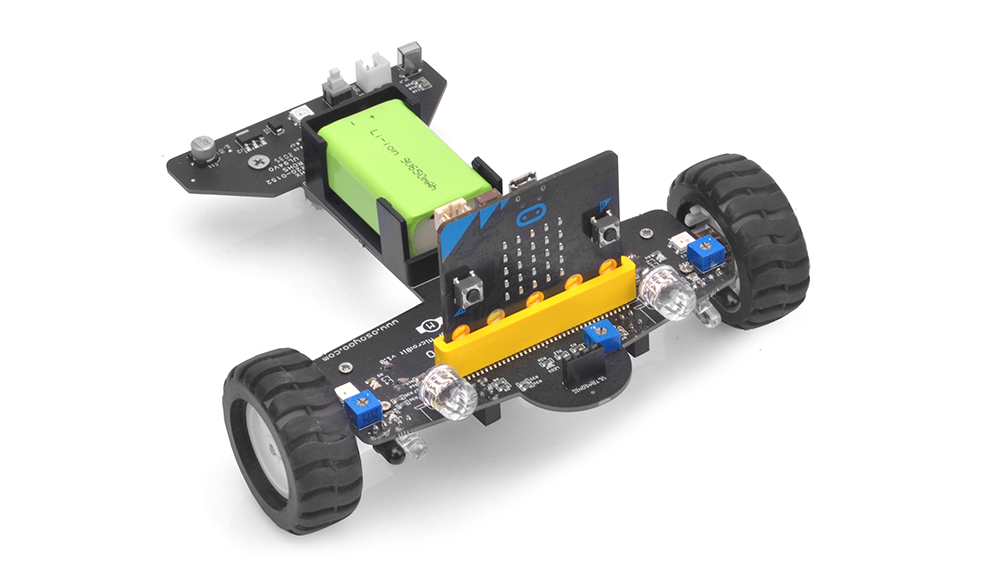
Step B)Insert the micro:bit main board into the robot, and install a 9v battery into the battery box.
Step C)Turn the POWER switch ON. The micro:bit car ‘s will move with playing music and changing RGB light color