


I. Objective
II. Parts and Devices
III. Hardware Installation
IV. Software Installation
V. Functional Testing and Verification
VI. Troubleshooting

In this project, we will connect the Robot Car to Wi-Fi and Use an APP to control the car through Wi-Fi. This is a typical Internet of Things (IoT) Application.
You must complete lesson 1 before you continue on with this lesson.

OSOYOO ESPro Robot car chassis x1
OSOYOO Wheels x2
OSOYOO DC motors x2
OSOYOO ESPro motor driver board x1
OSOYOO Voltage meter x1
OSOYOO MG90 servo motor x 1
OSOYOO Mount holder x1
OSOYOO Ultrasonic module x1
OSOYOO Battery box x1
OSOYOO 3pin female to female jumper wire x1
OSOYOO 4pin female to female jumper wire x1
18650 Batteries (3.7 V) x2
Battery charger x1

You must complete lesson 1 before you continue on with this lesson.

Step 1: Install latest Arduino IDE (If you have Arduino IDE version after 1.1.16, please skip this step). Download Arduino IDE from https://www.arduino.cc/en/Main/Software?setlang=en , then install the software.
Step 2: Download https://osoyoo.com/driver/espro-2wd-car/espro-lesson7-wifi.zip, unzip the download zip file , you will see a folder called espro-lesson7-wifi.zip.
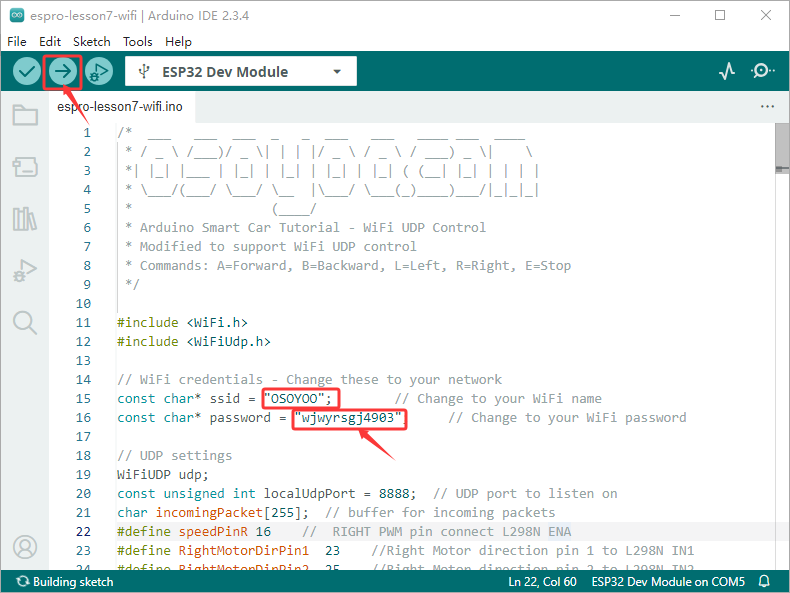
Step 3: Connect ESPro motor driver board to PC with USB cable, Open Arduino IDE -> click file -> click Open -> choose code “espro-lesson7-wifi.ino” in lesson1 folder,you need to change the code Line 15 and Line 16 .
const char* ssid = “*******”; // Change to your WiFi name
const char* password = “********”; // Change to your WiFi password
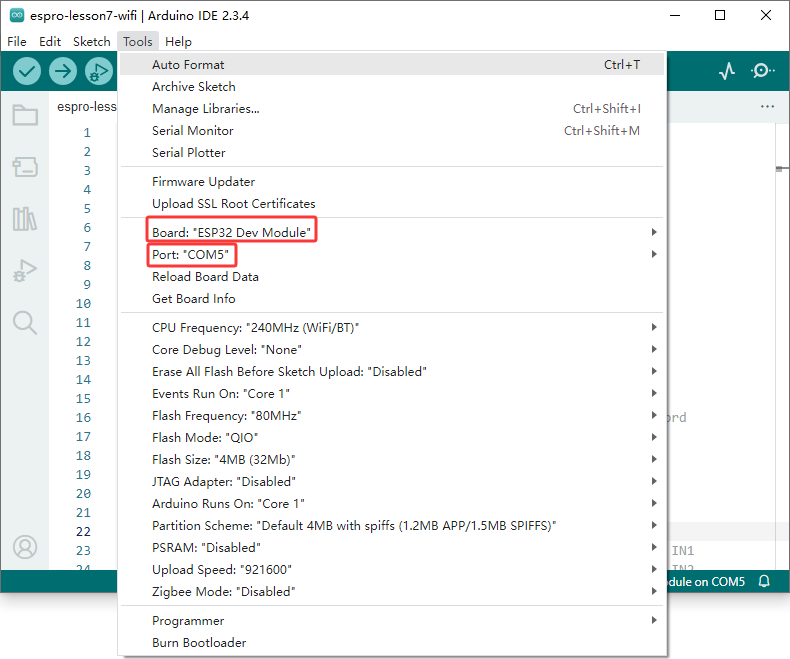
Step 4: Select Tool->Board->board Manager, Search ESP32 and Add ESP32 into Board Manager.
Then in Tool->Board, select esp32 ->ESP32 Dev Module,
Last select correct port which matches ESP32 board,upload the sketch to the board.
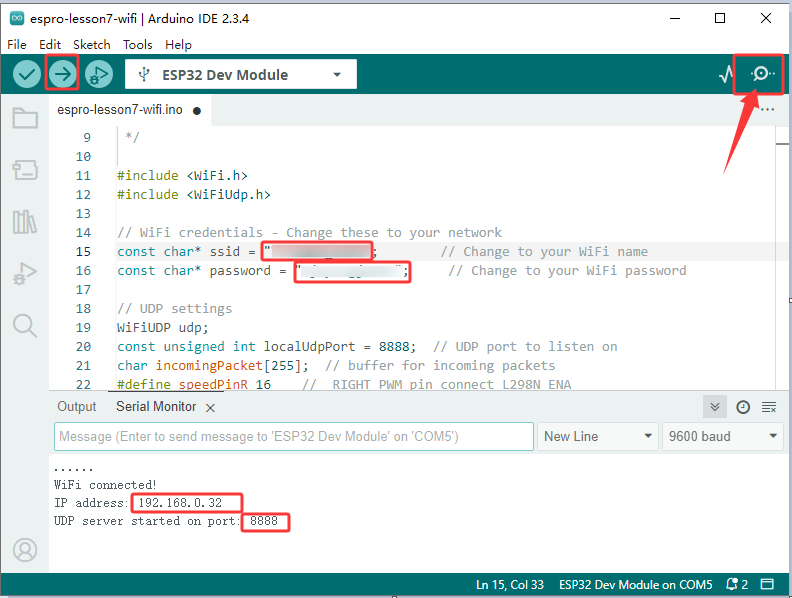
Step 5: Click the Serial monitor window in upper right corner of Arduino IDE, you will see following result. You will see an IP address, which is our LAN IP address assigned by my router,remember the IP address and port.
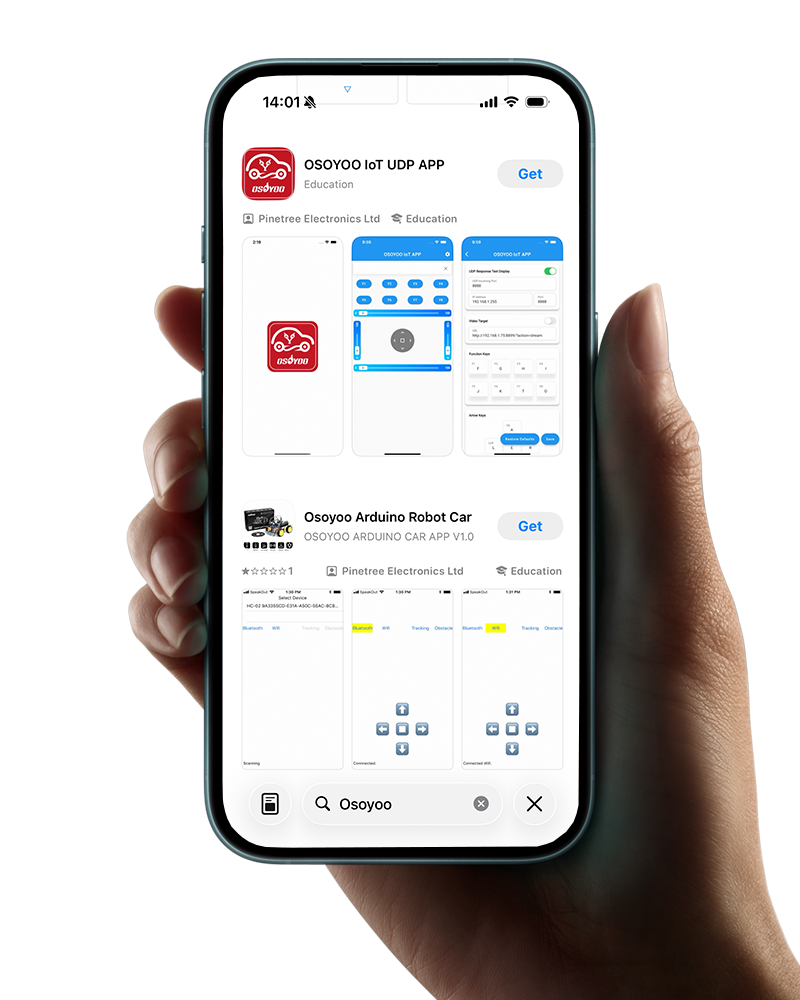
Step 6: Search “Osoyoo IoT UDP Robot APP” in Google Play or Apple Store. (If you can not find this APP in Google Play.
If you can not find OSOYOO IoT UDP Robot APP from Google Play Store, you can directly download the APP from following link: (https://osoyoo.com/driver/udp-app.apk)
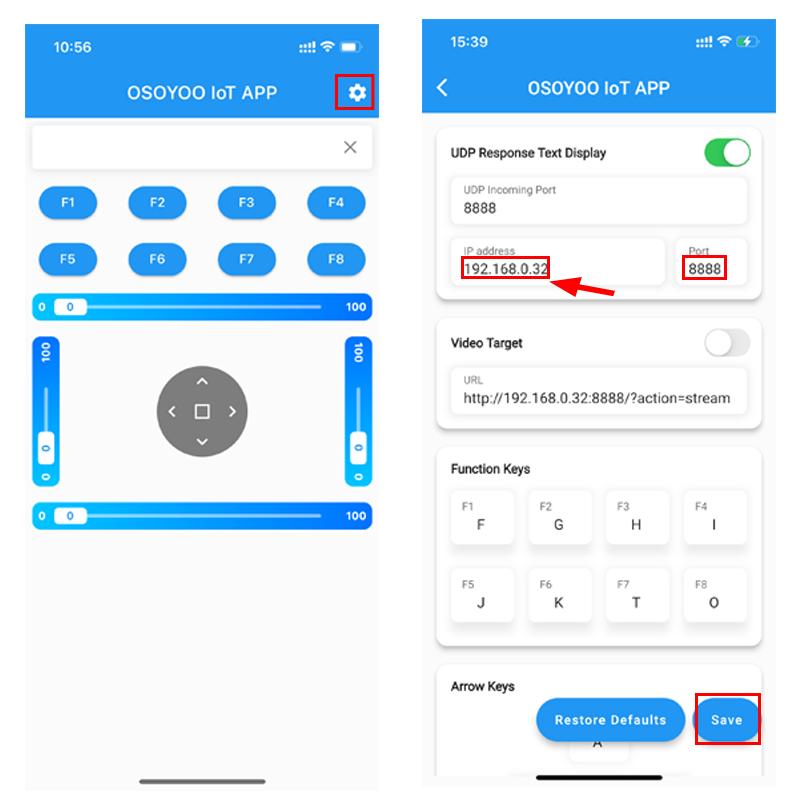
Step 7: Please write down this IP address 192.168.0.32 and click Setting to set up robot IP address and set this IP address 192.168.0.32 to your APP Setting section (see circle 2 in following picture) no need to change default port 8888 in APP.
Step 8: Now your Espro robot car is connected to your LAN, you can use Mobile phone under the same LAN to control the robot car. If your APP is in WAN, you need to go to your Router Control Panel, forward Port 80 to Robot car LAN IP address, then you can use Router IP to control the car. This feature makes our robot car A REAL INTERNET OF THING device.

You can click the ◄ ► ▲ ▼ direction keys to make the car move. Use “||” pause key to stop the car movement.


