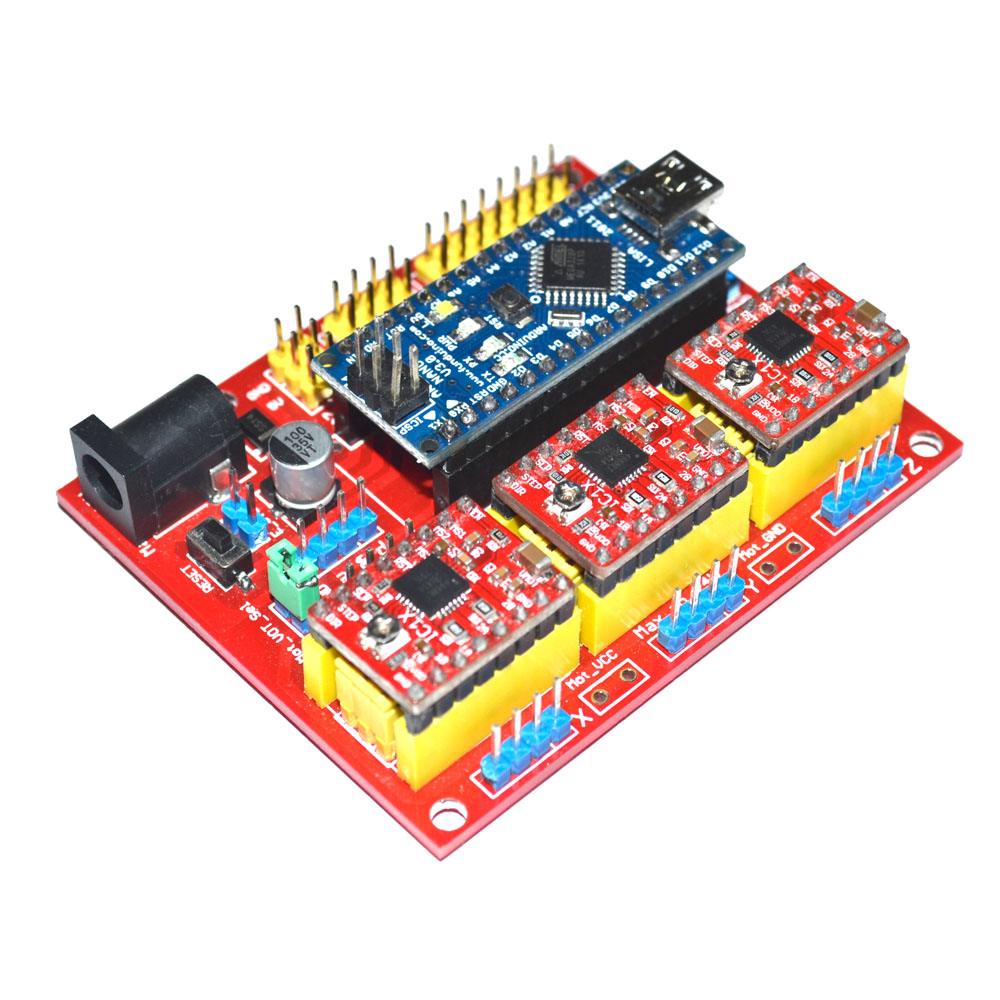
Overview
CNC Shield V4.0 can be used as a drive expansion board for engraving machines and need to be used with Arduino NANO. There’re 3 slots in the board for stepper motor drive modules, can drive 3 stepper motors, and each step stepper motor only need two IO port, that is to say, 6 IO ports can quite well to manage three stepper motor, it’s very convenient to use.
CNC Shield V4.0 has some GPIO of Arduino NANO, it’s convenient for connect other modules, like limit switch. Also, CNC Shield V4.0 also has I2C interface, you can connect LCD screen which has the I2C interface.
The input voltage of CNC Shield V4.0 is DC 7.5V-12V, do not higher than 12V.
Hardware installation
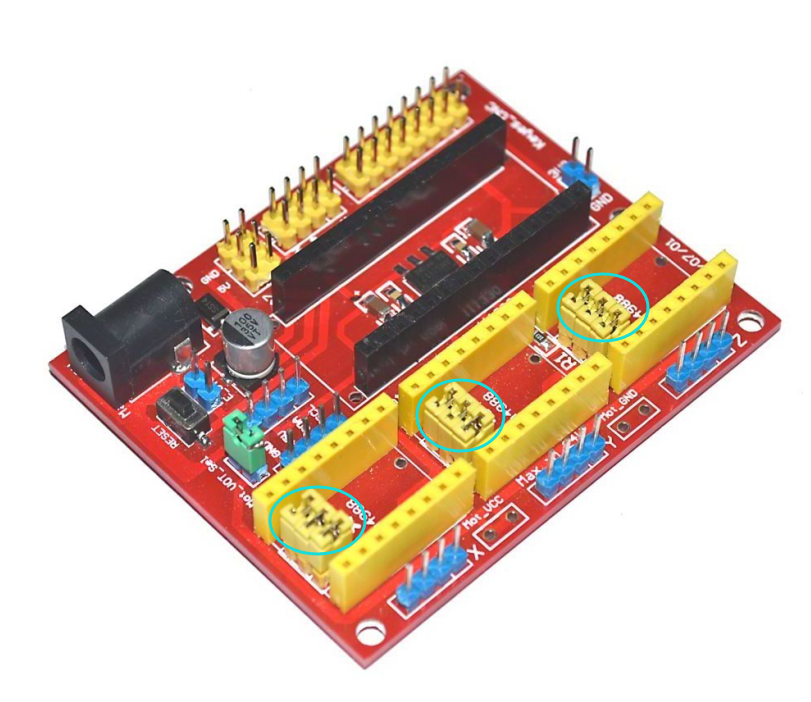
We use A4988 as the motor driver, A4988 support 1 segment, 1/2 segment, 1/4 segment, 1/8 segment, 1/16 segment. Each segment is set by the MS0、MS1、MS2 pin header in the CNC Shield V4.0, cover the jumper cap to the pin header represents high level, do not cover the jumper cap represents low level.
Each segment is specified set as shown in the following table:
| MS1 |
MS2 |
MS3 |
Microstep Resolution |
| Low |
Low |
Low |
Full step |
| High |
Low |
Low |
Half step |
| Low |
High |
Low |
Quarter step |
| High |
High |
Low |
Eighth step |
| High |
High |
High |
Sixteenth step |
In order to improve the precision of engraving, use 1/16 segment, it needs 3 jumper caps to cover MS0、MS1、MS2. As shown in picture:
After finished the above steps, you need to plug A4988 and Arduino NANO into CNC Shield V4.0, please ensure it’s the correct direction of A4988 and Arduino NANO, or it may burn your devices.
You can reference for the following picture:
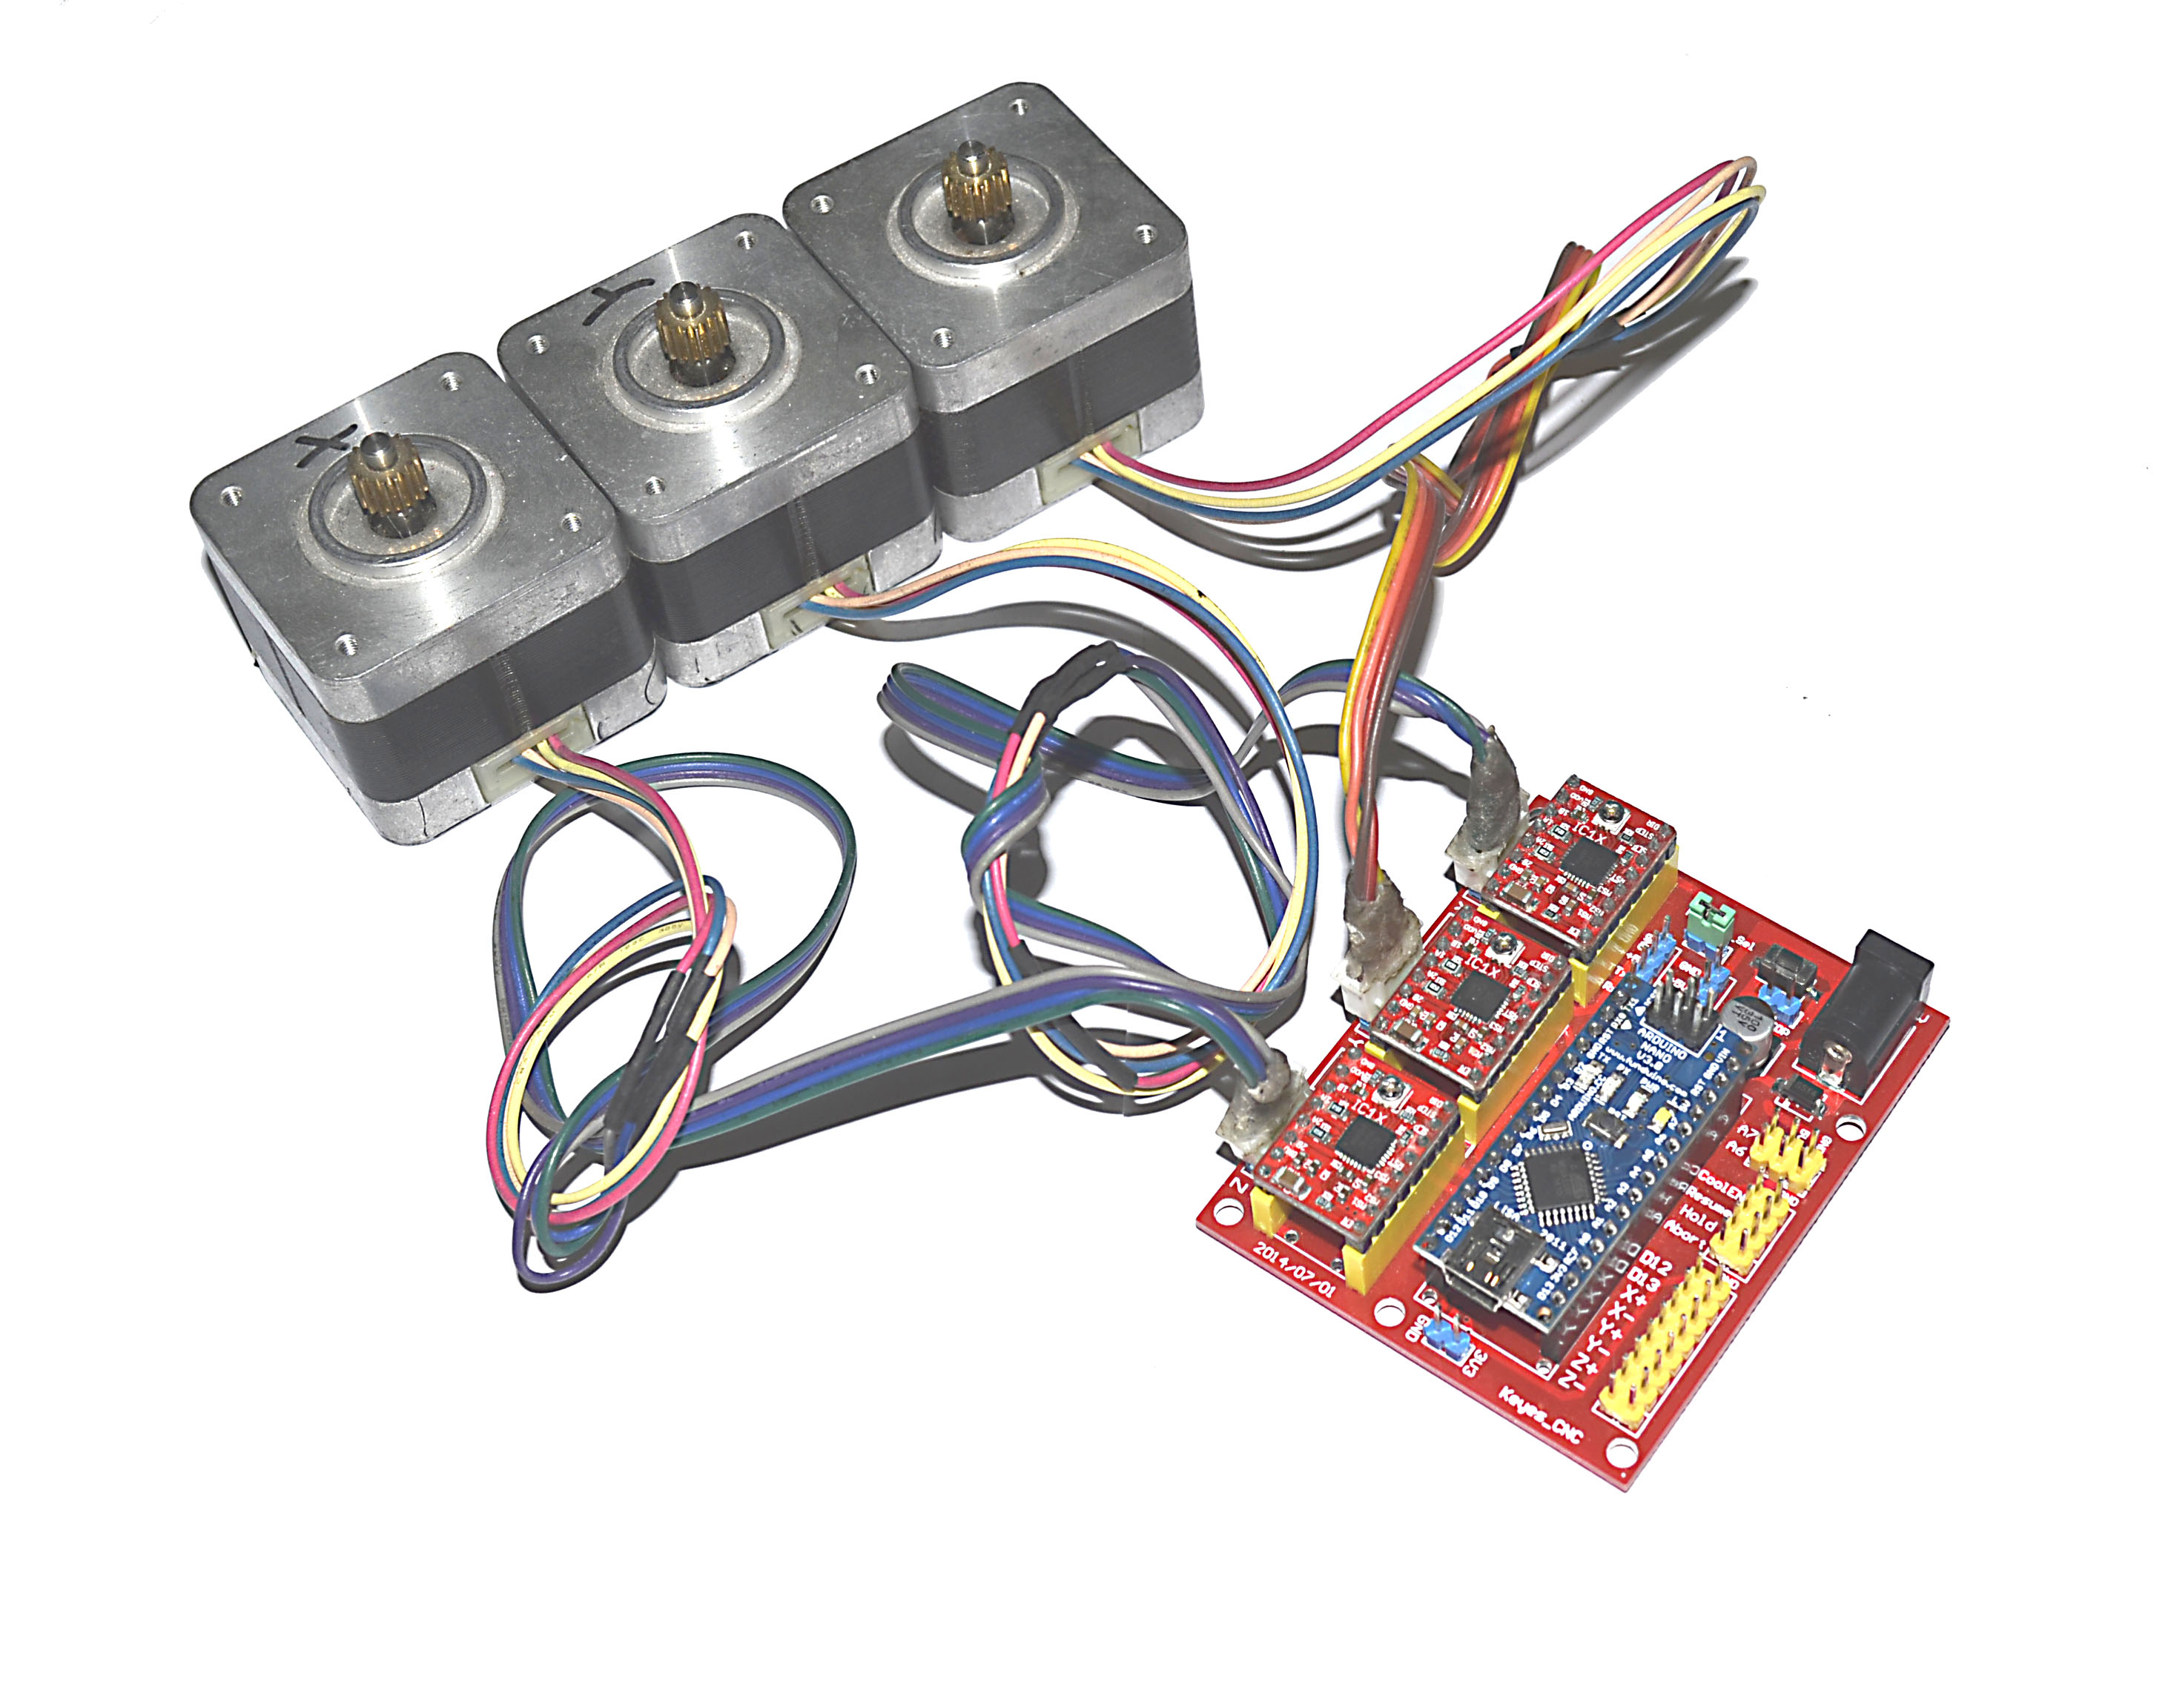
The installation of other equipment (such as limit switch, laser head) should be installed according to the actual situation.
Software installation
1) Install the grblmain library file and burn program
Download and unzip grblmain.zip, and then replace config.h in grblmain folder, the new config.h: https://osoyoo.com/wp-content/uploads/2017/04/config.h
Place the grblmain folder to libraries in Arduino IDE installation directory.
Open Arduino IDE, choose File->Examples->grblmain->GRBLtoArduino, you’ll open a grbl sample program, select the port and board type, burn this grbl sample program to Arduino NANO.
2) Install Grbl Controller
Download and install Grbl Controller,open it, interface as shown in picture:

Use the USB cable to connect your PC and Arduino NANO, select the port and select the baud rate as 9600. Click “Open”, if it connected, “Open” will be “Close/Reset “, the background is red. Click “Choose File” to choose the graphy you want to engrave, after selected click “Begin” to engrave.


